“OceanWP is a versatile WordPress theme that combines flexibility and ease of customization, making it ideal for creating diverse websites.”
How to Import Users and Customers into WordPress Using CSV File
17 Feb 2026, 7:54 am
Table of Contents
Importing users and customers into WordPress using a CSV file is one of the fastest and most reliable ways to manage bulk user creation. Instead of creating accounts manually one by one, you can upload a single CSV file and automatically generate hundreds or even thousands of WordPress user accounts in minutes using a WordPress CSV user import plugin.
This method is highly useful for real-world website management scenarios such as site migrations, membership platforms, LMS websites, and corporate portals. WooCommerce store owners also commonly use CSV imports when moving customers from another platform or restoring customer records from CRM exports. Since WordPress does not provide a built-in CSV import feature for users by default, using a dedicated plugin becomes the most practical approach for bulk user import tasks in WordPress tasks, especially when accuracy and time-saving are important.
In this guide, you will learn how to import users into WordPress using CSV and also how to import WooCommerce customers using CSV with the correct format and field structure. You will understand how user roles and permissions work, why field mapping is necessary, and how to avoid common import errors. The tutorial will focus on WP Ultimate CSV Importer, a popular and effective CSV user import plugin that WordPress site owners and developers use for smooth bulk user and customer imports.
Key Takeaways
- Importing users and customers into WordPress using CSV is one of the fastest ways to handle bulk account creation. It eliminates manual user entry and helps site owners manage large datasets efficiently.
- WordPress user import and WooCommerce customer import are closely related, but WooCommerce customers require additional billing and shipping fields. Proper CSV formatting ensures customer profiles are created with complete checkout-ready information.
- A clean and well-structured CSV file is the foundation of a successful import. Missing mandatory columns like user_login, user_email, or incorrect formatting can cause failed imports and duplicate account issues.
- WP Ultimate CSV Importer simplifies the entire process with features like field mapping, duplicate handling, import logs, and user role assignment. This makes it suitable for both beginners and developers managing large-scale imports.
- User roles must be assigned carefully during import. Incorrect role assignment can create serious security risks, especially when importing admins or privileged accounts in bulk.
- Post-import validation is essential. Always verify imported users, test login access, and confirm WooCommerce customer billing/shipping details to ensure the imported data works correctly across the website.
Understanding User and Customer Imports In WordPress
User and customer imports in WordPress mean adding multiple accounts to your website in bulk, instead of manually creating accounts one by one. This process is mainly used when a website has to manage large user databases, such as membership websites, LMS platforms, corporate portals, or WooCommerce stores. It saves time and reduces the risk of human errors while creating accounts.
In WordPress, user imports are mostly done to create login accounts for subscribers, authors, editors, or administrators based on the website’s needs. Customer imports are mainly related to WooCommerce, because customers require additional details like billing address, shipping address, and contact information for checkout and order processing.
By importing users and customers properly, website administrators can quickly set up roles, permissions, and profile details, making user management easier and more organized.
Use Cases for Importing Users and Customers
One of the most popular use cases is website migration, where user accounts must be moved from an old WordPress site or another platform into a new WordPress installation. It is also useful for corporate portals where administrators need to create employee logins in bulk, saving time and reducing manual errors during onboarding.
Another major use case is membership sites, LMS platforms, and WooCommerce stores. Membership websites often need to upload large subscriber lists, while LMS websites use CSV imports to add students in batches for course access. WooCommerce store owners frequently use CSV imports when migrating customers from platforms like Shopify or CRM exports, including billing and shipping details. This makes WordPress CSV user import and WooCommerce customer import essential for websites that handle large-scale user management.

WP Ultimate CSV Importer Pro
Get Ultimate CSV/XML Importer to import data on WordPress faster, quicker and safer.
Difference Between Users and Customers
| WordPress Users | WooCommerce Customers |
| A WordPress user is anyone who has an account on the website and can log in using a username and password. | A WooCommerce customer is also a WordPress user, but mainly created for shopping and purchasing products. |
| Users can have different roles like Subscriber, Contributor, Editor, or Administrator based on what access they need. | Customers are usually assigned the Customer role, which is mainly used for buying products and managing orders. |
| WordPress users store only basic details like name, email, username, and profile-related information. | WooCommerce customers store extra details like billing address, shipping address, phone number, and order history. |
| WordPress users are mostly used for managing website access, content creation, and admin tasks. | WooCommerce customers are used for checkout, payment, delivery, and order tracking in the store. |
WordPress User Roles and Permissions
User roles and permissions are one of the most important parts of WordPress user management because they control what each user can access and modify on your website. Every WordPress user account must have a role, and that role defines the level of authority the user has. Assigning the correct roles during a WordPress CSV user import is critical for both website security and proper site operation. If roles are assigned incorrectly, users may gain access to sensitive admin features, which can create serious security risks.
WordPress includes several default roles such as Subscriber, Contributor, Author, Editor, and Administrator. For WooCommerce websites, an additional role called Customer is commonly used for buyers. A Subscriber usually has minimal access, while an Editor can manage and publish content, and an Administrator has full control over the site. During a bulk user import WordPress process, roles can be assigned directly through a CSV column or set as a default role for all imported users. You can refer to the WordPress official documentation, for a deeper understanding of WordPress roles and capabilities.
Pre-Import Requirements
Before starting the WordPress CSV user import process, it is important to prepare your website and user data properly. Bulk importing users directly affects your WordPress database, so even a small mistake in the CSV file or field mapping can create incorrect accounts, duplicate records, or incomplete customer profiles. To avoid such issues, you should always plan the import process carefully and follow a checklist before uploading your CSV file.
The first and most important requirement is taking a full backup of your WordPress website, including both the database and files. This ensures you can restore your site if the import creates unwanted users or incorrect role assignments. Next, you must install a reliable CSV user import plugin WordPress supports, such as WP Ultimate CSV Importer, and confirm that it is updated to the latest version. You should also clean your CSV file by removing duplicate emails, invalid usernames, empty mandatory fields, and unwanted spaces. Preparing accurate data in advance reduces errors during import and ensures that the users and WooCommerce customers are created correctly.
CSV File Structure and Data Requirements
A properly formatted CSV file is essential for a successful WordPress CSV user import and customer import. The CSV file should contain clear column headers and correct values, because WordPress import plugins rely on these headers to map data into user fields. If column names are incorrect or required values are missing, the import may fail or create incomplete user accounts.
1. Mandatory User Fields
Mandatory fields are required to create a WordPress user account successfully. These typically include username, email, password, and role. If any of these fields are missing or invalid, the plugin may skip the user record import process.
2. Optional and Custom Fields
Optional fields help create complete user profiles, but are not required for account creation. Common optional fields include first_name, last_name, display_name, nickname, website, and description. You can also import custom user meta fields, such as phone number or membership ID, and WooCommerce billing/shipping fields like billing_phone and shipping_city for customer profiles.
Methods to Import Users and Customers into WordPress
There are multiple ways to import users and customers into WordPress. The best method depends on your website size, technical knowledge, and how much control you need over the import process. Generally, WordPress site owners prefer plugin-based imports, while developers may choose custom methods for advanced requirements.
1. Plugin-Based Import Method
Using a CSV import plugin is the easiest and most reliable method for bulk user import tasks. This plugin supports features like CSV upload, auto-field mapping(if names are the same), duplicate handling, import logs, batch import, and schedule import. This method is suitable for beginners, WooCommerce store owners, and administrators who want a fast and safe WordPress CSV user import process.
2. Manual or Custom Import Method
Manual import methods include using custom PHP scripts, WP-CLI commands, or direct database import techniques. This approach is mainly suitable for developers working with large datasets or complex migrations. While it provides more control, it requires technical expertise and may cause errors if not implemented carefully.
Step-by-Step Guide to Import Users Using CSV
Importing users into WordPress using a CSV file is one of the easiest ways to handle bulk user creation.
Instead of manually creating user accounts one by one, you can upload a single CSV file that contains all user information, such as usernames, emails, passwords, and even custom profile fields. This is a huge time-saver for websites that need to onboard large groups of users like students, employees, or paid members.
1. Preparing the CSV File
Before starting the import process, your CSV file must be prepared in the correct structure. If any fields are missing, the import may create incomplete user profiles. That’s why preparing the file properly is the most important step.
2. Creating the CSV File:
To create your CSV file, you can use Excel or Google Sheets. Each row should represent one user, and each column should contain a specific detail related to that user.
Your CSV file should contain the basic required fields like:
- username
- email
- password
Along with these, you can also include any extra user details or profile fields you want to import. For example:
- first_name
- last_name
- phone_number
- user_role
- user_email
- user_login
Once your file is ready, save it in CSV format so it can be uploaded into WordPress without issues.
3. Configuring the Import Process
Once your CSV file is ready, the next step is setting up the import process in WordPress. The easiest way to do this is by using the WP Ultimate CSV Importer plugin, which supports bulk user imports.
1. Install the Import Plugin
To import users into WordPress, the first step is to install a suitable import plugin.
Install and activate the WP Ultimate CSV Importer plugin from the WordPress dashboard. After activation, you will be able to access the plugin from the admin menu.
2. Start the Import Process
After installing the plugin, go to the WP Ultimate CSV Importer → Import/Update area.
Now upload the CSV file that you created earlier. Once uploaded, the plugin will scan the file and detect the available user data fields.
3. Select Users to Import
In the import setup screen, select Users as the data type.
This step is important because the plugin supports different import types, such as posts, pages, products, and users. By selecting “Users,” you are telling the plugin that the CSV data should be added to WordPress user accounts.
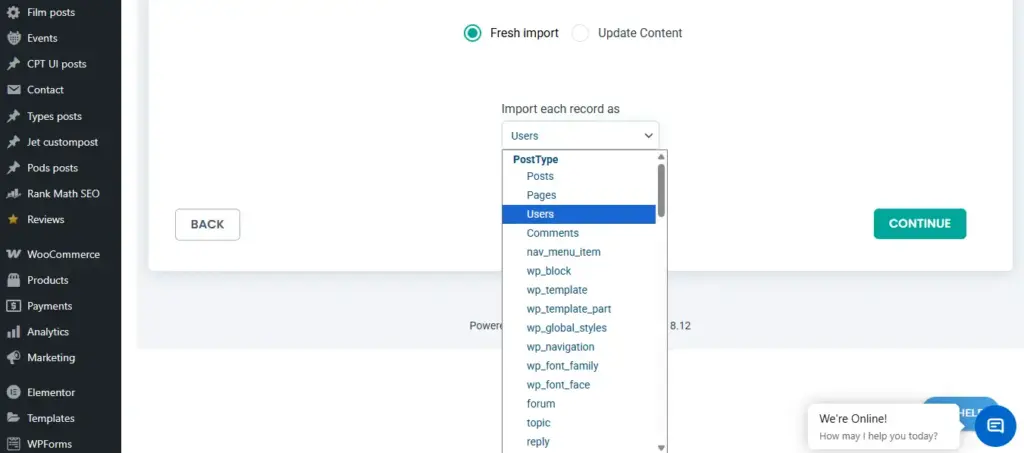
4. Set Import Options
After selecting the post type, configure the import type based on your needs.
For example, you can decide whether the plugin should create new users or update existing users if their email or username already exists. This option is helpful when you are updating customer details instead of creating duplicates.
5. Map the Fields
Field mapping is the step where you connect your CSV columns with the correct WordPress Users fields. This ensures every piece of information goes into the right place.
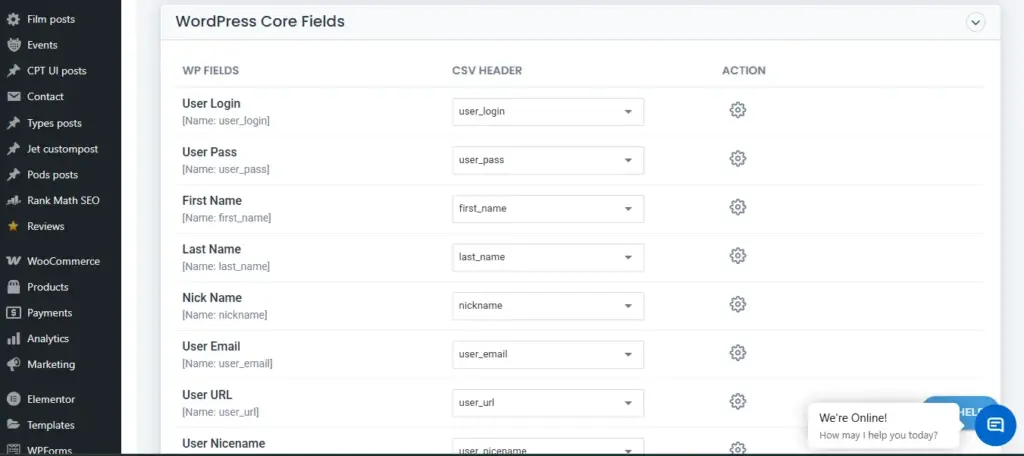
For example:
- username → Username field
- useremail → Email field
- userlogin → User Login field
- first_name → First Name field
- user_phone → Phone Number field
If you have custom fields, you must carefully map them as well. Otherwise, those details may not appear in the user profile even if the import is successful.
6. Run the Import
After completing the field mapping and settings, you can start the import.
Click the import button, and the plugin will process the CSV file row by row. Once completed, it will create user accounts automatically and store the imported details inside WordPress.
After the import finishes, you should check the WordPress Users menu and verify whether all users were imported correctly.
WP Ultimate CSV Importer Pro
Get Ultimate CSV/XML Importer to import data on WordPress faster, quicker and safer.
Importing Customers into WooCommerce
Managing customers is an important part of running a WooCommerce store. If you are migrating from another platform or updating many customer records at once, adding customers manually can take a lot of time.
With WP Ultimate CSV Importer, you can upload a customer file and import multiple WooCommerce customers in one process. This makes bulk customer management faster and easier.
Import & Export WooCommerce Customers with WP Ultimate CSV Importer – Step-by-Step Guide
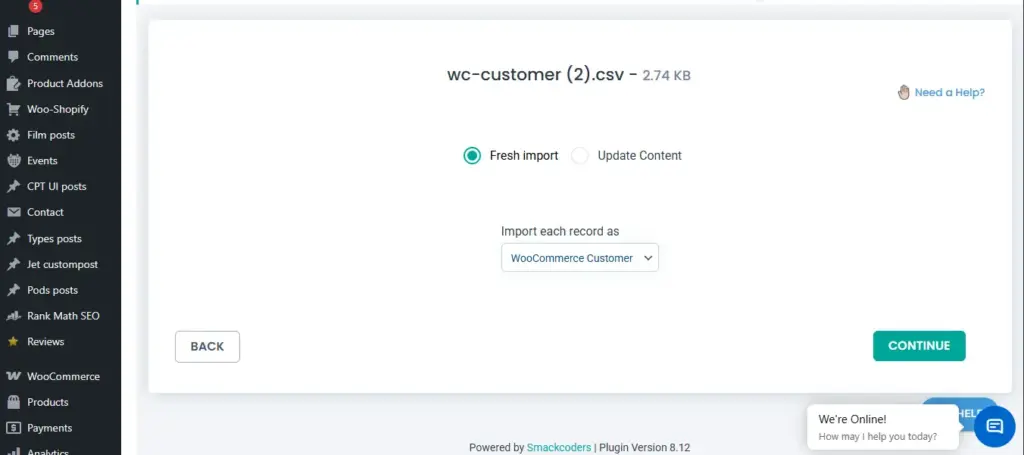
Step 1: Start a New Import for WooCommerce Customers
First, prepare a CSV file with customer details such as username, email, password, billing address, and shipping address.
Then go to your WordPress dashboard, open WP Ultimate CSV Importer, upload the CSV file, and select WooCommerce Customer as the post type. Choose Fresh Import for new customers (selected by default) or Update Content to update existing customers. Click Continue.
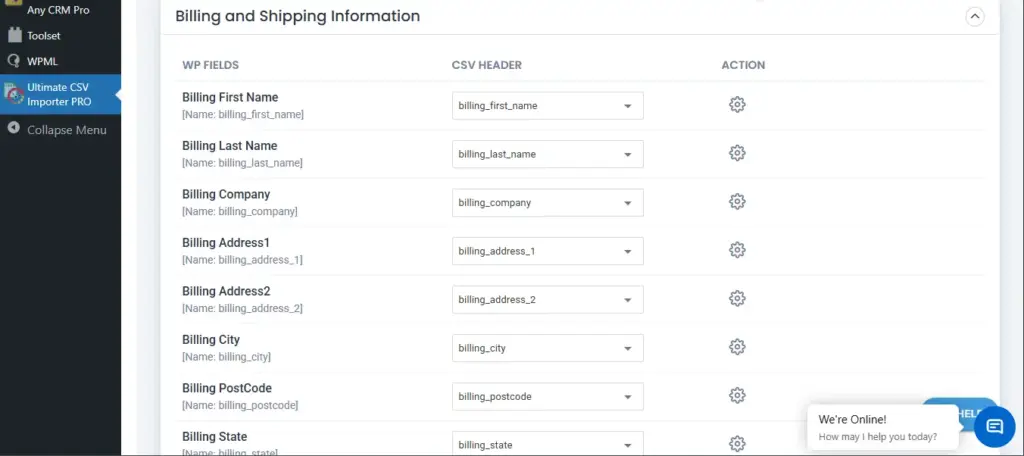
Step 2: Mapping WooCommerce Customer Fields
Now match your CSV columns with WooCommerce customer fields. If the headers are correct, the plugin will map them automatically. If not, you can map them manually.
Make sure billing and shipping fields are mapped correctly. After mapping, you can save it with a name as a template for future imports. Click Continue.
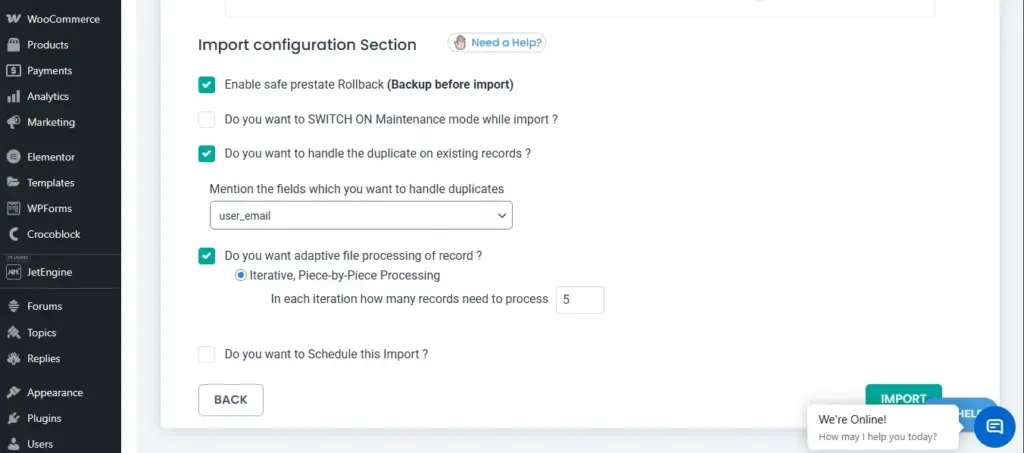
Step 3: Import Settings Configuration
In the settings section, you can enable options like duplicate handling to avoid importing the same customer again. For large files, enable batch processing to prevent server timeout issues.
Finally, click Import to start the process. After the import is completed, download the log file to check results and verify customers under WooCommerce → Customers.
WP Ultimate CSV Importer Pro
Get Ultimate CSV/XML Importer to import data on WordPress faster, quicker and safer.
Error Handling and Troubleshooting
During a WordPress CSV user import, errors may occur due to incorrect CSV formatting, missing mandatory fields, or duplicate user records. Common issues include duplicate email addresses, invalid usernames, and incorrect role values. These problems can cause the plugin to skip users or stop the import process.
To fix errors, check the plugin import log and identify the exact row causing the issue. Ensure your CSV headers match the correct WordPress fields and remove extra spaces, empty rows, or unsupported characters. If duplicates exist, enable the update option instead of creating new users, so existing users can be updated without failure.
Post-Import Validation and Verification
After completing the import process, it is important to verify whether all users and customers were created correctly. You can check imported accounts by going to WordPress Dashboard → Users → All Users and confirming usernames, emails, and assigned roles. This step ensures that the WordPress CSV user import was successful and no users were skipped or imported incorrectly.
For WooCommerce customers, open the customer profile and confirm that billing and shipping details are available. It is also recommended to test login credentials for a few sample users to ensure accounts work properly. Post-import validation helps you identify missing fields, incorrect mapping, or role issues before the site goes live.
Best Practices for User and Customer Imports
To ensure a successful bulk user import WordPress process, always take a full website backup before starting the import. It is also recommended to test the import on a staging site first, especially when importing large user databases. This prevents data loss and helps you fix errors without affecting the live website.
Always keep your CSV file clean by removing duplicates, empty rows, and invalid usernames or emails. Import users in smaller batches if the file is large, and assign user roles carefully to avoid security risks. After import, verify user accounts and WooCommerce customer profiles to ensure all required data is imported correctly.
Frequently Asked Questions (FAQ)
1. How to import and add users from CSV?
To import users from CSV, prepare a file with required columns like username, email, password, and role. Then upload it using a CSV user import plugin and complete field mapping to create user accounts automatically.
2. How do I import users into WordPress?
You can import users into WordPress by using a plugin that supports WordPress CSV user import. The plugin reads your CSV file and creates user profiles based on the data, including roles and optional user meta fields.
3. How to bulk add users to WordPress?
The easiest way to bulk add users is by using a CSV user import plugin for WordPress. Upload your CSV file, assign roles, and execute the import to create multiple users in one process.
4. How to export users to CSV in WordPress?
To export users to CSV, you can use export plugins such as WP Ultimate CSV Importer, WP All Export, or user export tools. These plugins allow you to download user details, including roles and custom meta fields, in CSV format.
5. How do I export customers from WooCommerce?
WooCommerce customers can be exported using plugins like WP Ultimate CSV Importer or WooCommerce Customer/Order Export tools. These plugins export customer details such as email, billing address, shipping address, and order-related information into a CSV file.
Conclusion
Importing users and customers into WordPress using CSV is one of the most efficient methods for handling bulk account creation. It is especially useful for WooCommerce stores, membership websites, LMS platforms, and business portals where managing large user databases manually is not practical. With a properly structured CSV file, you can quickly upload thousands of users while maintaining accurate profile information and reducing the chances of human errors.
Using WP Ultimate CSV Importer makes the WordPress CSV user import process simple by providing features like field mapping, duplicate handling, and role assignment. It also supports importing WooCommerce customers along with billing and shipping details, ensuring customer profiles are complete and ready for checkout.
To get the best results, always follow best practices such as taking backups, testing imports on staging sites, and validating user records after import. When done correctly, CSV-based bulk import saves time, improves data consistency, and helps administrators manage WordPress users and WooCommerce customers in a more scalable and professional way.
How to Export WooCommerce Orders to Google Sheets
13 Feb 2026, 7:53 am
Table of Contents
Exporting WooCommerce orders to Google Sheets helps store owners, bloggers, and developers manage, analyze, and share order data more efficiently. Rather than relying on static reports in WordPress or manually exporting CSV files, which can be time-consuming and error-prone, Google Sheets provides real-time access to your data, with options to filter, sort, and collaborate instantly. This makes it easier to track sales trends, manage inventory, reconcile accounts, and share information with your team without giving direct access to your store dashboard.
While some methods attempt to export WooCommerce orders to Google Sheets without plugins, they are often unreliable, difficult to automate, and not suitable for large stores. Using WP Ultimate CSV Importer Pro offers a structured, secure, and beginner-friendly way to export WooCommerce orders accurately, with features like advanced filtering, scheduled exports, and automated syncing, allowing you to keep a real-time, easy-to-use WooCommerce orders spreadsheet.
Key Takeaways
- Export WooCommerce orders directly to Google Sheets for easy reporting and collaboration.
- WP Ultimate CSV Importer Pro simplifies the export process, even for large stores.
- Advanced filters allow exporting by date range, product, payment method, or order status.
- Scheduled exports automate your workflow and keep data up to date.
- Performing a quick pre-export checklist prevents errors and ensures accurate data.
- The plugin is beginner-friendly but powerful enough for advanced users.
Benefits of Exporting WooCommerce Orders to Google Sheets
Exporting WooCommerce orders to Google Sheets makes order management faster and more flexible. Instead of checking reports inside WordPress, store owners can work with data in a simple spreadsheet format.
Simplified reporting
Easily create sales summaries, tax reports, and performance metrics using Google Sheets formulas and filters.
Real-time collaboration
Share order data with accountants, marketing teams, or fulfillment partners without giving WordPress access.
Automation and efficiency
Scheduled exports reduce manual work and keep your order data up to date automatically.
Data backup and security
Keeping orders in Google Sheets provides an additional backup outside your WordPress database.
Scalability for high-traffic stores
Regular exports help store owners organize data efficiently and optimize WordPress for high traffic by reducing the amount of admin-side data processing.
These benefits explain why many store owners prefer exporting WooCommerce orders to Google Sheets instead of relying solely on dashboard reports.
What is WP Ultimate CSV Importer?
WP Ultimate CSV Importer is a powerful WordPress plugin for importing and exporting data on WordPress and WooCommerce websites. It helps store owners and developers manage WooCommerce orders without needing custom scripts or technical setup. The plugin supports direct export of WooCommerce orders to Google Sheets, making data handling simple and efficient.
It is built to handle large order volumes smoothly, which is important for high-traffic stores. With features like advanced filtering, scheduled exports, and a guided workflow, WP Ultimate CSV Importer is suitable for beginners and advanced users who need precise control over their exports.
WP Ultimate CSV Importer Pro
Get Ultimate CSV/XML Importer to import data on WordPress faster, quicker and safer.
What Should We Do Before Exporting Orders
Before exporting WooCommerce orders, it is important to check that your store data is ready. Make sure orders exist, required fields are available, and access permissions are correctly set. This preparation helps avoid errors and ensures accurate exports to Google Sheets.
Step 1: Install and Activate the WP Ultimate CSV Importer Pro Plugin
First, visit the Smackcoders website and go to the My Account page. Log in to your account or create one if you are new. After logging in, purchase the WP Ultimate CSV Importer Pro version and download the plugin ZIP file.
Then, log in to your WordPress admin dashboard, upload the downloaded file from the Plugins section, install it, and activate the plugin. Once activated, the plugin will appear in your dashboard, confirming it is ready to use.
Step 2: Verify WooCommerce Order Settings
Before exporting, make sure your WooCommerce store has orders available. Open the Orders section in your WordPress dashboard and confirm that the order statuses you plan to export, such as Processing or Completed, are present. Also, ensure each order contains essential details like customer information, purchased products, and payment status. Verifying this in advance helps prevent empty exports, missing orders, and failed export processes.
Step 3: Configure Google OAuth Access for WP Ultimate CSV Importer
To export WooCommerce order data into Google Sheets, WP Ultimate CSV Importer needs secure authorization to interact with your Google account. This is done using Google OAuth, which allows the plugin to create and update spreadsheets without exposing your Google login credentials.
Create a New Google Cloud Project
Begin by signing in to the Google Cloud Console using the Google account you plan to connect with Google Sheets. At the top of the console, click Select a project and choose New Project.
Provide a project name and click Create.
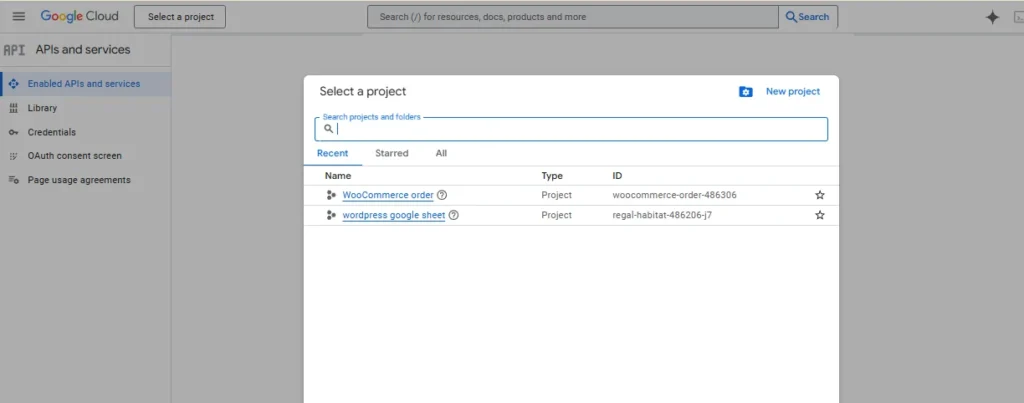
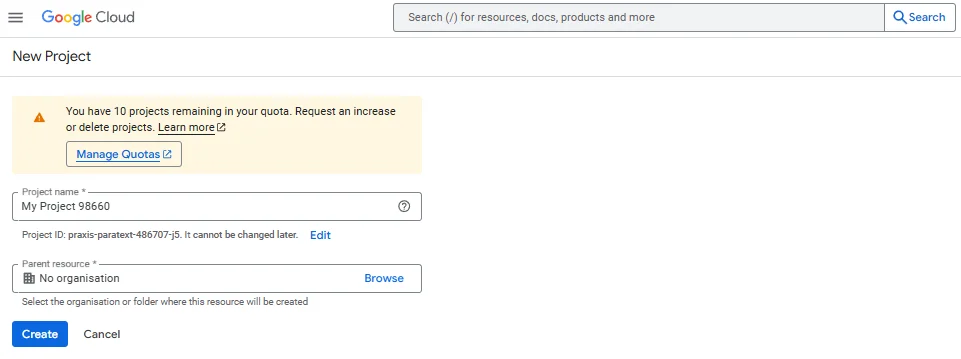
Once the project is created, ensure it is selected as the active project. This project will be used to generate the Client ID and Client Secret required by WP Ultimate CSV Importer.
Enable the Google Sheets API
With your project selected, open APIs & Services from the Google Cloud Console menu.
Navigate to Library, search for Google Sheets API, and enable it for your project.
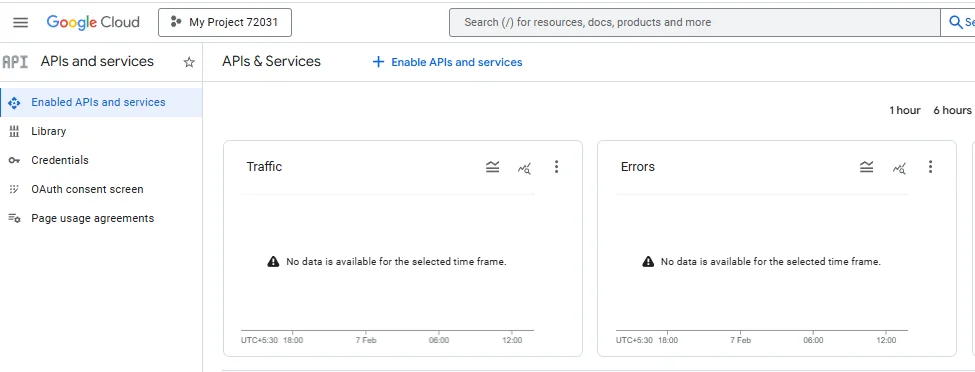
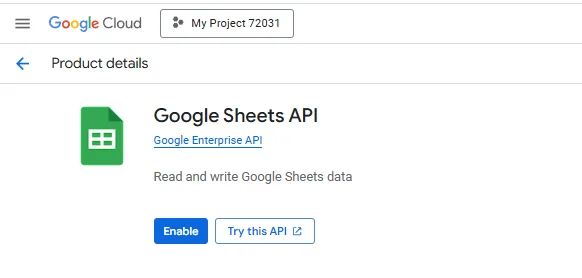
Enabling this API allows WP Ultimate CSV Importer to send WooCommerce order data directly to Google Sheets. Without it, the plugin will not be able to access or modify spreadsheets.
Set Up the OAuth Consent Screen
After enabling the API, go back to APIs & Services and open the OAuth consent screen.
Start by entering an application name. This name will be shown to you when Google asks for permission during authentication.

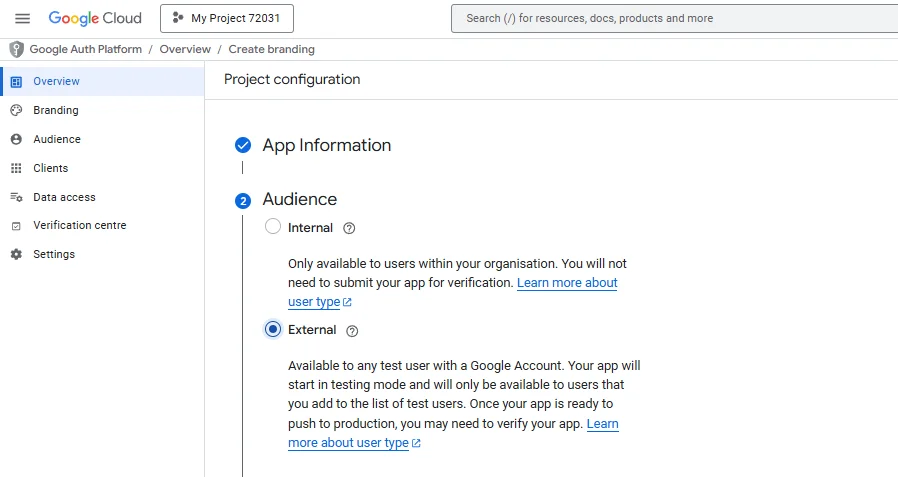
For User Type, select External, which allows the plugin to connect with your Google account.
Add your email address in the required fields, save the configuration, and continue to the next step.
Generate OAuth Client ID and Client Secret
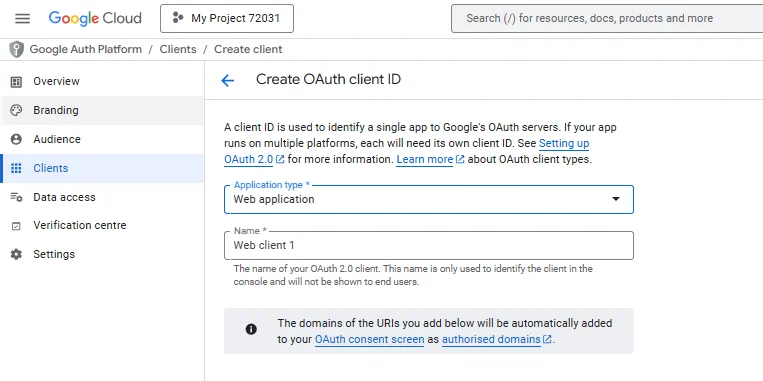
Next, open the Credentials section under APIs & Services and click Create Credentials → OAuth Client ID.
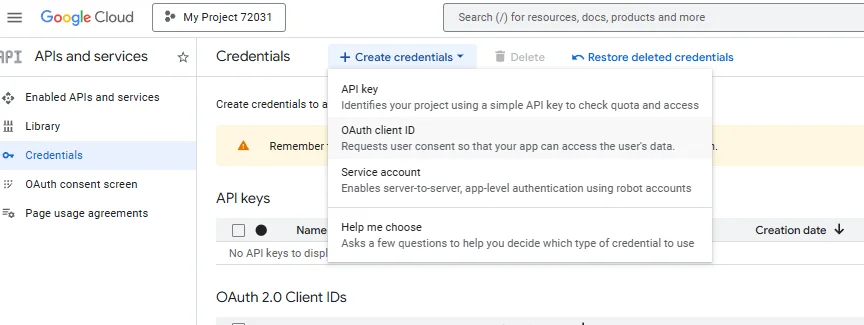
Choose Web application as the application type.
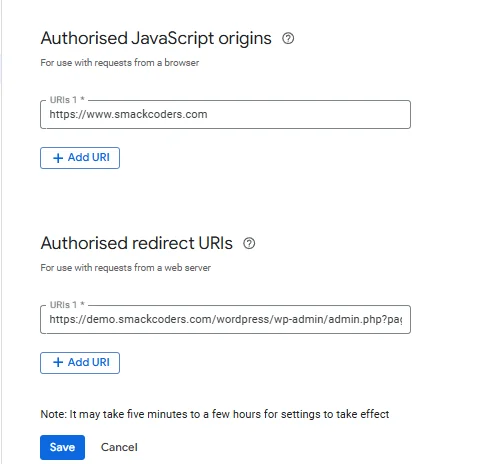
Add Authorized URLs
Scroll down to find the fields for authorized URLs:
- Authorized JavaScript origins
Enter your website’s base URL (for example, https://yourdomain.com). This tells Google which site is allowed to initiate authentication requests. - Authorized Redirect URLs
Open the WP Ultimate CSV Importer Settings page in your WordPress dashboard, copy the full page URL from the browser, and paste it into this field.
After saving, Google will generate a Client ID and Client Secret. Keep these details handy for the next step.
Connect Your Google Account in WP Ultimate CSV Importer
Return to your WordPress admin area and open the WP Ultimate CSV Importer → Settings page.
- Paste the Client ID and Client Secret into the corresponding fields.
- Add the authorized redirect URL if required, then save the settings.
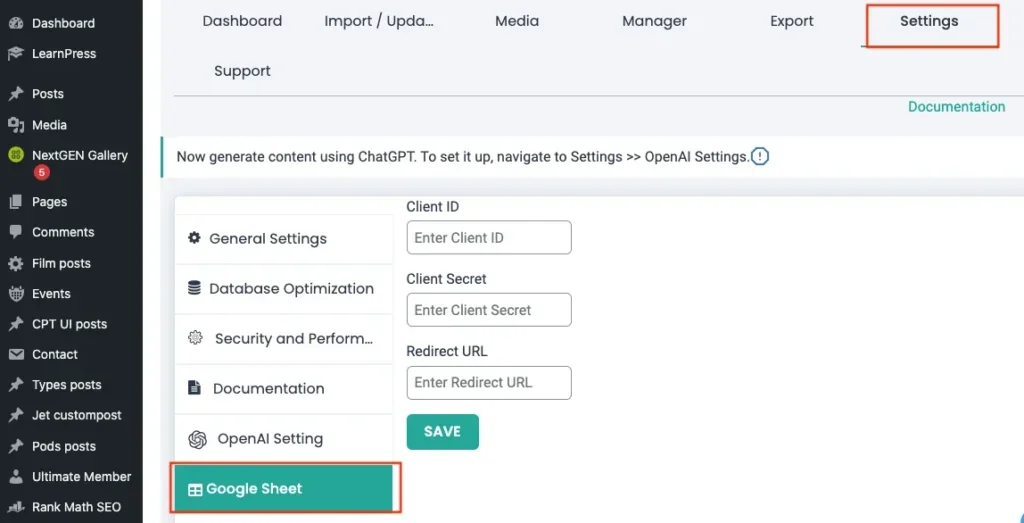
Click the option to connect your Google account. Once authentication is successful, you’ll see a confirmation message indicating that the plugin is now authorized to export WooCommerce orders to Google Sheets.
Step 4: Confirm Google Sheets Permissions
After connecting your account, Google will prompt you to grant access permissions. Make sure you allow access so the plugin can create and update spreadsheets.
If exported data does not appear in Google Sheets, double-check that:
- You approved access during the OAuth prompt
- The correct Google account was used during authentication
Permission issues often occur when access is denied or a different account is selected.
Step 5: Pre-Export Checklist for WooCommerce Orders
Before exporting, confirm that WP Ultimate CSV Importer is active and connected to your Google account. Make sure WooCommerce orders are available for export and Google Sheets permissions are approved. This quick check helps prevent export failures.
How to Export WooCommerce Orders to Google Sheets Using WP Ultimate CSV Importer
This section explains how to export WooCommerce orders to Google Sheets using WP Ultimate CSV Importer, from selecting the data to verifying the exported spreadsheet. Follow these steps to ensure accurate and successful exports.
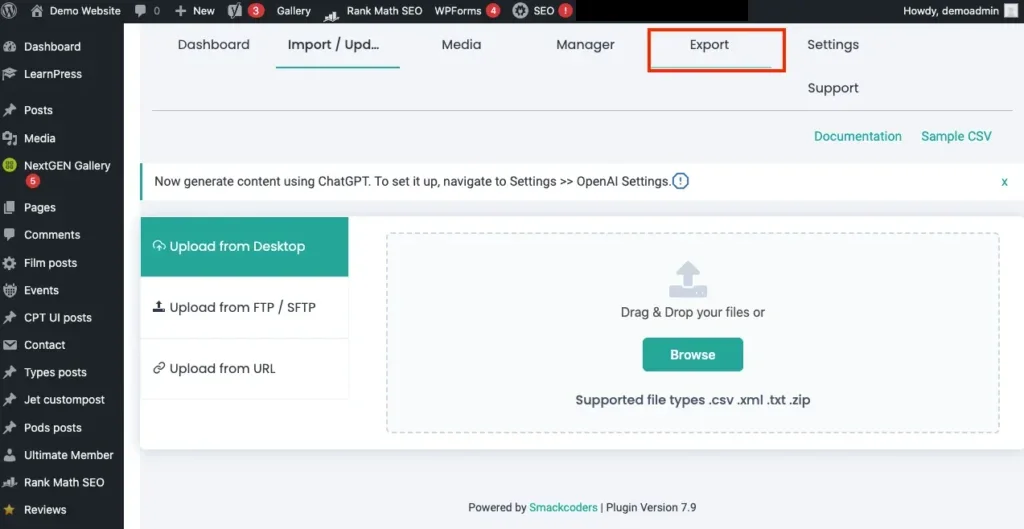
Open the Export Module
From your WordPress dashboard, open WP Ultimate CSV Importer and click on the Export option. This will take you to the export screen, where you can start exporting WooCommerce orders to Google Sheets.
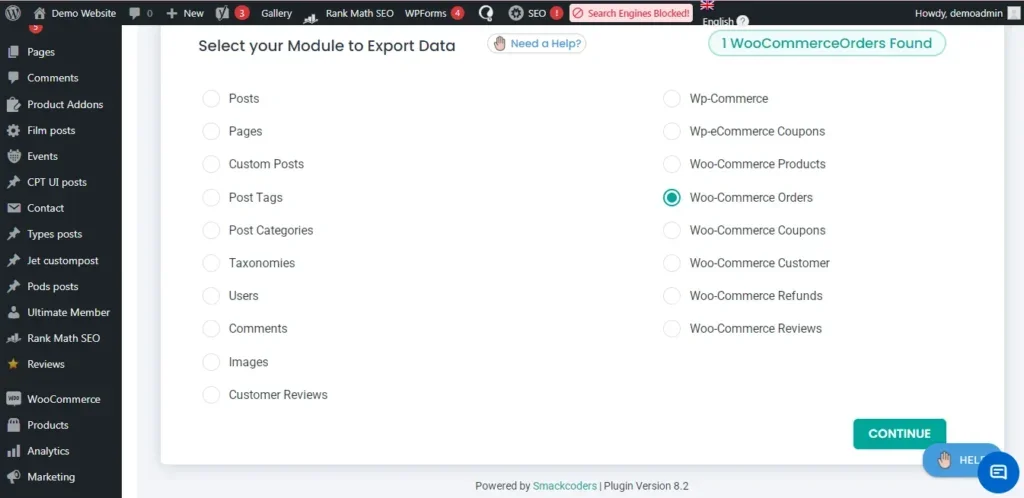
Select WooCommerce Orders
From the post type list, select WooCommerce Orders. When you choose this option, the total number of WooCommerce orders available on your WordPress site will be displayed next to it, helping you confirm how many orders will be exported.
WP Ultimate CSV Importer Pro
Get Ultimate CSV/XML Importer to import data on WordPress faster, quicker and safer.
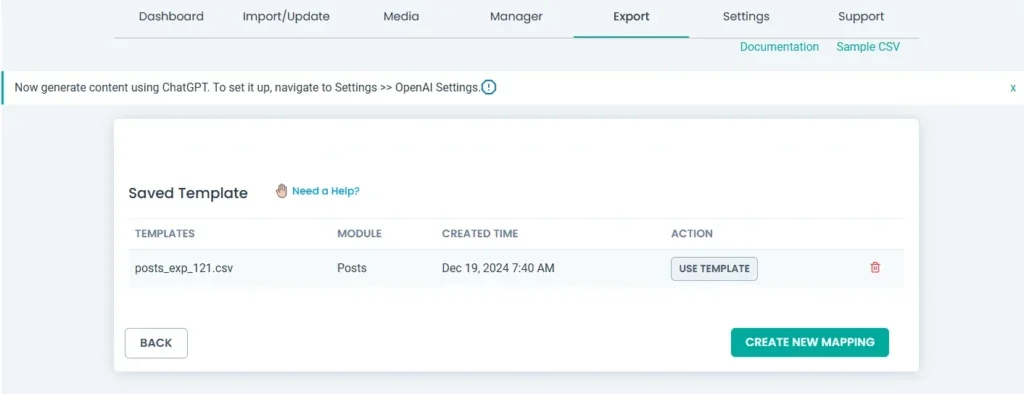
Configure Basic Export Settings
At this stage, you can choose to use an existing mapping template or create a new one for your export. If you select Create New Mapping, you will be taken to the next screen to configure advanced settings and apply filters as needed.
Enter a name for the export file and select the required file type from the Advanced Export Settings. For large WooCommerce order exports, enabling the split records option can help improve performance and prevent timeouts, or configure batch processing to completely avoid these errors.

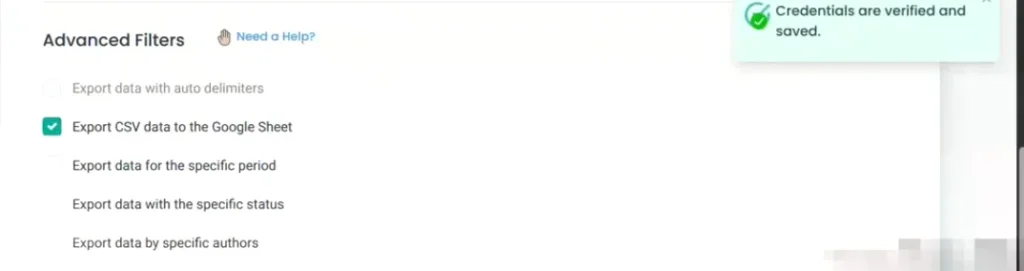
Configure Advanced Export Filters
WP Ultimate CSV Importer provides several export options that help you control how WooCommerce orders are sent to Google Sheets.
- Export CSV data to Google Sheets allows you to export WooCommerce order data directly into Google Sheets. Enable this option to choose Google Sheets as the export destination.
- Export data for a specific date range helps you export WooCommerce orders created within a selected time period. Enable this option and enter the From Date and To Date fields. Only orders placed between these two dates will be exported. For example, you can enter the first and last date of a month to generate a monthly sales report.

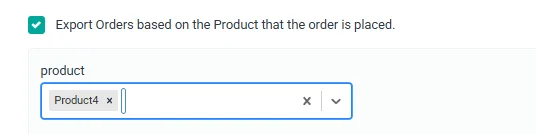
- Export data by product lets you export orders that include a specific product. Enable this filter and select the required product from the product list. Only WooCommerce orders that include the selected product will be exported to Google Sheets.
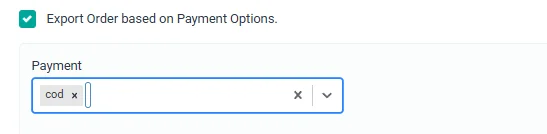
- Export data by payment method lets you export WooCommerce orders based on how customers paid for their orders. Enable this option and select the required payment method from the available options. This is useful when you want to review or reconcile payments made through a specific gateway.
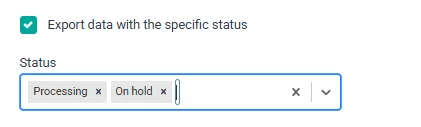
- Export data with a specific order status allows you to export WooCommerce orders based on their current status. Enable this filter, then select one or more order statuses, such as Pending Payment, Processing, On Hold, Completed, or Cancelled. Only orders matching the selected status will be included in the export.
By entering the correct values for each filter, you can export only the WooCommerce orders you need and keep your Google Sheets clean, accurate, and easy to manage.
Schedule Automatic Exports to Google Sheets
WP Ultimate CSV Importer Pro allows you to automate WooCommerce order exports to Google Sheets. This feature helps keep your spreadsheet updated without running the export manually each time.
To enable scheduling, turn on the scheduled export option and choose how often the export should run, such as daily, weekly, or monthly. Set the preferred time and apply the required filters, like date range or order status. Once saved, the plugin will automatically export new or updated WooCommerce orders to Google Sheets based on the schedule.
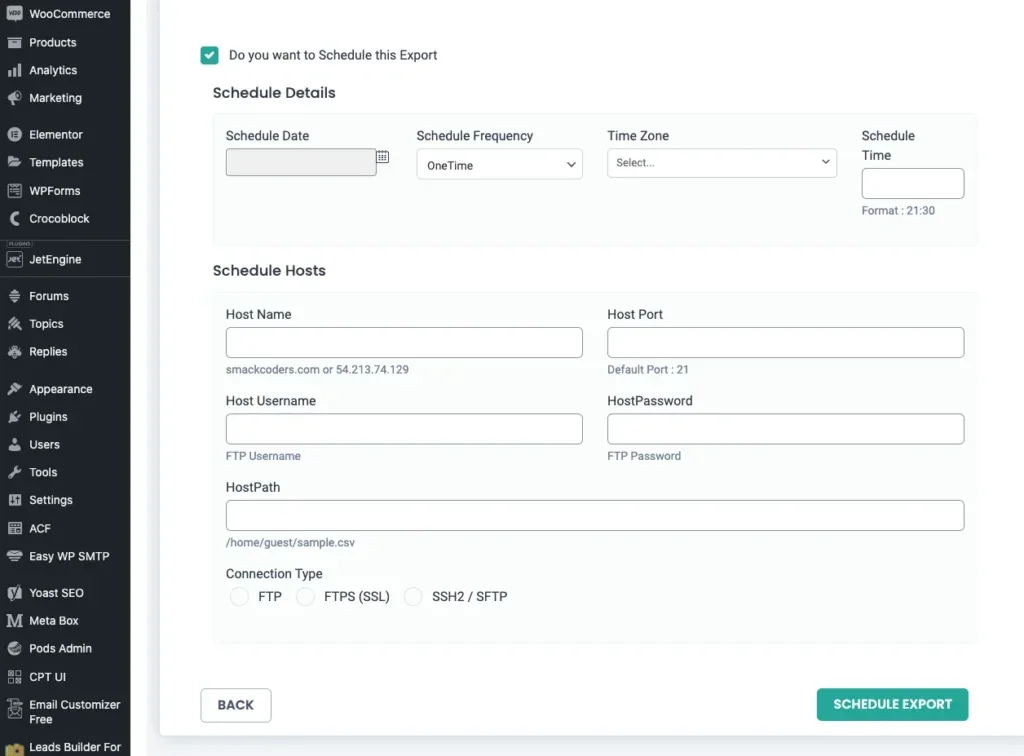
Scheduled exports are useful for regular sales tracking, accounting updates, and team reporting, as your Google Sheets will always contain the latest order data.
Run the Export Process and Verify the Export
After configuring all export settings and filters, click the Export button to start the process. WP Ultimate CSV Importer Pro will export the selected WooCommerce orders to Google Sheets.
Once the export is completed, you will see Download and G-Sheets options. Click the G-SHEETS option to open the exported WooCommerce orders directly in Google Sheets. Review a few records to confirm that order details such as customer information, products, payment method, and order status are exported correctly.
This verification step ensures the export was completed successfully and the data is accurate.
WP Ultimate CSV Importer Pro
Get Ultimate CSV/XML Importer to import data on WordPress faster, quicker and safer.
Use Cases for Exporting WooCommerce Orders to Google Sheets
Exporting WooCommerce orders to Google Sheets is useful in many day-to-day business scenarios. Store owners often use Google Sheets to create sales reports by filtering orders based on date, product, or payment method. This makes it easier to track performance without logging into WordPress repeatedly.
For accounting and payment reconciliation, exported order data helps teams verify transactions, calculate totals, and share reports with accountants. Since Google Sheets updates in real time, finance teams can access the latest order data whenever needed.
Google Sheets is also helpful for inventory planning. By reviewing product-level order data, store owners can identify fast-selling items and plan stock replenishment accordingly.
Team collaboration becomes easier when WooCommerce orders are shared in Google Sheets. Customer support, sales, and management teams can access the same order data, add notes, and coordinate actions without exporting files manually.
Common Issues and Troubleshooting
While exporting WooCommerce orders to Google Sheets using WP Ultimate CSV Importer Pro is generally smooth, you may occasionally encounter issues. Most of these problems are easy to resolve with a few simple checks.
Common Problems and Solutions
| Issue | Possible Cause | Solution |
| Google authentication error | Client ID, Client Secret, or Redirect URL is incorrect | Recheck the credentials in Google Cloud and ensure the Redirect URL matches exactly |
| Google Sheets was not created | Google Sheets API not enabled | Go to Google Cloud Console and enable the Google Sheets API for the project |
| Orders are missing in the export | Filters applied incorrectly | Review date range, order status, product, or payment method filters |
| Permission denied error | Google account access not approved | Reconnect the Google account and allow all requested permissions |
| Export fails for large orders | Server timeout or memory limit | Enable the split records option or export data in iterations (batch export) |
Additional Tips
If issues persist, ensure that WP Ultimate CSV Importer and WooCommerce are updated to the latest versions. Clearing cache plugins and retrying the export can also help resolve temporary conflicts.
By following these troubleshooting steps, most export-related issues can be resolved quickly without technical expertise.
Wrap Up
Exporting WooCommerce orders to Google Sheets makes order management easier and more efficient. It helps store owners improve reporting, share data with teams, and avoid manual exports. Keeping order data in Google Sheets also ensures better organization and quick access when needed.
With WP Ultimate CSV Importer Pro, you can securely export WooCommerce orders, apply filters, and schedule automatic exports directly to Google Sheets. The plugin is built to handle large order volumes and supports both beginners and advanced WooCommerce users.
If you have any questions or need help during the setup, the Smackcoders support team is here to help. Feel free to contact them at support@smackcoders.com for expert assistance.
Frequently Asked Questions
1. How do I export bulk orders from WooCommerce?
You can export bulk orders from WooCommerce by using an export plugin like WP Ultimate CSV Importer Pro. It allows you to select all WooCommerce orders, apply filters if needed, and export them in bulk directly to Google Sheets or other file formats.
2. What is the best export plugin for WooCommerce orders?
WP Ultimate CSV Importer Pro is one of the best export plugins for WooCommerce orders. It supports large data volumes, advanced filtering, scheduled exports, and direct integration with Google Sheets, making it suitable for both beginners and advanced users.
3. How do I export all orders from WooCommerce?
To export all orders, select WooCommerce Orders in the export module and avoid applying any filters. WP Ultimate CSV Importer Pro will export all available orders from your store into your chosen destination, such as Google Sheets.
4. How do I export WooCommerce orders to Excel?
WP Ultimate CSV Importer Pro allows you to export WooCommerce orders in Excel-compatible formats such as CSV or XLS. You can then open these files directly in Microsoft Excel for further analysis.
5. How does WP Ultimate CSV Importer Pro handle large order exports?
WP Ultimate CSV Importer Pro is optimized for large datasets. It includes options like split records and scheduled exports, which help prevent server timeouts and ensure smooth exports even for stores with thousands of orders
How to Bulk Update WooCommerce Prices and Stocks Using CSV File
9 Feb 2026, 1:15 pm
Table of Contents
Maintaining accurate product prices and stock levels is a daily responsibility for WooCommerce store owners or maintainers. While this task may feel manageable in the early stages of a store, it becomes increasingly difficult as the number of products grows. Updating each product manually takes time, demands attention, and often leads to avoidable mistakes.
Bulk updating WooCommerce prices and stock using a CSV file offers a practical and scalable solution. Instead of editing products one by one, store owners can manage updates in a single file and apply changes across the entire catalog at once. This method is especially useful for stores handling frequent price adjustments or inventory changes.
This article explains how to bulk update WooCommerce prices and stocks using CSV files, with a focus on using WP Ultimate CSV Importer as a reliable solution. The goal is to help store owners, managers, and beginners understand both the process and the reasons why CSV-based updates are essential for efficient store management.
Key Takeaways
- Use CSV files to update WooCommerce prices and stock levels in bulk, rather than editing products individually, saving significant time and effort.
- Always include a reliable product identifier, such as SKU or Product ID, to ensure updates apply to the correct existing products without duplication.
- Review and structure your CSV carefully by keeping only necessary columns like regular price, sale price, stock quantity, and stock status for accurate updates.
- Use a trusted import tool – WP Ultimate CSV Importer with field mapping and update options to modify pricing and inventory without affecting other product data.
- Test imports with a small sample file and keep a complete backup before running full bulk updates to prevent large-scale errors and maintain data safety.
Common challenges in updating WooCommerce prices and stocks manually
Running a WooCommerce store involves constant monitoring of product prices and inventory levels. While manual updates may seem manageable in the early stages, they quickly become inefficient as your store grows. Many store owners struggle with accuracy, time management, and scalability when relying on manual methods. Understanding these challenges highlights why bulk updates using CSV files are a smarter alternative.
Manual Updates Consume Valuable Time
Updating prices and stock product by product through the WooCommerce dashboard is extremely time-intensive. For stores with large catalogs, even a simple price change can take hours. This repetitive work slows down daily operations and diverts attention from business-critical activities.
Increased Chances of Human Error
Manually entering numbers increases the risk of mistakes such as incorrect pricing, missing zeros, or wrong stock quantities. These errors can lead to overselling, underselling, or displaying inaccurate product information to customers.
Lack of Efficiency for Bulk Changes
Price updates due to supplier changes, discounts, or seasonal sales often affect multiple products at once. Handling these changes manually makes bulk updates impractical and exhausting, especially for stores with hundreds or thousands of items.
Inconsistent Product Data
When updates are done manually, it’s easy to forget to update either the price or the stock. This results in mismatched data where a product shows the correct price but incorrect availability, confusing customers and impacting conversions.
No Easy Rollback or Update History
If an error occurs during manual updates, reverting changes is difficult. WooCommerce does not offer a straightforward undo option for bulk manual edits, making recovery time-consuming and potentially risky.
Poor Scalability as the Store Grows
Manual price and stock management may work for small stores, but it does not scale. As the number of products increases, manual updates become unmanageable and prone to delays.
Reduced Focus on Business Growth
Spending hours on routine updates limits the time available for marketing, customer engagement, and strategic planning. This can slow overall business growth and reduce productivity.
Why CSV-Based Bulk Updates Are the Better Solution
Because of these challenges, many WooCommerce store owners switch to bulk updating prices and stock using CSV files. CSV-based updates allow you to modify hundreds or thousands of products at once, reduce errors, maintain consistency, and save valuable time making inventory and pricing management far more efficient.
Why CSV-based bulk updates save time and reduce errors
Updating WooCommerce prices and stock manually takes time and often leads to mistakes. Using CSV-based bulk updates with WP Ultimate CSV Importer Pro makes the process faster, more accurate, and easier to manage. Store owners can maintain all product data in a single CSV file and map fields like price and stock directly to WooCommerce products, ensuring correct updates every time. The plugin’s high-speed import feature allows thousands of products to be updated in one go, saving significant effort. Preview and validation options help identify issues before changes go live, reducing errors. Product matching through SKU prevents duplicates and keeps the database clean. If corrections are needed, the CSV can be edited and re-imported safely. Scheduled imports using Cron further automate regular updates, keeping inventory accurate without manual work. Overall, CSV-based bulk updates improve efficiency and allow store owners to focus more on business growth instead of repetitive product management tasks.
When Do You Need Bulk Price & Stock Updates?
Bulk price and stock updates are not occasional tasks for most WooCommerce stores. They are often required regularly due to changing business conditions and inventory movement. Stores with large catalogs or frequently changing products depend on bulk update methods to maintain accurate data. Without bulk updates, keeping prices and stock levels consistent becomes difficult.
Below are common situations where bulk updates are especially useful.
Seasonal sales & discounts
Seasonal promotions and sales events often require updating sale prices across many products within a short period. Making these changes manually increases the risk of missed or incorrect pricing.
Using CSV updates, discounts can be applied by adjusting values in one file. This ensures that all eligible products reflect the correct sale price quickly and consistently.
Supplier price changes
Supplier cost changes often affect multiple products at once. When costs increase or decrease, store owners must update retail prices to maintain profit margins.
CSV updates allow price adjustments to be applied in bulk, reducing delays and preventing outdated pricing from being displayed to customers.
Managing large product catalogs
Stores with hundreds or thousands of products cannot rely on manual updates. As catalog size increases, the risk of missing updates also increases.
Bulk update methods save time, reduce effort, and help maintain accurate product data across the entire store. CSV files offer a scalable long-term solution for catalog management.
WP Ultimate CSV Importer Pro
Get Ultimate CSV/XML Importer to import data on WordPress faster, quicker and safer.
CSV File Structure for Price & Stock Updates
A well-organized CSV file is the foundation for accurate WooCommerce product updates. Since WooCommerce relies on specific data fields to recognize products and apply modifications, maintaining the correct structure is extremely important. If the file is poorly formatted, the import process may fail or result in incorrect price changes and inventory inconsistencies. Issues such as missing columns, wrong product identifiers, or invalid values can cause serious update errors. Preparing and reviewing the CSV file carefully before starting the import helps ensure a smooth and reliable bulk update process.
Required Columns (Product ID / SKU, Regular Price, Sale Price, Stock Quantity, Stock Status)
Each column in the CSV serves a clear purpose during the update workflow.
- The Product ID or SKU is used to connect each CSV entry with the correct existing product in WooCommerce.
- The Regular Price column defines the standard selling price of the product.
- The Sale Price column allows you to apply discounts whenever needed.
- The Stock Quantity field updates the available inventory count.
- The Stock Status determines whether the product appears as in stock or out of stock in the store.
Using accurate Product IDs or SKUs is especially important because it ensures updates are applied to existing products without accidentally creating duplicate listings.
Example CSV explanation (no raw CSV dump, explain field purpose)
Each column in the CSV corresponds directly to a WooCommerce product field. The regular price column controls the base price, while the sale price column overrides it during discounts.
Stock quantity updates inventory counts, and stock status ensures an accurate display of availability. Together, these fields allow WooCommerce to reflect current pricing and inventory without manual edits.
Step-by-Step: Bulk Update WooCommerce Prices & Stock Using WP Ultimate CSV Importer
Managing prices and inventory manually inside WooCommerce becomes time-consuming as your product catalog grows. Instead of editing each product one by one, you can update hundreds or even thousands of products in minutes using WP Ultimate CSV Importer. By working with CSV files, store owners can easily export existing product data, make changes offline, and import updates back into WooCommerce without disrupting the store’s structure.
The following step-by-step process explains how to safely export your products, update price and stock information, and import the revised data back into your WooCommerce store.
Step 1: Access WP Ultimate CSV Importer Pro
To get started, log in to your WordPress admin dashboard. This is the central place where all store management tasks happen.
Before you update any prices or stock values, it’s important to export your existing product data first. Doing this gives you a safe backup and ensures you’re working with accurate, up-to-date information.
What you need to do:
- Navigate to Ultimate CSV Importer Pro → Export from the WordPress dashboard
- Use the export section to download your current WooCommerce product details
By exporting your products at the beginning, you create a reliable base file that you can edit confidently without worrying about data loss.
Step 2: Select WooCommerce Products for Export
Once you’re on the export page, you’ll notice multiple modules that allow you to export different types of data. At this stage, you need to specify exactly what information you want to download. Since the goal is to update product prices and stock, selecting the correct module is essential.
What you need to do:
- Choose Woo-Commerce Products from the list of available modules
- Confirm that the displayed product count matches the number of products in your store
- Click Continue to move forward
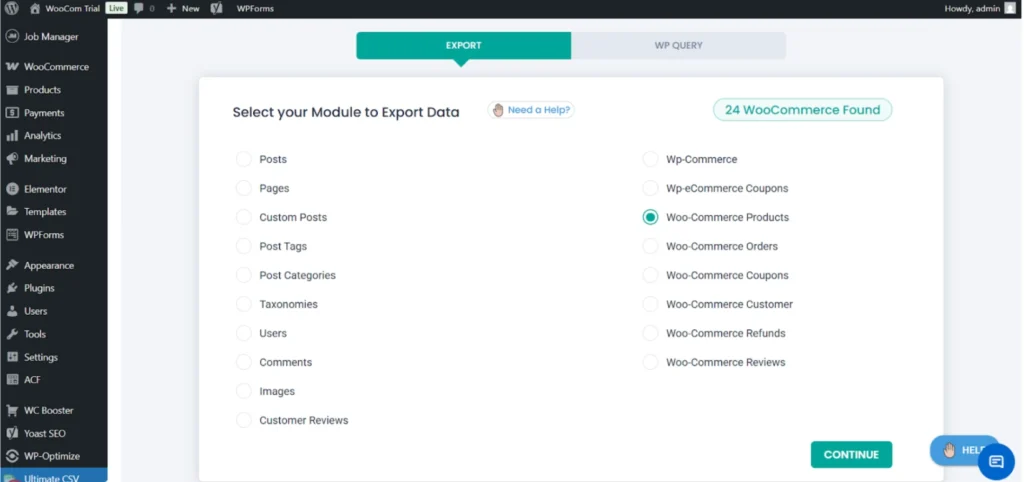
Selecting the WooCommerce Products module ensures that only product-related data is exported, keeping the CSV file clean and relevant for the update process.
Step 3: Export Products in CSV Format
After selecting the WooCommerce Products module, the next step is to choose how your product data should be exported. The file format you select here matters because it affects how easily you can edit and re-import the data later. CSV is the most practical option, as it works smoothly with tools like Excel and Google Sheets.
What you need to do:
- Select CSV as the export format
- Leave advanced filter options unchanged unless you need specific product conditions
- Click Export to start generating the file
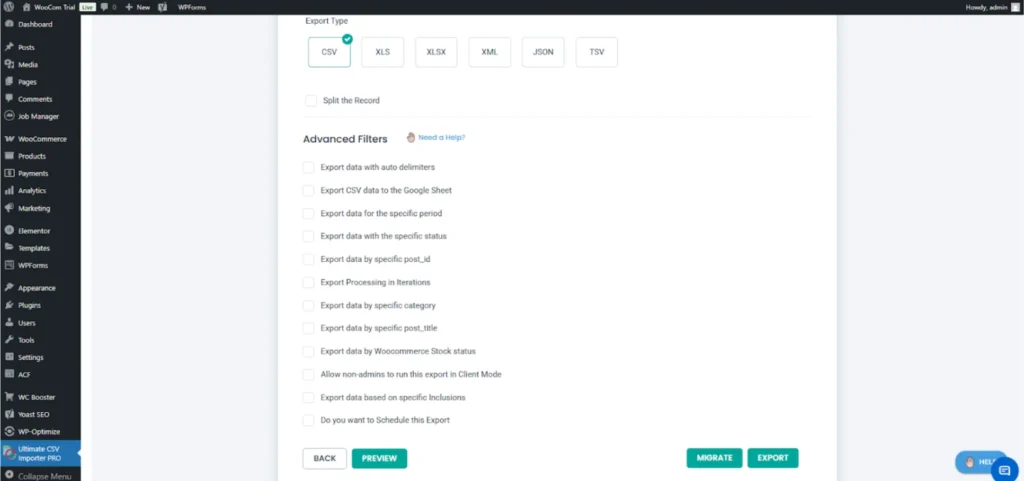
Exporting your products in CSV format makes it easier to edit prices and stock values while ensuring compatibility during the import process.
Step 4: Download the Exported CSV File
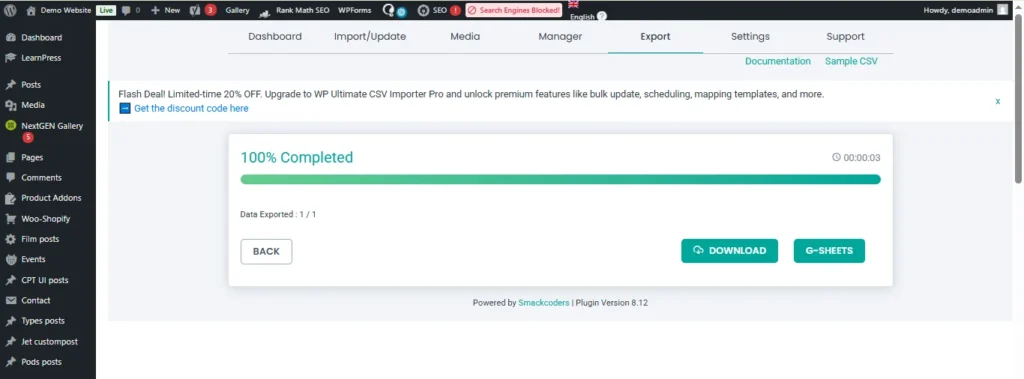
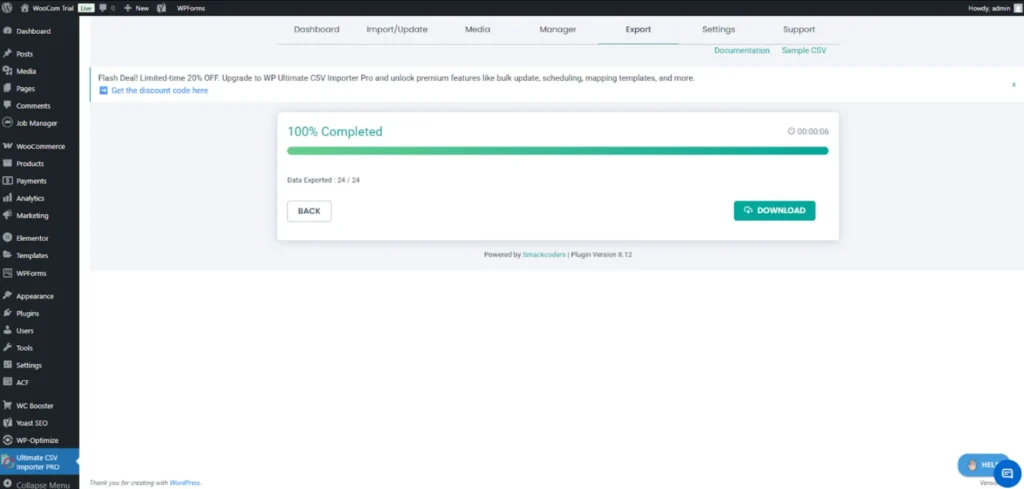
Once the export process begins, the system will generate your product file in the background. After the export reaches completion, you’ll be able to download the CSV file to your computer. This file plays an important role, as it serves both as your working file and a safety backup.
What you need to do:
- Wait until the export status shows 100% completed
- Click the Download button to save the file
- Store the file securely on your system before making any edits
Keeping this original CSV file unchanged gives you a reliable backup, allowing you to restore your product data if needed.
Step 5: Open the CSV File in Excel or Google Sheets
After downloading the CSV file, the next step is to open it using a spreadsheet tool such as Excel or Google Sheets. This is where you’ll review and prepare the data for updates. At first glance, the file may look overwhelming because it contains many columns, but you only need to focus on a few key fields.
What you need to do:
- Open the downloaded CSV file in Excel or Google Sheets
- Review the columns, including product name, SKU, price, stock quantity, and stock status
- Take a moment to understand the file structure before making any changes.
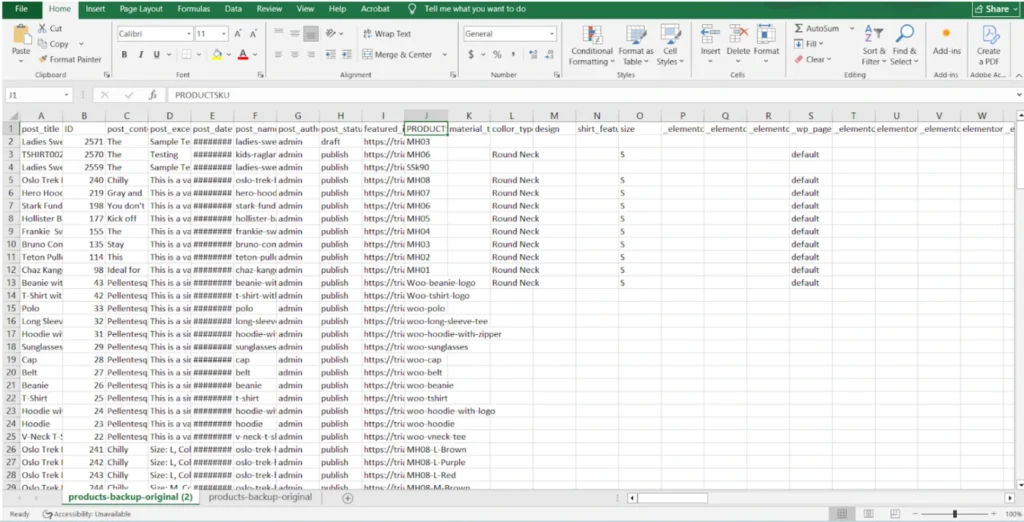
Familiarizing yourself with the CSV layout helps prevent mistakes and makes the editing process much smoother.
Step 6: Edit Prices and Stock Values Carefully
This is the most important part of the entire process, because this is where your actual product updates happen. Inside the CSV file, you can now adjust pricing and inventory details directly. While editing, it’s best to focus only on the fields you really need to change and avoid touching unnecessary columns.
What you need to do:
- Update the regular price if you want to change the main product price
- Modify the sale price if the product is on discount
- Adjust the stock quantity based on available inventory
- Update the stock status if needed (in stock or out of stock)
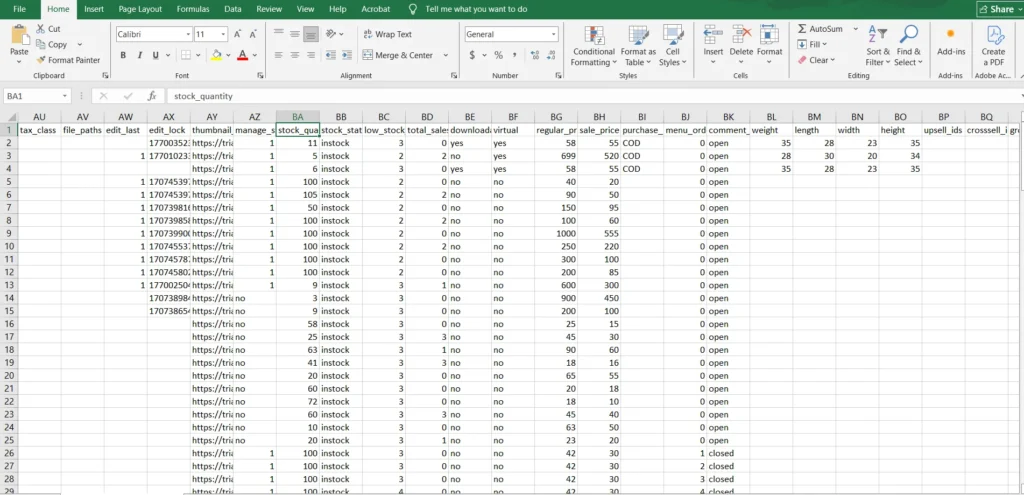
One critical thing to remember here is not to change the SKU values. WooCommerce uses SKUs to identify products, so keeping them unchanged ensures the correct products get updated during import.
Step 7: Save the Updated File as CSV
Once you’ve finished editing prices and stock values, the next step is to save the file correctly. Saving the file in the proper format is important because it ensures the importer can read and process the data without errors.
What you need to do:
- Click Save As in your spreadsheet tool
- Choose CSV as the file format
- Give the file a clear and recognizable name
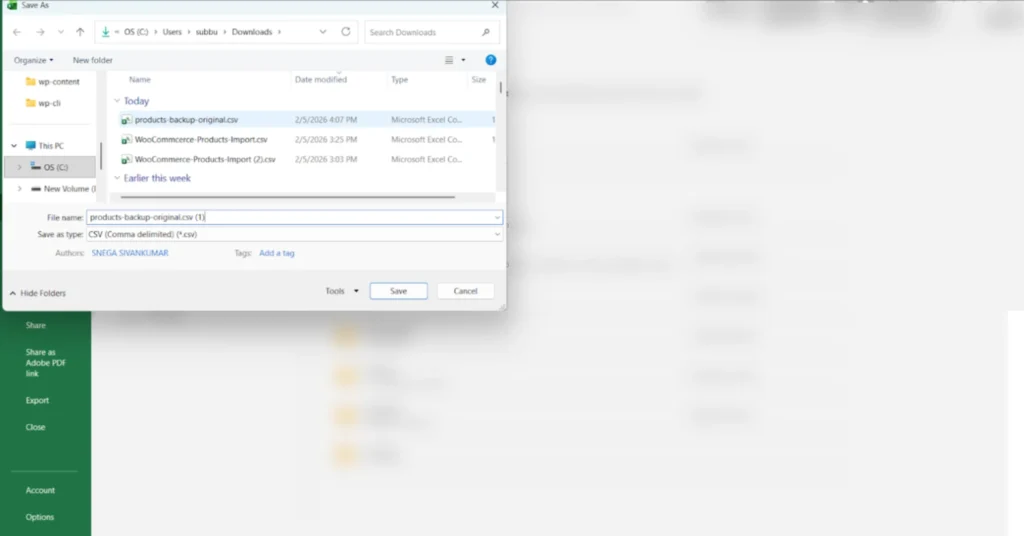
Saving the file in CSV format keeps it compatible with the import process and helps avoid upload issues later.
WP Ultimate CSV Importer Pro
Get Ultimate CSV/XML Importer to import data on WordPress faster, quicker and safer.
Step 8: Upload the Updated CSV File
Now that your CSV file is ready, it’s time to upload it back into WordPress. This step brings your edited data back into the system so the updates can be applied.
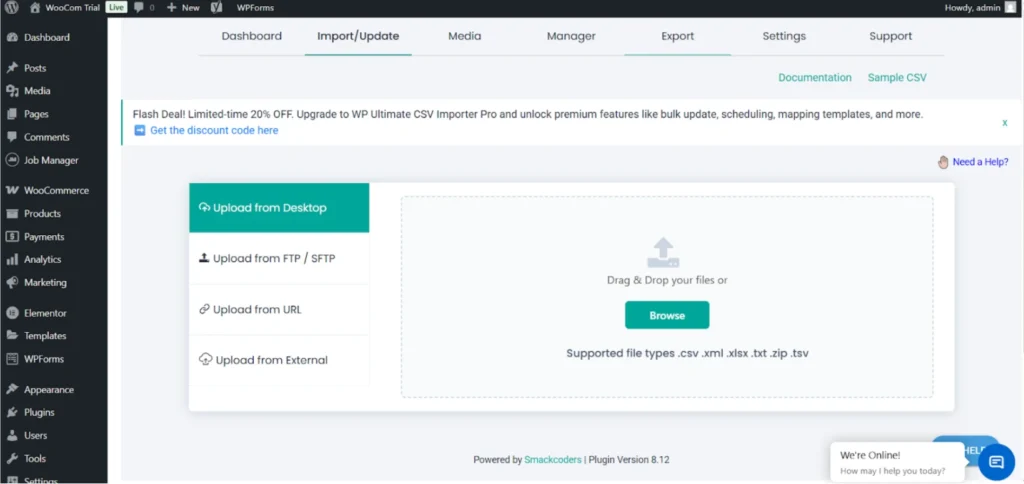
What you need to do:
- Go to Ultimate CSV Importer Pro → Import / Update
- Select Upload from Desktop
- Choose your edited CSV file and upload it
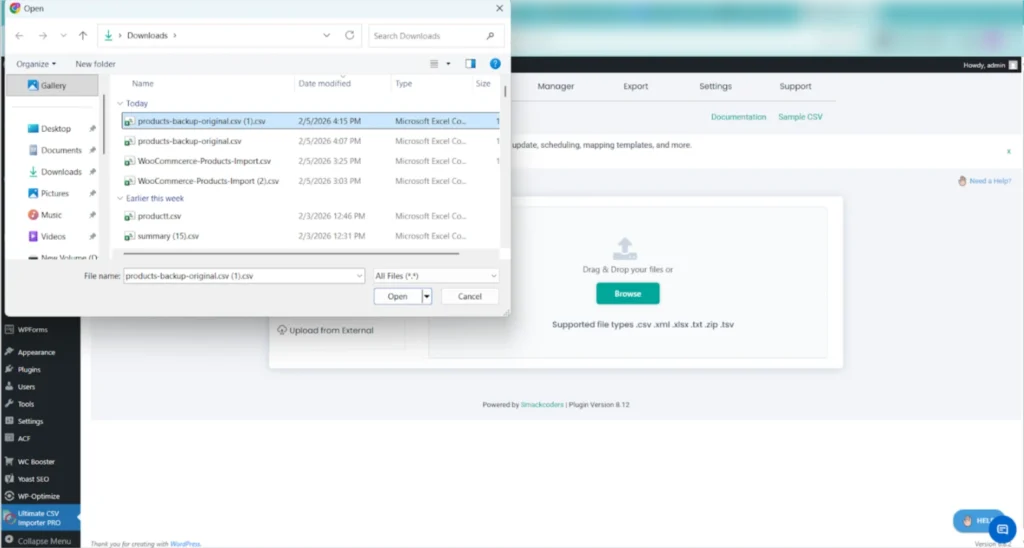
Uploading the correct file ensures the importer works with your latest changes.
Step 9: Select Update Content Mode
After uploading the CSV, you’ll be asked how the data should be processed. This step is crucial because it determines whether products are updated or duplicated.
What you need to do:
- Select Update Content
- Set the record type as WooCommerce Product
- Click Continue to proceed
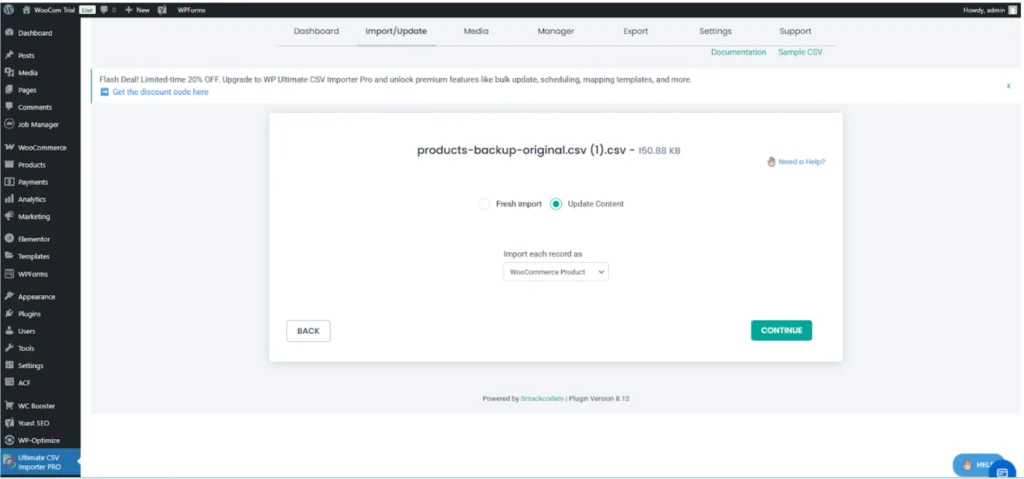
Choosing Update Content tells the system to modify existing products instead of creating new ones.
Step 10: Match CSV Columns with WooCommerce Fields
Next, you’ll see the field-mapping screen. While this may look technical at first, most mappings are handled automatically. Still, it’s important to review them carefully.
What you need to check:
- Product title mapping
- Product ID mapping
- Description and short description
- SKU field mapping
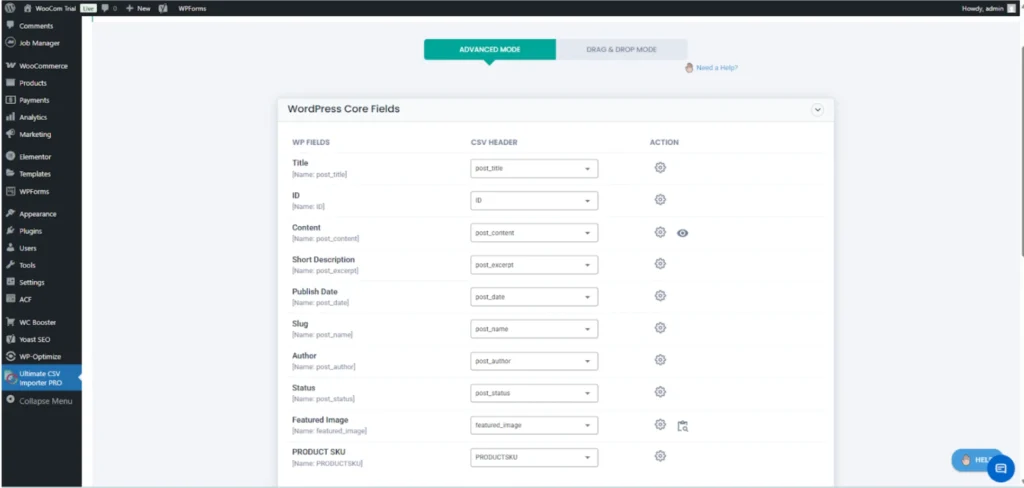
Taking a moment to verify these mappings helps ensure data is updated correctly.
Step 11: Map Stock and Pricing Fields
This is where WooCommerce receives updated stock and price values from your CSV file.
Make sure the following fields are mapped correctly:
- Stock quantity
- Stock status
- Regular price
- Sale price
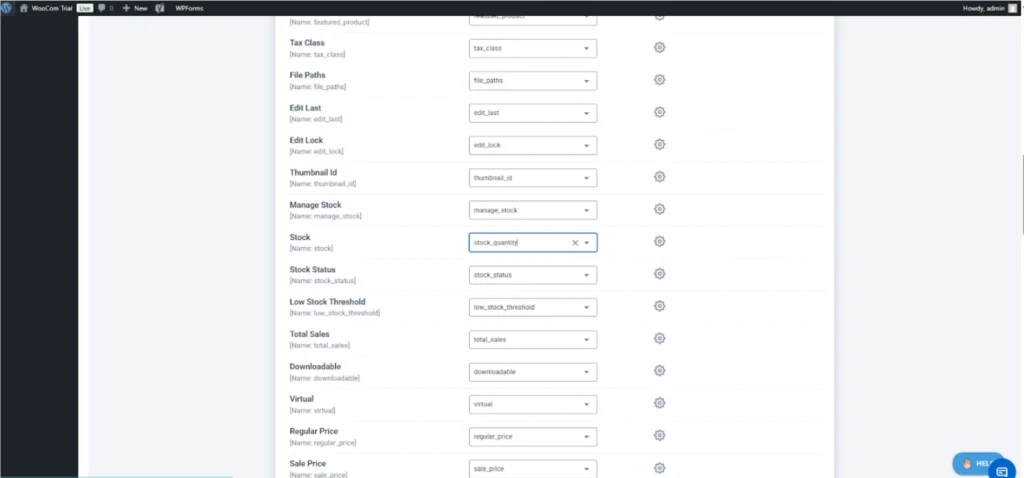
Correct mapping here ensures your store reflects accurate pricing and inventory levels.
Step 12: Review Optional Sections and Continue
You may notice additional sections related to SEO fields, product attributes, or page builder data. These sections are optional and only need attention if your CSV includes related information.
What you should do:
- Leave these sections unchanged if they are not relevant
- Review to ensure nothing is misconfigured
- Click Continue to move forward
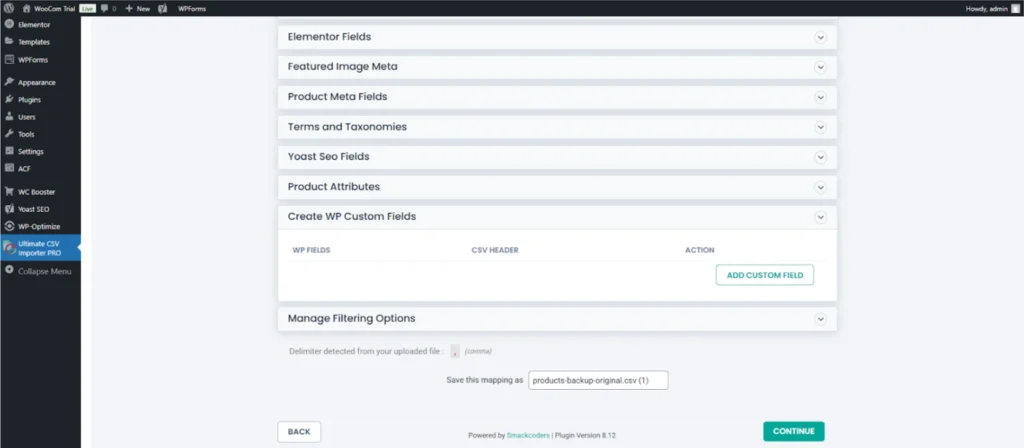
Skipping unnecessary fields helps keep the import clean and focused.
Step 13: Configure Import Rules Using SKU
In the import configuration screen, you’ll define how records should be matched and updated. This step ensures accuracy during the update process.
What you need to do:
- Enable handling duplicate records
- Choose Update records based on → PRODUCTSKU
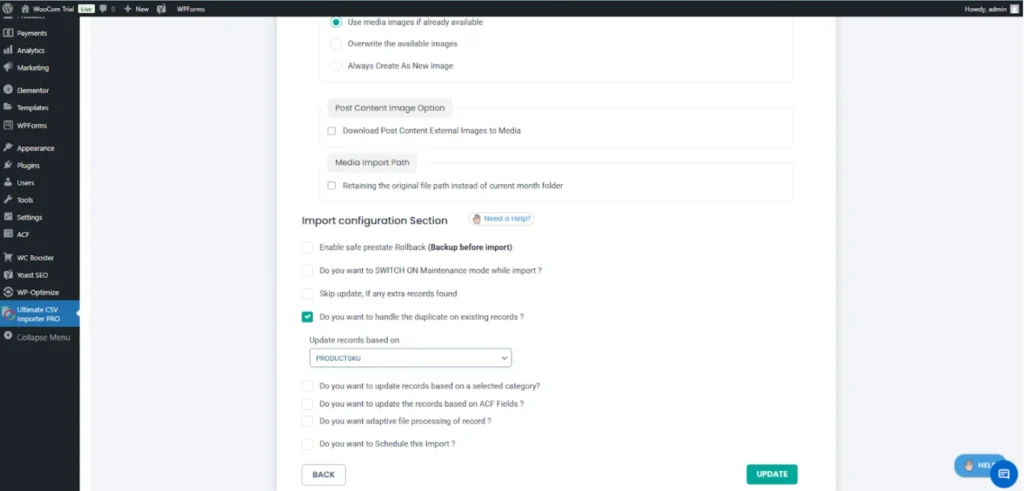
Using SKU as the matching key ensures each product is updated correctly.
Step 14: Run the Import Process
Once all settings are confirmed, you’re ready to run the import. The system will now process each product from the CSV file.
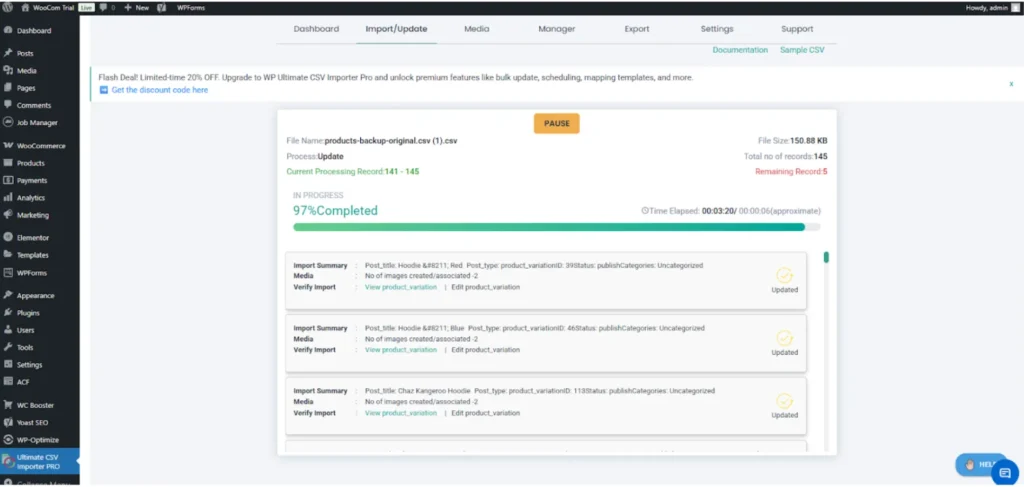
What you’ll notice:
- A progress bar showing real-time import status
- Automatic processing of product updates
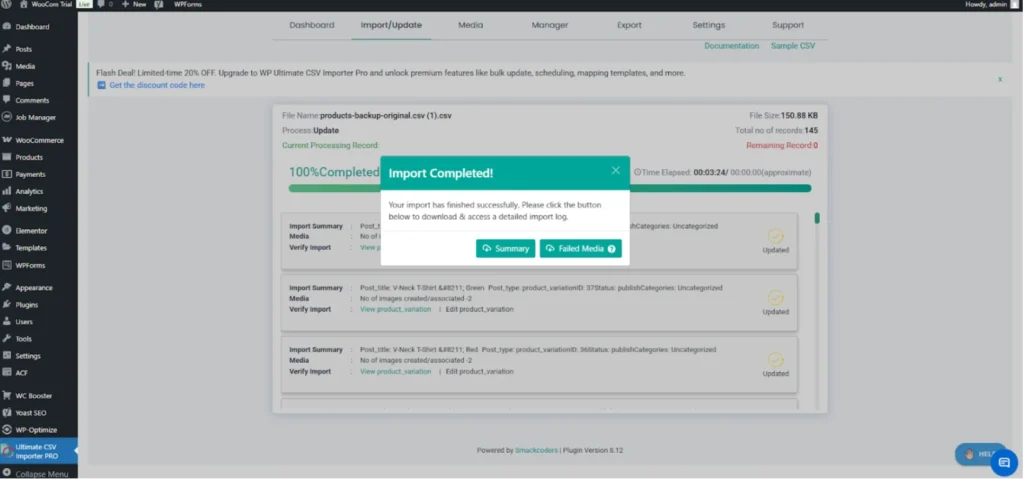
When the import completes, you’ll see a confirmation message indicating success.
Step 15: Review the Import Summary
After the import finishes, it’s a good idea to review the summary for confirmation and clarity.
The import summary shows:
- Number of products successfully updated
- Any failed images or records
- Overall import status
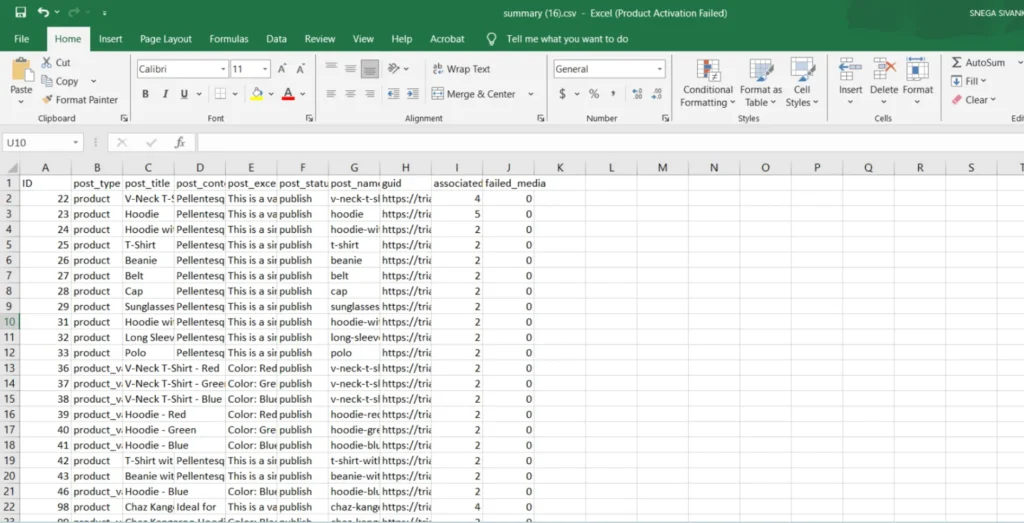
This step helps you quickly verify whether everything worked as expected.
Step 16: Verify Changes in WooCommerce
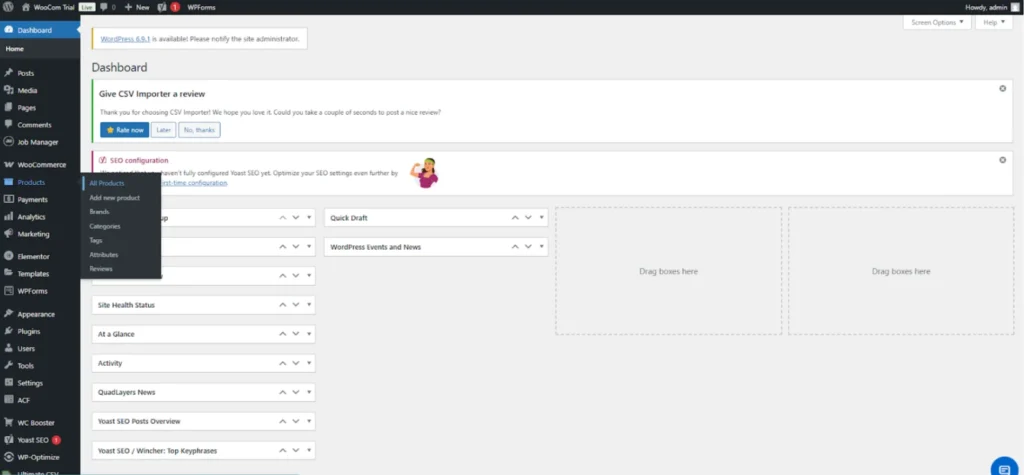
As a final check, head over to WooCommerce → Products → All Products and review a few items manually.
Make sure to confirm:
- Prices are updated correctly
- Stock quantities match the CSV values
- Products remain published and visible

Once everything looks correct, your bulk update process is complete
WP Ultimate CSV Importer Pro
Get Ultimate CSV/XML Importer to import data on WordPress faster, quicker and safer.
Best Practices for Successful Bulk Updates
To maintain data integrity and avoid mistakes, always keep a backup of your original CSV file. Use SKU values consistently to identify products, and consider testing the import with a small number of products before updating your entire catalog. Avoid altering product IDs manually, and ensure that all price and stock values are entered in a clean numeric format.
Important Import Settings to Avoid Mistakes
Choosing the right configuration during a bulk import plays a major role in keeping your WooCommerce store data accurate. Incorrect options can unintentionally change product details, create duplicate listings, or update stock information wrongly. Taking a moment to review and understand the available settings helps ensure the import runs smoothly and updates remain fully under your control.
Updating only selected fields
Configure the importer so that it modifies only the necessary fields, such as pricing and inventory values. Limiting the update scope protects other product elements like descriptions, images, categories, and attributes from being changed during the process.
Preventing product duplication
Duplicate entries usually appear when the system cannot properly identify existing products from the CSV file. Using consistent identifiers like SKU or Product ID allows WooCommerce to match records accurately and apply updates to the correct items without creating extra products.
Handling out-of-stock products correctly
Make sure that stock status settings correspond with the inventory quantities provided in the CSV. When the quantity reaches zero, products should automatically be marked as out of stock. Proper stock handling keeps availability information accurate and helps customers clearly understand which items are currently available.
Essential Practices for Safe and Accurate WooCommerce Bulk Updates
Applying proven methods during bulk updates helps minimize risks and ensures your WooCommerce data stays accurate and consistent. Careful preparation and smart workflow habits make the update process smoother and reduce the chances of unexpected issues.
Always test with a small CSV first
Start by running a trial import using a small WooCommerce Products sample file before updating the full product catalog. This allows you to verify field mapping, review settings, and confirm that the updates work as intended. Testing on a smaller scale helps detect problems early and prevents large-scale errors.
Use SKU instead of Product ID when possible
Whenever available, rely on SKU values for product matching instead of internal product IDs. SKUs remain more consistent across different websites, migrations, or staging environments, which helps maintain accurate product identification and reduces matching errors.
Backup before bulk updates
Create a complete backup of your website or product database before performing any large import. Having a backup ensures that you can quickly restore previous data if pricing or inventory updates do not produce the expected results, giving you an extra layer of protection.
Why Use WP Ultimate CSV Importer for WooCommerce Updates
WP Ultimate CSV Importer is designed to make large-scale WooCommerce product updates faster and more manageable. With advanced field mapping options, precise update controls, and the ability to process large CSV files, it helps store owners update pricing and inventory efficiently while maintaining data accuracy.
Supports large product catalogs
The plugin is built to manage bulk updates across extensive product databases, including stores with thousands of items. Automating updates through CSV files, it significantly reduces manual workload and speeds up product catalog maintenance.
Safe update without overwriting unwanted data
Flexible update settings allow you to choose exactly which product fields should be modified during the import process. This ensures that essential content, such as descriptions, images, and categories remain untouched unless intentionally updated.
Works with variable products and stock status
WooCommerce variable products often include multiple variations and complex stock details. The plugin supports accurate handling of variation pricing and inventory levels, ensuring that both product options and stock availability are updated correctly.
Conclusion
Bulk updating WooCommerce prices and stock using CSV is the most practical approach for managing large or growing product catalogs. CSV-based updates save time, reduce errors, and improve consistency across the store.
Using WP Ultimate CSV Importer streamlines the entire process, from file upload to safe and accurate updates. By following best practices, testing before full imports, and reviewing results carefully, store owners can manage WooCommerce pricing and inventory with confidence.
Don’t let manual product edits slow down your WooCommerce growth. Start simplifying your workflow today, prepare a structured CSV file, use reliable bulk import tools, and keep your prices and stock updated in minutes instead of hours.
If this guide helped you manage WooCommerce updates more efficiently, feel free to reference it in your blog or share your feedback with us at support@smackcoders.com. We’re always happy to collaborate and support better WooCommerce workflows.
If your WooCommerce store experiences frequent pricing or inventory changes, adopt CSV-based bulk updates using WP Ultimate CSV Importer or a similar structured workflow to improve efficiency, accuracy, and scalability
FAQ – Bulk Update Prices and Stocks in WooCommerce
1. Can I bulk update WooCommerce prices and stock without editing products manually?
Yes. WooCommerce allows bulk updates using CSV files, which let you modify prices and stock quantities for multiple products at once. This approach eliminates the need to open and edit each product individually, making it ideal for stores with large catalogs or frequent price changes.
2. What is the safest way to bulk update prices and stocks in WooCommerce?
The safest method is using a structured CSV file with a reliable import tool that supports update-only mode. This ensures that only selected fields—such as prices and stock—are updated without affecting other product data like descriptions, images, or categories.
3. Should I use Product ID or SKU for WooCommerce CSV updates?
Using SKU is generally recommended because it remains consistent across environments and imports. Product IDs can change between sites or during migrations, while SKUs provide a more reliable way to match existing WooCommerce products during bulk updates.
4. Can I update stock status along with stock quantity using a CSV file?
Yes. Along with stock quantity, you can also update stock status (in stock, out of stock, or backorder) through CSV-based imports. Correctly mapping both fields ensures accurate inventory visibility and prevents customers from purchasing unavailable products.
5. Will bulk CSV updates overwrite my existing WooCommerce product data?
Bulk updates will only overwrite the fields you choose to update. If your import is configured to update prices and stock only, other product data, such as titles, images, and attributes, will remain unchanged. This makes CSV updates a controlled and low-risk process.
6. Is it possible to bulk update prices for variable products in WooCommerce?
Yes. Variable products can be updated via CSV by targeting individual variations using their unique identifiers. Prices and stock levels can be adjusted per variation, making CSV imports suitable for complex WooCommerce product structures.
7. What precautions should I take before running a bulk update?
Before performing a bulk update, always back up your site and test the import with a small CSV file. This helps identify mapping issues early and prevents large-scale errors when updating your full product catalog.
8. How can I update bulk prices in WooCommerce?
Bulk price updates can be completed by preparing a CSV file that contains product identifiers, such as SKU or Product ID, along with updated pricing details. After editing the file in a spreadsheet, you can import it into WooCommerce using a bulk import plugin like WP Ultimate CSV Importer and map the price fields correctly. This method allows you to modify large numbers of products at once without editing each item individually.
9. How to bulk update stock in WooCommerce?
To update inventory in bulk, create a CSV file that includes the product identifier and stock quantity fields. Upload the file through a WooCommerce-compatible import tool and connect the stock columns to the correct inventory fields during mapping. Once the import is completed, WooCommerce automatically adjusts product availability and stock levels based on the data provided.
10. Can I import 10,000+ products in WooCommerce?
Yes, WooCommerce can manage very large product imports when supported by a reliable CSV importer plugin and proper server resources. Tools such as WP Ultimate CSV Importer are designed to handle high-volume data and allow you to upload thousands of products in a single or segmented import process. Using a clean and well-organized CSV file helps ensure the import runs smoothly without performance issues.
How to Add External URLs to Featured Images in WordPress
7 Feb 2026, 12:41 pm
Table of Contents
By default, WordPress does not allow featured images to be set from external URLs. You can either use a dedicated plugin like Featured Image from URL to reference external images without uploading them, or programmatically download the image and attach it as a featured image using WordPress core functions. The right approach depends on whether you want to reference external images or store them locally.
Key Takeaways
- WordPress does not support featured images from URLs by default.
- Plugins allow referencing external images without uploading them.
- Programmatic methods download and attach images locally.
- External images reduce storage but increase dependency risk.
- Always add alt text for accessibility and SEO.
What Does “Featured Image from URL” (FIFU) plugin Mean?
Featured Image from URL (FIFU) is a WordPress plugin that loads the post thumbnail directly from an external source instead of your WordPress media library. In simple terms, it lets you add URLs to featured images.
- The image is not uploaded to your server
- WordPress stores only the image URL
- The image is rendered dynamically from the external host
When Should You Use an External Featured Image?
Use external featured images when:
- You manage large content volumes and want to reduce storage usage
- Images are already hosted on a CDN or external asset server
- You are importing posts from another system that already references image URLs
- You want faster content publishing without media uploads
Avoid this approach if:
- You do not control the external image source
- Long-term image availability is critical
- The external site may block hotlinking
Method 1: How to Add External Image Links (URLs) to Featured Image in WordPress Posts, Pages & Products
The FIFU plugin adds a new field to the post editor, after it is installed and activated, for pasting an image URL. WordPress treats this image as the featured image without downloading it.
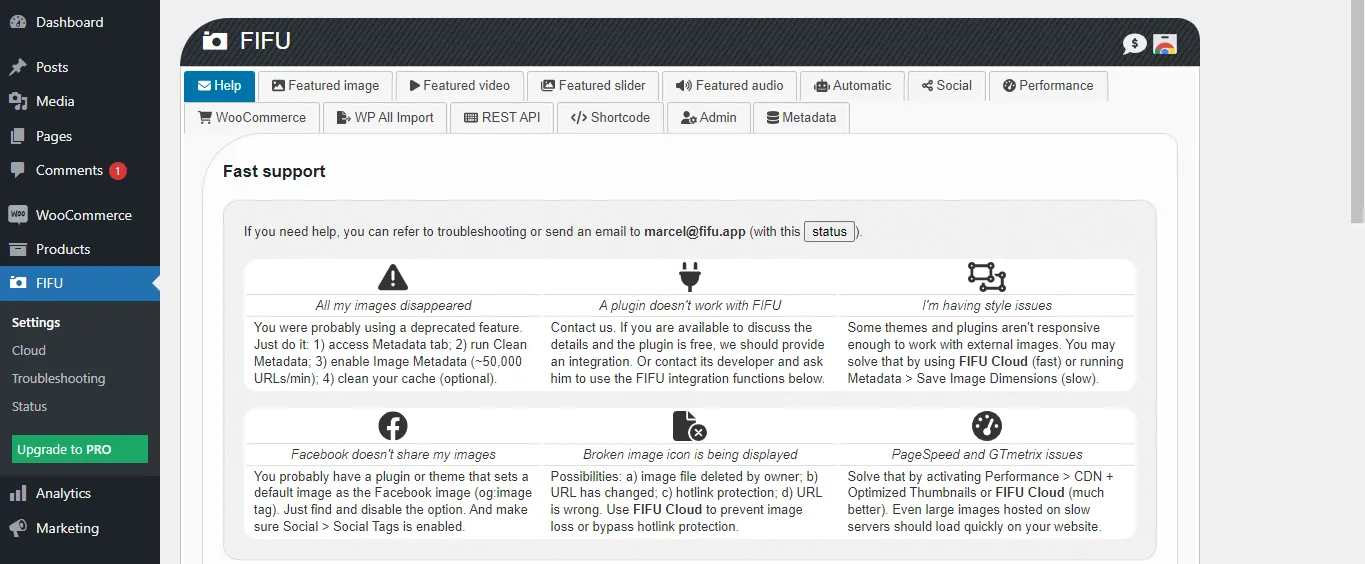
Install the WordPress Featured Image from URL(FIFU) plugin
The Featured Image from the URL plugin is available for free in WordPress. This plugin is easy to use and set up from your admin dashboard.
Visit dashboard → Plugins → Add new. Search for ‘fifu’ or ‘featured image from URL’ in the search box. The plugin will be listed. You can see that in the screenshot.
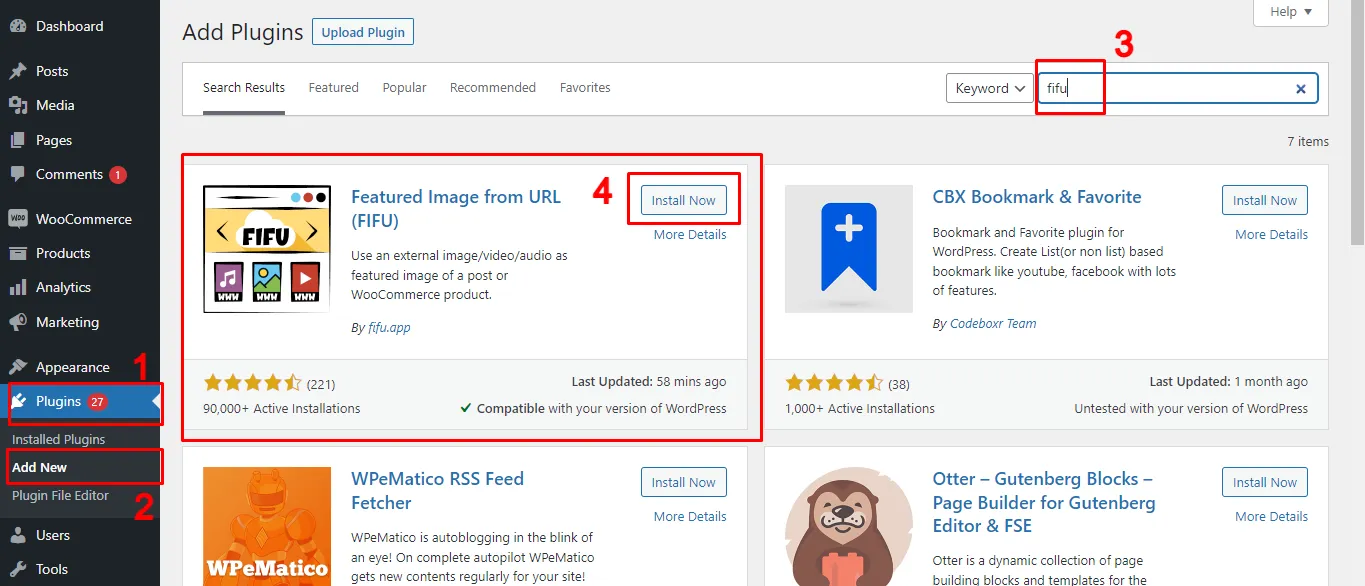
Install and activate the FIFU plugin.
You can now add external images as featured images for posts, pages, and custom post types.
How to Set a URL as Featured Image for WordPress Posts, Pages & Products
Before using images from other websites, just make sure you have the right permission or licensing to use them on your site.
To copy an external image URL:
- Visit the website where the image is located.
- Right-click the desired image and select ‘copy image address’.
- The image URL is now saved to your clipboard, and you can paste it wherever you need.
Keep in mind, you can only copy one image at a time.
Tip: If the image is from another WordPress site you own or manage, you can easily copy its URL directly from the media library.
Now, if you want to add external images as featured images for all your posts, you’ll need to copy and paste each URL into the featured image field of every post.
To add a featured image for WordPress Posts, Pages, or Custom Posts like Products:
- Open the edit screen of any post type(either create a new one or edit an existing one).
- From the top bar, click the settings icon to open the sidebar. By default, this will display the Post settings.
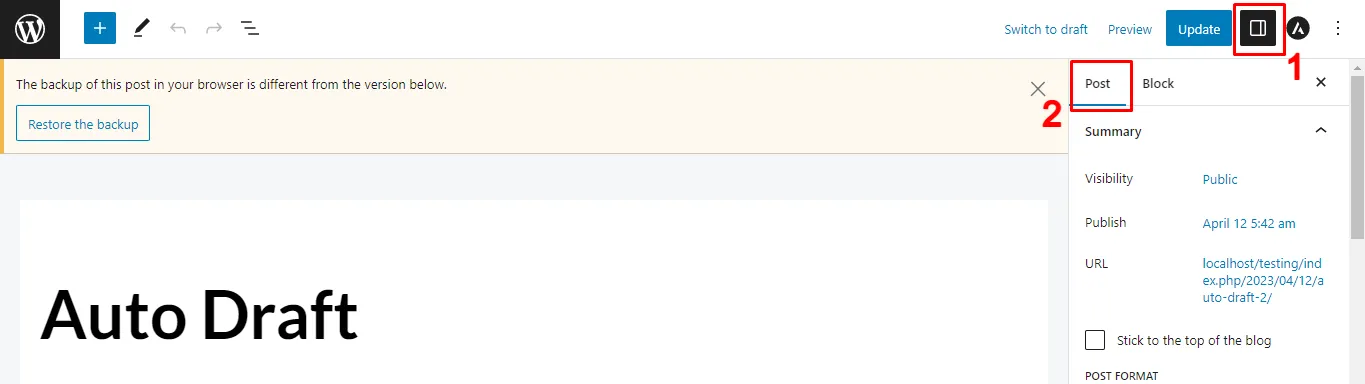
- Scroll down to locate the ‘Featured Image’ field provided by the FIFU plugin (like in the screenshot below).
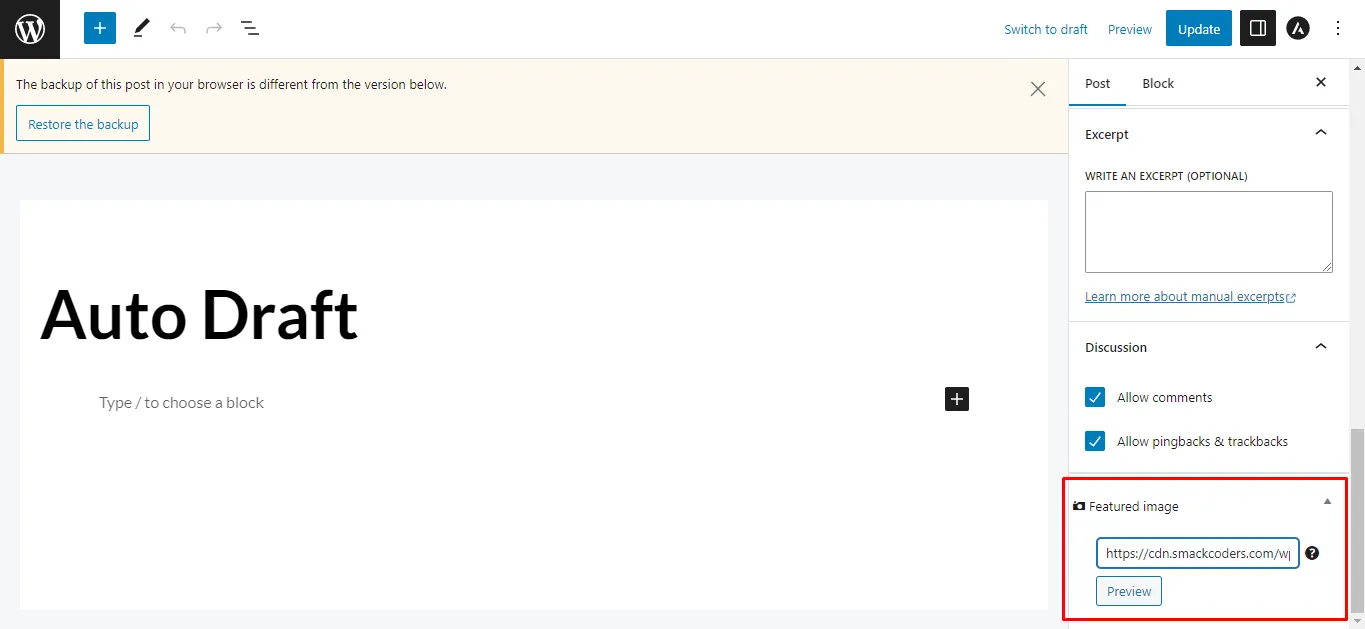
Now you can add your external image in two ways:
- Paste an image URL: Copy the external image link and paste it into the featured image text box.
- Search by keyword: Enter a keyword to get image suggestions, then choose one to use as your featured image.
Once you’ve added the image:
- Click Preview to see how it looks on your post.
- A new text box will appear where you can add Alt Text (recommended for SEO and accessibility).
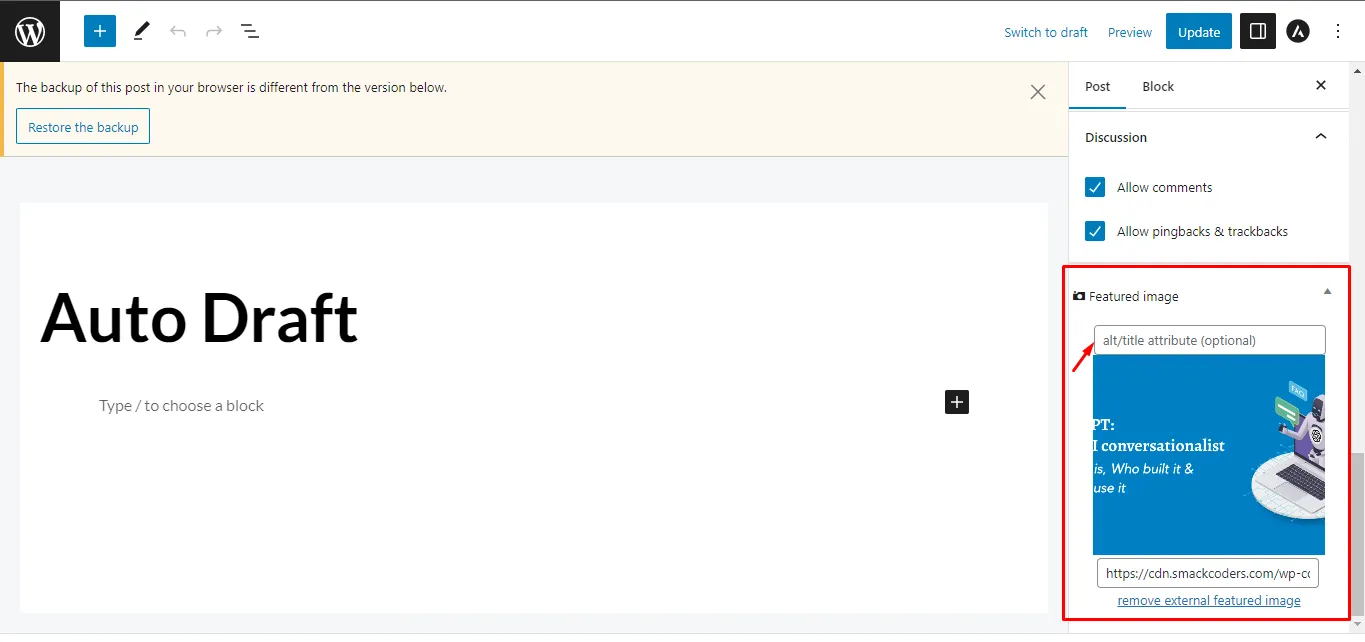
- Finally, click Save/Update to apply the changes.
To replace the featured image URL:
If you’d like to replace the featured image, simply remove the existing URL and paste a new one, then click Update.
To remove the featured image URL:
To remove it entirely, select “Remove External Featured Image” and you’ll return to the default state, where you can add another image if needed.
The above steps are applicable to Posts and Pages. To add featured image URLs for Products,
- Visit Products and open a product in an edit view
- You’ll see a “Product image” metabox newly added
- Enter the image URL inside the box and click the Preview button to view the image.
- Add an alt text for the image in the alt text box
Alt text is not optional for accessibility or search visibility.
Best practices for adding alt text:
- Describe what the image shows, not what it “is”.
- Avoid keyword stuffing.
- Keep it under 125 characters.
How to Hide the FIFU Featured Image Meta Box in WordPress
Sometimes, you may want to hide the featured image meta box by the FIFU plugin for specific post types like Posts, Pages, or Custom Post types like Products. This can be easily managed from the plugin’s settings.
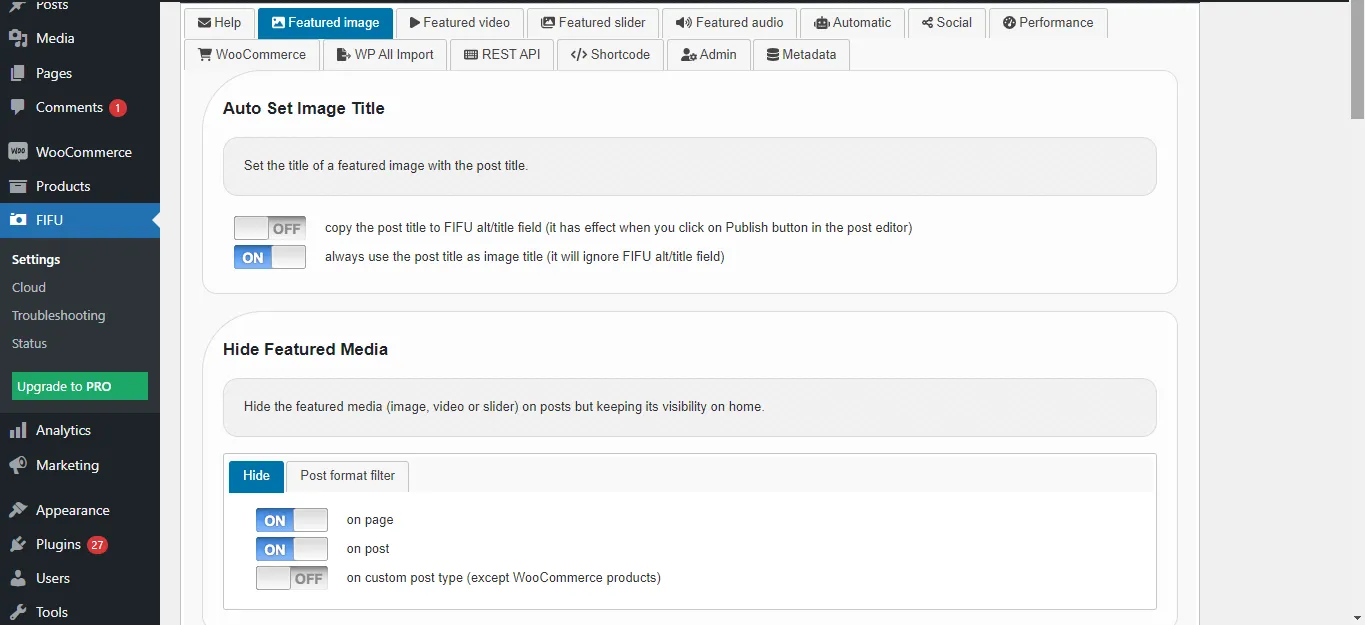
- Go to the FIFU → Settings menu in your WordPress dashboard.
- The Settings page has multiple tabs (like image, video, slider, audio, etc.). This plugin supports more than just images.
- Open the Image tab and scroll down to the “Hide Featured Media” section (just above the default featured image setting).
- Enable the Hide toggle and in the next post type filter tab, specify the post types like “page, post” you want to exclude.
- This will remove the meta box from those post types.
Note: Once you installed the FIFU plugin, the featured image meta box will automatically display inside the post types(posts, pages, and products).
How to Add a Default Featured Image for a Post
The Default Featured Image option is useful if you create or update a post, page, or custom post type without assigning a featured image. Instead of leaving it blank, the plugin will automatically use the default image you set.
To configure this:
- Go to the FIFU → Settings page.
- Scroll down to the Default Featured Image section.
- Enable the Default featured image toggle.
- Paste the URL of the image you want to use as the default into the Image URL field.
- (Optional) If you want this to apply only to specific post types, add their values in the Post Type filter field. Example: post, page. This ensures the default image is applied only to those post types.
- Once configured, the image will automatically be assigned as a featured image to any post type (post, page, product, etc.) that doesn’t have one.
Method 2: Set featured images from URL programmatically in WordPress
To set a featured image in WordPress programmatically from a URL, you can use the media_sideload_image() function along with the wp_insert_post() function. Here’s an example of how you can achieve this:
function set_featured_image_from_url($post_id, $image_url) {
// Add Featured Image to Post
$image_id = media_sideload_image($image_url, $post_id, ‘Image Description’);
// Set Featured Image
if (!is_wp_error($image_id)) {
     set_post_thumbnail($post_id, $image_id);
}
}
// Usage
$post_id = 123; // Replace with your post ID
$image_url = ‘https://example.com/image.jpg’; // Replace with the URL of the image
set_featured_image_from_url($post_id, $image_url);
In this example:
- Replace $post_id with the ID of the post to which you want to set the featured image.
- Replace $image_url with the URL of the image you want to set as the featured image.
This function downloads the image from the provided URL, attaches it to the specified post, and sets it as the featured image. The media_sideload_image() function downloads the image and returns the attachment ID, and then set_post_thumbnail() sets this attachment ID as the featured image for the specified post.
Ensure you add this code to your theme’s functions.php file or a custom plugin. Also, be aware that this method relies on the allow_url_fopen setting in your PHP configuration. If it’s disabled on your server, you might need to use alternative methods or enable this setting.
Advanced Help Topics
How to Import External Image URLs as Featured Images in WordPress Posts, Pages, and Custom Posts
When you are dealing with a large number of records, manually adding external image URLs as featured images can be extremely time-consuming. The WP Ultimate CSV Importer plugin makes this process much easier by allowing you to bulk import external image URLs into WordPress Posts, Pages, and WooCommerce Products, complete with their alt texts.
Here’s how to import external image URLs step by step:
Note that the same import steps are followed for posts, pages, and products. The only difference is in configuring the post type.
1. Prepare your import file: Create a file like a CSV, XML, Excel, or Google Sheet that includes the FIFU featured image URL and image alt text columns(as shown in the example screenshot below). The easier way is to export the records with WP Ultimate CSV Importer and add the image column and its values.

2. Upload your file: In your WordPress dashboard, go to the Ultimate CSV Importer plugin page. Browse and open your CSV file(or other type of file), or upload it using another available method.
3. Select the post type: Choose whether you want to import into Posts, Pages, or Products.
4. Map your fields: Match the columns in your import file with WordPress fields. Make sure to match the FIFU Post Fields for image url and alt text.
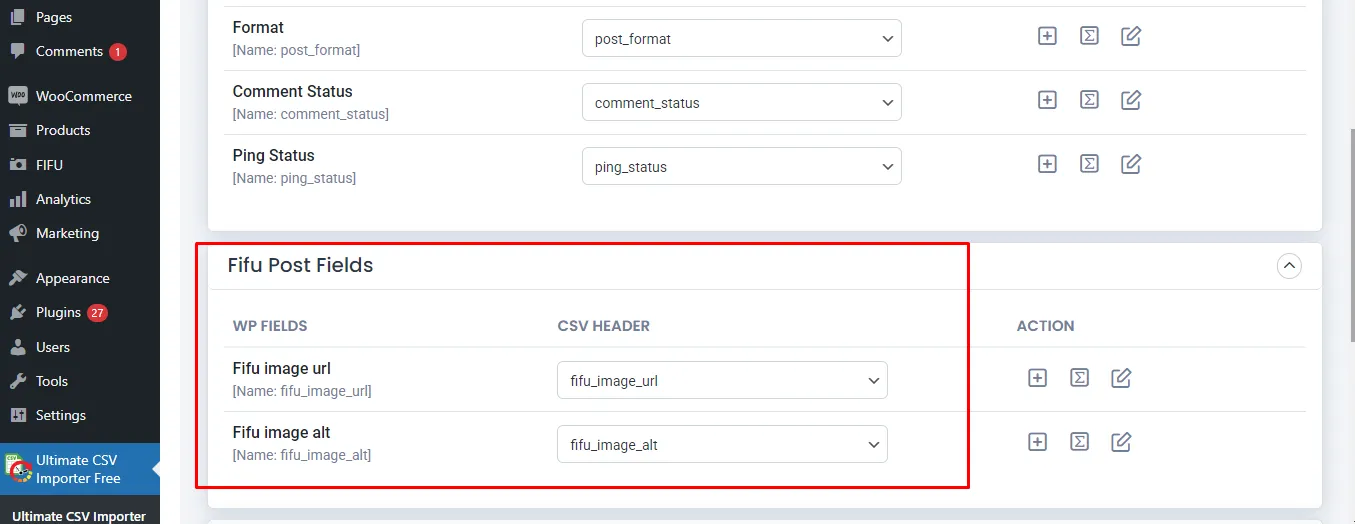
5. Run the Import: Click Import to begin. Once the process is complete, review the import log and verify the results both in the WordPress admin and on the front end.
WP Ultimate CSV Importer Pro
Get Ultimate CSV/XML Importer to import data on WordPress faster, quicker and safer.
How to Export FIFU featured image URLs and alt texts from WordPress
WP Ultimate CSV Importer also lets you export FIFU fields data from WordPress alongside posts, pages, custom posts, and products.
If you are using the free plugin, then we offer an export add-on to extract your FIFU fields.
Move to the Export tab. The export page tells you to install the Ultimate Exporter plugin by providing a button link to install. The export plugin is also free to use.
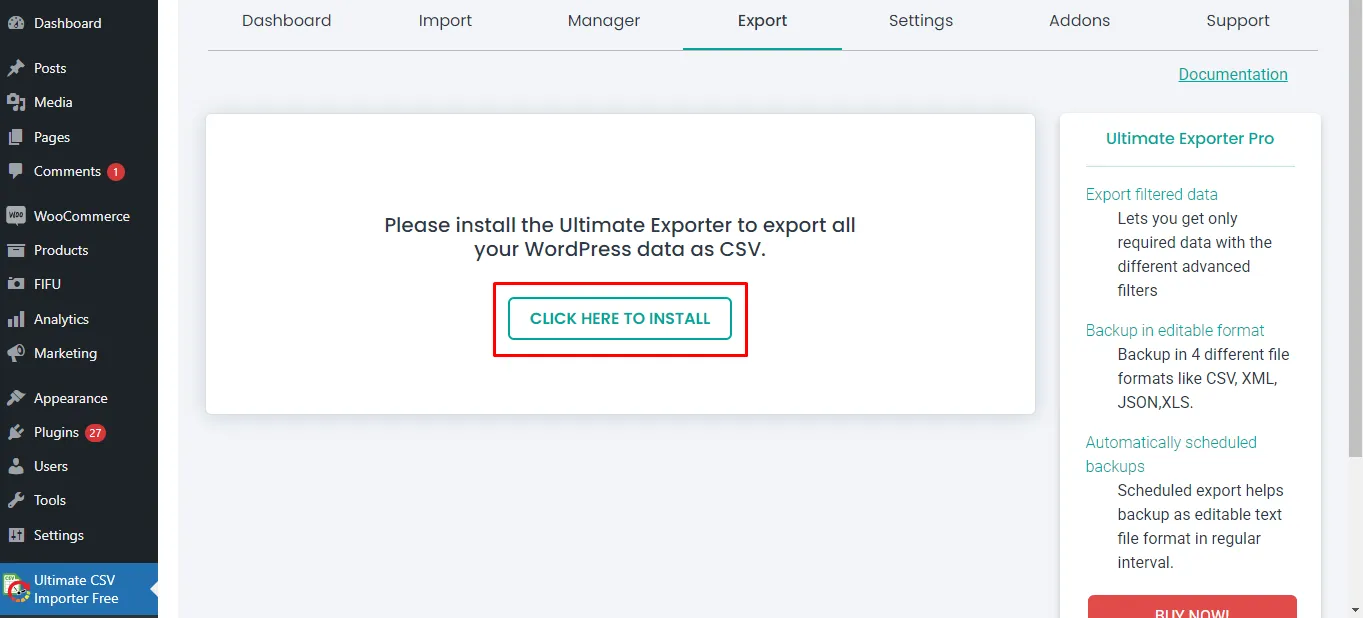
This takes you to the manage add-ons page, where you can see all the supported add-ons listed.
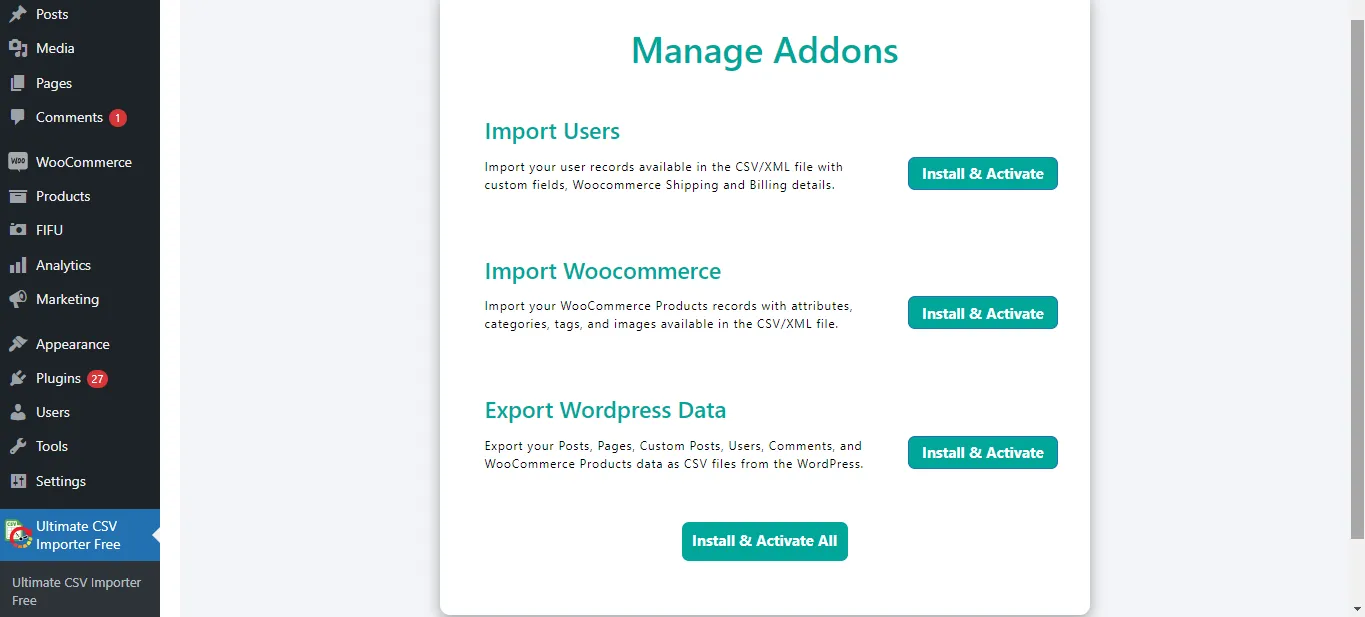
You can install and activate all the add-ons or specific add-ons you need.
When you activate the exporter addon, the export page will look like this.
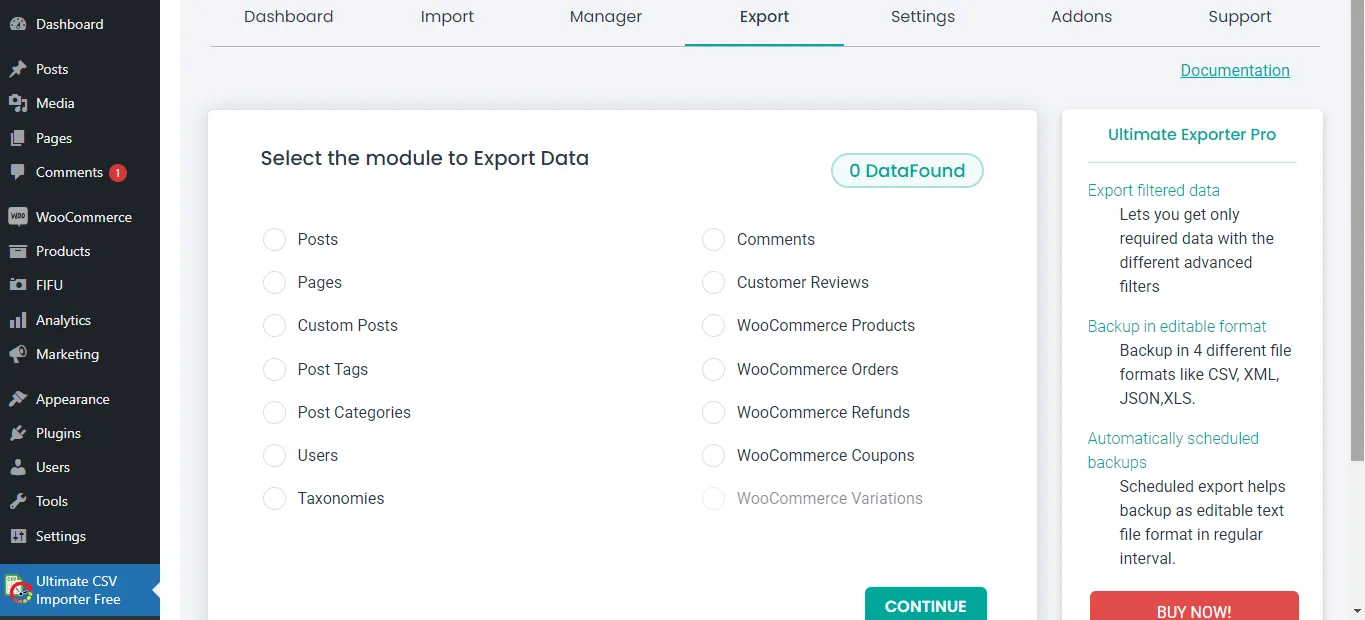
Select the post type here. Note that you can only export FIFU-featured image fields assigned to post types like Posts, Pages, Custom Posts, and WooCommerce Products.
On the next page, provide an export file name, then choose a file type.
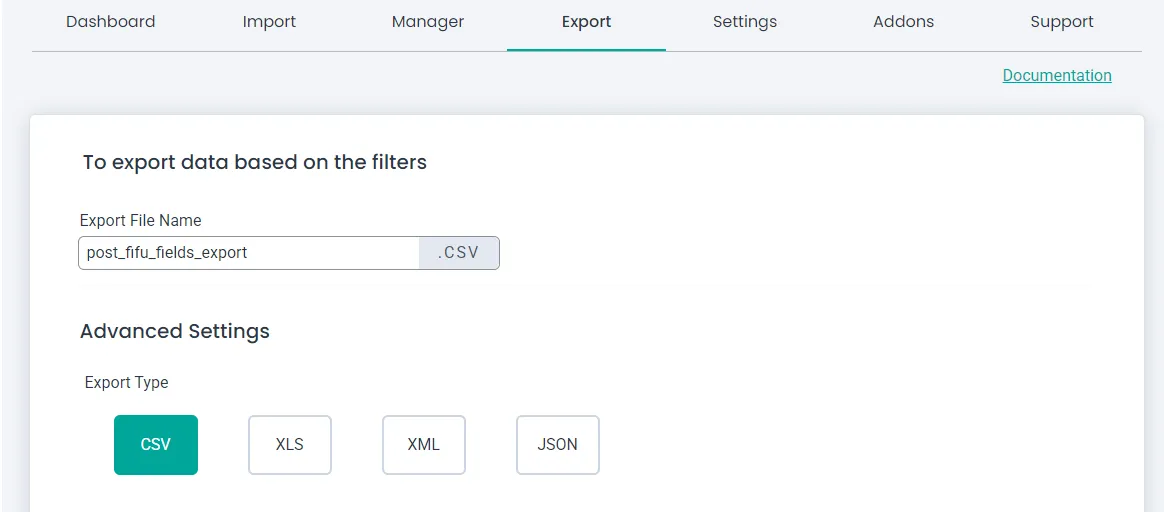
Configure filters like export for specific periods and export records of specific authors. If you don’t need filters and want to export all records of the chosen post type, just click Export without configuring the filters.
Finally, download the export file and verify the exported field data, including the FIFU Featured image and alt text columns, to confirm the successful export.
WP Ultimate CSV Importer Pro
Get Ultimate CSV/XML Importer to import data on WordPress faster, quicker and safer.
Frequently Asked Questions
1. How can I set a featured image from an external URL in WordPress?
By default, WordPress does not support featured images from external URLs. You can either use a plugin like Featured Image from URL (FIFU) to reference the image directly, or programmatically download the image and attach it as a featured image using WordPress core functions.
2. Can I use an image URL as a featured image without uploading it?
Yes. Plugins like FIFU allow you to paste an external image URL and use it as the featured image without storing the file in your media library. WordPress saves only the URL and loads the image from the external source.
3. How do you embed a URL in an image?
Embedding a URL in an image typically involves creating an image with a clickable link. This can be achieved by using HTML code if you’re working on a web page or by using image editing software such as Adobe Photoshop or GIMP if you’re creating a standalone image file.
Here’s how you can do it using HTML:
html
<a href=”https://www.example.com”>
<img src=”image.jpg” alt=”Description of the image”>
</a>
In this code snippet:
- <a> is an anchor tag used to create a hyperlink.
- href=”https://www.example.com” specifies the URL that the image will link to when clicked.
- <img> is an image tag used to display the image.
- src=”image.jpg” specifies the image file to be displayed.
- alt=” Description of the image” provides alternative text for the image, which is useful for accessibility and SEO purposes.
When a user clicks on the image, they will be directed to the specified URL.
If you’re creating a standalone image file (e.g., JPEG, PNG) and want to embed a clickable link directly into the image, you’ll typically need to use image editing software. These programs allow you to create image maps or add clickable areas to an image, which can then be exported with the link embedded. However, note that clickable images created this way will only work when displayed on a web page or in an environment that supports HTML and image maps. They won’t retain the clickable link if shared as standalone image files.
4. How do I add an Alt Tag to a Featured Image in WordPress?
- When setting or editing the featured image in WordPress, you’ll see an “Alt Text” field.
- Enter a brief, descriptive alt tag that accurately describes the content or purpose of the image.
- Save or update your post/page to apply the alt tag to the featured image.
By incorporating these techniques into your WordPress content creation workflow, you can enhance the interactivity and engagement of your posts, ultimately providing a more enriching experience for your readers. Whether it’s directing them to additional resources or improving accessibility through alt tags, these strategies can elevate the effectiveness of your WordPress website or blog.
5. Does using external images affect SEO?
External images can still rank in search results if alt text is provided. However, image performance, availability, and crawl reliability depend on the external host. For SEO stability, locally hosted images are generally safer.
6. How to set an image other than the featured image from a URL using Elementor?
With Elementor PRO, it is easy to import images from other sources using the URL.
- On your Elementor, drag the image widget where you want to insert the image in your post.
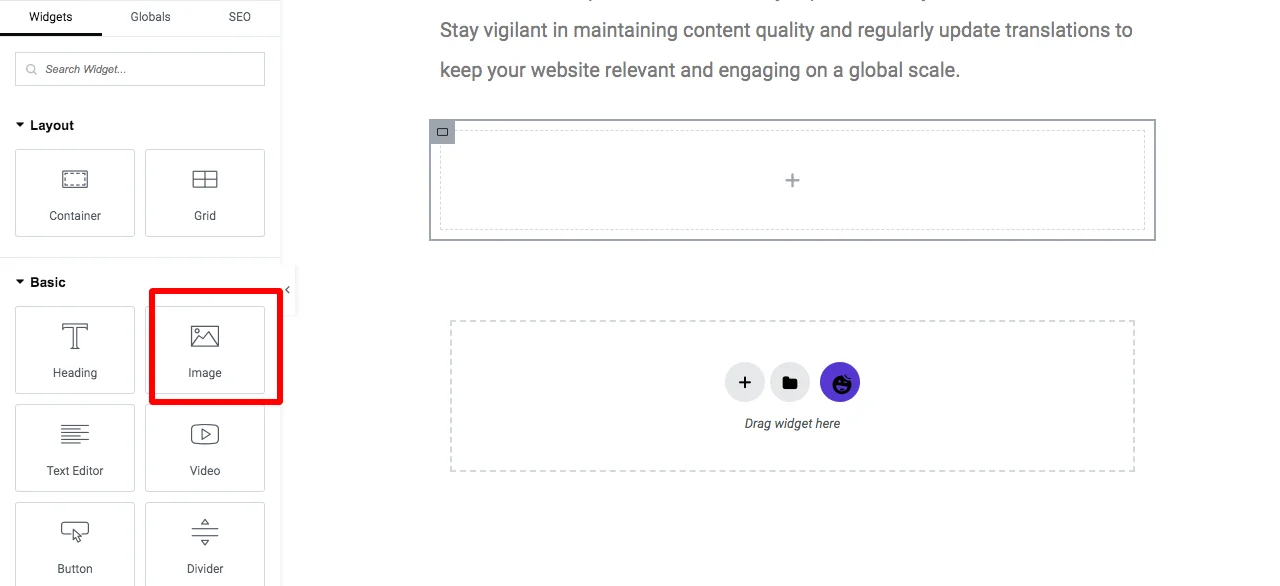
- Click on Choose Image
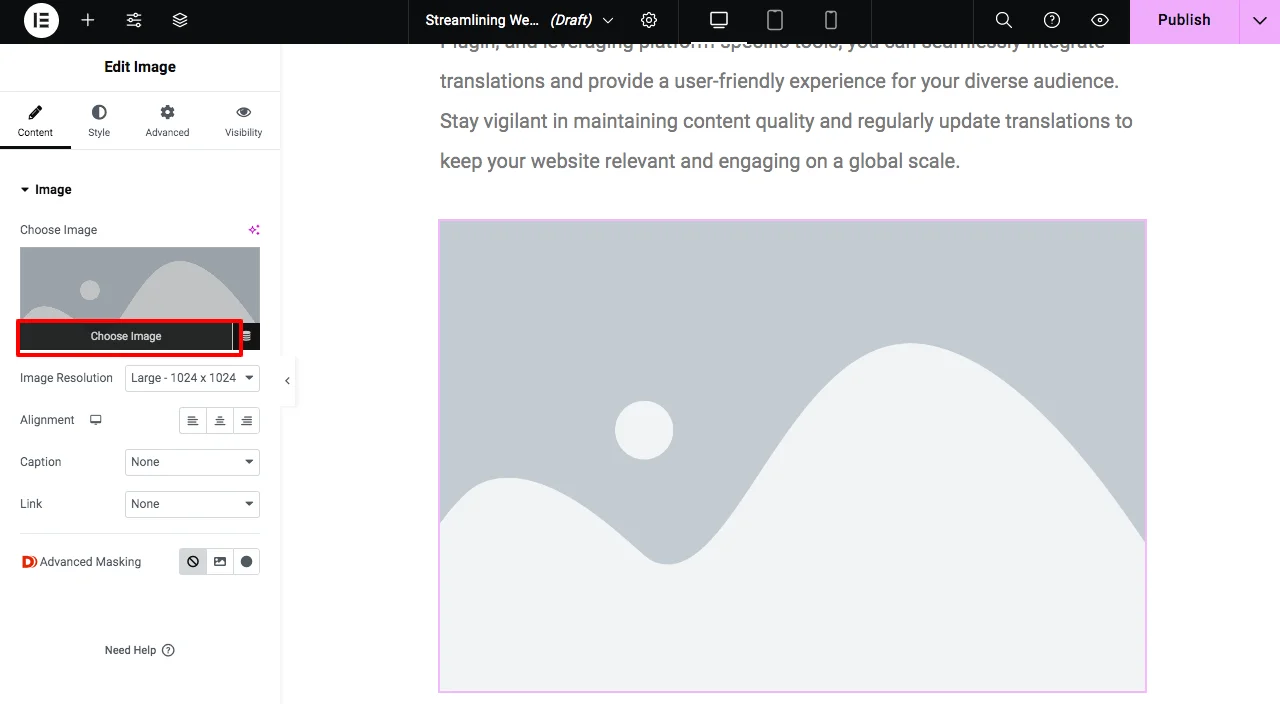
- On the Upload files section, select the Insert from URL option.
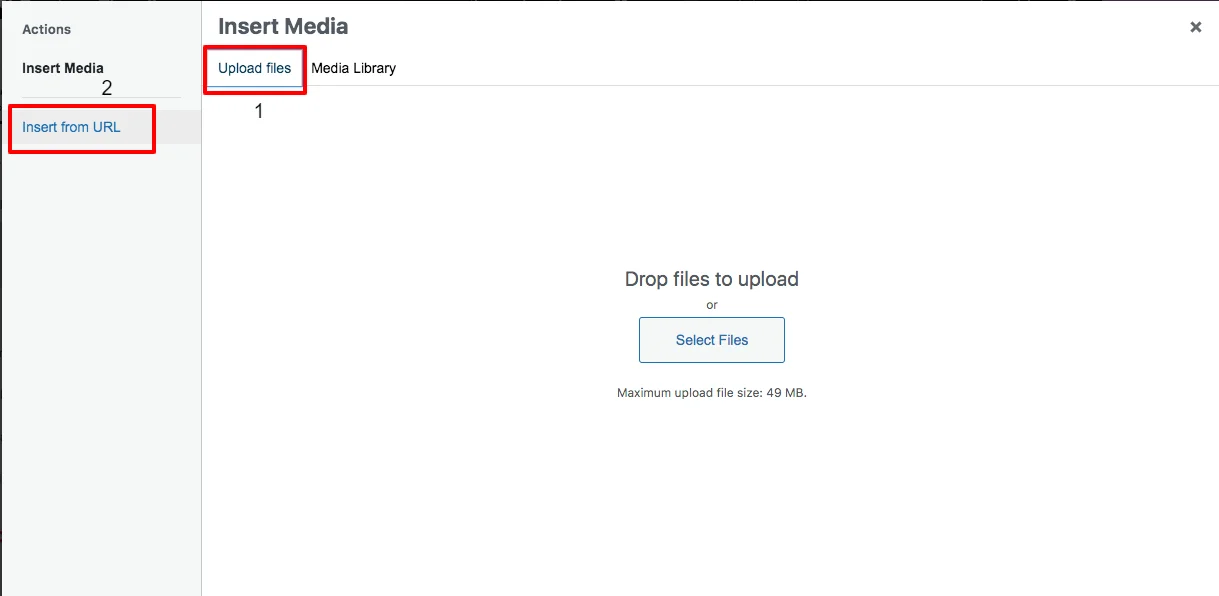
- Provide the link to your desired image and its Link Text(alt text).
- Click on the Insert to post
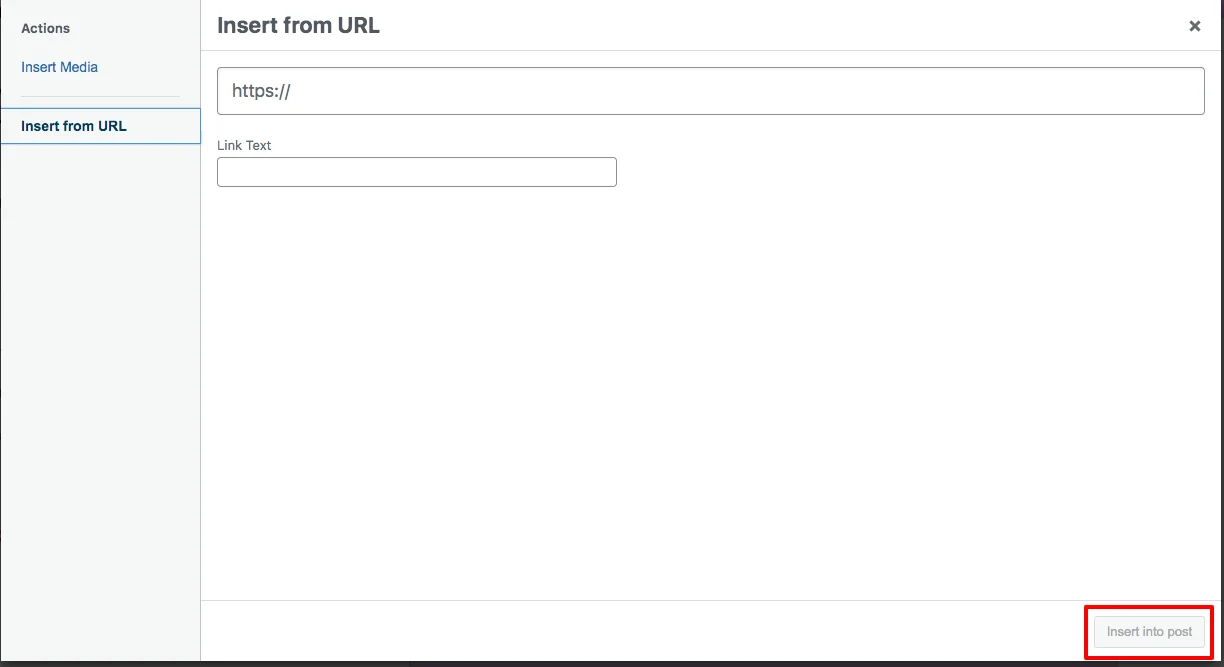
Now your images from the URL have been uploaded to your post successfully.
7. How can I find and use a WordPress featured image URL?
A WordPress featured image URL is simply the direct link to an image assigned as the featured image for a post, page, or product. If you’re using the Featured Image from URL (FIFU) plugin, you don’t need to upload the image to your media library. Instead, you can copy the external image URL (by right-clicking an image → “Copy Image Address”) and paste it into the featured image field of your post. This allows WordPress to display that external image as the featured image without consuming your server storage.
Wrapping Up
Using external URLs as featured images in WordPress is a practical solution when storage, speed, or bulk publishing is a concern. Plugins like FIFU make this easy for individual posts, while WP Ultimate CSV Importer enables scalable imports and exports for large datasets. Choose external images for flexibility, but switch to local hosting when reliability and long-term SEO matter most. If you frequently migrate or manage content at scale, combining external image URLs with structured imports gives you maximum control and efficiency.
Have questions about importing external images in WordPress? Reach out to us anytime at support@smackcoders.com. And don’t forget to subscribe to our YouTube channel for more step-by-step tutorials on getting the most out of our WordPress plugin, WP Ultimate CSV Importer.
How to install WAMP and XAMPP? – A Complete Guide
3 Feb 2026, 9:18 am
Installing WAMP or XAMPP allows you to create a local server environment on your computer. It makes it easy to run PHP-based applications like WordPress without using live hosting. These tools bundle Apache, MySQL, and PHP, enabling you to test websites, plugins, and themes safely on localhost before going live.
To install WAMP or XAMPP, simply download the installer from the official website, run the setup wizard, select the required components (Apache, MySQL, and PHP), and start the server using the control panel. Once running, your system behaves like a real web server, ideal for development, testing, and troubleshooting.
In this guide, you’ll learn what WAMP and XAMPP are, how they differ, and which one is best for your operating system. We’ll walk you through step-by-step installation instructions for Windows, macOS, and Linux, cover common setup errors and fixes, and explain when to choose WAMP vs XAMPP. By the end, you’ll have a fully working local server environment ready for WordPress development, testing, and migration work.
What Is WAMP?
WAMP stands for Windows + Apache + MySQL + PHP.
It is an open-source (free), Windows-only local server solution that allows developers to run WordPress and test any themes or plugins, like the CSV Importer, or any other actions, directly on their computer.
Note: You can’t install WAMP on your macOS or Linux OS.
How to Install WAMP
To install WAMP for WordPress, download the WAMP installer from the official website, run the setup wizard, select your preferred language, choose the installation folder, and complete the setup. Once installed, WAMP gives you a full local server environment where you can run and test WordPress effortlessly.
Below is a clear, step-by-step guide to help you install WAMP on your Windows computer:
Step 1: Download WAMP from the Official Website
Visit the official WAMP server website and choose the correct version for your system:
- 32-bit version for 32-bit Windows
- 64-bit version for 64-bit Windows
However, the latest version of WAMP, like 3.x, only supports the 64-bit version.
Pick the version that matches your system configuration and click Download.
Step 2: Select “Download Directly”
After clicking download, you may see a few warnings or information pop-ups. Simply click “download directly” to start the file download.
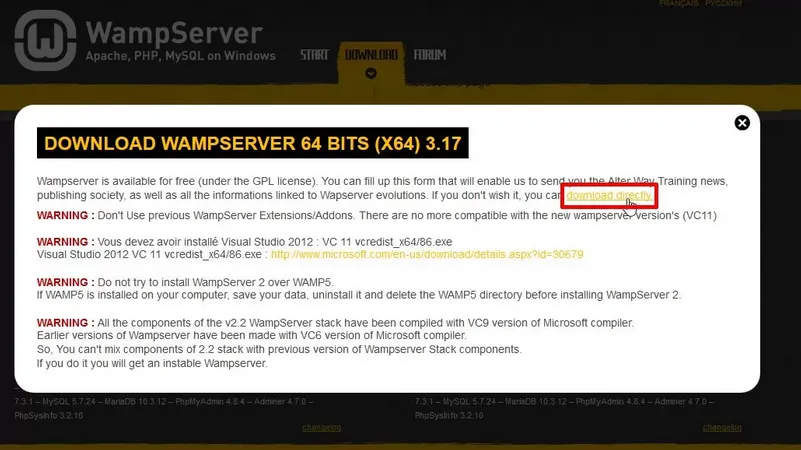
Step 3: Choose Your Setup Language
When the installer opens, the first window will ask you to choose a language. Select your preferred language and click OK.
Step 4: Accept the License Agreement
After reviewing the license agreement, choose “I accept the agreement,” and hit Next to advance in the installation process.
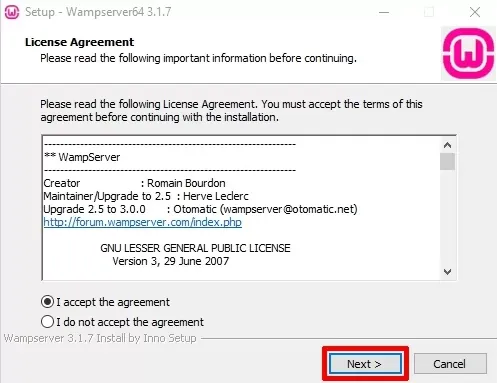
Step 5: Review Required Components
WAMP will display a list of required components needed for it to run properly. Review the information and click Next. This ensures your system is ready for installation.
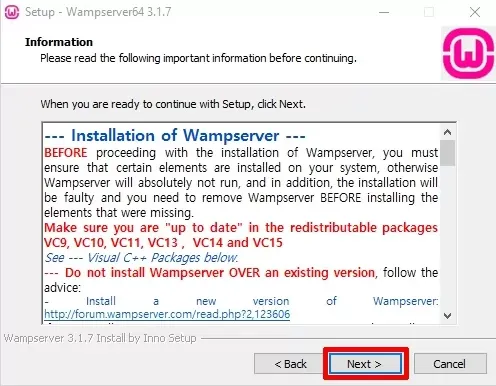
Step 6: Select the Installation Location
Choose the folder where you want WAMP to be installed. Most users keep the default path, but you can choose another drive if needed.
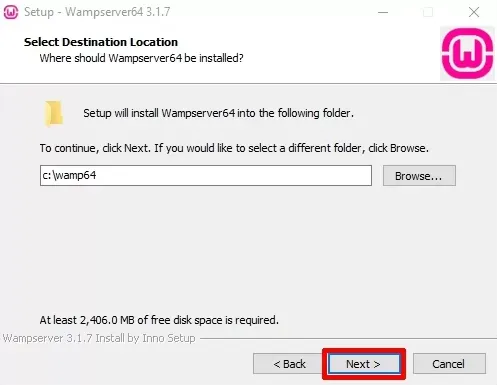
Step 7: Choose Start Menu Shortcut Location
Select where you want the program’s shortcuts to appear in your Start Menu. After choosing the folder, click Next.

Step 8: Begin Installation
Click Install to start installing WAMP on your computer. Wait for the installer to copy and configure all files.
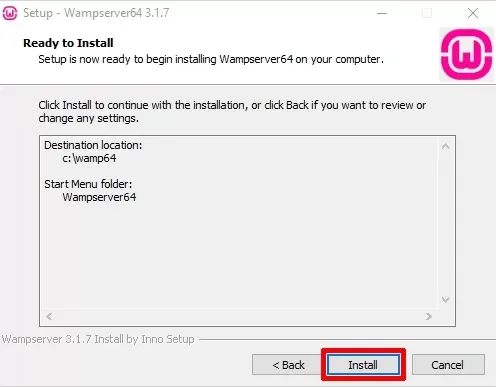
Step 9: Complete the Setup
Once the installation finishes, click Next on the information screen and then click Finish.
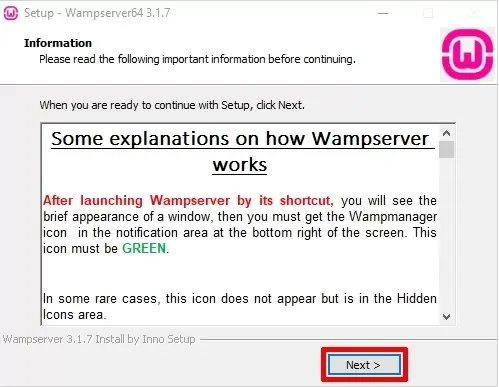
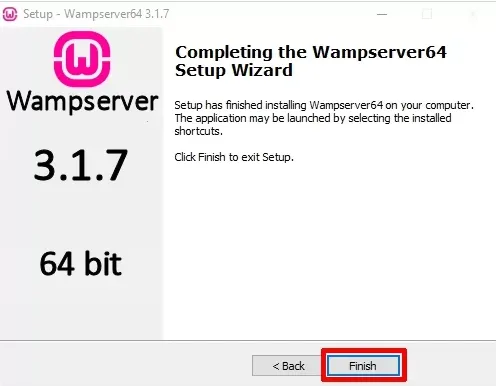
Your WAMP server is now successfully installed! You’ll find it in the location you selected earlier.
Common WAMP Server Errors and How to Fix Them
While WAMP Server is easy to install on Windows, users may face a few common issues during setup or while running WordPress on localhost. Most WAMP errors are simple to fix if you know the right steps.
1. WAMP Server Not Turning Green
Issue: WAMP icon stays red or orange instead of green.
Cause: Apache or MySQL services are not running.
Fix steps
- Close Skype, Zoom, or IIS (they often block ports)
- Right-click WAMP → Restart All Services
- Run WAMP as Administrator
2. Apache Port 80 or 443 Already in Use
Issue: Apache fails to start in WAMP.
Cause: Another application is using Port 80 or 443.
Fix steps
- Open httpd.conf and change – Listen 80 to – Listen 8080, then restart WAMP services
3. MySQL Not Starting in WAMP
Issue: MySQL service won’t start.
Cause: Port conflict or corrupted MySQL files.
Fix steps
- Check if another MySQL service is running
- Change MySQL port in my.ini
- Restart MySQL from the WAMP control panel
4. PHP Version Compatibility Issues
Issue: WordPress or plugins show errors.
Cause: Incorrect PHP version enabled.
Fix steps
- Click WAMP icon → PHP → Version
- Select a PHP version compatible with WordPress
- Restart services
5. Localhost Not Opening in Browser
Issue: http://localhost is not loading.
Cause: Services stopped or browser cache issue.
Fix steps
- Ensure the WAMP icon is green
- Clear browser cache
- Try http://localhost:8080 if the port changed
What Is XAMPP?
XAMPP stands for X (Cross-platform), Apache, MariaDB/MySQL, PHP, and Perl. Unlike WAMP, XAMPP works on,
- Windows
- macOS
- Linux
It’s lightweight, flexible, and perfect for users who want a consistent WordPress testing environment across different operating systems.
Learn How to Install WordPress on Localhost [Step-by-Step Guide] to start building and testing your site locally with confidence.
How to Install XAMPP for WordPress (Step-by-Step Guide)
To install XAMPP for WordPress, download the installer from the official Apache Friends website, run the setup wizard, select your components, choose the installation folder, and complete the setup. XAMPP includes Apache, MySQL, PHP, and phpMyAdmin, everything you need to run WordPress locally on Windows, macOS, or Linux.
Below is the complete, user-friendly guide.
Step 1: Download XAMPP
Go to the official XAMPP website: https://www.apachefriends.org. Choose the Windows version and download the installer.
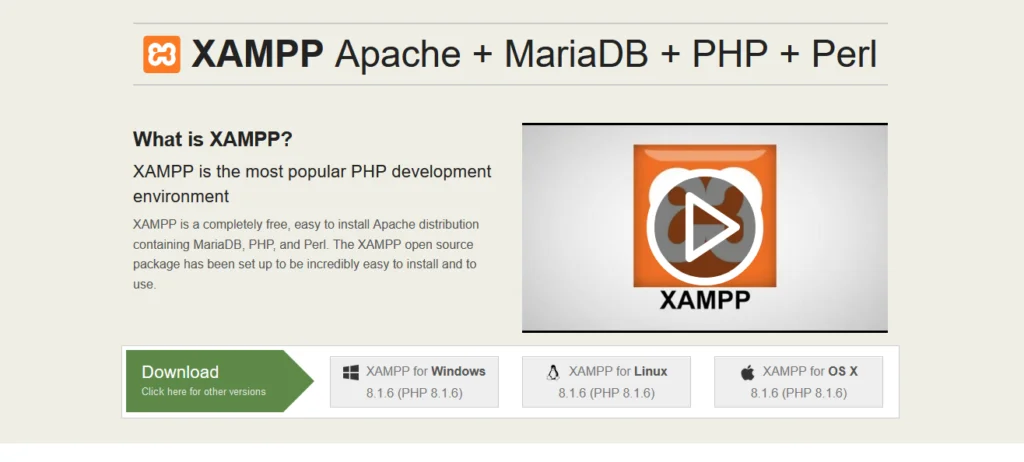
Step 2: Allow User Account Control (UAC)
When the User Account Control (UAC) pop-up appears, click Yes. If a warning message appears, click OK to continue.
Step 3: Open the Setup Wizard
The XAMPP Setup Wizard will open. Click Next to proceed.
Step 4: Select Components
Choose the components you want to install:
- Apache
- MySQL
- PHP
- phpMyAdmin
Leave the greyed-out items as they are; they are required. Click Next.
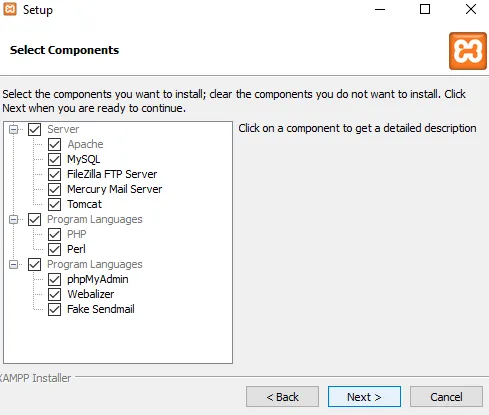
Step 5: Choose Installation Folder
Select where XAMPP should be installed.
Important: If UAC is enabled, avoid installing in C:\Program Files. Choose another folder (like D:\XAMPP or a new folder). Click Next.
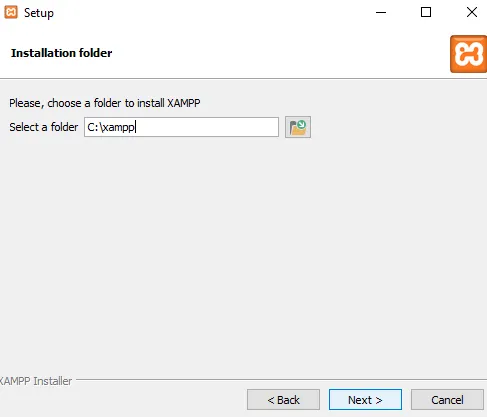
Step 6: Bitnami Option
You will see an option to learn more about Bitnami (used for installing open-source apps like WordPress, Drupal, and Joomla). Uncheck the box if you don’t want this. Click Next.

Step 7: Confirm Installation
You’ll now see the “Ready to Install” screen. Click Next to begin installing XAMPP.
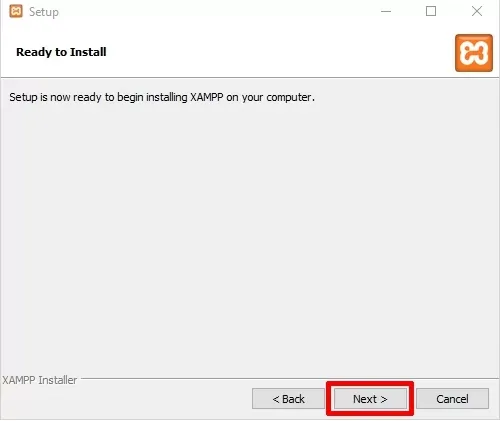
Step 8: Finish Setup
Once installation is complete, check “Do you want to start the Control Panel now?” Click Finish.
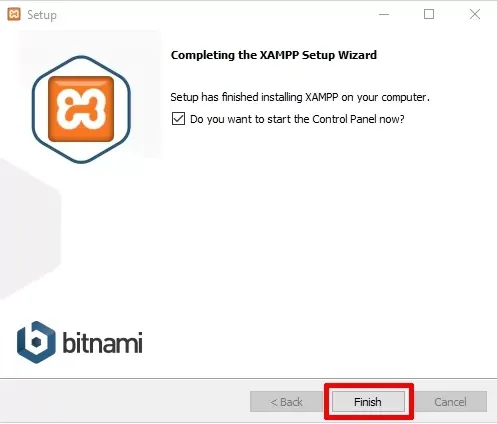
Step 9: Choose Your Language
Select your preferred language and click Next.
(NOTE: If all the above steps are performed correctly, then the XAMPP control panel opens smoothly.)
Step 10: Start Apache & MySQL
In the XAMPP Control Panel:
- Click Start next to Apache
- Click Start next to MySQL
You’ll see green status indicators with PID and port numbers.
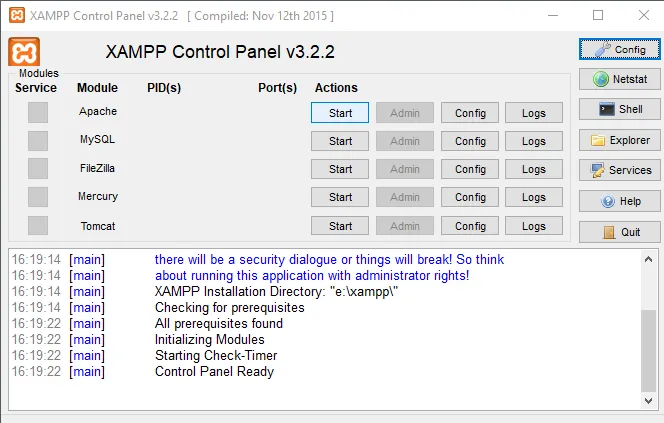
Your XAMPP installation is complete.
WP Ultimate CSV Importer Pro
Get Ultimate CSV/XML Importer to import data on WordPress faster, quicker and safer.
How to Install XAMPP on macOS
1. Download XAMPP for macOS
Go to the official XAMPP website and choose the newest macOS version to start your setup without any hassles.
2. Mount the DMG File
Now you need to mount them on the Volumes directory by entering the following command on the terminal.
$ hdiutil mount ~/Downloads/xampp-osx-[LATEST]-installer.dmg
Replace [LATEST] with the real version.
3. Launch Installer
Then run: open /Volumes/XAMPP/XAMPP.app
4. Follow the Setup Wizard
- Click Next
- Select components to install
- Confirm installation location
- Continue clicking Next until installation begins
5. Finish Installation
Click Finish when setup completes.
6. Unmount Installer (Optional)
If you want to unmount the installer, enter the below command on the terminal.
$ hdiutil unmount /Volumes/XAMPP
XAMPP is now ready on your Mac.
How to Install XAMPP on Linux
1. Download XAMPP for Linux
Download the Linux installer from the official XAMPP website. Ensure the file is saved in your Downloads folder.
2. Open Terminal
Press: Alt + Ctrl + T
3. Make the File Executable
Navigate to Downloads: cd Downloads
Then run the command,
chmod +x xampp-linux-x64-8.2.4-0-installer.run
Here, 8.2.4-0 is the version number of the Xampp file. Make sure you have entered the latest version number of your Xampp. Then click on Enter.
4. Start Installation
Run the installer command,
sudo ./xampp-linux-x64-8.2.4-0-installer.run
Ensure to use the latest version number of xampp.
Enter your password when asked. The setup wizard will appear → click Next to complete the installation.
5. Do Not Launch Automatically
Uncheck Launch XAMPP and click Finish. XAMPP is now installed on Linux.
How to Run XAMPP on Linux
1. Reopen Terminal
Press Alt + Ctrl + T
2. Navigate to XAMPP Directory
cd /opt/lampp
3. Start XAMPP Manager
sudo ./manager-linux-x64.run Enter your password.
4. Start All Servers
Go to Manage Servers → click Select All. This starts Apache, MySQL, and other components.
5. Access Localhost
Open any browser and visit: 127.0.0.1 or localhost. You should now see the XAMPP dashboard. Your XAMPP environment is ready for WordPress or any development work
When XAMPP Is the Best Choice
XAMPP allows you to
- Run WordPress locally
- Test code safely
- Debug plugins
- Try CSV imports without affecting your live site
- Install CRMs like Vtiger or SuiteCRM locally
It’s a complete and safe environment for developers.
Best Alternative for Mac and Linux Users: XAMPP
If you are using macOS or Linux, the recommended solution is XAMPP.
XAMPP works across all major platforms, including Windows, macOS, and Linux.
Like WAMP, XAMPP includes Apache, MySQL (MariaDB), and PHP, and offers a similar local server environment for
- Testing WordPress websites
- Developing plugins and themes
- Running PHP applications
- Importing large CSV files safely on localhost
Because of its cross-platform support and ease of use, XAMPP is the best choice for non-Windows users.
XAMPP Error Fixing: Common Issues and How to Resolve Them
XAMPP errors usually occur due to port conflicts, missing permissions, corrupted files, or system restrictions. To fix most XAMPP issues, check your Apache/MySQL error logs, change the default ports (80, 443, 3306), run XAMPP as an administrator, or reinstall missing components. Below is a simple, complete guide to identifying and fixing XAMPP errors on Windows, macOS, and Linux.
1. Why XAMPP Fails to Install
XAMPP may not install due to the following reasons
– System requirements don’t match
– Antivirus blocks the installation
– The installer file is corrupted
– UAC (User Account Control) restricts permissions
How to Fix XAMPP Installation Issues
Follow these steps to resolve most installation problems
- Run the installer as Administrator
- Disable antivirus temporarily
- Download a fresh installer from Apache Friends
- Avoid installing under “C:\Program Files.”
2. How to Identify XAMPP Errors
Before fixing any issue, check the error logs.
Where to check Apache errors
- Open XAMPP Control Panel
- Click Logs under Apache
- Select error.log
This file shows the exact reason Apache is failing.
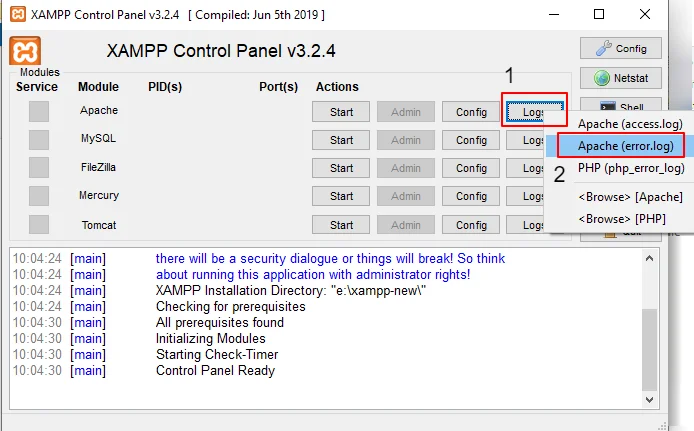
Where to check MySQL errors
- Go to Logs → MySQL
- Select mysql_error.log
3. Fixing Apache Port Conflict (Port 80 or 443 in use)
This is the MOST common issue in XAMPP
How to verify the port conflict
- Open XAMPP Control Panel
- Click Netstat
- View which application is using Port 80 or Port 443
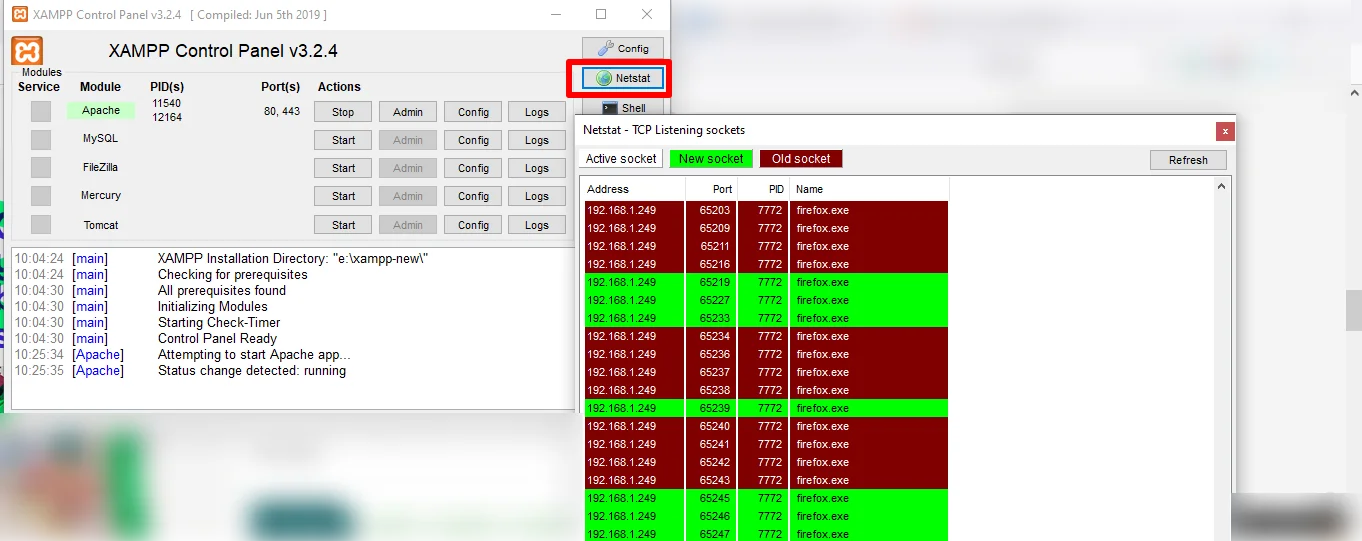
How to fix the conflict
There are 2 ways
Method A: Stop the conflicting application
Common apps that use Port 80
- Skype
- IIS
- VMware
- Windows Services: Web Deployment, W3SVC, and stop them if possible.
Method B: Change Apache Port to 8080
- Open XAMPP Control Panel
- Click Config (Apache)
- Open httpd.conf
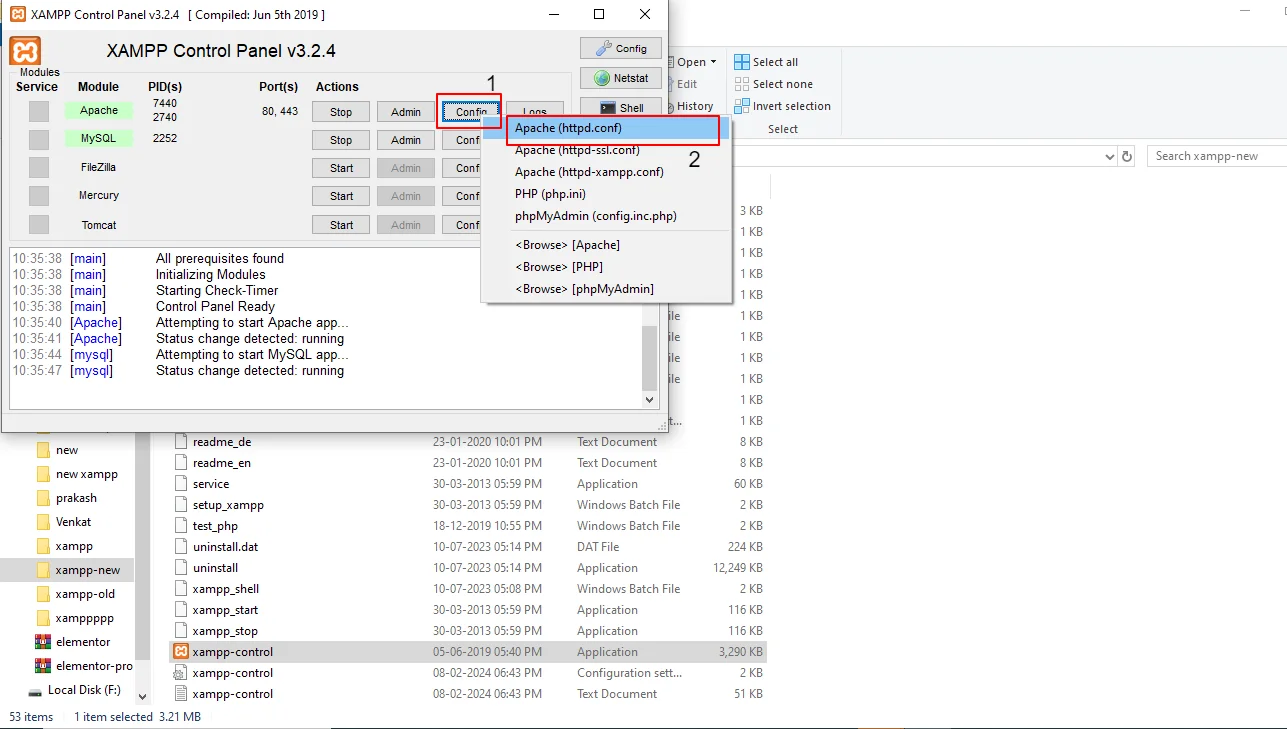
Find: Listen 80
ServerName localhost:80
Change to: Listen 8080
ServerName localhost:8080
- Save and restart Apache
Then open your WordPress site at http://localhost:8080/
Mac Users
Open Finder → Applications → XAMPP → Apache folder → open httpd.conf. Make the same port updates as Windows.
4. Installation Errors: How to Check If XAMPP Is Installed Properly
To confirm XAMPP is installed correctly
- Go to C:\xampp (Windows) or /opt/lampp (Linux)
- Open XAMPP Control Panel
- Start Apache and MySQL
- Open browser → enter: http://localhost/
If the dashboard loads, installation worked.
5. Test File Method: Verify XAMPP Configuration
Create a small PHP file to test the server
<!doctype html>
<html>
<head>
<title> Test Page</title>
</head>
<body>
<p> XAMPP Server runs successfully</p>
</body>
</html>
Save as: test.php under htdocs
Open: http://localhost/test.php. If you see the message, XAMPP is working correctly.
6. Fix MySQL Errors (Port 3306 issues or “MySQL stopped unexpectedly.”
Reason for MySQL failure
- Port 3306 is already used
- Corrupted MySQL files
- Permission issues
Fix 1: Change MySQL port to 3307
- Open the XAMPP control panel
- Ensure that you have stopped all the running modules such as Apache and MySQL.
- Go to Config → my.ini
- Replace Port=3306 with Port=3307
- Save and restart XAMPP
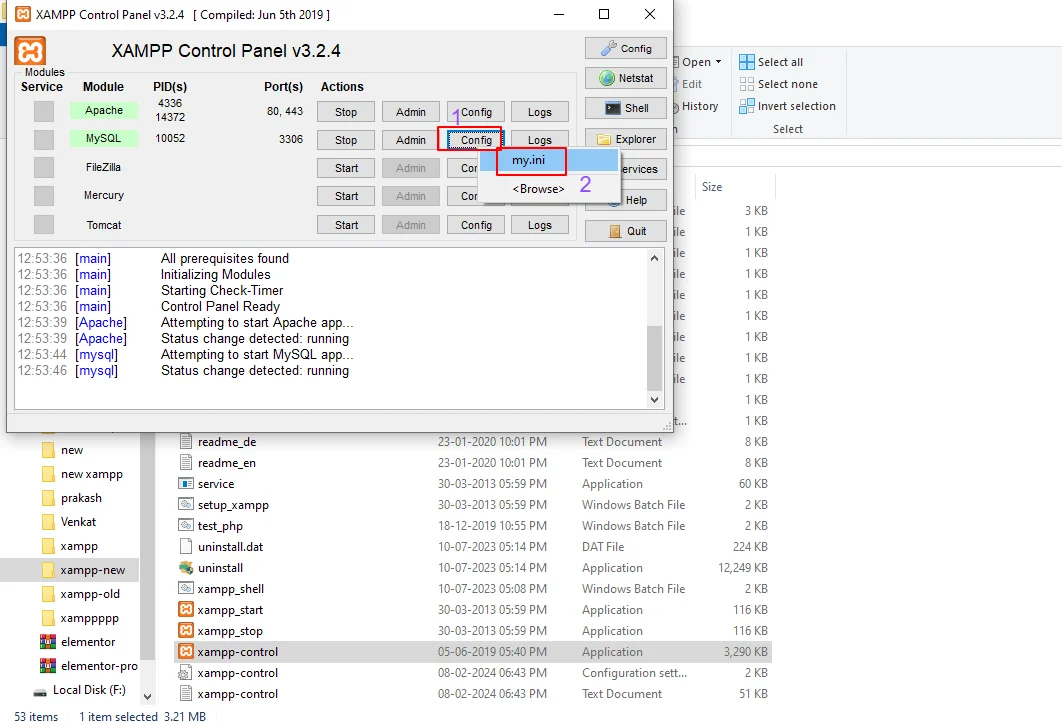
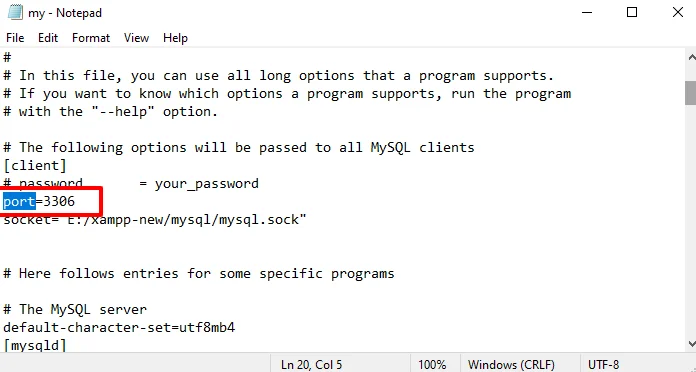
Fix 2: Run XAMPP as Administrator
Right-click → Run as administrator
macOS
- Right-click XAMPP
- Get Info → Sharing and Permissions
- Set all users to “Read and Write.”
- Enter admin password
WAMP vs XAMPP – Quick Comparison
| Feature | WAMP (Windows Only) | XAMPP (All OS) |
| Works On | Only Windows | Windows, macOS, Linux |
| Setup Difficulty | Easy if you use Windows | Easy on any operating system |
| PHP Version Handling | Change PHP versions easily | Needs manual PHP version setup |
| Control Panel Style | Small tray icon in the system | Full dedicated control panel |
| Best Choice For | Windows-based developers | Cross-platform users and testers |
Quick tip – If you use only Windows, WAMP is enough. If you work across macOS or Linux, XAMPP is the better choice.
FAQs
1. How do I download XAMPP on Windows?
To download XAMPP on Windows, visit the official Apache Friends website and choose the Windows installer. Select the latest version and follow the setup wizard to install Apache, MySQL, PHP, and phpMyAdmin on your system.
2. How do I install XAMPP and WAMP on Windows 10 and 11?
To install XAMPP or WAMP on Windows 10, download the installer from their official websites, run the setup file, choose the required components, and follow the on-screen instructions. After installation, start Apache and MySQL from their control panels to activate the local server.
3. How do I install XAMPP and WAMP on a Mac?
WAMP cannot be installed on macOS because it is designed only for Windows. However, you can install XAMPP on Mac by downloading the macOS version from the official Apache Friends website and completing the installation using the setup wizard.
4. How do I install XAMPP and WAMP for PHP development?
Both XAMPP and WAMP come with PHP pre-installed. To begin PHP development, install either tool, start Apache and MySQL, and store your PHP files inside htdocs (for XAMPP) or www (for WAMP).
5. How do I install XAMPP on Ubuntu or Linux?
Download the Linux installer from the Apache Friends website, make the file executable using the terminal, and run it with administrator privileges.
6. How do I download XAMPP 64-bit for Windows 10?
Visit the official XAMPP download page, choose the 64-bit Windows version, and download the installer. Run the setup file, select your preferred components, and complete the installation to set up a fully functional local development environment.
7. Where can I download WordPress for local installation?
Download WordPress from the official WordPress.org website. After downloading, extract the WordPress folder into the htdocs (XAMPP) or www (WAMP) directory, create a database via phpMyAdmin, and run the installation through http://localhost/wordpress.
8. How to install WAMP Server step-by-step?
To install WAMP Server, download the installer from the official WAMP website, run the setup file, choose your preferred language, accept the license, and select the installation folder. Complete the setup and launch WAMP. Once installed, start all services and ensure the tray icon turns green, indicating Apache, MySQL, and PHP are running successfully on localhost.
9. How to activate XAMPP?
XAMPP doesn’t require activation. Once installed, you can start the XAMPP Control Panel and manually start the Apache and MySQL services to activate them.
10. Will I lose everything if I reinstall XAMPP?
No, Reinstalling XAMPP will overwrite the existing installation but won’t affect your website files or databases if you keep them outside the XAMPP installation directory. However, it’s always a good practice to back up your data before reinstalling.
11. Why is XAMPP not verified on my Mac?
XAMPP might not be verified on your Mac due to security settings. You can manually verify and open it by right-clicking the XAMPP application, selecting “Open” from the context menu, and then confirming your action.
12. Why is my WampServer not working?
WampServer might not be working due to several reasons such as port conflicts, service failures, or misconfigurations. Check the WampServer error logs for any specific error messages to troubleshoot the issue.
For Apache port conflict, the solution is the same as that for Xampp as explained above. Change the Apache port name from 80 to 8080 and Server name localhost to Server name localhost: 8080 in the httpd.conf file (Xampp’s control panel -> Apache -> Config-> httpd.conf)
Sometimes, port 8080 may also be busy. In that case, you can use the port 7080.
If still you have an error in running Wamp Server in the local host, here is a simple solution
Navigate to My Computer. Right-click on it and select Properties->Device Manager
Now click on View-> Show Hidden Devices-> Non-Plug and plug devices-> HTTP -> Disable.
Now Restart your computer. Now you can run your Wamp Server effectively to access the WordPress site.
13. How to fix the MSVCR110 DLL error in Wamp?
The MSVCR110 DLL error usually occurs due to missing or corrupted system files. You can fix it by reinstalling the Microsoft Visual C++ Redistributable package, which includes the required DLL files.
The Visual Studio C++ redistributable package for 2012
14. How do I reinstall WampServer?
To reinstall WampServer, first, uninstall the existing installation, then download the latest version from the official website and run the installer. Follow the on-screen instructions for installation.
15. What is the forbidden error in Wamp?
The forbidden error in WampServer typically occurs when you try to access a directory for which the Apache server doesn’t have proper permissions. You can fix it by adjusting the directory permissions in the Apache configuration files.
16. How do I know if my WampServer is working?
You can check if WampServer is working by opening your web browser and typing localhost in the address bar. If you see the WampServer homepage or the default Apache page, it indicates that the WampServer is running correctly. Additionally, for beginner users, you can check the status of Apache and MySQL services in the WampServer icon in the system tray. This process is easy and helps ensure that your server is functioning properly.
Key Takeaway
Installing XAMPP or WAMP gives you a clean and reliable environment to set up your development workflow with confidence. With a local server in place, you can test your WordPress, run scripts, and validate large data files without touching your live website. This prevents unexpected issues, protects your data integrity, and keeps your site safe from avoidable errors.
A well-configured local environment not only boosts accuracy but also speeds up your entire development process. You get full control, easier troubleshooting, and a risk-free space to experiment and refine your work
If you’re aiming for a smoother and more secure workflow, starting with XAMPP or WAMP is the smartest and simplest first step.
Love this article? Share your feedback or other suggestions with us at support@smackcoders.com
WP Ultimate CSV Importer Pro
Get Ultimate CSV/XML Importer to import data on WordPress faster, quicker and safer.
Sample CSV & XML files for WordPress Import – WP Ultimate CSV/XML Importer (Trial & Testing Guide)
3 Feb 2026, 5:58 am
Table of Contents
Sample CSV and XML files help you test WordPress imports without creating data from scratch. WP Ultimate CSV/XML Importer provides ready-made CSV and XML sample files so you can understand field structure, relationships, and formatting before running a real import.
In this guide, you’ll learn what these sample files contain, how to use them for trial imports, and how to import CSV or XML files into WordPress step by step.
What’s Inside These Sample Files
The sample CSV and XML files provided in this article are not just demo data. They are reference templates that show how your WordPress data should be structured for a successful import. Each sample file is prepared so you can click, download, and use it directly to test imports with WP Ultimate CSV/XML Importer.
When you download any sample file listed in this guide, you’ll find:
- Predefined column headers aligned with WordPress fields and meta keys, making field mapping easier
- Correctly formatted relationship data, including parent–child and multi-record associations
- Structured custom field values for repeaters, groups, and flexible fields used by popular plugins
- Media reference examples showing how images and files are linked during import
- Taxonomies and hierarchy data, such as categories, tags, and custom taxonomies
- Plugin-specific field structures for WooCommerce, SEO plugins, multilingual setups, and other supported integrations
This allows you to safely download any file from the list below and use it as a working reference or trial import file.
These samples are intended to help you quickly understand the expected format and choose the right file for your import scenario.Note: The values are common for any file types. If you are importing a TSV, Excel, or Google Spreadsheet, you can download the corresponding file from the list below to verify the value formats before importing.
WordPress CSV Import
The plugin supports the CSV file type to import data into WordPress. You can create a CSV file with records of any post type, like posts, pages, products, orders, users, and coupons. But when preparing your CSV:
- Ensure the values in each column are in proper format.
- Refer to the sample CSVs provided in this blog for guidance on how to add values in the proper format for specific field types like ACF repeater, JetEngine CCT fields, etc.
- After preparing your CSV file, validate it with a tool like CSV lint.
- Always save your file in UTF-8 format to avoid encoding issues during import.
Please note that not only CSV files, but you can also use other files like XML, TSV, Excel, and Google Sheets.
Steps to import a CSV file to WordPress with WP Ultimate CSV Importer
You can import a CSV file into WordPress with WP Ultimate CSV Importer by uploading the file, mapping fields, configuring import settings, and running the import process. Follow the simple 3 steps to successfully import any CSV data into WordPress.
Step 1: Upload the CSV File
- Upload the prepared CSV file inside the plugin’s ‘import/update’ area. The plugin provides multiple upload sources: upload from desktop, ftp/sftp file upload, external file url, upload from external sources like Google Sheet & Dropbox, and locate a file from your server.
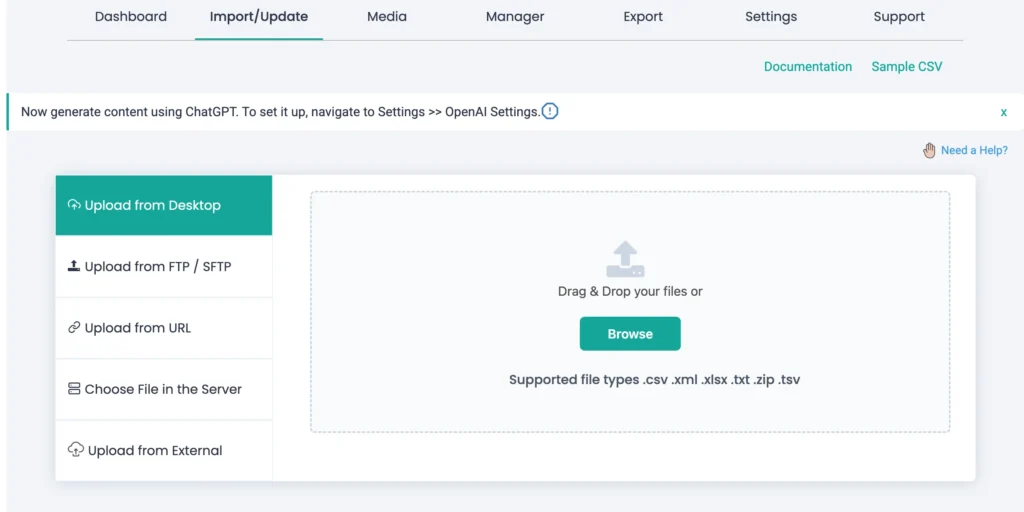
- Choose the post type and the import mode (whether it is a fresh import or an update to available content).
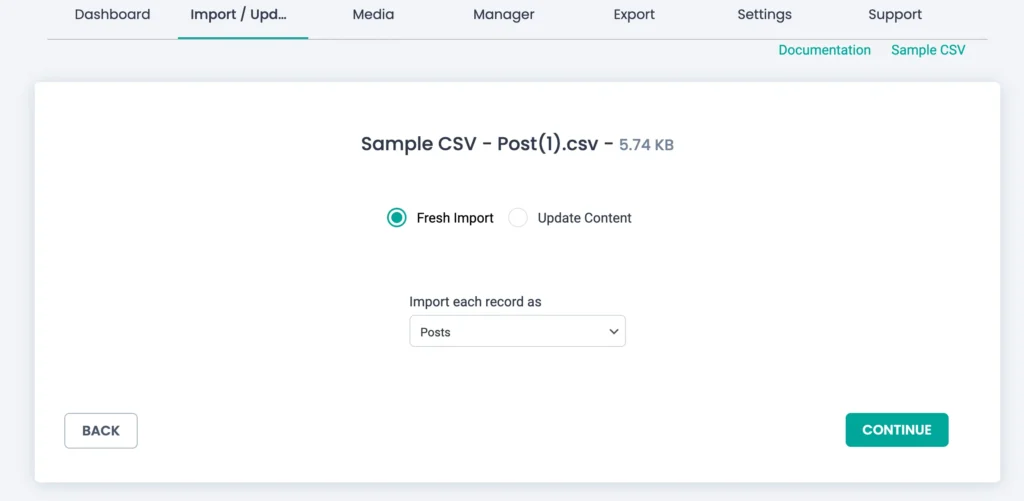
Step 2: Match the columns in CSV with WordPress fields
- On the left side, you have the WordPress fields of the selected post type. The right side of each WP field is the area to map your file fields. You can either use the dropdown or the drag-and-drop method to match the fields.

- The plugin will automatically match fields if both field headers have similar names. If you use our sample files, then most of the fields are auto-mapped.
- The advanced mode mapping area incorporates the actions section (the settings icon added beside each field). This is helpful to customize the field data during import. Configure actions like combining multiple fields, adding custom functions, formulas, and AI prompts for automatic content generation. Learn more about this here on our WP Ultimate CSV Importer how to import CSV files guide.

- You can apply conditional filters on this page to import selected records from your file. Check for the details on how to use the import filters.

- At the end of the page, enter a unique name in the ‘save this mapping as’ textbox, then proceed to the next step.
Step 3: Handling media files & other import settings
- Choose any one of the three options in manage media uploads to tell the importer how you want to handle the media imports.
- Then scroll down to import configuration settings and enable essential configurations like rollback for safety backups before import, maintenance mode to notify users about import, and iteration processing(batch imports).

- Once everything is configured, hit import, and your CSV records will be successfully imported into WordPress.
Learn more about importing a CSV File into WordPress with WP Ultimate CSV Importer.
WordPress XML import
Unlike WordPress’s default export, WP Ultimate CSV Importer allows filtered and format-specific XML exports with total control. This makes it easier to reuse exported files as controlled import sources.
It allows you to export any type of WordPress content with advanced filters and multiple file format options. So you can export exactly what you want, not everything at once.
To help you get started, we’ve provided sample XML files below. You can download them and try importing them into the plugin to see how it works.
How to export XML with the WP Ultimate CSV Importer
To export an XML file from WordPress:
- Navigate to the export tab in the WP Ultimate CSV Importer plugin.
- Choose a post type from the lists. If you want to export Products, select WooCommerce Products. To export any custom posts, choose Custom posts and select the custom post name from the dropdown.
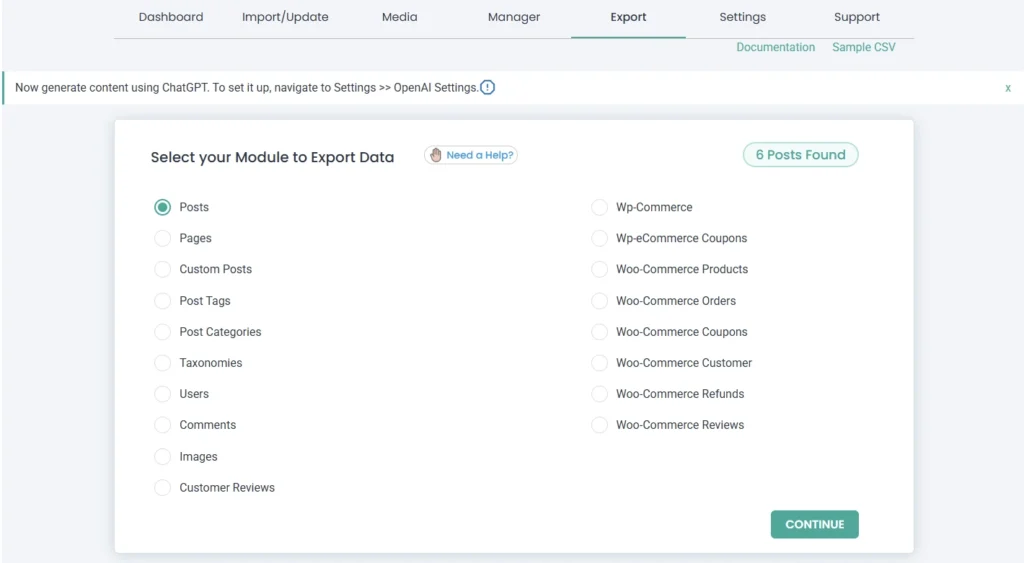
- Next, insert a file name and select the file type as XML.

- Configure advanced export settings like filters, records split, and scheduling features(optional).
- Hit export and click download to save the data as an XML file to your device.
In this way, you’ll get the XML file. Both the import and export steps are the same for CSV and XML types, but the only difference is the file type.
How to Import an XML file into WordPress
The import steps are common for all the file formats. To import an XML file:
- Upload the file to WP Ultimate CSV Importer.
- Configure the post type and import type (Fresh Import or Update Content).
- Match the XML file columns with the appropriate WordPress fields.
- Configure media and import settings.
- Finally Import your XML file.
It’s that simple.
WP Ultimate CSV Importer Supported Plugins
WP Ultimate CSV Importer supports many popular WordPress plugins, making it easier to migrate their data. Some of the supported WordPress plugins are:
- WooCommerce
- Custom Field plugins (JetEngine, Toolset Types, Meta Box, ACF (Free & Pro), Pods, CFS, CMB2, SCF)
- Multilingual Plugins (WPML, Polylang)
- SEO Plugins (YOAST SEO, RANKMATH SEO, AIOSEO)
- Events Manager
- The Events Calendar
- Business Directory Listings
- NextGEN Gallery
- WP Job Manager
And more on the list.Get to know the complete list of supported WordPress plugins, or contact us for any details.
Download Sample Files for WordPress CSV/XML Import
WP Ultimate CSV/XML Importer Pro makes it simple to transfer WordPress data. To help you get started, we’ve prepared sample CSV and XML files for the most common use cases. Below you can download them. Each file contains properly structured data, so you can understand the formatting requirements and easily test imports.
Quick Tip: If you didn’t find a sample file here for your post type, just follow this. Create a record in that post type, export it using our plugin, and you’ll have a ready-made sample file to use for testing the imports.
You can try the test import in any of the following sources we offer:
– WP Ultimate CSV Importer Pro Demo (test in a public WordPress instance, used by all users) or
– WP Ultimate CSV Importer Trial (test in private WordPress demo instance, created only for you)
WP Ultimate CSV Importer Pro
Get Ultimate CSV/XML Importer to import data on WordPress faster, quicker and safer.
Samples CSV & XML Files for WooCommerce Import (Products, Orders, Reviews, Customers, Coupons)
Moving data to your new WordPress store is easy. WordPress Ultimate CSV/XML Importer Pro plugin supports WooCommerce data import, including Products, Coupons, Orders, Customers, and Reviews. Below are the sample files for WooCommerce. (CSV sample file)
Click on the links and download the sample CSV files you want.
- WooCommerce Customers Import CSV – sample customer profile and billing/shipping data
- WooCommerce Products Import CSV – Woocommerce Sample product CSV file download, contains product details like title, description, price, SKU, categories, stocks, attributes, etc.
- WooCommerce Variations Import CSV – variable product details with parent and child(variations) products
- WooCommerce Product Bundles Import CSV – example of bundled product setup
- WooCommerce Group Products Import CSV – shows how to group multiple products
- WooCommerce Orders Import CSV – sample customer order records
- WooCommerce Coupons Import CSV – contains coupon codes with discount rules
- WooCommerce Reviews Import CSV – example customer reviews with ratings
Third-Party WooCommerce Extensions
- Yith WooCommerce Order Tracking Import – sample data for adding order tracking codes
- PPOM WooCommerce Order Import CSV – sample orders with PPOM fields
Download the Sample XML files for WooCommerce below:
- WooCommerce Variations Import XML – sample variable products data in XML format
- WooCommerce Product Bundles Import XML – sample bundled product data
Events Manager Import
The WordPress Ultimate CSV/XML Importer Pro plugin supports the Events Manager Plugin. You can import the custom post-types like events, locations, recurring events, and bookings. Also, you can import events manager categories and tags.
- Events Import CSV – example event records with title, description, date, time, day, location, and other details
- Events Import XML – example event records in XML format
- Recurring Events CSV – sample recurring events in CSV
- Recurring Events XML – sample recurring events in XML
- Event Location CSV – example venue/location details in CSV
- Event Location XML – example venue/location details in XML
- Event Categories Import CSV – categorization samples for events in CSV
- Event Categories Import XML – categorization samples for events in XML
- Event Tags Import XML – sample tags for events in XML
Multilingual Pages, Posts, and Products Import Samples
If you’ve built a multilingual website using plugins like WPML, qTranslateX, or Polylang, the importer supports importing multilingual data into them. Import translated data in many languages via CSV or XML. Engage the audience worldwide and get more visits to your website. WP CSV/XML importer supports importing translated data of posts, pages, custom post types, and WooCommerce.
Sample CSV and XML files are given below,
- WPML Sample CSV – CSV with language and translated post fields
- WPML Sample XML – XML with language and translated post fields
- Polylang with WooCommerce Product CSV – sample multilingual product records
Sample CSV & XML for SEO fields Import
Millions of websites created using WordPress are getting higher ranks in search results with the help of smart WordPress SEO plugins. Due to the increased demand to boost the rankings of websites, they are used by many WordPress administrators across the globe. Many SEO plugins are available for free at WordPress.org.
WP Ultimate CSV/XML Importer integrates with these SEO plugins: Yoast SEO, RankMath SEO, All in One SEO, SEOPress, and Slim SEO plugin. You can import these plugin fields using WordPress CSV/XML Importer Pro.
Download sample files for data import to SEO fields.
- Yoast SEO Import Sample CSV – contains Yoast fields like meta titles, descriptions, focus keywords, etc.
- Yoast SEO Import Sample XML – contains meta titles, descriptions, and focus keywords, etc. in XML format
- All In One SEO Import CSV – sample AIOSEO meta fields
- All In One SEO Import XML – sample AIOSEO meta fields in XML
- RankMath SEO Import CSV – example RankMath fields like focus keyword, schema, etc.
NextGEN Gallery Import Samples
The CSV/XML Importer offers support for the free version of NextGEN Gallery. If you have existing galleries in the NextGEN Gallery plugin, you can import new images into that gallery using the WordPress CSV/XML Import plugin. You can import images along with the post metadata and relate those images to the corresponding Post, Page, or Custom Posts.
Download the sample files below for NextGEN Gallery import.
- NextGEN Gallery Import CSV – example post fields with gallery IDs
- NextGEN Gallery Import XML – example post fields with gallery IDs in XML
WP Ultimate CSV Importer Pro
Get Ultimate CSV/XML Importer to import data on WordPress faster, quicker and safer.
Custom Fields Import CSV & XML Samples
Add custom fields to extend your default WordPress post type or include them inside the Custom Post Type. WP Ultimate CSV Importer supports importing data for the default custom fields and custom fields created with other plugins. It supports custom field plugins like JetEngine, ACF(Free & Pro), Pods, Meta Box, CFS, Toolset Types, CMB2, CCTM, and default WordPress custom fields. You can import custom fields assigned to Posts, Pages, Custom Posts, WooCommerce Products, Users, Categories, Tags, and Custom Taxonomies.
Get samples below:
- ACF Custom Fields Import CSV – sample post with acf meta fields
- ACF Custom Fields Import XML – sample post with acf meta fields in XML
- ACF Repeater Fields CSV – example repeater field structures
- ACF Repeater Fields XML – example repeater field structures in XML
- ACF Flexible Content Import CSV – sample flexible layouts with content blocks
- Toolset Types Import CSV – basic Types custom fields
- Toolset Types Import XML – basic Types custom fields in XML
- Toolset Types Repeater Field Sample CSV – example repeater field and values
- Toolset Types Repeater Field Sample XML – example repeater fields and values in XML
- Toolset Types Intermediate Sample CSV – example intermediate posts CSV
- Toolset Types Intermediate Sample XML – example intermediate posts XML
- Toolset Types One-to-One Relationship CSV – example one-to-one relationship fields CSV
- Toolset Types One-to-One Relationship XML – example one-to-one relationship fields XML
- Toolset Types Two-to-One Relationship CSV – example two-to-one relationship fields CSV
- Toolset Types Two-to-One Relationship XML – example two-to-one relationship fields XML
- Toolset Types One-to-Many Relationship CSV – example one-to-many relationship fields CSV
- Toolset Types One-to-Many Relationship XML – example one-to-many relationship fields XML
- Toolset Types Many-to-Many Relationships Import CSV – example many-to-many relationship fields CSV
- Toolset Types Many-to-Many Relationships Import XML – example many-to-many relationship fields XML
- JetEngine metabox Import Sample CSV – sample meta box fields
- JetEngine 1 to 1 Relation Import Sample CSV – sample jetengine one-one relation fields
- JetEngine 1 to many Relation sample CSV – sample jetengine 1 to many relation fields
- JetEngine Many to Many Relation sample CSV data – sample jetengine many to many relation fields
- Pods Import CSV – sample pods fields
- CFS Import CSV – sample cfs fields
- Meta Box Custom Fields CSV – sample meta box custom fields
- Meta Box Group CSV – sample meta box group fields
- Meta Box Field Clone CSV – sample meta box clone fields
- Meta Box Group Subfield Clone CSV – sample meta box group subfield clone fields and values
Custom Post Import Samples
WP Ultimate CSV Importer supports all types of custom posts created with default WordPress fields and custom posts created using plugins like Custom Post Type UI, Types, JetEngine, ACF, Meta Box, BuddyPress, LearnPress, Pods, CCTM, CustomPress & default WordPress custom posts.
Get the samples for custom posts below,
- Custom Post Import XML – example of a custom post with title, content, taxonomy, and metadata
Post & Page Import
WP Ultimate CSV & XML Importer/Exporter plugin offers complete support for the Posts and Pages import export. You can bulk import Posts and Pages with core content and all the attributes to WordPress. WP Import XML plugin lets you import all the important fields data, including images, categories, tags, taxonomies, page attributes, menu orders, featured images, post dates, post status, and more.
Sample data is available for you to download in the form of CSV or XML. (WordPress XML file download)
Download the posts and pages samples below.
- Post Import CSV – All post fields with sample data
- Post Import XML – All post fields with sample data in XML
- Page Import CSV – All page fields with sample data
- Page Import XML – All page fields with sample data in XML
WP Ultimate CSV Importer Pro
Get Ultimate CSV/XML Importer to import data on WordPress faster, quicker and safer.
Comments Import
WordPress Ultimate CSV Importer Pro Plugin lets you export comments from your old site and import them into the new one. If you have already imported all your post in WordPress, the CSV Importer plugin will use the post id to match and import all the comments under the individual posts.
You can download the comments sample below,
- Comments Import CSV sample – example comments with author, email, and post references
Note: Replace sample post ids with your own site’s post ids before importing to ensure correct mapping.
WP Customer Reviews Import Samples
The WordPress Ultimate CSV/XML Importer plugin supports WP Customer Reviews field data import and export. You can import bulk user reviews with meta field information like review content, rating, business name, review format, address data, and more.
- WP Customer Reviews Import CSV Sample – example reviews with rating, reviewer details, and meta fields
Users Import CSV & XML samples
Import or update all the default User fields data in bulk with ease. WordPress CSV/XML Import plugin supports import & export for the WooCommerce plugin fields (billing and shipping information), along with default WP user fields. It also supports third-party custom field plugins like WP-Members, MemberPress, Members, and Ultimate Member.
Below are the CSV & XML sample files to download.
- Users Import CSV – example user records
- Users Import XML – example user records in XML
- Users with WooCommerce billing & shipping data CSV – sample WooCommerce customer profiles
CSV & XML for Categories, Tags & Taxonomies Import
Using Ultimate CSV & XML Importer, you can import/update, and export your Categories, Tags, and Custom Taxonomies data like slug, description, image, and more.
It supports categories, tags, and taxonomies, along with custom fields created with plugins like JetEngine, Toolset, Meta Box, Pods, and ACF.
Sample content is available to download in the CSV & WordPress XML formats below.
- Category Import CSV – example categories with name slug, and description
- Category Import XML – example categories with name slug, and description in XML
- Tags Import CSV – sample tags data
- Tags Import XML – sample tags data in XML
- Taxonomies Import XML – sample custom taxonomy structures
If you are using the other importer and exporter plugins, the above CSV and XML files might not help you with the evaluation. All the sample files are prepared to test only with the WP Ultimate CSV Importer plugin.
If the CSV or XML header names are the same as the WordPress field names, then the WordPress CSV Importer Plugin will auto-map fields during import. You can also create with any header names, but make sure to map correctly during import configuration.
BBPress Import Samples
- BBPress Forum Import CSV – example forum records
- BBPress Topic Import CSV – sample topics under forums
MemberPress User Import Samples
- MemberPress User Import CSV – example membership user data
LearnPress Import Samples
- LearnPress Courses Import CSV – sample course structure
- LearnPress Quizzes Import CSV – example quiz data
- LearnPress Lessons Import CSV – lesson content samples
- LearnPress Orders Import CSV – sample course orders
- LearnPress Questions Import CSV – example quiz questions
Navigation Menu Import Samples
Import menus to your website using CSV/XML Importer. Simply export them with our plugin to move menu items to the new website.
Download the sample below for import testing:
- Sample CSV for Navigation Menu – example WordPress menu structure
Basic requirements for CSV
- The CSV file needs to be in UTF-8 format.
- Any delimiters can be used, but each cell needs to be properly escaped.
- The Importer can handle any large CSV files based on your server configuration.
- The headers can be of your choice. To automate mapping (relating the CSV headers with their corresponding WordPress fields), keep the CSV file headers the same as WordPress field names.
Basic XML Files requirements
- The XML file needs to be in a valid format. You can do the xml validation here.
- The plugin can handle any large XML files based on your server configuration.
- The headers can be of your choice, but you have to map the right header with WordPress fields in the mapping section. If you keep the XML file headers the same as the WordPress field slug name, the fields will get auto-mapped on the mapping page.
Frequently Asked Questions (FAQ)
1. What should a CSV file look like?
A CSV (Comma Separated Value) file stores tabular data in plain text format with a list of data separated by commas. The first row in CSV is used as headers, and the remaining rows are values. Each column represents a field, and each row is a record.
For example,
Name, Mailid, DOB, Address
Tanny, tan@mail.com, 12/03/1978, Sample Address
Benno, ben@mail.com, 11/09/1972, Example Address
You can open the CSV file in any text editor, but most of them use a Microsoft Excel sheet.
2. How do I create a CSV file format?
Creating a CSV (Comma-Separated Values) file format is relatively simple.
Follow these steps to create a CSV file:
1. Open a Text Editor: You can use any text editor, such as Notepad (Windows), TextEdit (Mac), or any code editor like Visual Studio Code, Sublime Text, etc.
2. Enter Data: Input your data in a tabular format, with each cell separated by a comma and each row separated by a new line.
For example,
Name, Age, City
John, 25, New York
Alice, 30, London
Bob, 28, Paris
3. Save as CSV: Save the file with a .csv extension. For example, data.csv.
3. How do I format a CSV file to import?
Formatting a CSV file for import typically involves ensuring the data is structured correctly and follows specific guidelines to be successfully imported into the target system, like WordPress. Each CSV file should have a specific structure depending on what you’re importing (users, posts, etc.). Ensure that column headers match the fields in WordPress.
Here’s a general guide on formatting a CSV file for import:
– Headers: Include headers at the top of the CSV file. These headers should accurately describe the data contained in each column.
– Delimiter: Choose a delimiter to separate the values within each row. Comma (,) is the most common delimiter, but other options like semicolon (;) or tab (\t) can be used depending on your requirements.
– Quoting Values: If your data contains special characters (like the delimiter itself), whitespace, or line breaks, you may need to enclose values within quotes (“). This helps the importer distinguish between actual data and separators within the data.
– Consistent Structure: Ensure that each row of data has the same number of columns and that the data in each column adheres to the expected format. Inconsistent structure can cause errors during the import process.
– Encoding: Save the CSV file with an appropriate character encoding to support special characters and ensure compatibility with the import tool. UTF-8 encoding is commonly used and recommended.
– Clean Data: Remove any unnecessary whitespace, special characters, or formatting from the CSV file to prevent errors during import.
– Handle Empty Values: If a column doesn’t have data for a particular row, leave it empty or use a placeholder value as needed. Ensure that the CSV file handles empty values consistently throughout.
Following these guidelines will help ensure your CSV file is properly formatted for import into WordPress.
4. How do I import a CSV file into WordPress?
1. Format the CSV File: Ensure that your CSV file is properly formatted with the required data for import. WP Ultimate CSV Importer supports importing various data types, including users, posts, and custom post types.
2. Access the Import Tool & Upload CSV: In your WordPress admin dashboard, go to Ultimate CSV Importer Pro → Import/Update. Upload the desired CSV file.
3. Configure Post Type & Mapping: Configure the post type and map the CSV columns to the corresponding WordPress fields.
4. Run the Importer: Then, run the import. All CSV file data will be imported into WordPress.
5. How do I import users from a CSV file into WordPress?
– Prepare a CSV file with user data, including usernames, emails, and other required fields.
– Install the WP Ultimate CSV Importer plugin.
– Browse the prepared CSV with User details.
– Select the post type as Users from the drop-down.
– Map the field columns and configure import settings.
– Finally, click on Import.
6. How do I import custom post types CSV into WordPress?
Importing a custom post type is the same as importing posts, pages, etc. with the WP CSV Importer plugin. To import custom post type data from a CSV file into WordPress:
– Prepare the CSV for your custom post type. Ensure that the CSV file includes all the necessary data fields for each custom post type entry.
– Head on to the WP CSV importer plugin → Import/Update.
– Insert the custom post type CSV, and choose the content type. The custom post type you want to import from the drop-down.
– Map fields, configure import settings (if needed), and click Import.
Now the custom post type CSV data has been imported into WordPress.
7. Can I create a CSV file without Excel?
– Yes, you can do that. Use a text editor like Notepad or a code editor to create and edit CSV files.
– Provide the column headers and subsequent rows for the data corresponding to columns.
– Separate data with commas (,), and use new lines for each row.
– Ensure you have saved the file with the ‘.csv’ extension. For example (Lead.csv)
Now your CSV file has been created without Excel.
8. How do I fix CSV formatting?
Fixing CSV formatting involves identifying and resolving any issues with the structure or content of the CSV file. Here are some common steps to fix CSV formatting issues:
Check for missing or extra commas.
– Ensure consistency in quoting values if necessary.
– Verify that the CSV structure matches the import requirements of your target system.
– Confirm that the headers at the top of the CSV file accurately describe the data in each column.
– Headers should be clear, concise, and correctly spelled to avoid confusion during import.
– If your data contains special characters (like commas), whitespace, or line breaks, ensure that values are properly enclosed within quotes (“). This prevents the importer from misinterpreting the data structure.
9. How do I import an XML file into WordPress?
You can import an XML file into WordPress using the WordPress built-in tool or using the WP Ultimate CSV importer plugin.
Using WordPress Built-in Tool
– Importing an XML File into WordPress involves the following simple steps:
– Navigate to Tools → Import in the WordPress admin dashboard.
– Here, click on Install WordPress → Run Importer.
– Browse the XML file you want to import and click on Upload File, and then hit Import.
Using CSV Importer Plugin
– Install and activate the WP Ultimate CSV importer plugin.
– Browse and open the XML file of your post, page, or custom posts. The plugin supports many ways to upload the XML file.
– Choose the content type, map the XML fields, and configure the import settings.
– Finally, click on Import. Your XML file has been successfully imported into your WordPress site.
10. How do I create a file to import into WordPress?
You can create import files manually using text editors or export data from other systems in CSV or XML format.
11. What is an XML file in WordPress?
XML files are structured data files often used for exporting and importing content in WordPress. They contain data in a hierarchical format.
12. How do I download an XML file from WordPress?
You can download an XML file from WordPress in two ways.
With WordPress’s Built-in Export tool
– You can export content from WordPress into an XML file using the default export tool located in the Tools menu.
– Choose the content types you want to export and click the Download Export File button.
– The selected content type(posts, pages, or other) will be exported as an XML file and saved to your device’s downloads folder.
With WP Ultimate CSV Importer Plugin
– Install and activate this plugin on your WordPress.
– Access the plugin page and navigate to its Export tab.
– Choose the content type, such as posts, pages, or WooCommerce products.
– Provide the file name and choose the file type as XML.
– Configure any filters to extract selective data when exporting.
– Click on Export, then Download to download your WordPress data as an XML file.
Final Takeaway
Sample CSV & XML files act as ready-made templates to understand correct WordPress field structure, relationships, and formatting before running real imports. All sample files provided are tested with WP Ultimate CSV/XML Importer, ensuring accurate auto-mapping and reliable import results during trials. The samples cover real-world use cases, including posts, pages, users, WooCommerce data, custom fields, taxonomies, SEO fields, and third-party plugin integrations. Using sample files helps avoid common import errors, such as incorrect headers, encoding issues, or invalid data formats. If a sample file isn’t listed, you can easily create one by exporting a single record with the plugin and using it as a reusable import reference.
To learn how to import these sample files, follow the instructions we’ve discussed above or visit our WordPress Ultimate CSV/XML Importer documentation, and try it on our live demo.If you want a sample CSV or XML for any other use cases or if the plugin you use is not in the list of supported 3rd party add-ons of WordPress Ultimate CSV/XML Importer, you can write to us at support@smackcoders.com.
WP Ultimate CSV Importer Pro
Get Ultimate CSV/XML Importer to import data on WordPress faster, quicker and safer.
WP Ultimate CSV Importer Pro 8.12 — Easy Digital Downloads Plugin Support & Minor Bug Fixes
10 Jan 2026, 11:53 am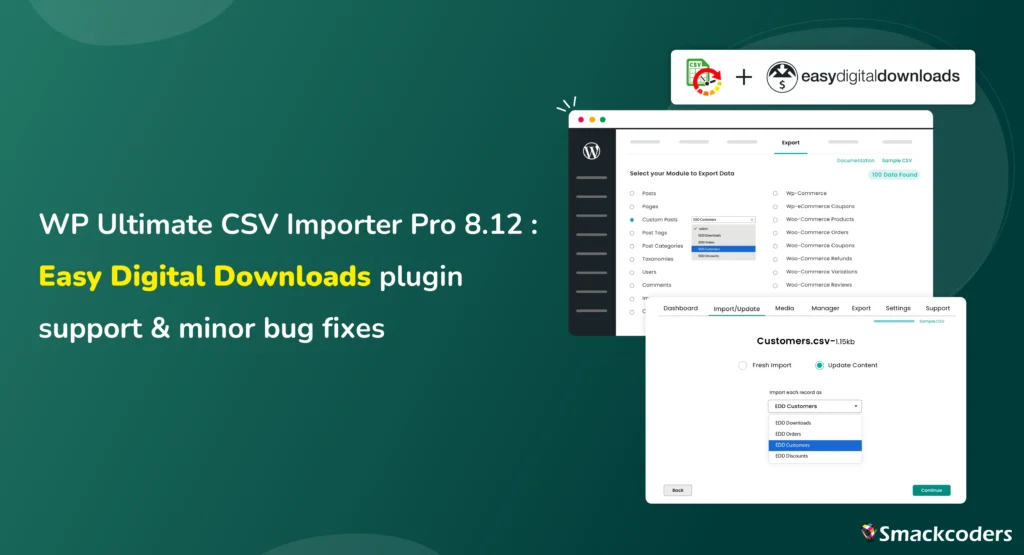
Table of Contents
Hi, Our Beloved User Community! WP Ultimate CSV Importer Pro 8.12 is now live. This release introduces support for Easy Digital Downloads (EDD) along with a set of important bug fixes and security improvements that make everyday import and export workflows more stable and reliable.
Version 8.12 focuses on two things that matter most to growing WordPress sites:
- Expanding support for real-world eCommerce use cases
- Improving reliability across commonly used features and integrations
If you work with digital products, recurring updates, or large datasets, and EDD is your go-to plugin, this release is designed to fit seamlessly into your existing workflow.
What’s New in WP Ultimate CSV Importer Pro 8.12
Easy Digital Downloads (EDD) Import & Export Support
With version 8.12, WP Ultimate CSV Importer officially adds support for Easy Digital Downloads, one of the most widely used solutions for selling digital products on WordPress.
This is a full integration, built on the same core import and export engine that existing users rely on for WooCommerce and other data types. There are no special workflows or reduced capabilities; EDD data follows the same structured, predictable process.
Easy Digital Downloads Support — Built for Digital Product Stores
Easy Digital Downloads powers thousands of businesses selling ebooks, plugins, licenses, and other downloadable products. Managing that data at scale often requires more than manual edits or one-off scripts.
With WP Ultimate CSV Importer, EDD users can now confidently import and export their store data using structured CSV workflows.
What You Can Import and Export with EDD Integration
The EDD integration supports key store data, including:
- Downloads (Digital Products)
Import or export product details such as pricing, variable pricing, downloadable files, categories, tags, featured images, limits, expiration rules, and custom metadata. - Orders (Payments)
Manage payment records with customer information, billing details, order totals, taxes, discounts, gateways, transaction IDs, and line items. - Customers
Import and export customer profiles with purchase history, lifetime value, addresses, and notes. - Discounts
Handle discount codes with usage limits, date restrictions, product or category rules, and status.
WP Ultimate CSV Importer Pro
Get Ultimate CSV/XML Importer to import data on WordPress faster, quicker and safer.
Why This Matters for EDD Users
For many Easy Digital Downloads store owners, bulk data management is still time-consuming and error-prone. Version 8.12 removes that friction.
With WP Ultimate CSV Importer Pro, you can:
- Migrate an entire EDD store between environments
- Bulk update product pricing, files, or categories without touching the database
- Rebuild stores safely using export → modify → re-import workflows
- Generate structured data exports for reporting or analysis
- Maintain backups of critical store data
All of this works within the same familiar import steps and field mapping system, no new learning curve required.
Bug Fixes & Stability Improvements
This release also includes several important fixes that improve stability, security, and usability across the plugin:
- Fixed the UK language (lang-UK) issue
- Fixed the Google Sheet URL file upload issue
- Fixed the Manage Media uploads button issue
- Fixed File Manager “Delete All Records” button not working issue
- Fixed the jQuery vulnerability issue
- Fixed WooCommerce product export issue
These fixes address commonly reported edge cases and ensure smoother operation for both new and existing users.
Who Benefits Most from This Release
Store Owners
If you run an Easy Digital Downloads store, this release gives you structured, repeatable control over your store data, without manual edits or risky database changes.
Agencies & Freelancers
For teams handling EDD migrations, rebuilds, or client onboarding, version 8.12 simplifies bulk data handling using a single, reliable tool.
Developers
Developers working with structured eCommerce data will benefit from consistent import behavior, improved attribute handling, and cleaner exports.
Operations & Content Teams
Teams managing pricing updates, product files, discounts, or customer records can now do this in bulk with fewer errors and less effort.
Familiar Workflow, No Disruption
One of the key goals of version 8.12 was consistency. If you already use WP Ultimate CSV Importer Pro,
- The import steps remain unchanged
- Field mapping works exactly as before
- Filters, duplicate handling, logs, and scheduling behave the same
- The EDD modules appear automatically when the plugin is active
You can start using the new functionality immediately, with no retraining or setup overhead.
Documentation & Getting Started
Comprehensive documentation for the Easy Digital Downloads integration is now available, covering each module:
- Downloads Import Export
- Orders (Payments) Import Export
- Customers Import Export
- Discounts Import Export
These guides are designed to help users get started quickly, especially when working with large datasets.
How to Get WP Ultimate CSV Importer Pro 8.12
If you’re already using WP Ultimate CSV Importer Pro, visit your account on our website, log in, and download the pack. Delete the old one, install and activate the newer one on your website. Once updated, EDD options will appear automatically when the Easy Digital Downloads plugin is active.
Final Thoughts
WP Ultimate CSV Importer Pro 8.12 is a focused release to build and strengthen support for digital product businesses while improving overall stability and security. By adding Easy Digital Downloads support and addressing key issues, this version helps WordPress users manage their data with more confidence, whether they’re migrating stores, maintaining large catalogs, or handling ongoing updates. As always, your feedback continues to guide what we build next. Write to us at support@smackcoders.com, and we are all ears for your feedback.
Frequently Asked Questions
1. Does WP Ultimate CSV Importer Pro support Easy Digital Downloads?
Yes. From version 8.12 onwards, WP Ultimate CSV Importer Pro supports Easy Digital Downloads. This release introduces initial support for core EDD data, laying the foundation for broader compatibility.
2. What EDD data can I import and export using WP Ultimate CSV Importer?
You can import and export:
– Digital products (downloads)
– Orders and payment records
– Customers and purchase history
– Discount codes with rules and limits
All data follows the same mapping and validation process used across the plugin.
3. Can I migrate an entire Easy Digital Downloads store using CSV Importer Pro?
Yes. You can migrate EDD products, customers, orders, and discounts between sites or environments using export → modify → import workflows, without directly touching the database.
4. Will this update affect my existing WooCommerce imports?
No. Existing WooCommerce functionality remains unchanged. Version 8.12 only adds EDD support and fixes specific issues without disrupting current workflows.
WooCommerce Variable Pricing Calculator – Sell by Area, Volume, or Length
3 Jan 2026, 5:06 am
Table of Contents
Ever tried selling something online that doesn’t fit standard sizes? Yeah. Think carpets, fabric, tiles, wood planks. Traditional WooCommerce pricing? Not built for this. Messy. Confusing. Customers get lost.
Enter the WooCommerce Variable Pricing Calculator. Simple. Powerful. Makes measurement-based pricing easy. Fast. Accurate. Customers love it.
We’ll break it down. Why it matters. How to use it. Even some SEO tips and GEO optimization for stores in Europe, North America, or anywhere else where units differ.
What is the WooCommerce Variable Pricing Calculator?
The plugin calculates prices based on customer measurements. Not fixed prices. Not vague ranges. Real numbers. Real-time. It’s perfect for items sold by area, volume, or length.
Main perks:
- Multiple Measurement Types: Length, area, volume, custom dimensions.
- Variation Control: Each product can have unique rules.
- Pricing Rules: Minimums, maximums, increments, discounts, tables.
- Stock Management: Auto-reduces stock based on actual quantity.
- Easy Setup: No coding. No formulas. Simple menus.
Think of it as your silent assistant. Behind the scenes, doing the math. So, you don’t have to.
Why You Need This Plugin
Selling measurement-based products online is tricky. Here’s why:
- Accuracy Matters
Customers want exact pricing. Not guesses. Not approximations. A customer buying 15.5 sq m of tiles wants that price now. Not tomorrow. - Speed and Transparency
Shoppers hate waiting. With this plugin, prices update instantly. They see what they’ll pay. No support tickets. No emails. - Better Sales
Flexible pricing encourages purchases. Customers buy exactly what they need. Big orders, small orders—it works. - Reduce Errors
Manual math is messy. Mistakes happen. This plugin handles calculations automatically. Stock is accurate. Prices are right. Always. - SEO Advantage
Serving multiple countries? Metric, imperial, or both. Customers see units they understand. Makes shopping easier. Converts better.
WP Ultimate CSV Importer Pro
Get Ultimate CSV/XML Importer to import data on WordPress faster, quicker and safer.
How the Plugin Works: Step-by-Step Guide
Let’s make this practical. Step by step.
1. Install and Activate
- Go to WooCommerce → Plugins → Add New.
- Search for “WooCommerce Variable Pricing Calculator.”
- Install. Activate. Done.
A new Pricing Calculator tab appears in product pages. Easy.
2. Configure Measurement Types
- Open your product.
- Select measurement type: length, area, volume, custom.
- Pick units: meters, feet, square meters, square feet, cubic meters, cubic feet.
Tip: For SEO-targeted stores, show metric in EU, imperial in US. Simple.
3. Set Pricing Rules
- Minimum and Maximum Measurements: Avoid weird orders.
- Increment Steps: Sell in chunks (0.5m, 1 sq ft, etc.)
- Pricing Tables: Bulk discounts. Starting rates. Dynamic pricing.
- Limit Quantity: Keep stock in check.
Pricing rules feel alive. Not rigid. Customers see fair prices every time.
4. Manage Stock
- Automatic stock reduction. Real quantities, not units.
- Example: 3.7 cubic meters of gravel? Stock drops exactly that. No rounding errors.
Stock stays clean. You stay sane.
5. Optimize Product Pages
- Only show necessary fields: width, height, length, area, volume.
- Real-time price updates. Customers love it.
- Clean, simple design. No formulas, no clutter.
Trust me. Customers convert faster when it’s easy.
6. Test Before Launch
- Add sample products.
- Try different measurements.
- Check stock reduction.
- Test metric and imperial units.
Small step, huge difference.
Real-Life Use Cases
Here’s where this plugin shines:
- Tiles: Sell by area (sq m or sq ft). Customer measures their floor. Plugin calculates price instantly. No confusion.
- Carpets & Fabric: Sell by length. One customer wants 3.2 meters. Another wants 5.5 meters. All handled automatically.
- Wood Planks & Metal Rods: Linear measurement. Cut lengths vary. Pricing changes instantly. Stock reduces precisely.
- Soil, Gravel, Foam Blocks: Volume-based pricing. Cubic meters or cubic feet. Customers order exact quantities. Less waste.
- Glass or Countertops: Custom width × height. Perfect for builders, renovators, and DIYers.
SEO tip: Show local units and format decimals based on region. Customers notice. They appreciate it.
WP Ultimate CSV Importer Pro
Get Ultimate CSV/XML Importer to import data on WordPress faster, quicker and safer.
Case Studies
Case 1:
A German store sells kitchen tiles. Customers input room dimensions in meters. Plugin calculates square meters, converts to boxes, and applies a bulk discount. Customer sees exact cost instantly. Sales spike. Support tickets drop.
Case 2:
A US store sells custom curtains. Customers choose length in feet. Plugin updates price live. Minimum order rules prevent tiny scraps. Result? Less wasted material, happier customers, repeat orders.
Case 3:
Landscape supplier sells gravel by cubic meter. Orders can be large. Plugin automatically adjusts stock. Shipping rules apply based on volume. Store owner saves hours weekly. Customers get precise prices fast.
Advanced SEO Optimization Tips
- Units by Location
Metric in Europe, imperial in US/UK. WooCommerce geolocation helps. Customers see what makes sense. - Currency Formatting
Dynamic pricing in local currency: EUR, USD, CAD, GBP. Keeps it consistent. - SEO Keywords
- “Buy tiles by square meter in Germany”
- “Order wood planks by linear feet in the US”
- “Shop fabric by yard in Canada”
- Shipping Calculations
Combine measurement-based pricing with region-specific shipping rules. Gravel and large items need this.
Benefits of Using the WooCommerce Variable Pricing Calculator
- Boost Customer Trust
Instant, accurate pricing. Customers feel in control. They see what they pay. No surprises. GEO-targeted units and currencies build trust.
- Save Time
Manual quotes? Gone. Math errors? Gone. Focus on other tasks. Marketing, customer service, expanding your store. Plugin handles the math.
- Increase Sales
Flexible pricing makes exact orders easier. Bigger orders. Smaller orders. Customers happy. More conversions. Repeat sales.
- SEO-Friendly
Metric or imperial units. Currency formatting. Localized shopping experience. Customers feel comfortable. Google notices.
- Reduced Errors & Simplified Management
Automatic validation. Stock updated in real-time. Pricing rules applied consistently. Less headaches. Smooth operations.
- Scalable for Growing Stores
One product or 1,000, it scales. Each variation has unique rules. GEO targeting is easy. Expand to new regions smoothly.
- Better Customer Experience
Instant pricing. Accurate calculations. Flexible order sizes. Customers feel understood without talking to support. Loyalty grows. Repeat orders happen.
Troubleshooting & Tips
- Price Not Updating? Check measurement type and units. Plugin might be set to default variation.
- Stock Misalignment? Make sure stock is defined per variation, not globally.
- Complex Formulas Needed? Use the pricing table option. No coding required.
- Multiple Units? Enable both metric and imperial in plugin settings. GEO-targeting automatically shows the right one.
These small fixes prevent most headaches.
Conclusion
Selling products by area, volume, or length? Hard without the right tool. The WooCommerce Variable Pricing Calculator fixes it. Instantly. Accurately. Automatically. It:
- Handles variations.
- Applies rules.
- Manages stock.
- Updates prices in real-time.
SEO-optimized stores win. Customers trust the numbers. They return. Repeat sales happen. Small plugin. Big impact. Selling complex measurements? Done. Easy. Whether you sell tiles in Germany, wood planks in the US, or fabric in Canada, the plugin ensures your customers get exactly what they need, instantly and accurately.
Best WooCommerce Plugins to Manage Your eCommerce Store in 2026
22 Dec 2025, 5:06 am
Table of Contents
Looking for the best plugins for your WooCommerce store? You’re in the right place.
WooCommerce is a powerful platform to launch an online store, but staying ahead in the competitive eCommerce space isn’t easy. From managing orders and packaging to handling refunds, payments, and returns, there’s a lot on your plate. Sounds like a lot of work, doesn’t it?
To make things easier, we’ve curated a list of 15+ must-have WordPress plugins to help you run your WooCommerce store more efficiently. These tools cover everything from inventory management and payments to compliance, promotions, and marketing.
Without further ado, let’s jump in.
1. Product Import Export for WooCommerce
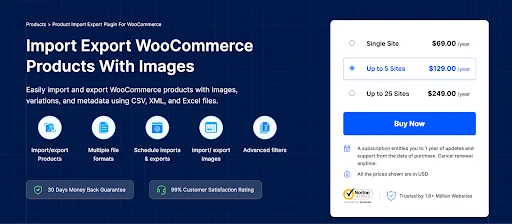
The WooCommerce Product Export plugin makes it incredibly easy to move products in and out of your store without the usual spreadsheet headaches. Whether you’re bulk updating prices, uploading new inventory, or migrating data from another store, this product import export plugin handles it all with a smooth, user-friendly experience. It supports simple, variable, grouped, and even custom product types, so you don’t have to worry about breaking things when your catalog gets more complex.
You can import or export everything from product titles and descriptions to images, metadata, stock levels, and categories. What makes it especially helpful is the flexibility to map fields to match your store’s structure. This is a big time-saver if you’re working with supplier data or switching platforms. Plus, with powerful filters and scheduling options, store owners can keep product data in sync automatically, without constant manual work. It’s a must-have tool for stores with large inventories or frequent product updates.
2. Checkout Field Editor for WooCommerce

WooCommerce Checkout Field Editor & Manager lets you shape your checkout page exactly the way you need it, without touching a line of code. It’s built with a drag-and-drop interface that makes rearranging, editing, or hiding WooCommerce’s default billing, shipping, and order fields feel intuitive and fast.
You can also add new custom fields, such as text, email, phone, select, radio, date picker, and many more (over 20 types in all), so your checkout can gather exactly the customer info you need, whether it’s delivery instructions, VAT numbers, or custom notes. For store owners dealing with B2B/B2C or complex product setups, the plugin offers conditional logic so fields only appear when relevant, a neat way to keep checkout tidy and reduce friction.
Additional features include built-in validation (email, phone, numeric limits), multilingual compatibility via WPML/Polylang/Loco Translate, and control over whether each field appears in emails or order details.
3. Smart Coupons for WooCommerce
Smart Coupons for WooCommerce makes managing discounts and promotions a breeze without complex configurations or extra extensions. Imagine creating bulk gift vouchers, store credits, BOGO deals, or discount coupons in one place. This plugin handles all those effortlessly.
You can issue store credit that customers can apply over multiple orders, or hand out unique digital gift certificates via email. It also lets you bulk-create coupon codes with custom prefixes, limits, and date ranges for seasonal campaigns or segmented customer groups. For WooCommerce store owners, Smart Coupons means saving time while giving you precise control over promotions. It’s especially helpful when you want to boost average order value, encourage repeat business, or reward loyal customers.
4. Salesforce CRM Integration for WooCommerce
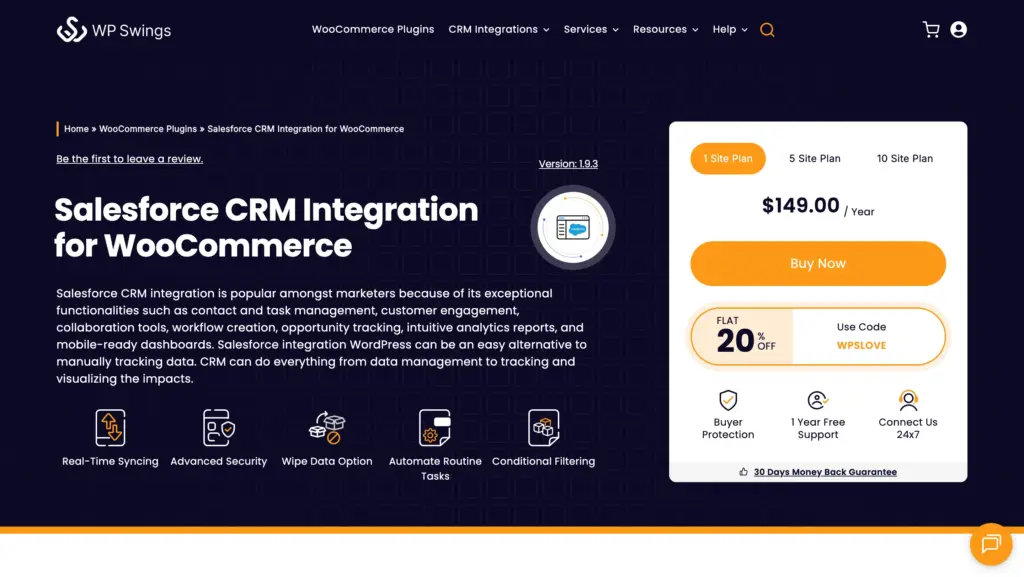
Salesforce CRM Integration for WooCommerce plugin helps you automatically sync your store data with Salesforce. It allows you to transfer important WooCommerce data such as customers, products, orders, reviews, coupons, and inventory details directly into your CRM, keeping your sales and marketing teams updated in real time.
The plugin supports two-way product synchronization, so you can create or delete products from either WooCommerce or Salesforce while keeping both systems aligned. It also lets you control sync behavior, including filtering records based on specific timeframes. In addition, abandoned cart details can be pushed into Salesforce as leads, helping businesses follow up with potential customers and improve conversion rates.
It is compatible with popular extensions like Advanced Custom Fields (ACF), WooCommerce Memberships, Affiliate Manager, and Subscriptions, making it suitable for stores running advanced or custom WooCommerce setups.
5. Accessibility Tool Kit

Accessibility Tool Kit is a WordPress plugin that helps your site meet accessibility standards like WCAG 2.1, Section 508, and ARIA guidelines. It identifies common issues—such as missing labels, incorrect heading structure, or keyboard-navigation problems—and helps you fix them.
It also enhances the browsing experience for users with disabilities by improving screen-reader markup, keyboard accessibility, link and form usability, and overall content readability.
To further support developers and testers, WebYes offers a free Accessibility Checker Chrome Extension that enables fast, WCAG-based accessibility checks on any webpage. It identifies common issues like missing alt text, incorrect heading structure, and insufficient color contrast, while allowing real-time element inspection, alt text review, focus order visualization, and testing across both desktop and mobile views. This lightweight, privacy-friendly tool helps teams quickly evaluate accessibility and stay aligned with WCAG, ADA, and EAA compliance goals.
6. WooCommerce Marketing Automation
This Ecommerce Marketing Automation App helps store owners run smarter marketing right from within WooCommerce. What’s really helpful is the ability to send fully customizable email templates based on shopper behavior. You can also schedule drip campaigns, create sign-up forms, and various popups such as exit intent popups, cart abandonment popups, and more. For WooCommerce store owners, this app reduces manual follow-up and keeps customers engaged without spending extra time. It’s a practical and efficient way to nurture leads and drive higher repeat sales.
You can automate WooCommerce Marketing emails triggered by key customer actions, like abandoned carts, product purchases, and win-back emails after periods of inactivity. The friendly campaign builder walks you through setting up triggers, rules, and messages in minutes.
7. WP Ultimate CSV Importer PRO – For WooCommerce Import Export

WP Ultimate CSV Importer is a WordPress import export plugin that offers a complete set of features you need to import and export WordPress data. For WooCommerce, it provides everything to import and export WooCommerce products (including simple, grouped, variable, external/affiliate), along with reviews, categories, tags, coupons, orders, refunds and other related data as CSV, XML, Excel, Google Sheet, and TSV formats.
This plugin supports large files and works well with many custom field plugins. If you use meta fields for your products, it will be easier for you to import, update, or export their data. The built-in AI integration with platforms like ChatGPT, Gemini, and Claude makes it easy for you to generate product descriptions and images during the time of import, which is useful when managing large catalogs.
You can update inventory regularly by connecting a Google sheet that contains all product and stock details and configuring schedule updates option to run at any intervals. This helps keep your store updated and ready for customers.
If you are running a multilingual online store, the plugin makes it easier to import product data in multiple languages. It works smoothly with WooCommerce stores built using plugins like WPML or Polylang. Overall, it’s perfect for store migrations and for websites with large or complex inventories, and doing frequent updates.
WP Ultimate CSV Importer Pro
Get Ultimate CSV/XML Importer to import data on WordPress faster, quicker and safer.
8. PDF Invoices and Packing Slips for WooCommerce
WooCommerce PDF Invoices and Packing Slips plugin generates ready-to-download invoices, packing slips, and credit notes automatically for every order. With its in-built templates and customization options, store managers can add their logo, business details, and terms in PDF format—instantly available through the order confirmation emails and the customer account area.
Invoices and slips can be customized as per your requirements. The auto-numbering ensures each document remains organized and compliant. The plugin supports bulk PDF export, making it simple to download multiple invoices or packing lists at once for accounting or batch shipments. Additionally, it lets store owners include personalized notes, conditional content, and attach invoice PDFs to emails as needed.
For WooCommerce store operators who need a professional, streamlined approach to documentation, this WooCommerce invoice plugin cuts out manual formatting and ensures customers get consistent, on-brand invoices and delivery paperwork every time.
9. Dokan

Dokan turns a WooCommerce store into a full-fledged multi-vendor marketplace, allowing multiple sellers to register, manage their own products, and sell through your platform. Vendors get individual dashboards to track orders, earnings, and inventory, while store admins maintain full control over commissions, vendor approvals, and site-wide policies.
It supports digital and physical products, variable pricing, and even subscription-based selling. From a customer perspective, it’s a seamless marketplace experience; from an admin’s view, it’s a scalable solution that opens up new revenue streams. Ideal for entrepreneurs building Etsy-style marketplaces, Dokan removes the heavy lifting typically involved in running multi-vendor setups.
10. GDPR Cookie Consent

GDPR Cookie Consent simplifies compliance by handling cookie declarations and consent management automatically. The plugin scans your WordPress site to identify all cookies in use, covering essential, analytics, and marketing categories, and then displays a customizable banner to collect consent from visitors.
This WordPress cookie consent plugin prevents non-essential cookies from loading until consent is given, ensuring a clean opt-in process. Store owners can customize the look and wording of the consent banner, choose banner position, themes, button styles, and configure consent behavior (explicit or implied) based on regional legal standards. It also comes with multi-language support, integration with popular consent logs, and the ability to generate Cookie Policy pages tailored to WooCommerce needs.
Automatic cookie scanning keeps the policy up to date, and consent records are maintained for audit purposes. For store operators concerned about legal compliance and user trust, this plugin offers a reliable, hands-free solution that aligns with GDPR requirements.
11. WPLoyalty – Loyalty & Rewards Plugin
WPLoyalty is a WooCommerce loyalty and rewards plugin built to help store owners increase repeat purchases, customer loyalty, and lifetime value—without relying on constant discounts. It lets you reward customers with points, referrals, and incentives that keep them coming back automatically.
With WPLoyalty, you can launch powerful loyalty campaigns like points for purchases, referrals, reviews, birthdays, and social sharing in minutes. The plugin is easy to set up, works with any WooCommerce theme, and gives you full control over rewards, branding, and customer data no developer or complex setup required.Whether you run a single store or manage multiple client sites, WPLoyalty grows with your business. Turn every order into an opportunity for retention and long-term growth. Explore the Live demo to see how WPLoyalty works in real time and how it can boost repeat sales for your store.
12. Yoast SEO
Yoast SEO is the go-to plugin for optimizing WordPress and WooCommerce stores for search engines without needing to be an SEO expert. It helps store owners craft better product titles, meta descriptions, and schema markup to stand out in search results.
The real-time content analysis guides you on keyword usage, readability, and internal linking as you write—so you’re not guessing what works. For WooCommerce users, it adds support for product-specific SEO fields and helps build clean sitemaps that Google loves. It even integrates with breadcrumbs and Open Graph data for social sharing. Whether you’re running a small shop or a growing catalog, Yoast makes SEO approachable and effective, directly from your WordPress dashboard.
13. WebToffee WooCommerce Product Recommendations
This WooCommerce Product Recommendations plugin helps increase average order value by showing the right products to the right shoppers at the right time. It lets you display dynamic product recommendations like “frequently bought together,” “customers also bought,” or “related items” on product, cart, or checkout pages, without writing custom code.
The rules-based engine in this recommendations plugin gives you control over what appears and when, so you can cross-sell or upsell based on specific products, categories, or cart conditions. It’s especially useful for stores with a large catalog where shoppers might need a nudge to explore more. With this plugin, WooCommerce store owners can create a more personalized shopping experience and gently guide customers toward higher-value purchases.
14. YITH WooCommerce Wishlist

YITH WooCommerce Wishlist makes it easy for customers to save their favorite products for later—which means fewer lost sales and better customer engagement. Once installed, it adds a wishlist button to your product pages, allowing visitors to bookmark items they’re interested in without committing right away.
Shoppers can create and manage multiple wishlists, share them with friends, or use them as reminders for future purchases. For store owners, this opens up powerful marketing opportunities, like sending personalized emails when a wishlisted item drops in price or goes out of stock. It’s a simple, lightweight way to keep your products top-of-mind and bring users back when they’re ready to buy.
WP Ultimate CSV Importer Pro
Get Ultimate CSV/XML Importer to import data on WordPress faster, quicker and safer.
15. Sequential Order Numbers for WooCommerce
This custom order number plugin brings clarity to your WooCommerce store by replacing random order IDs with a simple, sequential format that’s easier to track. Clear numbering helps both store owners and customers reference orders with less confusion during support or fulfillment.
You can build structured order formats using letters, numbers, dates, or other fields to match your workflow. The plugin lets you apply sequences to new orders, update existing ones, and set rules for how the numbering progresses including custom starting points and reset schedules (daily, monthly, or yearly).
Additional features of sequential order number plugin include applying new numbering rules to past orders, adding prefixes or suffixes, and creating order structures that improve overall record-keeping.
16. Customer Reviews for WooCommerce

Customer Reviews for WooCommerce encourages buyers to leave detailed feedback by making the review process smoother and more engaging. It automates post-purchase review reminders and adds features like photo uploads, ratings filters, and review voting to build trust and credibility across your store.
What makes it really useful is the option to offer discount coupons in exchange for reviews, helping you collect more social proof without manual follow-up. The plugin supports rich snippets so your product ratings show up in Google search results, which can increase clicks and conversions. If you’re serious about growing with user-generated content, this plugin helps turn your customers into advocates.
17. WooCommerce Product Feed
Product Feed for WooCommerce makes it easy to list your products on major sales and advertising platforms. It generates optimized feeds for Google Shopping, Meta, Pinterest, TikTok, and other marketplaces.
Powerful filtering and attribute-mapping tools let you control which products appear in each feed and how their data is displayed. Scheduled updates keep your listings accurate as prices or stock levels change.
With support for multiple feeds at once, the WooCommerce Product Feed plugin saves time for stores managing several channels and helps improve visibility and performance across your marketing efforts.
18. MailPoet

MailPoet brings email marketing into WordPress and WooCommerce, letting you design and send newsletters, abandoned cart emails, and product promotions directly from your dashboard. With its drag-and-drop editor and WooCommerce blocks, it’s easy to create emails that showcase your products and reflect your brand.
Subscriber management, automated welcome emails, and list segmentation are built-in, making it suitable for stores that want to nurture leads without relying on external tools. You can set up triggered emails based on user actions like purchases or signups. For small to medium stores looking to stay in touch with customers and boost repeat sales, it offers a convenient, all-in-one email solution.
WP Ultimate CSV Importer Pro
Get Ultimate CSV/XML Importer to import data on WordPress faster, quicker and safer.
19. WooCommerce Gift Cards

WooCommerce Gift Cards lets stores offer digital gift cards that customers can purchase and send by email. Shoppers can choose an amount, add a personal message, and schedule delivery.
Gift cards can be redeemed at checkout, making them useful for gifting or store credit. Store owners get full management tools to track balances, expiration dates, and usage history.
The gift card plugin integrates seamlessly with product pages, allowing gift cards to function like regular products and helping stores drive repeat business and attract new customers.
20. Variation Swatches for WooCommerce

Variation Swatches for WooCommerce replaces standard dropdowns with visually engaging swatches for color, size, pattern, and more. Instead of picking from a text list, customers can select options using clickable images or color buttons, making the experience faster and more intuitive.
It works with variable products and updates product galleries based on selections, giving shoppers a clearer view of what they’re buying. You can also add tooltips, out-of-stock indicators, and custom styling to match your theme. For fashion, accessories, or any store with multiple product variations, this plugin helps reduce decision fatigue and makes browsing feel more interactive and user-friendly.
21. Mollie Payments for WooCommerce

Mollie Payments for WooCommerce provides a hassle-free way to accept payments through major cards, wallets, and local methods like iDEAL, Bancontact, and Klarna. The plugin integrates cleanly with WooCommerce and doesn’t require coding to get started. It’s designed for fast onboarding and supports recurring payments, refunds, and multilingual checkout, all while ensuring compliance with European payment regulations.
What makes it stand out is the wide range of region-specific payment methods, which is especially helpful for stores selling across Europe. With Mollie, WooCommerce stores can offer a frictionless checkout experience while handling payouts and transactions from a single dashboard.
Conclusion
The plugins we’ve covered here are all designed to simplify your workload and improve the customer experience at different touchpoints of the buying journey. Whether you’re looking to boost sales, manage operations more effectively, or stay on top of legal requirements, there’s a solution out there that fits your needs.
Take the time to explore and experiment with the ones that align best with your goals. A few smart additions to your WooCommerce setup can go a long way in making your store run more smoothly and profitably.
How to Import CSV Files in WordPress Without a Plugin in 2026
18 Dec 2025, 12:11 pm
Table of Contents
You can import CSV files into WordPress without using any plugins. This is done by uploading the CSV file to your server and importing the data directly into the WordPress database using phpMyAdmin, WP-CLI, or custom PHP scripts. This method gives you full control over performance, data validation, and security, making it ideal for importing large datasets, users, custom post types, and WooCommerce products efficiently.
When and Why to Import CSVs Without Plugins
Importing CSV data programmatically instead of using a plugin can be appropriate in specific situations where direct control over the import process is required.
When to use this method:
- Reducing Dependency on Plugins:
This approach avoids adding third-party plugins to the site, which can be useful in environments where plugin usage is restricted or tightly controlled. - Granular Control Over Data Mapping:
Programmatic imports allow precise handling of fields, making it easier to import custom post types, user meta, taxonomy terms, or custom fields exactly as needed. - Data Validation and Sanitization:
Handling the import in code makes it possible to validate CSV values, sanitize inputs, and enforce data rules before writing anything to the database. - Performance Management for Large Imports:
Custom scripts can be optimized to process records in batches, helping manage memory usage and execution time during large imports.
When Not to Use This Method
- For One-Time or Small Imports:
Writing custom import logic may take more time than using an established plugin for simple or infrequent imports. - If You’re Not Comfortable with PHP or Databases:
Manual imports require knowledge of WordPress internals, SQL, and PHP. Mistakes can lead to data corruption if not handled carefully. - When Ongoing Maintenance Is a Concern:
Custom import scripts need to be maintained and updated as WordPress, themes, or database structures change. - If a Reliable Plugin Already Meets the Requirement:
For common use cases (e.g., basic post or product imports), mature plugins may offer a safer and faster solution.
Updated Prerequisites
Before importing your CSV files into WordPress, ensure the following prerequisites are met:
- WordPress Version: WordPress 6.6 or newer
- PHP Version: PHP 8.1 or later (recommended for performance and compatibility)
- CSV File Format: UTF-8 encoded and properly structured
- WP-CLI (Optional): Installed if you plan to automate or script CSV imports
Methods to Import CSV Files into WordPress Without a Plugin
You can import CSV data into WordPress without plugins by using a custom PHP script, WP-CLI, or by converting CSV to JSON and importing it programmatically. These approaches rely on WordPress core APIs and are suitable for developers who need full control over the import process.
1. Import CSV Using a Custom Script
- Write a PHP script that reads the CSV file
- Use WordPress functions like wp_insert_post() and update_post_meta()
- Best for custom logic, validation, and complex mappings
- Can be run once or reused for migrations
2. Import CSV Using WP-CLI
- Convert CSV rows into posts via command-line commands
- Faster and more memory-efficient than browser-based scripts
- Ideal for large datasets and automation
- Commonly used in staging and production pipelines
3. Import CSV Using JSON
- Convert CSV to JSON first
- Import data using the WordPress REST API or a PHP script
- Useful when integrating with external systems or headless setups
- Adds flexibility but introduces an extra transformation step
Comparison of Import Methods
| Method | Skill | Performance | Best Use Case | Automation |
| Custom PHP Script | Medium | Medium | Custom logic and field mapping | Limited |
| WP-CLI | Advanced | High | Large imports and repeatable workflows | High |
| CSV → JSON | Medium | Medium | API-based or external system imports | Medium |
Steps for Importing CSV to WordPress Without a Plugin
Import CSV Using Custom Script:
Step 1: Prepare Your CSV File
Start by ensuring that your CSV file is correctly formatted (columns and rows match WordPress fields). It’s important to clean the data (remove extra spaces, check for missing headers).
- The first row should contain column headers, such as post_title, post_content, post_status, etc.
- Ensure the file is UTF-8 encoded to avoid any encoding issues.
- Double-check that no special characters or extra spaces are present.
2. Create a Custom Script
To handle the CSV import process, you need to create a custom PHP script. This ensures you have complete control over the data and can sanitize inputs as necessary. Here’s how to begin:
 // Get upload directory

 $upload_dir = wp_upload_dir();

 $csv_file = $upload_dir[‘basedir’] . ‘/posts.csv’;
3. Read the CSV Data Securely
Next, open the CSV file and start reading its contents. Ensure that all data is sanitized before being inserted into WordPress.
  if (($handle = fopen($csv_file, "r")) !== FALSE) {

    $header = fgetcsv($handle);  // Read the header

    while (($row = fgetcsv($handle)) !== FALSE) {

        $data = array_combine($header, $row); // Combine headers with row data

        // Sanitize and validate inputs

        $title = sanitize_text_field($data['post_title']);

        $content = wp_kses_post($data['post_content']);

        try {

            wp_insert_post([

                'post_title'   => $title,

                'post_content' => $content,

                'post_status'  => 'publish',

                'post_type'    => 'post'

            ]);

        } catch (Exception $e) {

            error_log('CSV Import Error: ' . $e->getMessage());

        }

    }

    fclose($handle);

  }
This method uses input sanitization (like sanitize_text_field() and wp_kses_post()) to ensure that no harmful scripts are inserted into your WordPress posts. It’s important to handle these inputs carefully, especially if you’re dealing with user imports or WooCommerce products.
WP Ultimate CSV Importer Pro
Get Ultimate CSV/XML Importer to import data on WordPress faster, quicker and safer.
WP-CLI for Advanced Users
If you prefer working in the command line, WP-CLI offers powerful tools for CSV imports. Here’s a basic WP-CLI user import command:
wp user import-csv users.csv
For custom post types or complex imports, you might write a script and execute it via WP-CLI:
wp eval-file import-posts.php
Using WP-CLI allows you to avoid timeouts and memory errors when importing large CSV files. Here’s how you can use WP-CLI to import custom post types:
Step 1: Install WP CLI (If Not Installed)
You can install WP CLI by following the installation instructions on WP-CLI’s official site. If you’re using cPanel, Plesk, or another hosting environment, WP-CLI might already be installed.
Step 2: Prepare Your Data (CSV, JSON, etc.)
You can import your data using CSV or JSON formats. For this example, let’s assume you’re using a CSV file containing your CPT data.
Step 3: Import Custom Post Types via WP CLI
You can use the wp post create or wp post import commands in WP CLI. Here’s a detailed process:
Navigate to Your WordPress Directory:
Open your terminal and navigate to the root of your WordPress installation.
cd /path/to/your/wordpress
Import Using wp post create:
- If you have a simple CSV and want to create posts individually, you can loop through the CSV and use the wp post create command.
For example: wp post create –post_type=”your_cpt” –post_title=”Your Post Title” –post_content=”Content for the CPT” –post_status=”publish”
- To automate this, you can use a script that reads the CSV and executes this command for each row.
Example Script (Bash with CSV Import):
Assuming you have a CSV file with post titles and content, you can use a bash script to import posts:
  #!/bin/bash

  while IFS=, read -r post_title post_content

  do

  wp post create –post_type=”your_cpt” –post_title=”$post_title” –post_content=”$post_content” –  post_status=”publish”

  done < posts.csv
This script creates a custom post for each row as it reads from posts.csv.
Import Using JSON (Advanced):
If your data is in JSON format, you can use WP CLI’s wp post import functionality (though you’ll need to install the required package).
You can create a JSON file like this:
 [

   {

     "post_title": "Post 1",

     "post_content": "Content for Post 1",

     "post_type": "your_cpt"

  },

   {

     "post_title": "Post 2",

     "post_content": "Content for Post 2",

     "post_type": "your_cpt"

   }

 ]
Then use the following command to import:
wp post import posts.json –post_type=”your_cpt”
Importing Different Data Types Without a Plugin
Importing Custom Post Types without a Plugin
To import Custom Post Types (CPTs) into WordPress without using a plugin, you can use the native WordPress import/export functionality, or you can manually import them using SQL queries or through WP-CLI. Here’s a detailed guide on each method:
1. Import Custom Post Types using WordPress Export/Import Feature
WordPress has a built-in export and import feature that allows you to export content, including posts, pages, and custom post types. This is a relatively easy method, but it only works if your custom post types are set up correctly, and you want to import the content as posts.
Steps to Export Custom Post Types:
- On the WordPress Dashboard, navigate to Tools -> Export in your WordPress dashboard.
- Choose the Post Type to Export:
- You can choose the specific Custom Post Type (CPT) you want to export or Select All content.
- Download the Export File:
- Click “Download Export File,” and it will generate an XML file (WXR format) containing the posts of the selected custom post type.
Steps to Import Custom Post Types:
- On the WordPress Dashboard, navigate to Tools -> Import in your WordPress dashboard.
- Install the WordPress Importer
- If the importer is not already installed, click “Install Now” under the “WordPress” option.
- Upload the Exported File:
- Choose the XML file you exported previously and upload it.
- Assign Authors:
- During the import process, WordPress will ask if you want to assign authors or create new users.
- Import Attachments:
- Make sure to check the option to download and import file attachments if needed.
While this method works for the basic transfer of posts and CPTs, it doesn’t handle custom fields, taxonomies, or post meta.
Note: WordPress exports data only as WXR (XML).While the XML may contain metadata and taxonomies, WordPress does not provide them in CSV form, nor does it offer granular control over how they are exported.
WP Ultimate CSV Importer Pro
Get Ultimate CSV/XML Importer to import data on WordPress faster, quicker and safer.
Import Custom Post Types Using WP-CLI
WP-CLI is the most efficient way to import Custom Post Types (CPTs) into WordPress without plugins. It’s fast, scalable, and SEO-friendly for large content migrations.
- High-performance (no browser limits)
- Scriptable and repeatable
- Uses WordPress core APIs (safe for SEO data
Quick Method: Import CPTs from CSV
CSV → WP-CLI → CPTs
wp eval-file import-cpt.php
Minimal import logic:
- Read CSV rows
- Sanitize data
- Create CPTs with wp_insert_post()
Supports:
- Custom post types
- Custom fields (post meta / ACF)
- Taxonomies
Import Custom Post Types Manually via SQL
Advanced / Not Recommended for Most Users
Directly importing Custom Post Types (CPTs) via SQL is an advanced technique intended for developers with strong knowledge of WordPress’s database structure. While it can be useful for very large or highly customized imports, it bypasses WordPress core APIs, which increases the risk of data corruption, broken relationships, and missing metadata.
Reminder: Always back up your database before attempting this method.
When This Approach Makes Sense
- You need to import tens of thousands of records
- You are migrating from a non-WordPress system
- WordPress import tools or plugins are too slow or limited
- You fully understand WordPress database relationships
For most cases, WP-CLI or import plugins are strongly preferred.
Concept Overview (How It Works)
WordPress stores content across multiple database tables. A manual SQL import typically involves:
- wp_posts – Main post data (title, content, post type, status, dates)
- wp_postmeta – Custom fields (meta keys and values)
- wp_terms, wp_term_taxonomy, wp_term_relationships – Categories, tags, and custom taxonomies
When inserting data manually, you must maintain the correct relationships between these tables.
Steps to import CPT using SQL
Step 1: Prepare Your CSV Data
Create a CSV file that includes all required fields for your CPT, such as:
- post_title
- post_content
- post_type
- post_status
- post_date
- Custom field values
- Taxonomy identifiers (term IDs or slugs)
This CSV acts as your source of truth for the import.
Step 2: Insert CPT Records into wp_posts
At a minimum, each CPT entry must be inserted into the wp_posts table with:
- Correct post_type
- Valid post_status (e.g., publish, draft)
- Proper timestamps
Important: WordPress does not auto-handle side effects here (like cache clearing or hooks).
Step 3: Insert Custom Fields into wp_postmeta
Each custom field becomes a separate row in wp_postmeta, linked via post_id.
Things to watch for:
- Serialized values (used by ACF and other plugins)
- Correct meta keys
- Matching post IDs from the previous step
Step 4: Assign Taxonomies
Taxonomies require existing terms in the database. You must:
- Ensure terms already exist in wp_terms
- Confirm taxonomy mappings in wp_term_taxonomy
- Link posts via wp_term_relationships
A mismatch here can result in missing or invisible taxonomy data in the WordPress admin.
Step 5: Execute and Verify
Run your SQL via:
- phpMyAdmin
- MySQL command line
- Database management tools
After import:
- Check posts in WordPress admin
- Verify custom fields and taxonomies
- Flush permalinks
- Clear caches
Risks and Downsides
- No WordPress hooks (save_post, wp_insert_post
- No validation or sanitization
- Easy to break serialized data
- Plugin data (ACF, SEO, multilingual) may not register properly
- Hard to debug if something goes wrong
Bonus: Use AI to Enhance Your Script
AI tools can be used as a development aid when creating or refining CSV import scripts for WordPress. Instead of writing everything from scratch, you can use AI to help generate baseline code, validate logic, and identify potential issues early in the process.
Practical Ways AI Can Help
- Generate Initial Script Structure
AI can produce a starter PHP script that follows WordPress standards, including correct usage of functions like wp_insert_post(), update_post_meta(), and built-in sanitization helpers. - Reduce Common Coding Errors
By reviewing CSV parsing logic, AI can help spot mistakes such as incorrect array indexing, missing header checks, or unsafe database operations before the script is executed. - Improve Data Sanitization and Validation
AI-assisted code suggestions often include appropriate sanitization and validation functions, reducing the risk of malformed data or unsafe input being inserted into the database. - Adapt Scripts for Different Data Types
Existing scripts can be adjusted to handle users, custom post types, or WooCommerce products by modifying parameters and mappings rather than rewriting the entire import logic.
Example Prompt for Practical Use
“Generate a WordPress-compatible PHP script that imports custom post types from a CSV file, validates required fields, sanitizes inputs, and logs errors during the import process.”
Using AI in this way helps streamline development, minimize manual errors, and speed up iteration, while final testing and execution remain fully under your control.
Import Users Without a Plugin
To import users into WordPress without a plugin, you can follow the same general process using SQL or WP-CLI.
Import Users Using WP CLI:
Create Users with wp user create:
You can use WP CLI’s wp user create command to import users. For example:
wp user create newuser1 newuser1@example.com –role=subscriber –user_pass=password1
wp user create newuser2 newuser2@example.com –role=administrator –user_pass=password2
Batch User Import via Script:
If you have a CSV of users, you can create a bash script that reads the file and uses WP CLI commands:
#!/bin/bash

while IFS=, read -r username email password role

do

  wp user create “$username” “$email” –role=”$role” –user_pass=”$password”

done < users.csv
Execute the Script
Once your script is ready, you can execute it in various ways:
- As a page template or theme function: You can place this script in your theme’s functions.php or create a custom page template.
- Via WP-CLI: Use WP-CLI for batch processing large CSV files to avoid memory or timeout errors.
For example, running a custom PHP script using WP-CLI could look like this:
wp eval-file import-posts.php
Insert User Meta Data:
If you have user metadata (such as roles, custom fields), insert it into the wp_usermeta table:
INSERT INTO wp_usermeta (user_id, meta_key, meta_value)
VALUES
(1, ‘wp_capabilities’, ‘a:1:{s:10:”subscriber”;b:1;}’),
(1, ‘wp_user_level’, ‘0’);
- The wp_capabilities meta field determines the user’s role (e.g., subscriber, administrator, etc.).
Performance Tips for Handling Large CSV Files
If you’re dealing with a massive CSV file, you may encounter memory errors or slow performance. Here are a few tips to handle large datasets efficiently:
- Batch Processing: Process the CSV in smaller chunks to avoid hitting PHP’s memory limits.
- Increase Memory Limits: Add the following code to your wp-config.php file to increase the memory limit: define(‘WP_MEMORY_LIMIT’, ‘512M’);
- Use Transients: If you need to pause and resume the import process, consider saving the current state using transients or custom database checkpoints.
Security Best Practices
When working with CSV imports, security is paramount to prevent malicious data injection. Here’s how to ensure a secure import process:
- Sanitize Inputs: Always sanitize user inputs and data from external sources using functions like sanitize_text_field() and wp_kses_post().
- Validate CSV Files: Check for unexpected scripts or malicious code within your CSV files before processing them.
- Restrict Access: Limit access to the script only to authenticated users with admin privileges.
- Use Nonces: If you create a custom form for CSV uploads, include WordPress nonces to protect against cross-site request forgery (CSRF).
Best Practices for Importing CSV Files into WordPress:
- Create a Full Backup Before Importing\
Always back up both the database and files before running a CSV import. This ensures you can restore the site if data is inserted incorrectly or the import process fails. - Validate and Sanitize CSV Data
Check that the CSV structure, delimiters (commas or semicolons), and field values match WordPress requirements. Validate data types and sanitize inputs to prevent malformed entries or security issues. - Optimize for Performance on Large Imports
Test the import process using a small CSV file first, then process large datasets in batches to reduce memory usage, execution time, and server load. - Use UTF-8 Encoding for Data Consistency
Save CSV files in UTF-8 encoding to avoid character corruption, especially for multilingual content and special characters. - Prevent Accidental Data Overwrites
Use unique identifiers such as post IDs, user IDs, or custom keys to control whether records are inserted or updated, and verify mappings before execution.
Use Cases for Importing CSV Files Without Plugins
1. Migrating Data Between WordPress Websites
Use Case: Moving large volumes of posts, pages, or custom post types from an old site to a new one.
Recommended Method:
- Export data to CSV from the source site
- Import using custom PHP scripts, WP-CLI, or phpMyAdmin
This approach allows control over post IDs, metadata, and relationships during migration.
2. Transferring Data from Spreadsheets to WordPress
Use Case: Importing content maintained in Excel or Google Sheets into WordPress as posts or custom post types.
Recommended Method:
- Convert the spreadsheet to a UTF-8 encoded CSV
- Parse and insert data using wp_insert_post() and update_post_meta()
This method ensures accurate field mapping and data validation.
3. Bulk Updating Existing WordPress Content
Use Case: Updating large sets of existing content, such as WooCommerce product prices or stock values.
Recommended Method:
- Use unique identifiers (post ID, SKU, or custom key) in the CSV
- Run batch updates via custom scripts or WP-CLI
This avoids overwriting unrelated data and improves performance for large updates.
Problems & Fixes When Importing CSV Files into WordPress
Problem: CSV Formatting Errors
Cause: Inconsistent columns, extra delimiters, or incorrect encoding.
Fix:
- Ensure all rows have consistent column counts
- Remove extra commas or spaces
- Use UTF-8 encoding
Problem: Import Fails Due to Server Limits
Cause: PHP memory or execution time limits exceeded.
Fix:
- Increase memory_limit, max_execution_time, and upload_max_filesize
- Process CSV files in smaller batches
Problem: Missing or Incomplete Data After Import
Cause: Incorrect column-to-field mapping or empty values in CSV.
Fix:
- Verify column headers match WordPress fields or meta keys
- Add validation checks before inserting data
Problem: Duplicate or Overwritten Content
Cause: No unique identifier used during import.
Fix:
- Use post IDs, SKUs, or custom unique keys
- Implement conditional insert/update logic in the script
Frequently Asked Qustions
1. Can I import CSV files into WordPress without using a plugin?
Yes. WordPress does not natively parse CSVs, but you can import CSV data by using custom PHP scripts, WP‑CLI, or by inserting data directly into the database with phpMyAdmin. These methods give you full control over how the data is handled, including performance and validation.
2. What WordPress versions support manual CSV imports?
Manual CSV import methods work with WordPress 6.6 and newer. On older versions, you may need adjustments, especially for server compatibility or updated functions.
3. How do I handle large CSV files without running into memory errors?
Split large CSVs into smaller chunks or process them in batches using custom scripts or WP‑CLI to avoid PHP memory and execution time limits. Batch processing also reduces server load during import.
4. How do I import custom post types without a plugin?
Use wp_insert_post() in your script with the ‘post_type’ => ‘your_custom_post_type’ argument. This lets you create or update entries for any registered post type directly from the CSV data
5. How can I secure my custom CSV import script?
Sanitize and validate all inputs, restrict access to authenticated administrators, and use WordPress nonces if you build a front‑end upload form. Treat CSV uploads like any other untrusted input to prevent security issues.
6. What if my CSV contains special characters or encoding problems?
Make sure the file is saved in UTF‑8 encoding to prevent character corruption. You can use functions like mb_convert_encoding() to convert other formats to UTF‑8 before processing.
7. Can these import methods be automated?
Yes, you can automate CSV imports using WP‑CLI in scripts or by scheduling the process with cron jobs to run at regular intervals without manual intervention.
8. How do I debug issues in my import process?
Enable WP_DEBUG in wp-config.php and use error_log() calls in your script to record errors and data anomalies. Logs make it easier to identify formatting, permission, or field‑mapping issues.
9. What are the risks of running custom import scripts on a live site?
Import scripts can affect performance, cause data corruption, or introduce security vulnerabilities if not coded carefully. Always test on a staging environment and back up your database before running imports.
10. Can I import WooCommerce products without a plugin?
Yes, but WooCommerce products have complex metadata and taxonomies. Your script must handle custom meta fields and relationships manually to correctly insert products and variations.
Conclusion
Importing CSV files into WordPress without using a plugin gives developers and advanced users full control over performance, data mapping, and security. Techniques such as custom PHP scripts, WP-CLI, or direct database imports work well for large datasets, custom post types, users, and WooCommerce products.
However, this approach requires careful planning and execution. Proper data sanitization, UTF-8 encoding, batch processing, and error handling are critical to prevent failed imports or data issues. Always back up your site and test the import process in a staging environment before applying changes to a live website.
If you’re comfortable working with code, importing CSV data without a plugin offers maximum flexibility. For recurring imports or those who prefer a faster, no-code solution, WP Ultimate CSV Importer is a dependable alternative. It simplifies complex field mapping, supports large CSV files, and handles validations automatically, helping reduce errors and save time.
WP Ultimate CSV Importer Pro
Get Ultimate CSV/XML Importer to import data on WordPress faster, quicker and safer.
Morbi lectus risus, iaculis vel, suscipit quis, luctus non, massa. Fusce ac turpis quis ligula lacinia aliquet. Mauris ipsum. Nulla metus metus, ullamcorper vel, tincidunt sed, euismod in, nibh.
Proin quam. Etiam ultrices. Suspendisse in justo eu magna luctus suscipit. Sed lectus. Integer euismod lacus luctus magna.
Nulla facilisi. Ut fringilla. Suspendisse potenti. Nunc feugiat mi a tellus consequat imperdiet. Vestibulum sapien. Proin quam. Etiam ultrices. Suspendisse in justo eu magna luctus suscipit. Sed lectus. Integer euismod lacus luctus magna.