“OceanWP is a versatile WordPress theme that combines flexibility and ease of customization, making it ideal for creating diverse websites.”
WordPress 7.0: What’s Really Happening Right Now: Features, Status, and What to Expect Next
9 Apr 2026, 1:16 pm
WordPress 7.0 is not a routine update. It marks the official start of Gutenberg Phase 3 – the long-awaited era of collaboration. For the first time, WordPress is moving beyond its single-editor origins toward a shared, real-time platform where writers, editors, designers, and clients can work together directly inside the CMS.
This is also a comeback moment. After a turbulent 2025 that saw the WP Engine vs. Automattic lawsuit, paused core contributions, and only one major release (WordPress 6.9), the WordPress project is back with its most ambitious release in years. The scope of change touches everything: how teams edit content together, how AI integrates with the platform, how the admin dashboard looks and feels, and what developers can build natively without third-party plugins.
This guide covers every major feature, the real-time status of the release, practical preparation steps, and what comes next – all from the perspective of people who build WordPress tools every day.
1. Real-Time Collaboration – The Headline Feature
The feature that defines WordPress 7.0 is real-time collaboration (RTC). For the first time, multiple users can co-edit the same post or page simultaneously, with changes appearing live. No more editor lock screens. No more overwriting your colleague’s work. No more drafting content in Google Docs and pasting it into WordPress.
How It Works Under the Hood
The collaboration system uses a CRDT-based (Conflict-free Replicated Data Type) approach for conflict resolution. Sync data is stored persistently via post meta on a dedicated internal post type called wp_sync_storage. The transport layer uses HTTP polling rather than WebSockets – a deliberate architectural decision to ensure the feature works on every hosting environment, from budget shared hosting to enterprise infrastructure.
The default client-side limit is two simultaneous collaborators per post, though hosts and developers can adjust this. Collaboration is opt-in through the Writing settings screen, so it won’t activate on your site unless you explicitly enable it.
The Challenges That Shaped This Feature
Real-time collaboration is the most technically ambitious feature WordPress has ever attempted. During testing, the community identified several concerns that shaped how it shipped:
• The initial approach of storing sync data in postmeta raised performance concerns. The team is evaluating dedicated database tables optimized for the high-frequency writes that real-time editing generates.
• On shared hosting, even a single post with two collaborators can generate approximately 480 HTTP requests per minute, a significant load for budget hosting plans.
• Based on community feedback, RTC was moved to off-by-default (opt-in) for the Release Candidate phase, ensuring site owners consciously choose to enable it.
The Positive Side: It Works on Modern Setups
WordPress VIP’s early testing with production sites showed that RTC works seamlessly on sites built for modern WordPress. Teams using the block editor with native blocks reported smooth experiences. Stress tests, including adding dozens of blocks simultaneously, copying large amounts of content in parallel, and having entire teams edit together, showed the feature held up remarkably well.
Visual Revisions also arrive in 7.0, allowing a side-by-side visual comparison of page versions before reverting. No more scanning code diffs, you can see exactly what changed between drafts.
2. The Native AI Infrastructure – WordPress Becomes AI-Ready
WordPress 7.0 is not adding an AI chatbot or content writer. It’s doing something more strategic: building a standardized AI infrastructure layer directly into the core that any plugin, theme, or external service can connect to.
The Four Components
WP AI Client – A provider-agnostic API that lets plugins and themes communicate with any AI model (OpenAI, Anthropic Claude, Google Gemini) through a single, consistent interface. No AI provider is bundled by default.
Settings to Connectors – A new centralized screen in wp-admin where site owners register AI provider API keys. Connect once, and every compatible plugin benefits.
Abilities API + MCP – A standardized bridge that lets AI services discover what your WordPress site can do, request permission to act, and execute tasks within defined boundaries. This works with the Model Context Protocol, enabling AI assistants to manage content through natural language commands.
AI Experiments Screen – Found under Settings, this lets users opt in to AI-powered features such as excerpt generation, alt text creation, image generation, and content summarization.
| WHAT THIS MEANS FOR SMACKCODERS USERS: WP Ultimate CSV Importer already supports AI content generation via ChatGPT, Gemini, and Claude during imports. WordPress 7.0’s native Connectors API means future versions of our plugin can leverage a centralized API key setup, eliminating the need for separate configuration and simplifying your workflow even further. |
Production security note: API keys entered through the Connectors UI are masked visually but not encrypted in the database. For production environments, load credentials through environment variables or PHP constants. The system checks in priority order: environment variable, then PHP constant, then database.
3. Admin Dashboard Overhaul – DataViews Changes Everything
The WordPress admin interface hasn’t had a meaningful visual update since 2013. WordPress 7.0 changes that with DataViews – a modern, React-based replacement for the traditional admin list tables that have been the backbone of content management for over a decade.
| Before (WordPress 6.x) | After (WordPress 7.0) |
| Static server-rendered list tables | Dynamic React-based DataViews |
| Full page reload for every filter | Instant client-side filtering and sorting |
| Single table layout only | Grid, list, and table layout options |
| Limited bulk editing | Advanced bulk operations |
| Generic form elements | Unified design system with tokens |
| No font management screen | Dedicated Appearance → Fonts screen |
Beyond DataViews, the admin refresh includes animated page transitions, smooth dropdown interactions, unified form elements, and a consistent design token system for colors, spacing, and typography. The Font Library is now universally accessible at Appearance to Fonts across all themes, including classic PHP-based themes.
4. New Blocks and Design Controls That Fill Real Gaps
WordPress 7.0 introduces blocks that address genuine gaps site owners have been filling with third-party plugins for years:
Breadcrumbs Block – Native breadcrumb navigation that works with custom post types, archives, and query loops out of the box. No plugin needed.
Icons Block – A built-in icon system directly in core, reducing reliance on icon font plugins or custom SVG workarounds.
Responsive Grid Block – Set maximum columns and let layouts adjust across devices. Responsive visibility controls let you show or hide specific blocks per screen size (desktop, tablet, mobile).
Cover Block Upgrade – Video embed backgrounds for hero sections without custom code.
Navigation Block – Significantly upgraded with built-in mobile menu design, flexible submenus, customizable overlay behavior, and mobile layout preview in the sidebar.
Pattern Editing – Simplified substantially. Patterns now default to Content-Only editing mode, presenting clean fields grouped with block icons. Pattern overrides work with custom dynamic blocks through the expanded Block Bindings API.
5. Developer Toolbox – What’s Under the Hood
PHP-Only Block Registration
Blocks can now be registered and rendered entirely via PHP – no JavaScript and no build pipeline required. WordPress auto-generates inspector controls for common attribute types. This lowers the barrier for theme developers shipping custom blocks.
React 19 Upgrade
The block editor upgrades to React 19, bringing performance improvements and new capabilities. This is a potentially breaking change – custom block developers should test their plugins thoroughly.
Enforced Iframed Editor
The post editor now runs inside an iframe by default, isolating theme styles from editor styles. This significantly reduces the visual conflicts and “this block is broken” recovery prompts that have frustrated developers. Full enforcement is on a gradual rollout in 7.0, with complete enforcement planned for 7.1.
DataViews and DataForm API
Developers can use DataViews and DataForm components to build custom admin interfaces with standardized layouts, validation, and new controls like combobox and adaptive select. This replaces the need for one-off custom React admin tables.
Client-Side Image Processing
Uploaded images are now processed directly in the browser before reaching the server. This saves server resources, speeds up uploads, and adds support for modern image formats without requiring server-side library support.
Metabox Compatibility Note
Real-time collaboration disables itself when classic meta boxes are present. Plugins that rely on legacy metaboxes should be audited for RTC compatibility.
6. The PHP 7.4 Requirement – Check This First
| ACTION REQUIREDWordPress 7.0 raises the minimum PHP version from 7.2 to 7.4. If your hosting environment is running PHP 7.2 or 7.3, the update will not install. Check your PHP version now through your hosting control panel or WordPress dashboard under Tools → Site Health → Info → Server. |
While PHP 7.4 is the floor, the WordPress core team recommends PHP 8.3 or later for optimal performance and security. For the AI Client and real-time collaboration features specifically, PHP 8.2+ is recommended for full functionality.
7. How to Prepare Your Site – 7-Step Checklist
A major release like 7.0 demands more preparation than a minor security patch. Here’s your step-by-step checklist:
1. Verify Your PHP Version – Log into your hosting control panel. Confirm PHP 7.4 or higher. Upgrade to PHP 8.3 if available.
2. Create a Full Backup – Back up your entire site database, files, media, and configuration. Use a reliable backup plugin or your host’s snapshot tool.
3. Set Up a Staging Environment – Clone your production site to a staging environment. Never test a major release on your live site.
4. Audit Your Plugins and Theme – Update all plugins to their latest versions. Flag any plugin that modifies admin list views (Posts, Pages, Media); these carry the highest DataViews compatibility risk.
5. Test on Staging Run the update on staging. Walk through critical user journeys: publishing, editing, WooCommerce checkout, contact forms, CSV imports/exports, and any custom functionality.
6. Check Hosting for Collaboration If you plan to use real-time collaboration, confirm your hosting supports additional concurrent connections. HTTP polling works universally, but performance varies.
7. Plan Your Update Window – Wait 1–2 weeks after release before updating production. This gives the community time to surface issues and plugin vendors time to push compatibility updates.
| PRO TIPBookmark this checklist. It’s the single most important thing you can do before WordPress 7.0 hits your dashboard update screen. |
8. What WordPress 7.0 Means for Smackcoders Plugin Users
If you’re using Smackcoders plugins, here’s what you need to know about WordPress 7.0 compatibility:
WP Ultimate CSV Importer Pro
Our team is actively testing CSV Importer against the WordPress 7.0 Release Candidates. The plugin’s core import/export functionality works through WordPress’s data layer, not through admin list tables directly, which reduces the DataViews compatibility risk. However, we recommend updating to the latest version of CSV Importer before upgrading to WordPress 7.0 and testing on a staging site first.
The new WP AI Client in 7.0 is also exciting for CSV Importer users. Our plugin already supports AI content generation during imports via ChatGPT, Gemini, and Claude. As WordPress’s native AI infrastructure matures, expect tighter integration with the Connectors API in future releases.
WP Ultimate Exporter
Export functionality operates independently of the admin interface changes, so DataViews should not affect exports. Test your standard export workflows on staging as a precaution.
WP Leads Builder for CRM
CRM integrations work through form data capture and API calls, which are not directly impacted by 7.0’s editor or admin changes. Ensure your CRM plugin is updated, and test lead capture flows on staging.
Woo to Shopify Sync
Inventory sync operates at the API and database level. No direct impact expected from 7.0’s changes, but always verify sync operations on a staging environment before upgrading production.
| STAY UPDATED We’ll publish a dedicated compatibility report for all Smackcoders plugins once WordPress 7.0 reaches its final release. Follow our blog for the latest updates. |
9. What’s Coming After 7.0 – The Roadmap
WordPress is returning to a three-release cadence in 2026 after 2025’s slowdown. Here’s what’s on the horizon:
WordPress 7.1 – August 2026: Deeper collaboration workflows, the always-iframed post editor (deferred from 7.0), the Tabs block, Core Abilities for post management, and further DataViews extensibility.
WordPress 7.2 – December 2026: Expanded collaboration features and the first steps toward native multilingualism in WordPress core, a capability the community has requested for years.
Connectors API Growth: Scoped to expand beyond AI providers to support additional authentication methods and service types in future releases.
The trajectory is clear: WordPress is evolving from a content management system into a collaborative content platform. Each 2026 release builds on the foundation that 7.0 establishes.
Frequently Asked Questions
Q1: Will my existing plugins break after updating to 7.0?
Most plugins will continue to work. The highest risk is with plugins that modify the Posts, Pages, or Media list views (due to DataViews) and custom block plugins (due to React 19). Update all plugins to their latest versions and test on a staging site first.
Q2: Is WordPress 7.0 adding an AI writer to my site?
No. WordPress 7.0 builds AI infrastructure (WP AI Client, Abilities API, Connectors), not an AI writer. No AI calls are made unless you configure an API provider and explicitly opt into specific features.
Q3: Should I enable automatic updates for WordPress 7.0?
No. Major releases should always be tested manually on a staging site first. Automatic updates are best reserved for minor security releases.
Q4: What PHP version do I need for WordPress 7.0?
Minimum PHP 7.4. Recommended PHP 8.3+ for best performance. PHP 8.2+ recommended for AI Client and real-time collaboration features.
Q5: Is there a new default theme with 7.0?
No. There is no “Twenty Twenty-Six” theme. The focus is on making existing block themes more powerful through the Site Editor and Phase 3 tools.
Q6: Will WP Ultimate CSV Importer work with WordPress 7.0?
We are actively testing compatibility with the latest Release Candidates. Our plugin’s core functionality works through WordPress’s data layer, minimizing DataViews impact. Update to the latest version and test on staging before upgrading production.
How to enable & Configure WP-Cron
25 Mar 2026, 1:05 pm
Table of Contents
WP-Cron is one of those things most WordPress site owners never think about until something breaks. A scheduled post did not publish on time. A plugin update that was supposed to run automatically never did. Emails stopped going out. Nine times out of ten, WP-Cron is sitting right at the center of the problem.
WP-Cron is WordPress’s built-in task scheduling system. It handles everything that needs to happen automatically in the background, from publishing scheduled posts and sending notifications to running plugin tasks and triggering bulk imports. The difference between WP-Cron and a traditional server cron job is that WP-Cron depends on site traffic to fire. When someone visits your site, WordPress checks whether any scheduled tasks are due and runs them. On low-traffic sites, this can cause delays. On high-traffic sites, it can create unnecessary server load if it is not configured correctly.
This guide covers everything you need to know about WP-Cron in 2026. How to check if it is enabled, how to configure it properly, how to hook it into your system task scheduler, and how to fix it when scheduled tasks stop running. Whether you are setting it up fresh or troubleshooting an existing issue, every answer you need is in here.
What is WP-Cron in WordPress?
WP-Cron is WordPress’s built-in scheduling system. It handles everything that runs automatically in the background, publishing scheduled posts, sending email notifications, checking for updates, and triggering plugin tasks at set intervals.
Unlike a traditional server cron that runs on a fixed clock, WP-Cron fires when someone visits your site. WordPress checks for pending tasks on every page load and runs anything due. It works well for most sites, but low-traffic sites can experience delays, and high-traffic sites can put unnecessary load on the server if WP-Cron is not configured properly. Both are common issues, and both are completely fixable.
Is WordPress Cron Enabled? Here Is How to Check and Turn It On:
WP-Cron comes enabled on every fresh WordPress installation by default. If scheduled tasks are not running on your site, the first thing worth checking is whether it got disabled somewhere in your wp-config.php file, either manually or through a plugin setting.
How to Check If WP-Cron Is Enabled:
Open your wp-config.php file from the root directory of your WordPress installation and look for this line:
define(‘DISABLE_WP_CRON’, true);
If this line exists and is set to true, WP-Cron is off. If the line is not there at all, WP-Cron is running as it should.
How to Enable WP-Cron:
To switch it back on, either delete that line completely or update the value to false:
define(‘DISABLE_WP_CRON’, false);
Save the file, and WP-Cron will start handling your scheduled tasks right away.
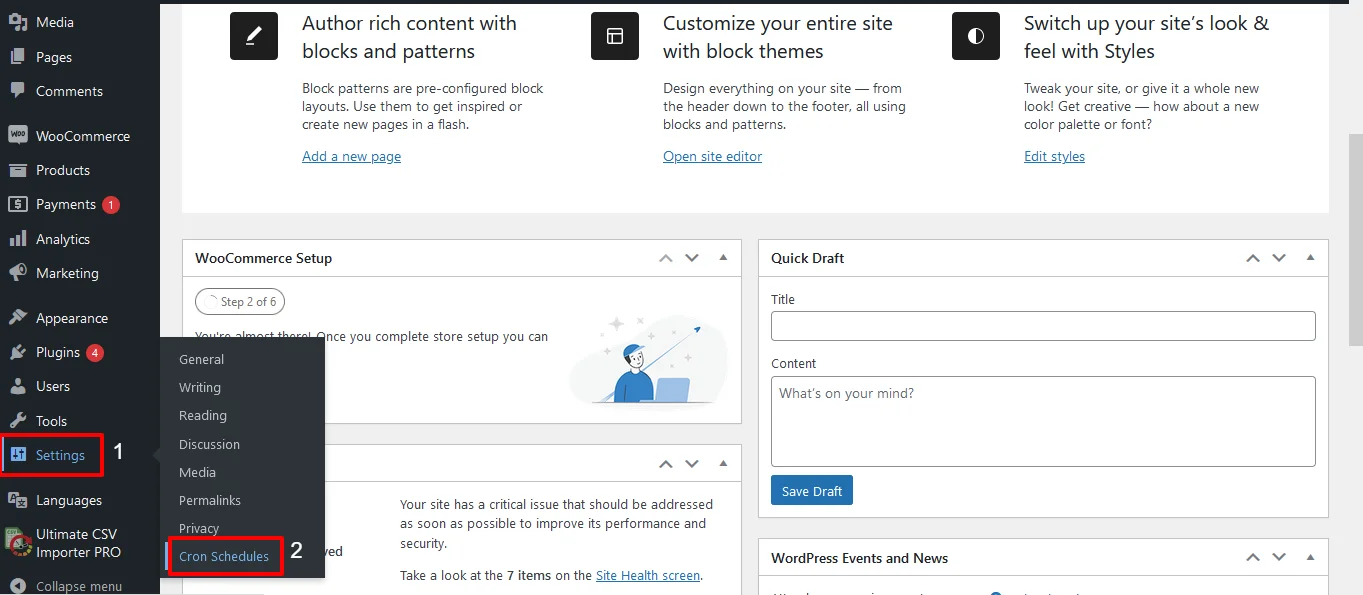
Verify Through the WordPress Dashboard:
Head to Settings, then General, inside your WordPress dashboard, and confirm your timezone is configured correctly. WP-Cron schedules everything based on your site’s timezone, so an incorrect setting here will cause tasks to fire at the wrong time even when WP-Cron itself is running perfectly.
Hooking WP Cron in the task scheduler
WP Cron does not run continuously, and to run the tasks at the time of import, you can set up the system task scheduler to run on intervals. If you have a high-traffic website, you can trigger WP-Cron only during CSV imports.
First, disable the built-in trigger by adding this line to your wp-config.php:
define(‘DISABLE_WP_CRON’, true);
Then set up your system scheduler to call wp-cron.php at regular intervals using the steps below.
Windows
Open Task Scheduler via Start → All Programs → Accessories → System Tools → Task Scheduler.

Create a new basic task and set your preferred trigger interval. For the action, select “Start a Program” and use PowerShell with the following command:
powershell.exe -Command “Invoke-WebRequest -Uri ‘http://yoursite.com/wp-cron.php?doing_wp_cron’ -UseBasicParsing”
Replace `yoursite.com` with your actual domain. Set the task to run every 5 or 15 minutes, depending on how frequently your scheduled tasks need to fire.
Mac / Linux
Both macOS and Linux use crontab for time-based scheduling. Open your terminal and run:
crontab -e
Add one of the following lines depending on your schedule needs.
To run every 5 minutes, the most common setup for WordPress:
*/5 * * * * wget -q -O – http://yoursite.com/wp-cron.php?doing_wp_cron > /dev/null 2>&1
To run every 2 hours:
0 */2 * * * wget -q -O – http://yoursite.com/wp-cron.php?doing_wp_cron > /dev/null 2>&1
To run once daily at midnight:
0 0 * * * wget -q -O – http://yoursite.com/wp-cron.php?doing_wp_cron > /dev/null 2>&1
Note: Replace yoursite.com With your actual domain in every command above. Save and exit, your system scheduler will now trigger WP-Cron at the interval you set, completely independent of site traffic.
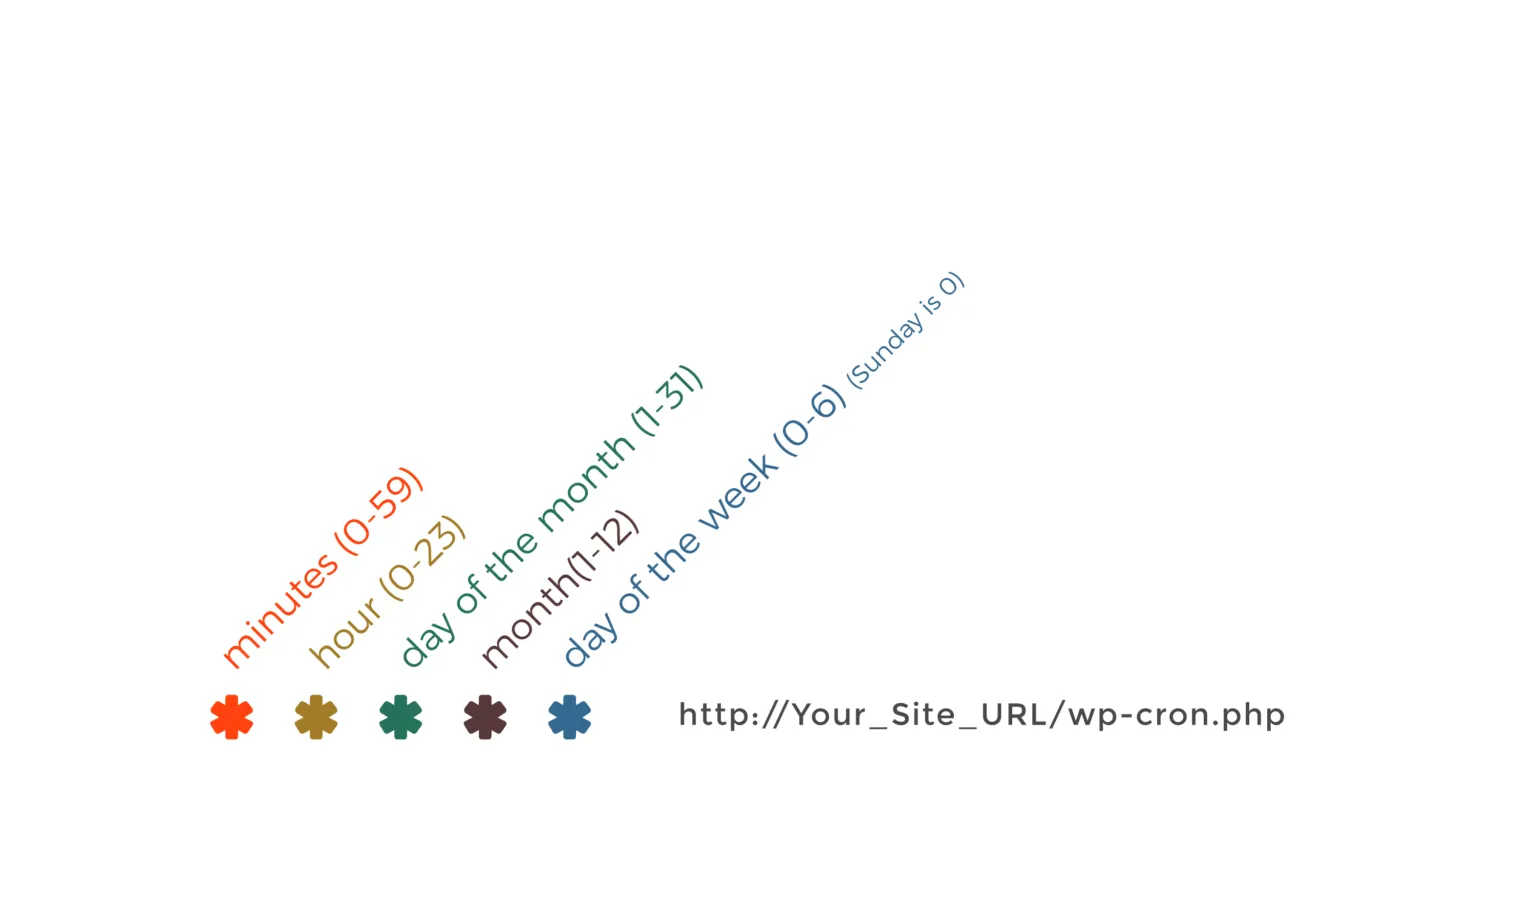
How to read the cron time format, five fields in order:
minute hour day-of-month month day-of-week
WP-Cron Job: How to Set Up and Manage Cron Jobs
If you want WordPress to do something on a schedule, you need a cron job. That could be running an import every hour, sending out a notification every morning, or clearing out temporary data every few days. WP-Cron handles all of this, but you have to tell it what to do and when.
Setting Up a Custom Cron Job:
You need two things to get a cron job running. A scheduled hook that tells WordPress when to fire, and a function that tells it what to actually do. Add this to your functions.php file or a custom plugin:
php:
function smack_schedule_cron() {
if ( ! wp_next_scheduled( ‘smack_custom_cron_job’ ) ) {
wp_schedule_event( time(), ‘hourly’, ‘smack_custom_cron_job’ );
}
}
add_action( ‘wp’, ‘smack_schedule_cron’ );
add_action( ‘smack_custom_cron_job’, ‘smack_run_cron_task’ );
function smack_run_cron_task() {
// Your task logic goes here
}
Swap smack_custom_cron_job with your own hook name and put your task logic inside smack_run_cron_task.
Built-in WordPress Cron Intervals:
WordPress gives you four ready-to-use intervals straight out of the box.
| Schedule | How Often It Runs |
| hourly | Every 60 minutes |
| twicedaily | Every 12 hours |
| daily | Every 24 hours |
| weekly | Every 7 days |
If none of these work for what you need, you can create your own.
Adding a Custom Interval:
Say you need something to run every 20 minutes. WordPress does not have that built in, but adding it takes about ten lines of code:
php:
add_filter( ‘cron_schedules’, ‘smack_add_custom_schedule’ );
function smack_add_custom_schedule( $schedules ) {
$schedules[‘every_20_minutes’] = array(
‘interval’ => 1200,
‘display’ => ‘Every 20 Minutes’,
);
return $schedules;
}
The interval is always in seconds. 1200 equals 20 minutes. Change that number to whatever your situation calls for.
Running a Cron Job Manually:
Sometimes you just need to trigger a job right now without waiting for the next scheduled run. Here are three ways to do it, depending on what you have access to.
WP-CLI
Open your terminal, go to your WordPress root directory, and run:
bash
wp cron event run –all
cURL
No WP-CLI? Use cURL instead:
bash
curl http://yourdomain.com/wp-cron.php?doing_wp_cron
“`
**Browser**
Paste this directly into your browser address bar:
“`
http://yourdomain.com/wp-cron.php?doing_wp_cron
Removing a Cron Job You No Longer Need:
Leaving unused cron jobs sitting in your queue is not a great idea. They keep running in the background even if they are not doing anything useful. Clean them out like this:
php:
$timestamp = wp_next_scheduled( ‘smack_custom_cron_job’ );
wp_unschedule_event( $timestamp, ‘smack_custom_cron_job’ );

WP Ultimate CSV Importer Pro
Get Ultimate CSV/XML Importer to import data on WordPress faster, quicker and safer.
WordPress cron job or WP cron not working
If scheduled tasks have stopped running on your site, work through these checks in order. Most issues are resolved by step 1 or 2.
Step 1 — Check if WP-Cron is disabled
Open your wp-config.php file and look for this line:
php
define(‘DISABLE_WP_CRON’, true);
If it exists and is set to true WP-Cron is off, and no scheduled tasks will run. Either remove the line entirely or change it to false and save the file.
Step 2 — Check your timezone setting
Go to Settings → General in your WordPress dashboard and confirm your timezone is set correctly. WP-Cron schedules everything relative to your site’s timezone. A wrong timezone is one of the most common reasons tasks appear broken when WP-Cron itself is actually running fine, tasks fire at the wrong time and look like they never ran at all.
Step 3 — Run pending tasks manually to confirm they execute
If you have WP-CLI access, run all pending cron events immediately:
bash
wp cron event run --allIf tasks complete successfully when run manually but fail on schedule, the issue is with how WP-Cron is being triggered, not with the tasks themselves. Move to Step 4.
Step 4 — Switch to a server-level cron job
If WP-Cron keeps failing intermittently or your site has low traffic, the most reliable permanent fix is replacing the default trigger with a real server cron. See the Scheduled Task with Server Cron section below for the complete setup steps.
Step 5 — Check for plugin conflicts
Caching plugins and security plugins occasionally block wp-cron.php requests. If you have a caching plugin active, add wp-cron.php to its exclusion list. If a security plugin is blocking external requests, whitelist the wp-cron.php endpoint.
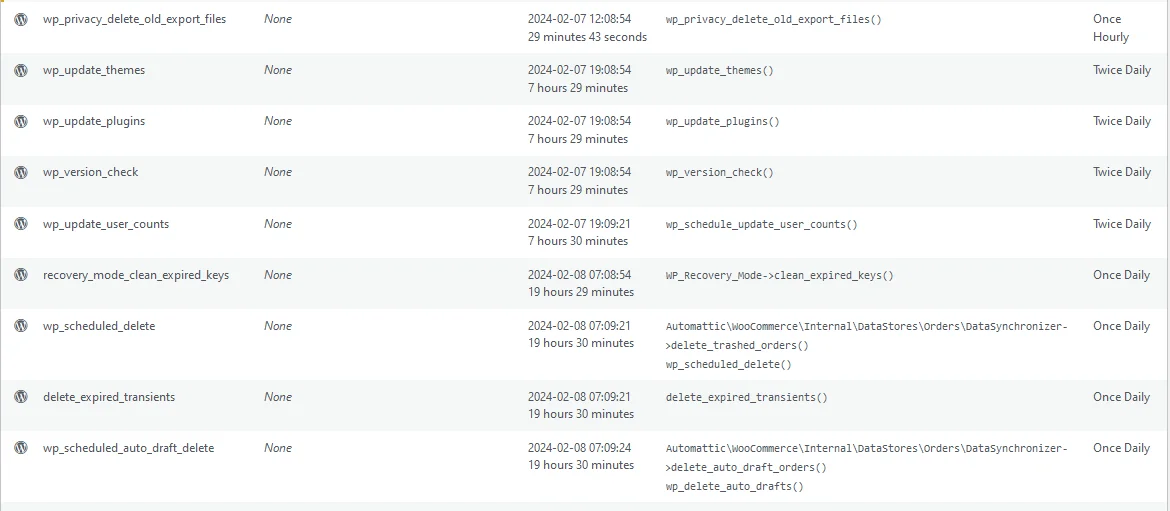
Step 6 — Use WP Crontrol to inspect the task queue
Install the free WP Crontrol plugin and go to Tools → Cron Events. Look for overdue tasks, shown with a past “Next Run” time. If overdue tasks are accumulating, it confirms WP-Cron is running, but tasks are either failing or taking too long to complete. Check your PHP error logs for the specific task that is failing.
Scheduled Task with Server Cron
You can set up a cron job in WordPress without a plugin by adding custom code to your theme’s functions.php file or by using a custom plugin. Alternatively, you can schedule cron jobs directly on your server’s control panel or through a command-line interface like SSH.
Set up a server cron job to run the WordPress cron regularly. Edit your server’s crontab file:
crontab -e
Add a line like the following to run the WordPress cron every 5 minutes:
*/5 * * * * wget -q -O – http://yoursite.com/wp-cron.php?doing_wp_cron > /dev/null 2>&1
Replace “yoursite.com” with your actual domain.
After enabling the cron system, WordPress should be able to perform scheduled tasks, including garbage collection. Keep in mind that running the cron system too frequently may impact server performance, so adjust the frequency based on your site’s needs.
To re-enable default Cron behavior, remove any custom cron-related configurations and ensure that the Disable_WP_CRON constant in your wp-config. php file is not set to true. This constant, when set to true, disables the default cron behavior in WordPress.
If the external WP-Cron seems to be enabled, you can still manually run it using the following methods:
To manually run the cron system in WordPress, you have a few options:
- Use WP-CLI
If you have command-line access to your server and WP-CLI installed, you can manually trigger the cron events. Open a terminal, navigate to your WordPress root directory, and run the following command:
wp cron event run –all
This command instructs WordPress to execute all pending cron events, ensuring timely updates and scheduled tasks.
- cURL or Wget
Alternatively, you can use cURL or Wget to make an HTTP request to the wp-cron.php file. This simulates a visitor accessing your site and triggers the cron events. Here’s an example using cURL:
curl http://yourdomain.com/wp-cron.php
Replace “yourdomain.com” with your actual domain. This method is useful if you don’t have access to WP-CLI.
How to Set Up and Manage WP-Cron Using Plugins – Best WordPress Cron Job Plugins
However, managing WP Cron effectively requires attention to detail and sometimes additional plugins to enhance functionality. Let’s explore some of the top WP-Cron plugins and their role in CSV importing.
Below are some of the top WP Cron plugins available to enhance WP-Cron functionality.
WP Crontrol
WP-Crontrol is one of the top plugins for setting up and managing Cron jobs effectively in WordPress. It is a free plugin that offers a user-friendly interface to manage WP-Cron jobs. WP-Crontrol allows granular control over cron events, enabling you to add, edit, and delete events directly from the WordPress dashboard.
How does the WP- Crontrol works?
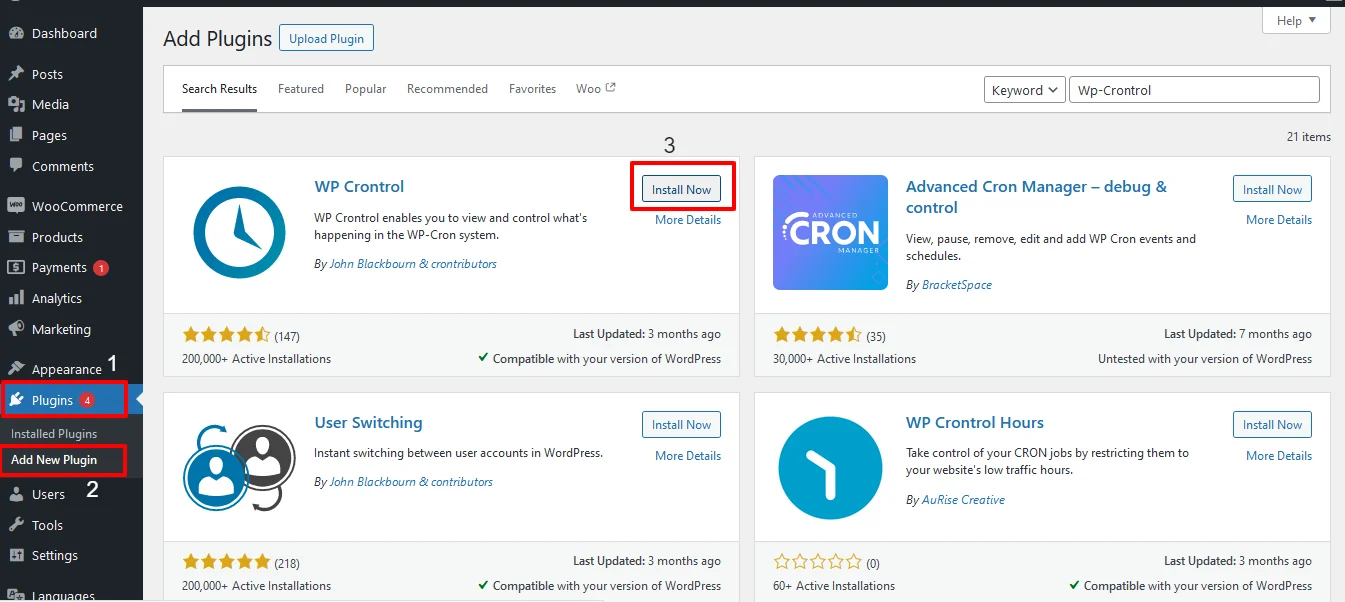
Step 1: Install and Activate
- Login to your WordPress dashboard and Install the WP-crontrol plugins.
- Once installed, click on Activate.
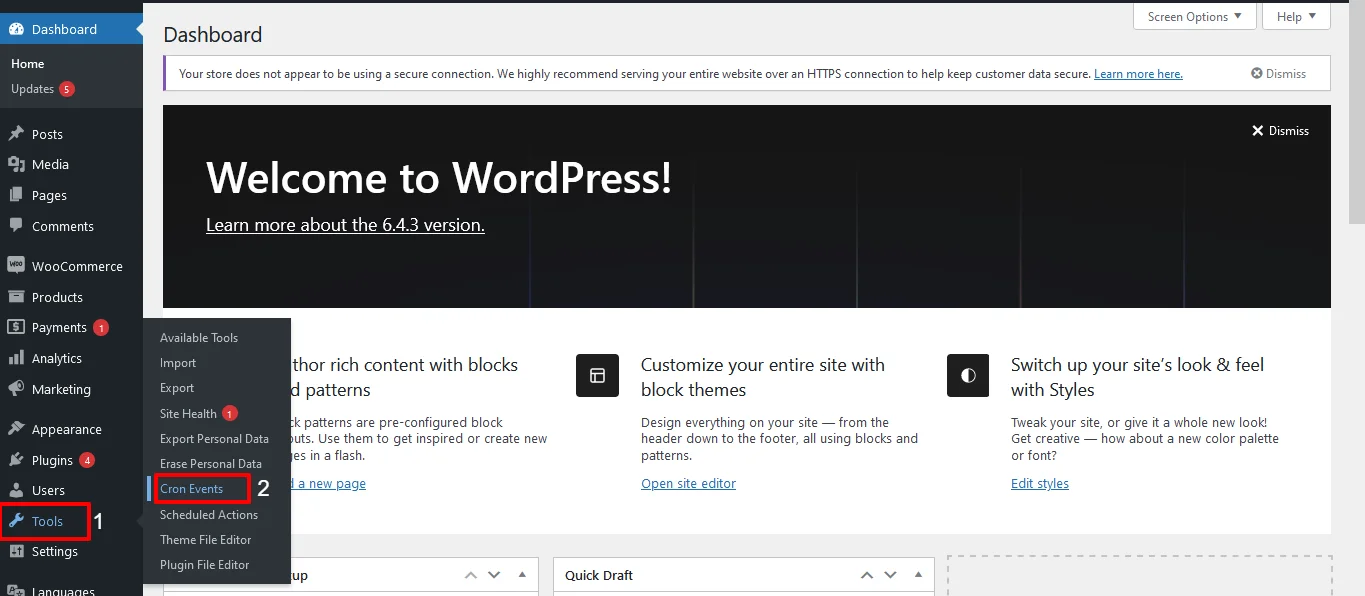
Step 2: Access the plugin
- To access the WP-Crontrol plugin, navigate to Tools -> Cron Events
Step 3: WP- Control dashboard
- Once you access the extension, you will land on the WP-Crontrol dashboard. Here, you have a complete overview of all the WP cron jobs running on your WordPress site.
- It also includes the default wordpress cron jobs that prefix with wp. Make sure not to delete these core files as it will impact the core functionality of your WordPress site.
Step 4: Add New Cron event
To add a new cron event,
- Navigate to the Add New button corresponding to the Cron events tab.
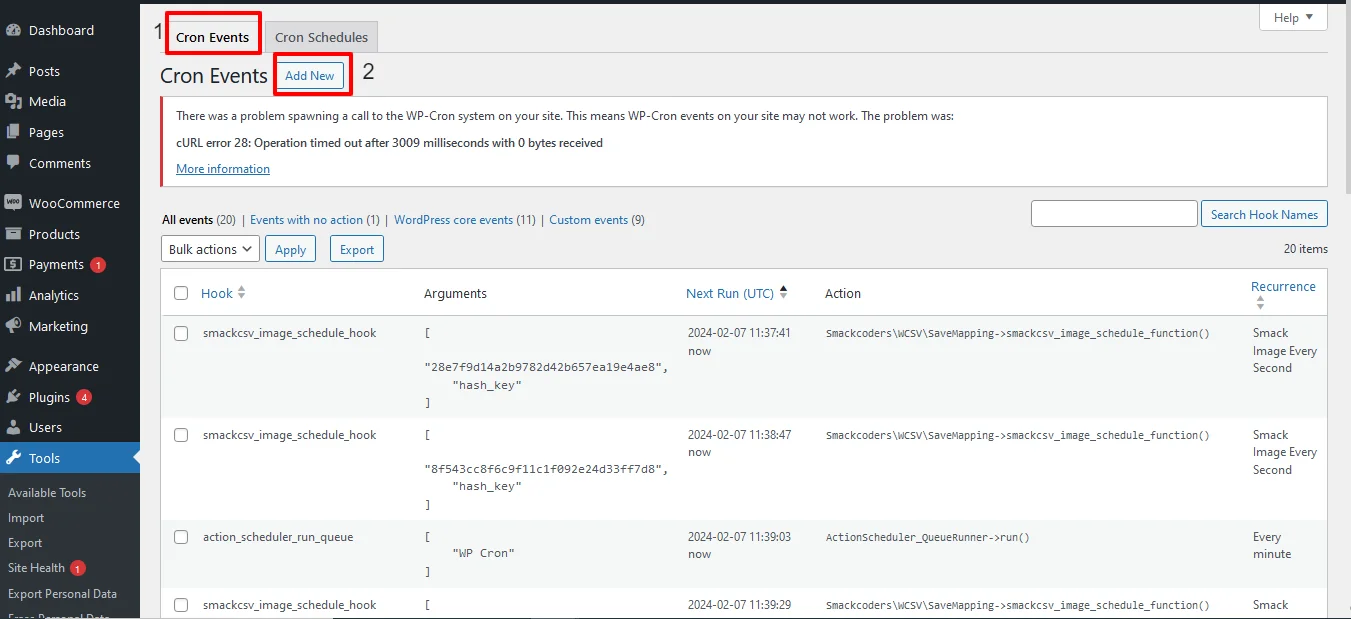
- The Add new cron event page will be displayed.
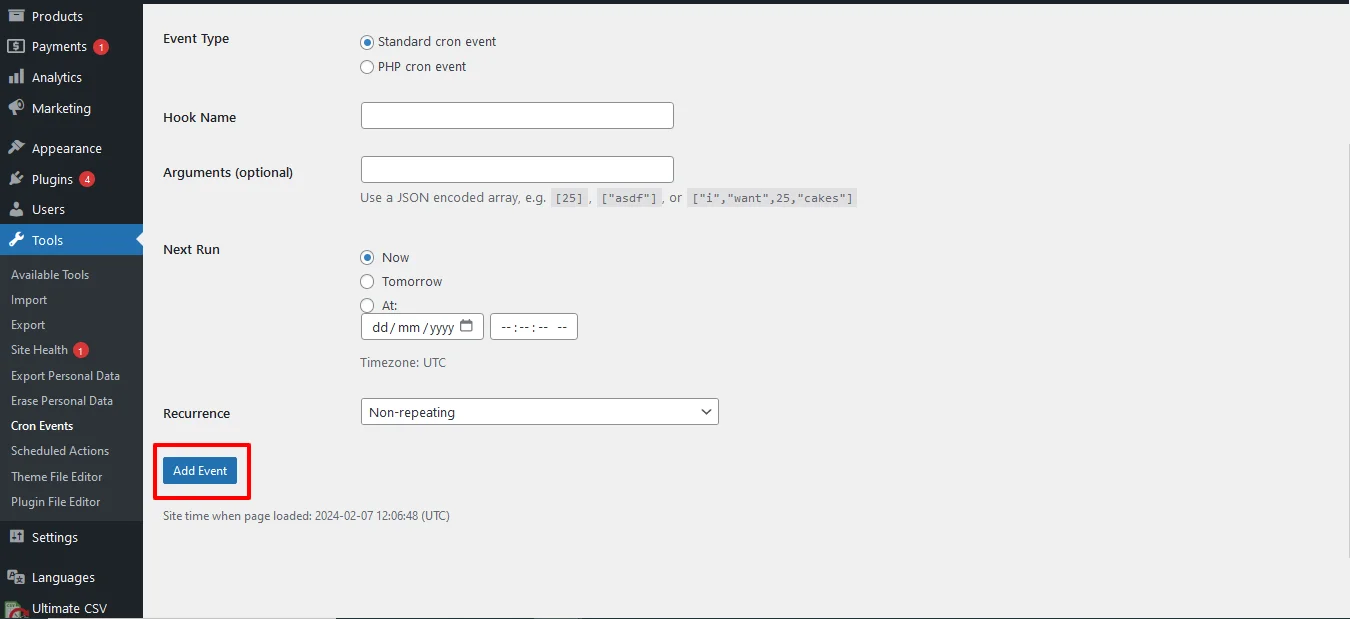
- Select the cron event type as the standard cron event
- Provide the name of your webhook using PHP naming conventions. For example, smack_cron_event.
- The Arguments field is optional. You can simply leave it empty or you can use your desired JSON-encoded array
- Select the time for the next run as Now, tomorrow, or At(provide any specified date and time) to run the cron event next time.
- Select the recurrence of the cron event from the drop-down. That is how often the cron events need to run. For example, every two hours or every ten minutes.
- Finally, click on Add Event. Now, new WP cron events have been added to your CRON event list.
- Here, you have the None option which shows an error. So you have to write the below code in functions.php.

- Navigate to xampp/wamp on your local computer where you installed WordPress.
- Navigate to htdocs > wordpress > wp-content > themes > [Your Theme] > functions.php
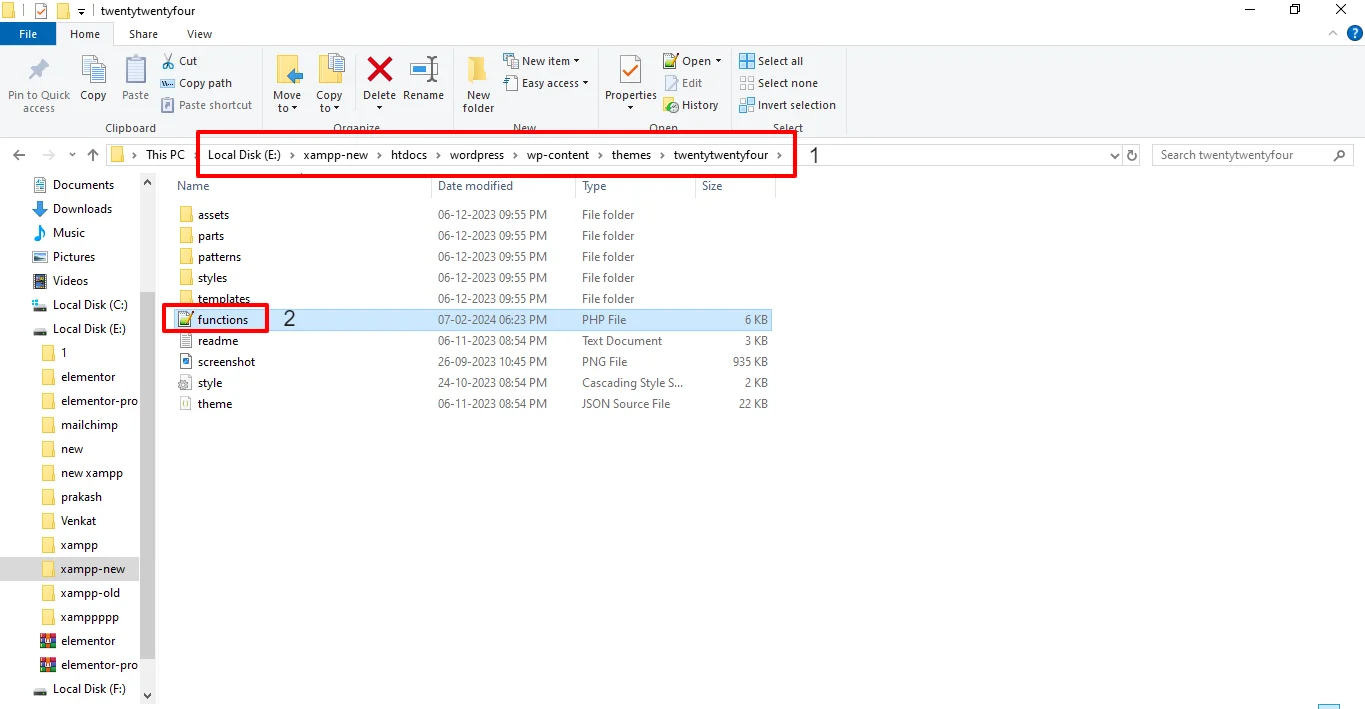
- Open the file and write the below code:
add_action( ‘smack_cron_event’, ‘smack_cron_event_func’ );
function smack_cron_event_func() {
wp_mail( ‘abc@mail.com’, ‘Automatic email’, ‘Automatic scheduled email from WordPress to test cron’);
}
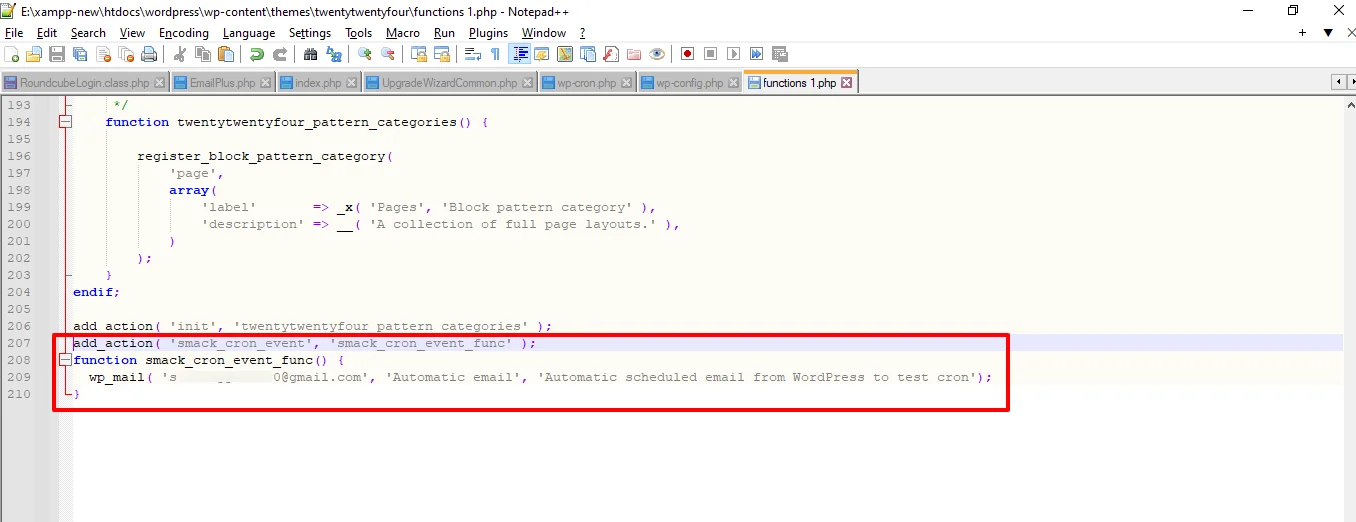
Note: Make sure you have edited the above code by replacing smack_cron_event with your desired cron event name that you have created, and abc@mail.com with your email address.
Once done, you will receive an email at the email address mentioned in the code. The email you receive indicates that the Cron job ran successfully.
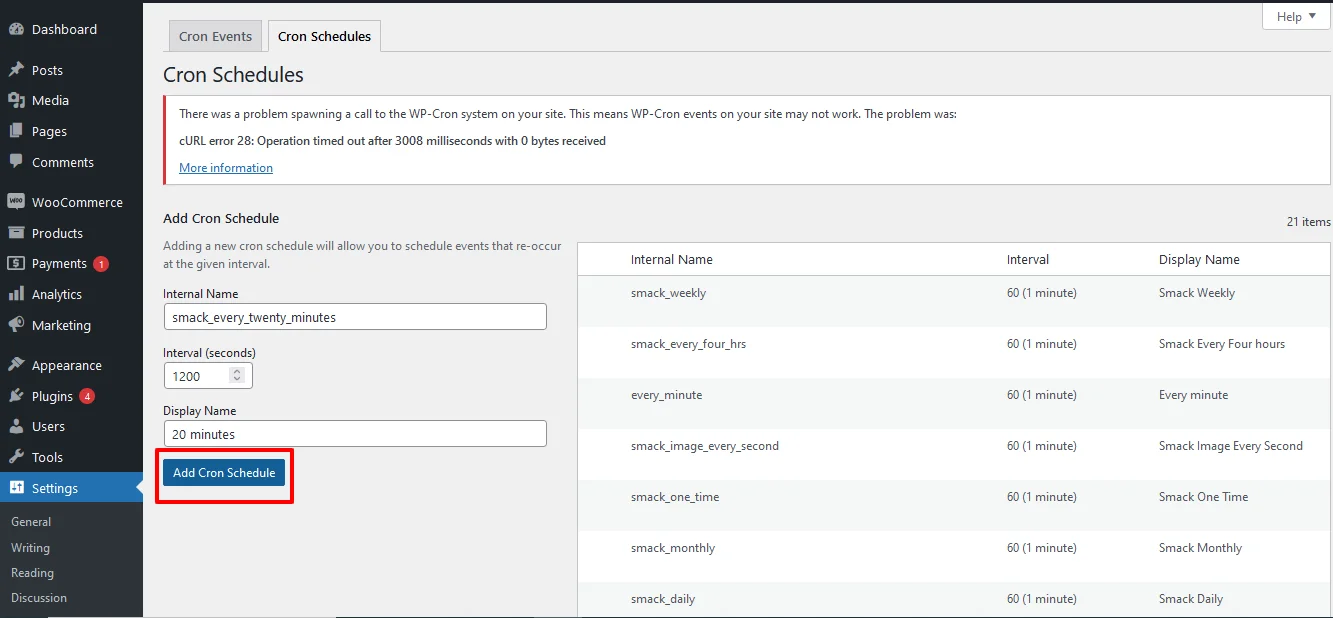
Step 5: Add new CRON Schedule
WordPress allows four standard cron intervals to choose when creating a new cron event. However, with WP-Crontrol, you can also add new custom cron intervals by,
- Navigating to WordPress Settings -> Cron Schedules or navigate to Tools-> Cron Events-> Cron Schedule
- Provide the internal name for your cron schedule with php naming convention For example, smack_twenty_minutes.
- Then provide the interval in seconds. Here, I have set 1200 seconds(20 minutes)
- Provide the display name. Here, I have given 20 minutes.
- Click on Add Cron schedule. The newly created cron schedule has been listed in the table.
Step 6: Edit or delete any existing cron event
In addition to adding new cron events, WP Crontrol enables you to edit or delete existing cron events effortlessly. This functionality is useful for fine-tuning scheduled tasks or removing redundant cron jobs.
With WP-Crontrol, it is easy to edit any existing WP- CRON event that was listed in the WP-crontrol dashboard.
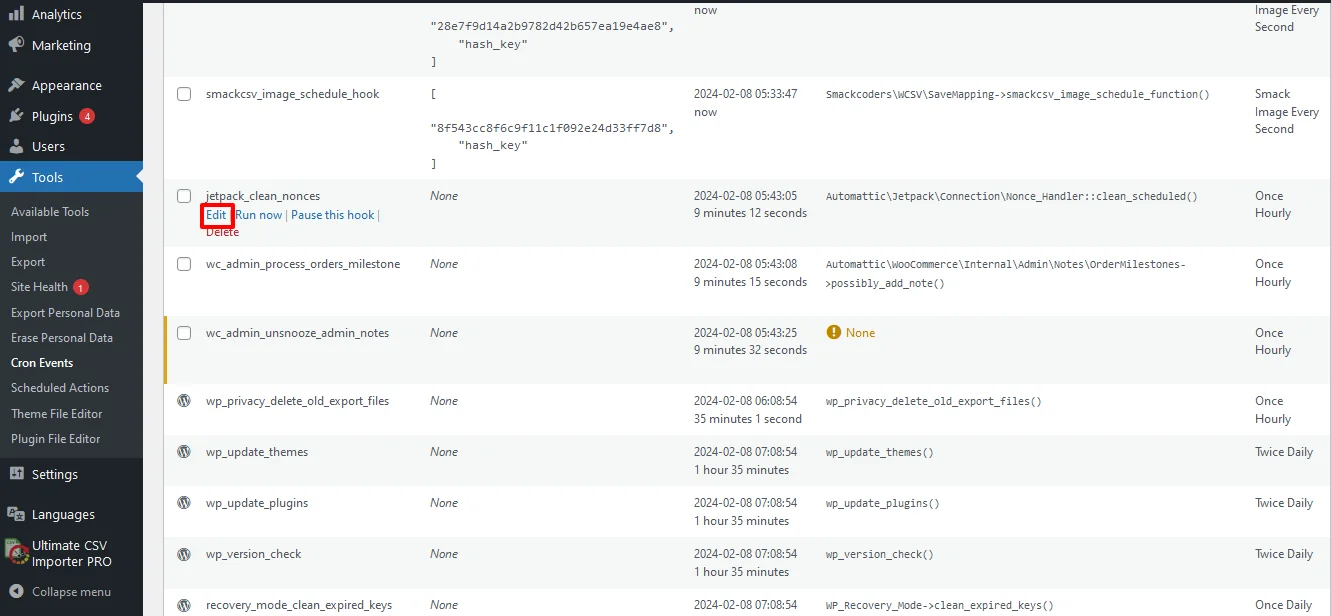
- Hover over the desired Cron event and click on Edit.
- Edit the desired fields based on your business needs. You can update the recurrence time interval, Hooke name, or Next run time.
- Once edited, click on Update Event.
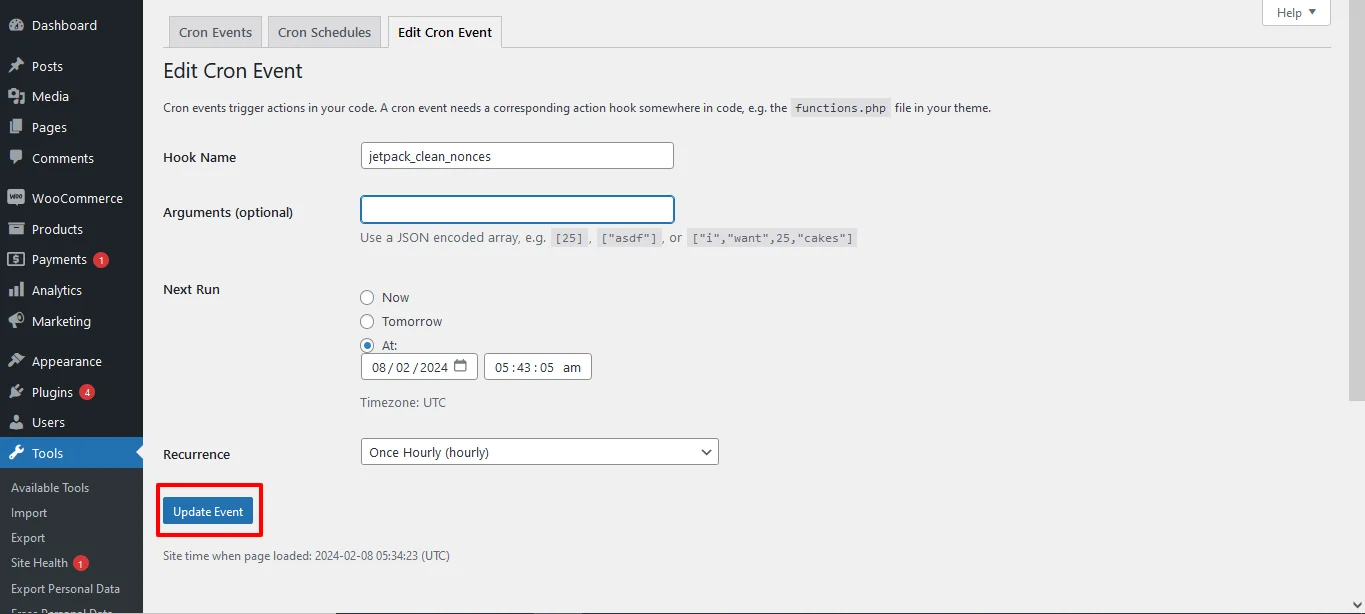
To delete an existing cron event, hover over the desired cron event and click on Delete.
WP Crontrol is a powerful tool for WordPress administrators and developers to manage cron jobs efficiently. By providing an intuitive interface and robust features, WP Crontrol simplifies the process of scheduling, monitoring, and debugging cron events, ultimately enhancing the automation capabilities of your WordPress site. Whether you’re a novice user or a seasoned developer, WP Crontrol empowers you to take control of your site’s automation with ease.
Advanced Cron Manager:
This plugin provides a user-friendly interface to manage all WP-Cron tasks. It allows you to view, edit, delete, and schedule tasks effortlessly. Additionally, it provides insights into when each task last ran and when it’s scheduled to run next.
Steps to Set up and Manage WP-Cron Schedule Using Advanced CRON Manager:
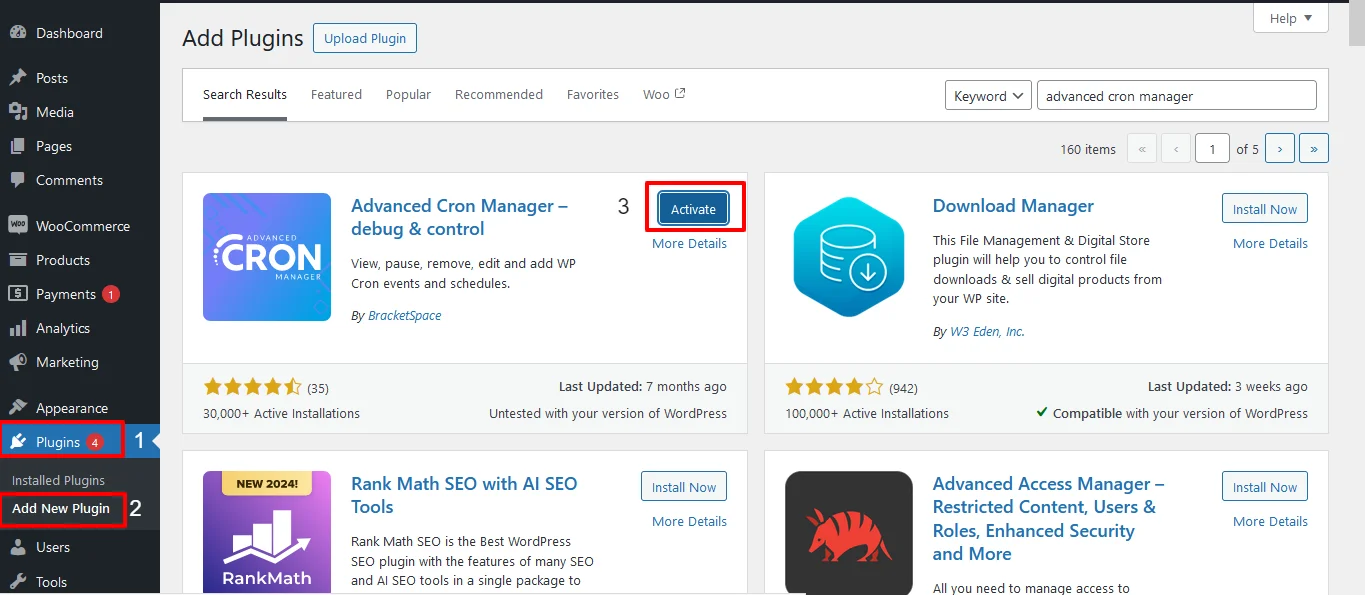
Step 1: Install and activate the plugin
Navigate to plugins and search for Advanced CRON Manager.
Install the plugin and then activa
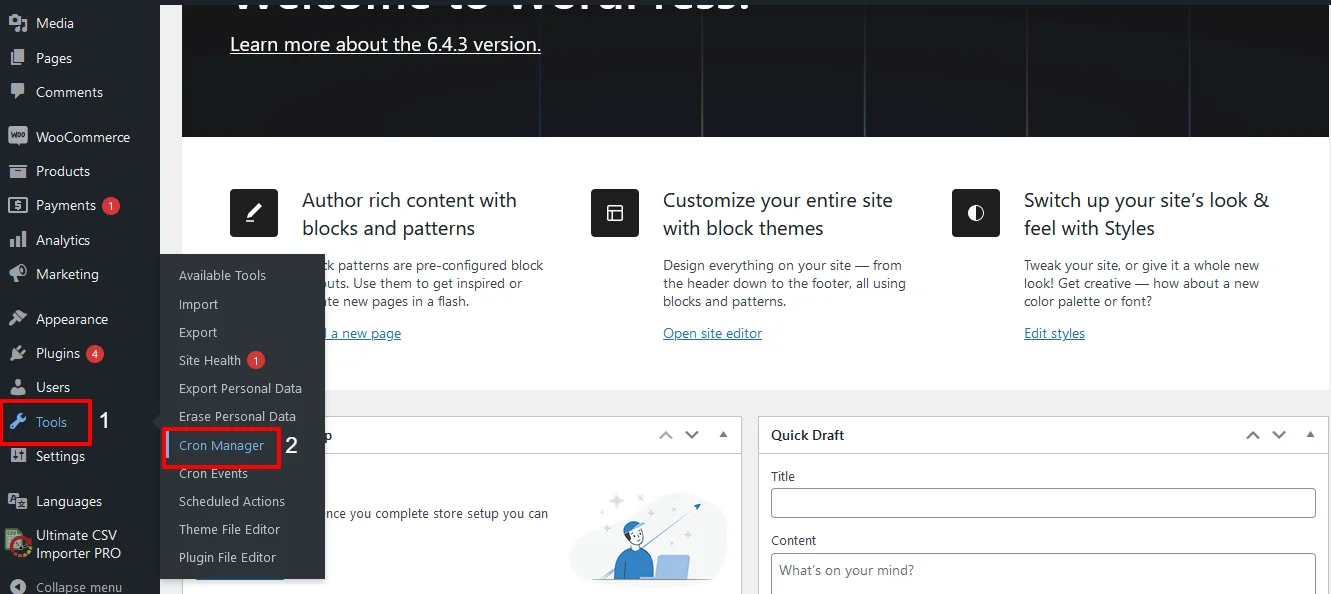
Step 2: Access the Plugin
To access the plugin, navigate to Tools -> CRON Manager
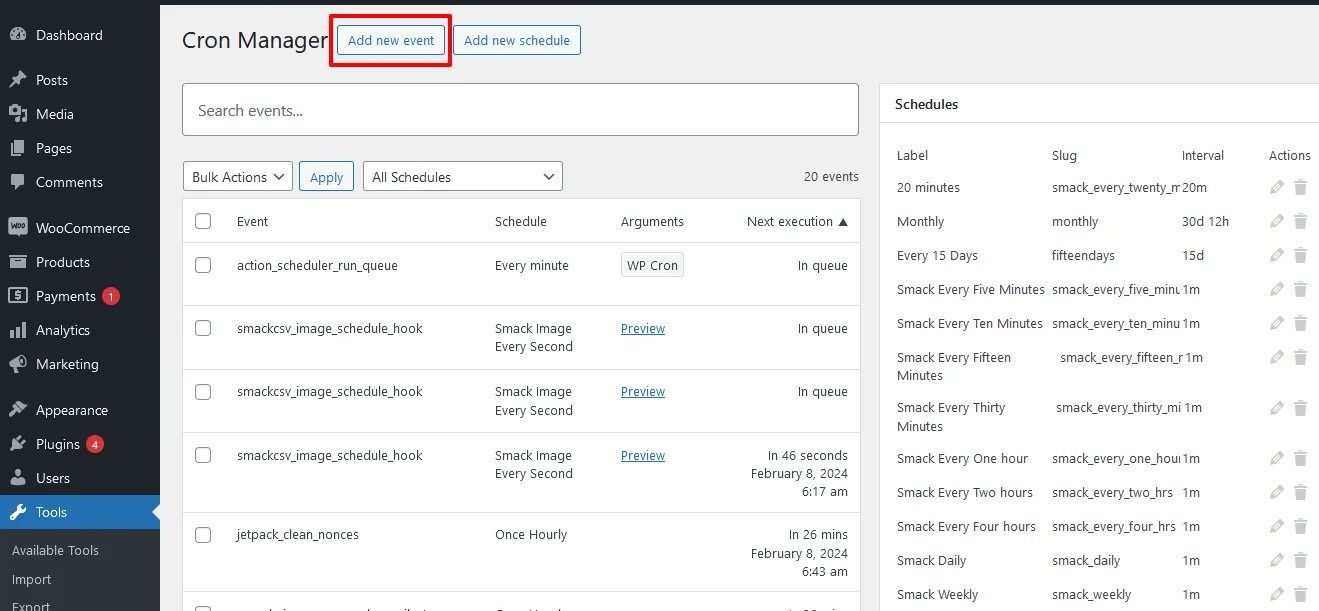
Step 3: View the CRON Manager’s Dashboard
On accessing the CRON manager, you can view the list of all cron events and list of all cron schedules.
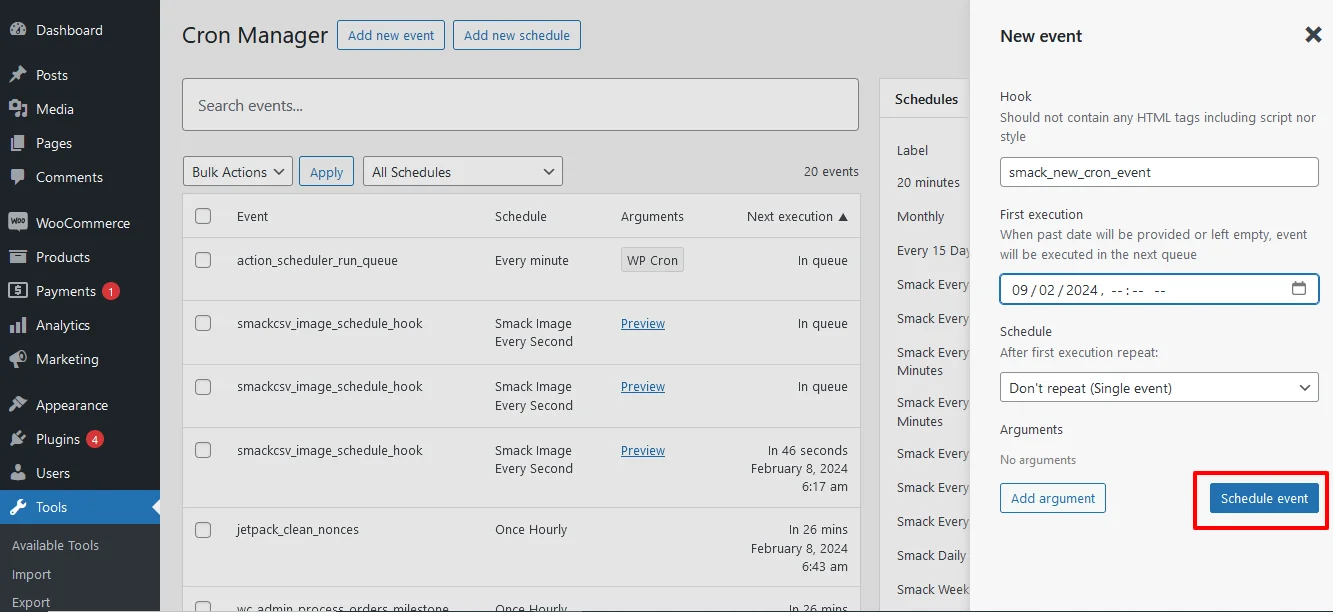
Step 4: Add a new CRON Event
With Advanced CRON Manager, you can easily add new CRON events by simply clicking on the Add new event button on Cron Manager’s dashboard.
Provide the hook name with the php naming convention. E.g. smack_new_cron_event.
Then select the first execution date and recurring (Scheduled) time interval of the New Cron event.
Once done, Click on schedule event
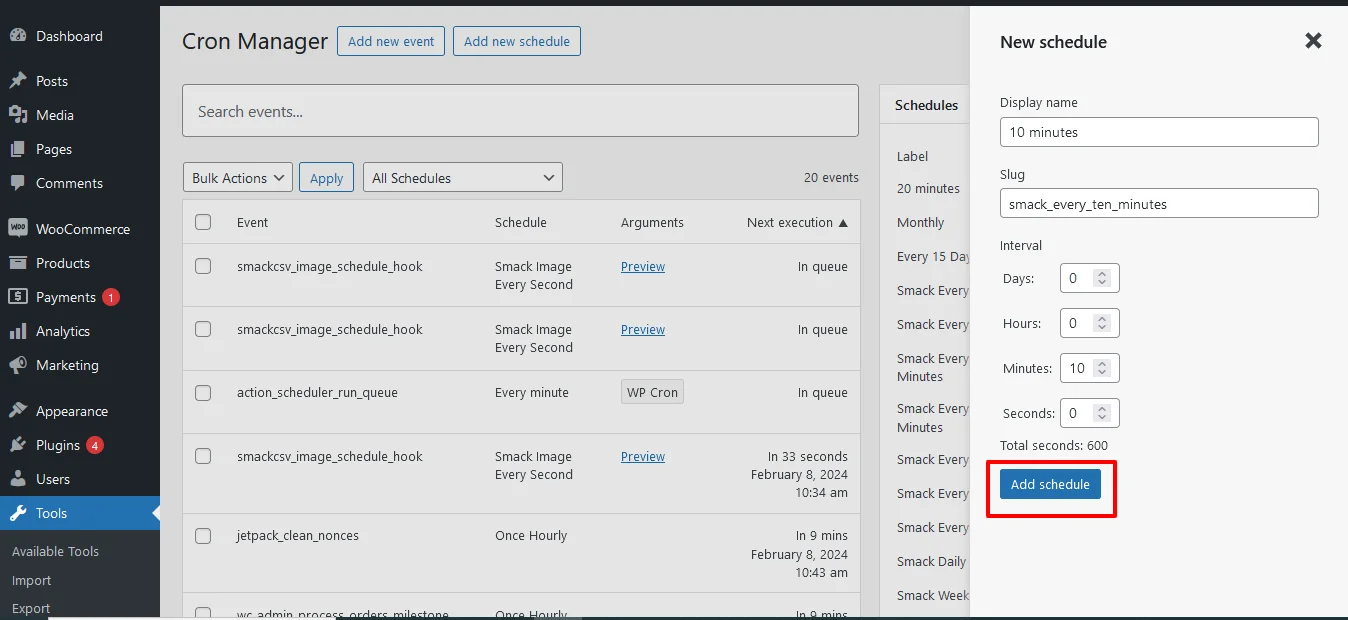
Step 5: Add new schedule
To add custom time schedule for wp- cron,
- Navigate to the Add new schedule at the top of the Cron’s Manager dashboard page.
- Provide the display name, slug and the select the schedule intervals as day, hour, minutes or seconds.
- Once done click on Add schedule button. Now your new schedule will get added to the schedule list.
How WP Ultimate CSV Importer Works with WP-Cron:
If you are importing large volumes of data into WordPress, WP-Cron becomes genuinely useful rather than just a background system you never think about. WP Ultimate CSV Importer uses WP-Cron in two specific ways that make a real difference when you are working with big datasets.
Scheduled Imports:
Instead of triggering every import manually, you can set WP Ultimate CSV Importer to run at a defined interval using WP-Cron. If you receive updated CSV files regularly, whether daily, weekly, or on any custom schedule, you can configure the importer to pick up those files and process them automatically without you having to log in and kick things off every time.
Batch Processing:
Large imports do not run as a single operation. WP Ultimate CSV Importer Plugin breaks them down into smaller batches and processes each one in the background using WP-Cron. This keeps your server from being overwhelmed by a single heavy operation and means your site stays responsive for visitors while the import is running. Featured images from external URLs are also handled this way, pulled and
WP Ultimate CSV Importer Pro
Get Ultimate CSV/XML Importer to import data on WordPress faster, quicker and safer.
Frequently Asked Questions:
1. What is WP-Cron in WordPress?
WP-Cron is how WordPress handles anything that needs to happen on a schedule. When you set a post to go live tomorrow morning, schedule a plugin to check for updates overnight, or configure an automated email to go out every week, WP-Cron is what actually makes those things happen. It runs quietly in the background and most site owners never interact with it directly until a scheduled task stops working.
2. How do I check if WP-Cron is enabled?
Head into your wp-config.php file and search for this line:
phpdefine(‘DISABLE_WP_CRON’, true);
If it is there and set to true, WP-Cron is switched off. If you cannot find the line at all, it is enabled and running fine. Another quick way to confirm is by installing the WP Crontrol plugin, which shows you every scheduled event and whether they are running correctly.
3. How does WordPress cron work?
It piggybacks on site visits. Every time a visitor loads a page, WordPress checks its task queue and runs anything that is due. No visitors means no trigger, which is why low traffic sites sometimes see delays with scheduled tasks. It works well enough for most sites but if you need tasks firing on a strict schedule, setting up a real server cron job to call wp-cron.php is the more dependable setup.
4. How do I fix WP-Cron when it stops working?
First check wp-config.php and make sure DISABLE_WP_CRON is not set to true. Then head to Settings and General inside your dashboard and double-check your timezone. A wrong timezone setting is one of the most common reasons tasks appear to be broken when WP-Cron itself is actually fine. If tasks are still stuck after that, try running them manually through WP-CLI:
bashwp cron event run –all
If nothing works and the issue keeps coming back, switching to a server-level cron job is the cleanest permanent fix.
5. How do I disable WP-Cron in WordPress?
Turning off WP-Cron makes sense in two specific situations. Your site gets a lot of traffic and WP-Cron is firing too frequently on every page load, or your scheduled tasks are heavy enough that running them through site visits is putting real strain on your server. In both cases the better move is to disable WP-Cron and hand the job over to a real server cron instead.
To disable it, add this line to your wp-config.php file:
php
define(‘DISABLE_WP_CRON’, true);
Once that is in place, set up a server cron job to call wp-cron.php at regular intervals so your scheduled tasks still run on time. Disabling WP-Cron without replacing it with a server cron means your scheduled tasks stop running entirely, so do not skip that second step.
Wrapping Up:
WP-Cron is one of those parts of WordPress that works fine until it does not, and when it breaks, the symptoms show up in places that seem completely unrelated. Posts not publishing, emails are not sending, and imports are sitting untouched. Now you know exactly where to look and what to do about it.
If your site is small and traffic is steady, the default WP-Cron setup will serve you well with the right configuration in place. If you are running a high-traffic site or need tasks firing on a precise schedule, switching to a server-level cron job is worth the extra fifteen minutes it takes to set up.
The plugins covered in this guide make day-to-day cron management straightforward, even if you never want to touch a line of code. Pick the one that fits how you work and use it to keep an eye on what is running and what is not.
If something is still not behaving the way it should after working through this guide, reach out to us at support@smackcoders.com, and we will help you sort it out.
How to Install ionCube Loaders on Any Server, Hosting or PHP Environment
24 Mar 2026, 5:43 am
Table of Contents
Most people land on this page for one of two reasons. Either they just saw the error “the ionCube PHP Loader needs to be installed” and have no idea what that means, or they are setting up a PHP application that requires ionCube and want to get it right the first time.
ionCube Loader is a PHP extension that decodes and runs encrypted PHP files on your server. A lot of commercial PHP software, including plugins, modules, and web applications, ship with their source code encrypted using ionCube. If the Loader is not installed and matched to your PHP version, those files will not execute at all. Your site either throws an error or goes completely blank.
Getting it installed correctly comes down to three things: knowing your PHP version, picking the right Loader file for your server environment, and dropping one line into your php.ini. That is the entire process whether you are on Linux shared hosting, a VPS, a Windows server, or a local XAMPP setup on your machine.
This guide covers all of it in plain language. No assumptions about your experience level, no skipping steps. By the time you finish, ionCube Loader will be running and you will know exactly how to confirm it.
Why Use IonCube Loader?
ionCube Loader exists because commercial PHP software needs protection. When developers build paid plugins, themes, or web applications, they cannot distribute raw source code to every customer. ionCube solves this by encoding PHP files into a format that only the Loader can decrypt and execute at runtime. Without it installed on your server, those encoded files are unreadable and your application will not run.
Here is what that means in practice for the most common use cases:
Enhanced security -The ionCube Loader protects PHP code from unauthorized access and modification by encrypting the source files. This is the primary reason commercial WordPress themes, plugins, and licensed web applications ship with ionCube encoding, it prevents customers from reading or editing the underlying code.
Improved performance – The Loader caches precompiled bytecode, which speeds up PHP execution compared to interpreting raw source files on every request. For applications running encoded files across multiple page loads, this reduces server overhead measurably.
Protected intellectual property – ionCube encoding prevents code theft and unauthorized redistribution. Developers who sell licensed software can tie encoded files to specific domains or license keys, so the application only runs where it is legally deployed.
Bulk data processing – Applications that handle high-volume operations, such as data importers, API integrations, and batch processing scripts, benefit from the runtime efficiency of precompiled bytecode, particularly when processing large datasets repeatedly.
What is ioncube Loaders, and How is it Useful?
You can use the online version of the ioncube encoder for free to encrypt your PHP code, but it’s for testing purposes. And there is no need to pay for IonCube Loader, it’s completely free to download and install on your server. You need to purchase the ionCube Encoder to encode your PHP files.
Encoding your application sources offers many benefits:
- Helps Developers in protecting and licensing your application sources.
- Hides sensitive information and protects scripts from unauthorized changes for Website Owners.
- Guards creative work and revenue stream of Website Designers against future script updates.
- Now we get to know about ionCube and its benefits, what’s next? Install ionCube Loader. How many questions pop up in our mind, How to go ahead with this? What version should I use? Is the installation that much harder? The list goes on.
How to Install an ionCube Loader, What’s Involved?
IonCube loader install is not what you think is difficult but an easy process to do. We can get it done in a few simple steps:
- Download IonCube Loader.(You can download the ionCube Loader from https://www.ioncube.com/loaders.php)
- Extract and install the ionCube extension file.
- Find the PHP.ini file (configuration file)
- Enable the IonCube Loader.
- Configure IonCube Loader.
- Verify the installation.
Find Out Your PHP Version
Before installing the ionCube Loader, you need to find your PHP version so you download the matching Loader file. To check your PHP version and server environment, follow these steps:
Create a file called phpinfo.php in the root directory of your web server and add the following code:
php
<?php phpinfo(); ?>
“`
Visit `yourdomain.com/phpinfo.php` in your browser. The PHP version appears at the top of the page in the header. Note the version number for example, PHP 8.3.x and the system architecture shown further down. If the system line ends with `x86_64`, you are running 64-bit PHP. If it ends with `i686`, it is 32-bit. Use this information to select the correct Loader file in the next step.
Note: Delete or restrict access to `phpinfo.php` after you are done. The page exposes detailed server configuration information that should not be publicly accessible.
Download ionCube Loader
Using Terminal
Run the following commands in the terminal:
Before downloading the ionCube Loader, confirm whether your system is running 32-bit or 64-bit architecture by running:
uname -a
If the output ends with `x86_64`, your system is 64-bit. If it ends with `i686`, it is 32-bit. The majority of modern servers run 64-bit.
For 64-bit Linux:
wget https://downloads.ioncube.com/loader_downloads/ioncube_loaders_lin_x86-64.tar.gz
tar xfz ioncube_loaders_lin_x86-64.tar.gz
For 32-bit Linux:
wget https://downloads.ioncube.com/loader_downloads/ioncube_loaders_lin_x86.tar.gz
tar xfz ioncube_loaders_lin_x86.tar.gz
Choosing the right one and installing
After downloading and extracting the Loader on your server, install the Loader file that matches your PHP version.
Run `php -v` to confirm your PHP version, then run the command below to find the correct directory to place the file:
php -i | grep extension_dir
Note: The directory path differs per PHP version and Linux distribution. Do not assume it is the same as a previous installation.
Configure PHP For the IonCube Loader
Activate the extension by including the following line at the top of your php.ini file. Replace the version number in the filename with the PHP version running on your server.
Important: ionCube Loader does not support PHP 8.0. If your server is running PHP 8.0, switch to PHP 8.1, 8.2, 8.3, or 8.4 before proceeding. The examples below use PHP 8.3, adjust the filename to match your installed PHP version.
For CentOS / RHEL:
zend_extension = /usr/lib64/php/modules/ioncube_loader_lin_8.3.soFor Ubuntu / Debian:
zend_extension = /usr/lib/php/ioncube_loader_lin_8.3.soFor Windows:
zend_extension = C:\php\ioncube\ioncube_loader_win_8.3.dllFor FreeBSD:
zend_extension = /usr/local/lib/php/ioncube_loader_fre_8.3.soNotes:
- Make sure the path points to your actual PHP extension directory. Run
php -i | grep extension_dirto find the correct path on your server. - The ionCube Loader must be the first Zend extension listed in your php.ini. If other Zend extensions are present, place the ionCube line above them.
- After adding the line, restart your web server for the change to take effect.
- On IIS (Windows Server), you may also need to update the file permissions on the Loader .dll file. Right-click the file → Properties → Security tab → add the Users group. Then restart the IIS World Wide Web Publishing service to reload PHP.
How to check ionCube loader is installed- Test the ionCube Loader installation
Now, verify the ionCube loader is properly installed and configured on your server. Let’s see how to check the ionCube loader version. You can verify just by checking the PHP version.
In your terminal, use the command: php -v to test the ionCube loader installation.
You can also run the URL along with phpinfo.php and verify the ionCube installation.
WP Ultimate CSV Importer Pro
Get Ultimate CSV/XML Importer to import data on WordPress faster, quicker and safer.
Installing with the Loader Installer or Loader Wizard
Loader Wizard PHP script can be helpful with installation when it is available in a Zip and tgz archive. Download and install the script into your web space. Then launch the script in your browser for guidance on installation and selection of the correct Loader package. The Wizard is also provided within the Loader packages below.
For more info, you can refer to http://www.ioncube.com/loader_installation.php and download the package at http://www.ioncube.com/loaders.php.
Installing ionCube in Hosting Providers
Most hosting providers either have ionCube Loader pre-installed or can enable it for your account on request. Before attempting a manual install, check your hosting control panel first, many providers offer a one-click option under PHP settings that takes less than a minute.
If you cannot find it in your control panel, contact your hosting support team and ask them to enable ionCube Loader for your account and PHP version. This is a routine request and most hosts handle it the same day.
Otherwise, creating a custom php.ini file with the correct zend_extension line is sufficient for most shared hosting environments. The host-specific steps below cover the most common setups.
Shared Hosting Quick Check
- Log into your hosting control panel and search for “ionCube” in the PHP extensions or software settings
- If it does not appear, check your hosting knowledge base or support forums for ionCube-specific instructions
- If nothing is found, open a support ticket, do not attempt to manually install on shared hosting without confirming your host allows it
Note: The Loader filename format follows this pattern:
ioncube_loader_os_phpversion.ext
Where os is lin for Linux or win for Windows, phpversion is your PHP version (8.1, 8.2, 8.3, or 8.4), and .ext is .so for Linux or .dll for Windows.
Example: ioncube_loader_lin_8.3.so
How to install ionCube Loader on the server side
On most web servers, adding a single zend_extension line to your php.ini file is all that is needed. The Loader does not require a full server restart in all environments, some setups reload PHP configuration automatically. Refer to the Configure PHP section above for the exact line to add for your operating system.
Installation with Various Hosting Providers
HostGator
- Log into your HostGator cPanel
- Go to Software → Select PHP Version
- Switch to the Extensions tab and look for ionCube Loader in the list
- Enable the toggle next to ionCube and save the changes
- Verify by visiting your phpinfo.php page and searching for “ionCube”
Note: The older PHP Config → PHP5 (Single php.ini) method referenced in earlier guides no longer applies to current HostGator cPanel versions. Use the PHP Selector instead.
Blue Domino
- Log into the Control Panel
- Click CGI and Scripted Language Support under Scripting and Add-Ons
- Click PHP Scripting
- Add the following line, replacing
x.xwith your PHP version number:
zend_extension = /usr/local/lib/ioncube/ioncube_loader_lin_8.3.soClick Save
OVH Hosting
Add the following lines to your custom .htaccess file in the root of your site:
SetEnv IONCUBE 1
SetEnv PHP_VER 8
If the file does not exist, create a new file called .htaccess, add the lines above, save it, and upload it to your site’s root directory.
Other Hosting Providers — Quick Reference
| Host | ionCube status |
|---|---|
| SiteGround | Supported — enable via PHP settings in cPanel |
| Kinsta | Supported — enable via MyKinsta → Sites → Tools |
| DreamHost | Supported — manual install via SSH required |
| Cloudways | Supported — enable via PHP settings in the platform |
| GoDaddy | Supported — contact support or use cPanel PHP extensions |
| Namecheap | Supported — enable via cPanel PHP extensions |
| WP Engine | Contact support to enable |
| A2 Hosting | Supported — available via cPanel PHP extensions |
| GreenGeeks | Supported — contact support to enable |
| Hostinger | Supported — enable via hPanel PHP configuration |
| Glow Host | Contact support to request ionCube installation |
| Network Solutions | Not supported |
| Yahoo Hosting | Not supported |
Note: Ktools, Aruba, IX Web Hosting, Jacobson Hosting, Web Hosting Pad, Lunarpages, Jaguar PC, and several others listed in older guides are either discontinued, acquired, or no longer commonly used. They have been removed from this list.
Loader Downloads
Download the ionCube Loader package that matches your operating system and PHP version from the official downloads page: ioncube.com/loaders.php
Troubleshooting Site error:
If you see either of these errors after installing ionCube, your server is either missing the Loader entirely or the installed version does not match your current PHP version:
Site error: the ionCube PHP Loader needs to be installed.Site error: We detect you do not have the ionCube Loader, please ask your host to install ionCube Loader version 11.0 or higher.Work through the following checks in order. Most installations are resolved by step 2 or 3.
Step 1 – Confirm the Loader is actually installed
Run this command in your terminal:
php -i | grep ionCubeIf no output appears, the Loader is not installed or not loading correctly. Return to the installation steps above and verify you placed the correct Loader file for your PHP version in the right directory.
If output appears showing the ionCube version, move to Step 2.
Step 2 – Check for a PHP version mismatch
This is the most common cause of the error. The Loader filename must exactly match your PHP version. A Loader built for PHP 8.2 will not run on a PHP 8.3 server and will throw this error silently.
Run:
php -vCompare the PHP version shown against the version number in your Loader filename. If they do not match — for example, your server is running PHP 8.3 but your Loader file is named ioncube_loader_lin_8.2.so — download the correct Loader file from ioncube.com/loaders.php and update your php.ini to point to it.
Step 3 – Verify the zend_extension line is in the correct php.ini
Servers often run multiple php.ini files depending on how PHP is being called — one for CLI (command line), one for web requests, and sometimes one per virtual host. Adding the zend_extension line to the wrong file means the Loader loads in one context but not the other, producing the error inconsistently.
To find which php.ini your web server is actually reading, create a temporary file in your web root:
php
<?php phpinfo(); ?>Open it in your browser and search for “Loaded Configuration File.” The path shown is the php.ini your web server is using. Confirm your zend_extension line is in that file — not just any php.ini on the server.
Step 4 – Confirm ionCube is listed first in php.ini
The ionCube Loader must be the first zend_extension entry in your php.ini. If another Zend extension loads before ionCube, conflicts can cause the error to persist even when everything else is configured correctly. Check that no other zend_extension = lines appear above the ionCube line.
Step 5 – PHP 8.0 incompatibility
If your server is running PHP 8.0, ionCube Loader will not work — PHP 8.0 is not supported by any version of ionCube Loader. Switch to PHP 8.1, 8.2, 8.3, or 8.4. The error will resolve immediately once you change PHP versions, assuming the correct Loader for the new version is installed.
Step 6 – Contact your hosting provider
If none of the above resolves the error, the issue is likely a server-level restriction that requires your host’s involvement. Shared hosting providers in particular sometimes restrict which PHP extensions can be loaded from user-level php.ini files. Contact your host’s support team and ask them to confirm ionCube Loader is enabled for your account and PHP version.
Frequently Asked Questions (FAQ)
1. What is IonCube Loader?
IonCube Loader is a PHP extension used to decode files encoded with the IonCube PHP Encoder. It allows PHP scripts encoded with IonCube to be executed on a web server.
2. What does ionCube do?
ionCube is a PHP encoding tool that protects the source code of PHP applications from being read, copied, or modified. When a developer encodes their PHP files using ionCube, those files can only be executed by a server that has the ionCube Loader installed. The encoder scrambles the code into an unreadable format and the Loader is the only thing on your server that knows how to translate it back into something PHP can actually run. This is why a lot of commercial PHP software, premium plugins, and licensed web applications require ionCube to be present on your server before they will run.
3. How do I install ionCube Loader in XAMPP?
Start by visiting the official ionCube website and downloading the Loader package that matches your operating system. Since XAMPP runs on Windows in most cases, download the Windows version. Extract the package and copy the correct Loader file for your PHP version into the ext folder inside your XAMPP PHP directory. The file will be named something like ioncube_loader_win_8.3.dll depending on your PHP version.
Next, open your php.ini file from the XAMPP control panel and add the following line at the very top before any other zend entries:
zend_extension = "C:/xampp/php/ext/ioncube_loader_win_8.3.dll"
Save the file and restart Apache from your XAMPP control panel. Open your browser and visit localhost/phpinfo.php to confirm ionCube Loader appears in the output.
4. How do I check if ionCube Loader is installed?
There are two straightforward ways to check. The first is through your terminal. Run the command below and look for ionCube in the output.
php -i | grep ionCube
The second way is through a phpinfo page. Create a file called phpinfo.php in your web root, add the code below, and open it in your browser.
<?php phpinfo(); ?>
Search the page for “ionCube.” If it shows up with version details, the Loader is installed and running correctly. If nothing appears, it is either not installed or not configured properly in your php.ini file.
5. How do I fix the site error “the ionCube PHP Loader needs to be installed”?
This error means your server does not have the ionCube Loader installed, or the version installed does not match your current PHP version. Here is how to work through it.
First, check your PHP version by running php -v in your terminal. Then download the ionCube Loader package from the official website and pick the file that matches your exact PHP version and operating system. Add the correct zend_extension line to your php.ini file pointing to the Loader file location. Restart your web server and verify the installation using phpinfo().
If the error persists after installation, the most common cause is that the zend_extension line was added in the wrong php.ini file. Some servers use multiple php.ini files depending on how PHP is being called. Check with your hosting provider to confirm which one is active for your account.
6. How do I enable ionCube Loader in PHP?
Once the Loader file is in place on your server, enabling it is a single step. Open your php.ini file and add this line at the very top of the file before any other extensions:
zend_extension = /path/to/ioncube_loader_lin_8.3.so
Replace the path with the actual location of your Loader file and make sure the filename matches your PHP version. On Windows the file extension will be .dll instead of .so. Save the file, restart your web server, and confirm the Loader is active by checking your phpinfo() output or running php -i | grep ionCube in the terminal.
Wrapping Up
ionCube Loader is not complicated once you stop overthinking it. Find your PHP version, grab the matching Loader file, add the zend_extension line to your php.ini, and restart your server. That is genuinely all there is to it for most setups.
If something is not working after installation, nine times out of ten it is either a version mismatch or the extension line ended up in the wrong php.ini file. Both are easy fixes once you know where to look, and the troubleshooting section in this guide walks you through both scenarios.
For anyone who got here because of a site error, hopefully your pages are loading cleanly now. For anyone setting this up fresh, run a quick phpinfo() check before you do anything else. It saves a lot of back and forth later.
Any questions about your specific setup? Reach out at support@smackcoders.com and we will take a look.
How to Set Featured Images from URL in WordPress Using FIFU
19 Mar 2026, 6:38 pm
Table of Contents
Setting a featured image from an external URL in WordPress is straightforward once you know which approach fits your situation, but WordPress doesn’t support it out of the box, and choosing the wrong method can create storage bloat, broken images, or long-term SEO instability.
There are three ways to make it work. The FIFU plugin is the fastest route for most sites; install it, paste a URL, and done. For developers who want images stored locally rather than referenced externally, the media_sideload_image() function downloads and attaches the image directly to your media library. And if you’re already building with Elementor Pro, it has its own built-in URL import that skips both.
This guide covers all three methods in plain steps, helps you choose between external and local hosting based on your actual use case, and includes a comparison table so you can make the right call before you start.
Key Takeaways
- WordPress does not support featured images from external URLs by default
- Plugins like FIFU let you reference external images without uploading them
- Programmatic methods download and attach images directly to your media library
- External images save storage but depend entirely on the availability of the host
- Always add alt text for both accessibility and search visibility
What Is the Featured Image from URL (FIFU) Plugin?
Featured Image from URL (FIFU) is a WordPress plugin that loads the post thumbnail directly from an external source instead of your WordPress media library. In simple terms, it lets you add URLs to featured images.
- The image is not uploaded to your server
- WordPress stores only the image URL
- The image is rendered dynamically from the external host
When Should You Use an External Featured Image?
External featured images are the right call in specific situations, and the wrong call in others. Choosing without knowing the difference creates problems that are frustrating to fix after the fact.
Use external featured images when:
- You manage large content volumes and want to avoid filling your server storage with media files
- Images are already hosted on a CDN or external asset server you control and maintain
- You are importing posts from another system that already references image URLs in bulk
- Publishing speed matters more than long-term image control for that specific content type
Avoid external featured images when:
- You don’t own or control the external image source, if that site goes down, your featured image disappears with it, leaving a broken image placeholder on every affected post
- Long-term availability is critical, external hosts can pull files, restructure URLs, or block hotlinking at any time without warning you
- The content is evergreen or SEO-critical, a missing featured image on a high-ranking post can hurt click-through rates in search results where the image appears in previews
- The external site may block hotlinking, some hosts actively prevent other sites from loading their images, which means your featured image loads for you but fails for every visitor
Method 1: How to Add External Image Links (URLs) to Featured Image in WordPress Posts, Pages & Products
The FIFU plugin adds a new field to the post editor, after it is installed and activated, for pasting an image URL. WordPress treats this image as the featured image without downloading it.
Install the WordPress Featured Image from URL(FIFU) plugin
The Featured Image from the URL plugin is available for free in WordPress. This plugin is easy to use and set up from your admin dashboard.
Visit dashboard → Plugins → Add new. Search for ‘fifu’ or ‘featured image from URL’ in the search box. The plugin will be listed. You can see that in the screenshot.
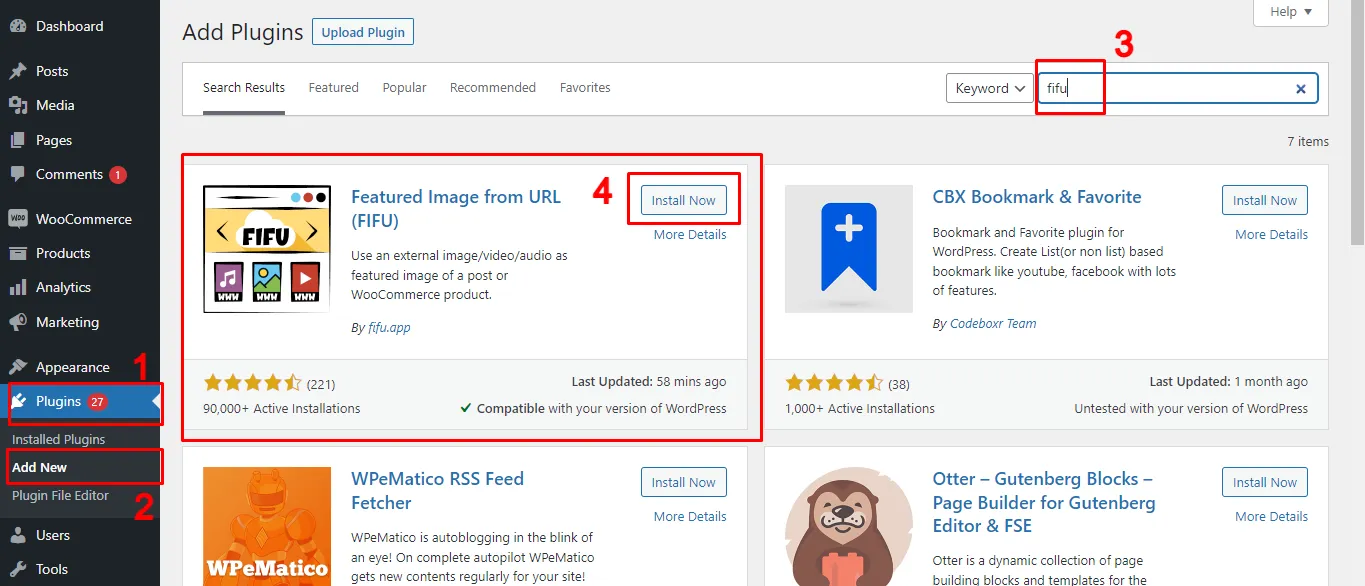
Install and activate the FIFU plugin.
You can now add external images as featured images for posts, pages, and custom post types.
How to Set a URL as Featured Image for WordPress Posts, Pages & Products
Before using images from other websites, just make sure you have the right permission or licensing to use them on your site.
To copy an external image URL:
- Visit the website where the image is located.
- Right-click the desired image and select ‘copy image address’.
- The image URL is now saved to your clipboard, and you can paste it wherever you need.
Keep in mind, you can only copy one image at a time.
Tip: If the image is from another WordPress site you own or manage, you can easily copy its URL directly from the media library.
Now, if you want to add external images as featured images for all your posts, you’ll need to copy and paste each URL into the featured image field of every post.
To add a featured image for WordPress Posts, Pages, or Custom Posts like Products:
- Open the edit screen of any post type(either create a new one or edit an existing one).
- From the top bar, click the settings icon to open the sidebar. By default, this will display the Post settings.
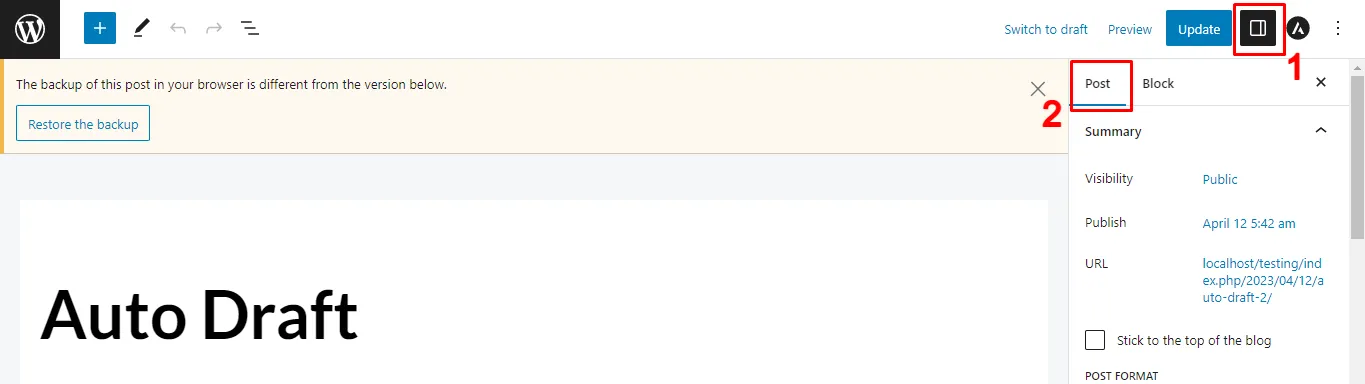
- Scroll down to locate the ‘Featured Image’ field provided by the FIFU plugin (like in the screenshot below).
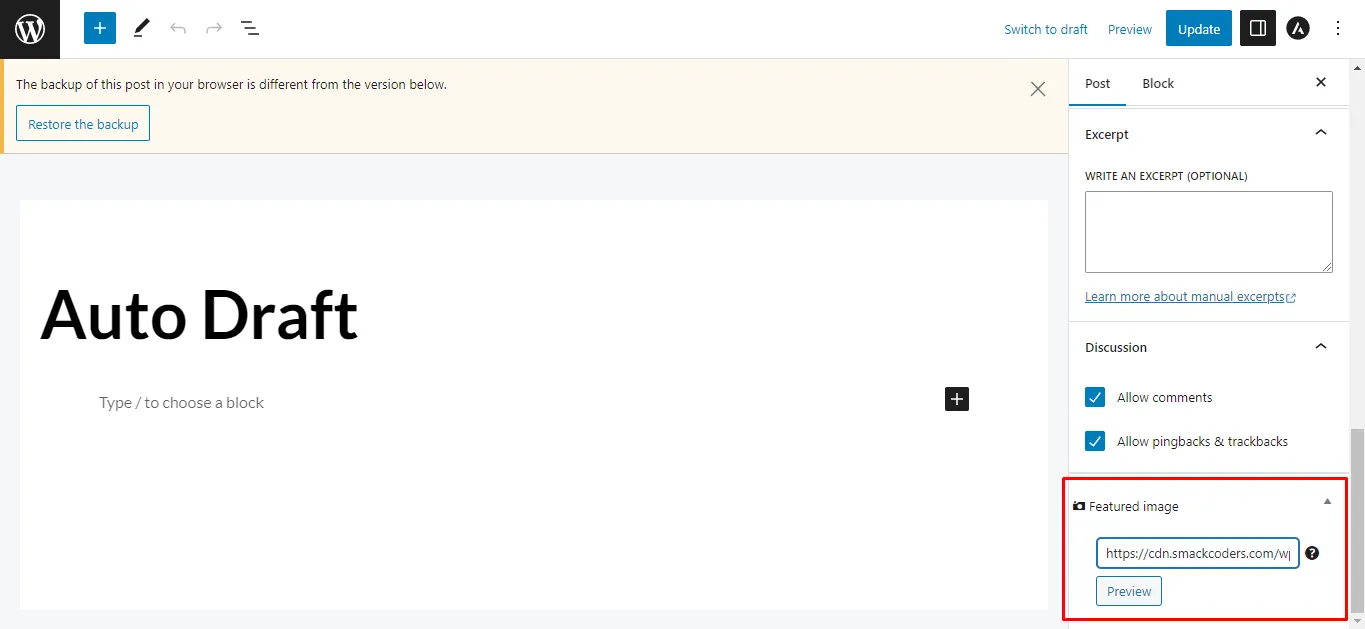
Now you can add your external image in two ways:
- Paste an image URL: Copy the external image link and paste it into the featured image text box.
- Search by keyword: Enter a keyword to get image suggestions, then choose one to use as your featured image.
Once you’ve added the image:
- Click Preview to see how it looks on your post.
- A new text box will appear where you can add Alt Text (recommended for SEO and accessibility).
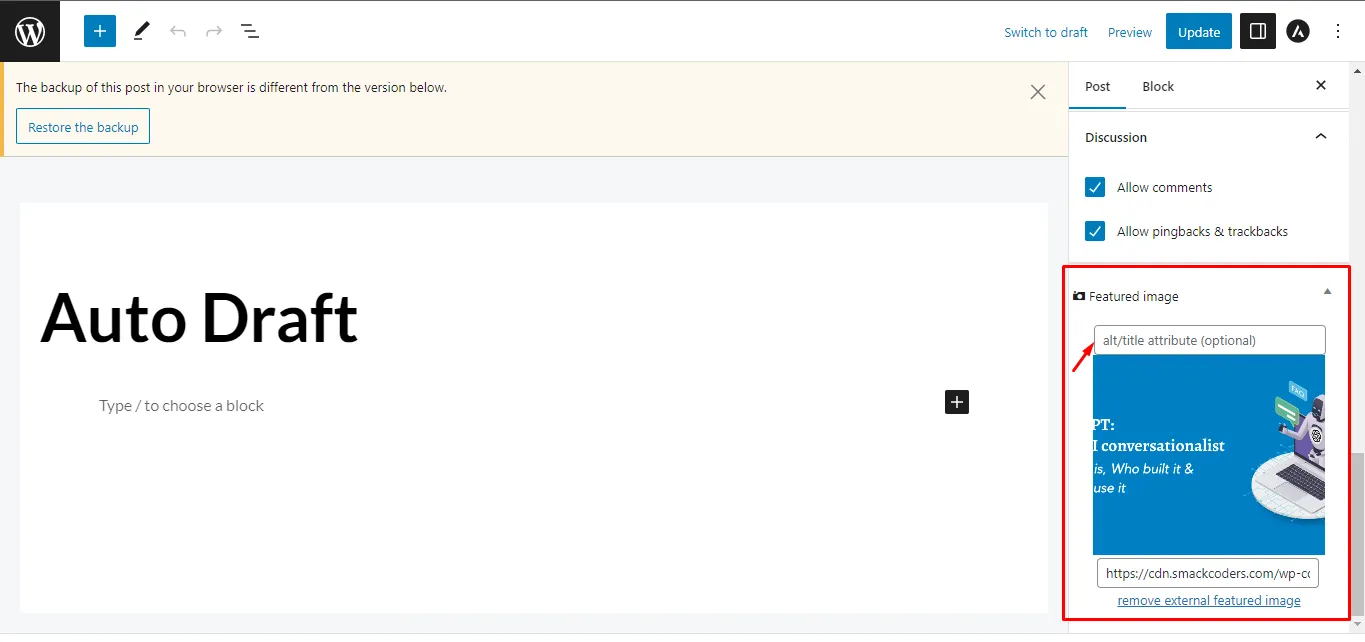
- Finally, click Save/Update to apply the changes.
To replace the featured image URL:
If you’d like to replace the featured image, simply remove the existing URL and paste a new one, then click Update.
To remove the featured image URL:
To remove it entirely, select “Remove External Featured Image” and you’ll return to the default state, where you can add another image if needed.
The above steps are applicable to Posts and Pages. To add featured image URLs for Products,
- Visit Products and open a product in an edit view
- You’ll see a “Product image” metabox newly added
- Enter the image URL inside the box and click the Preview button to view the image.
- Add an alt text for the image in the alt text box
Alt text is not optional for accessibility or search visibility.
Best practices for adding alt text:
- Describe what the image shows, not what it “is”.
- Avoid keyword stuffing.
- Keep it under 125 characters.
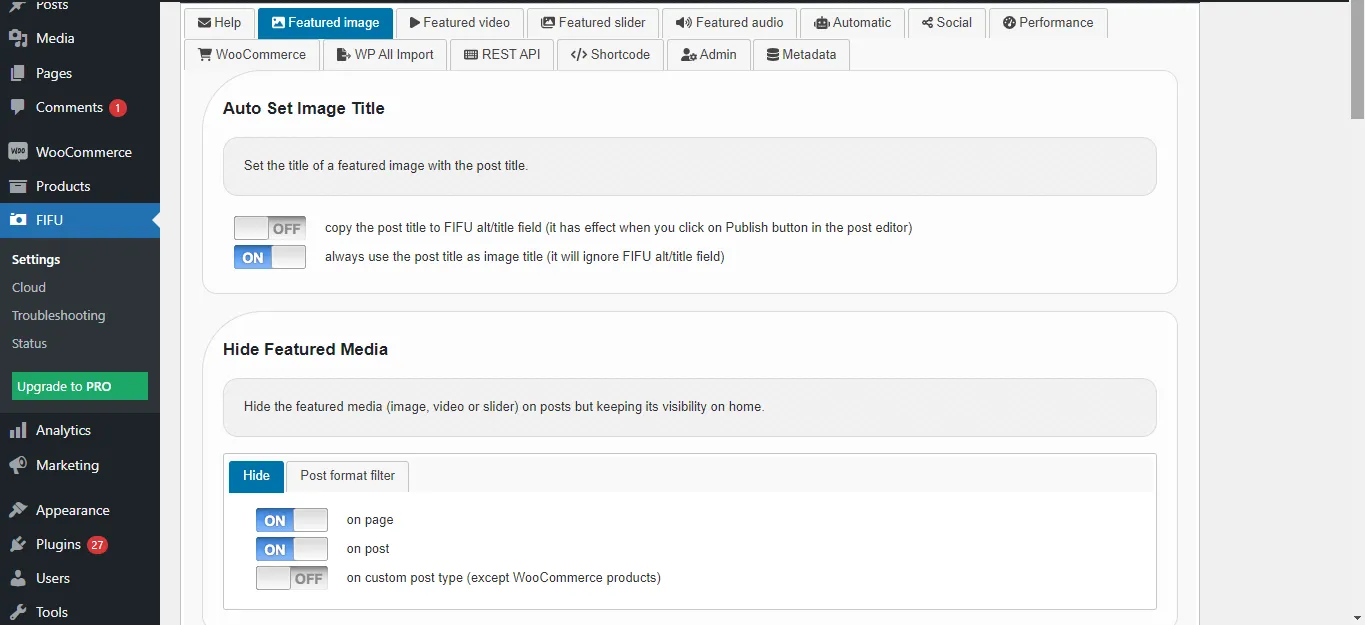
How to Hide the FIFU Featured Image Meta Box in WordPress
Sometimes, you may want to hide the featured image meta box by the FIFU plugin for specific post types like Posts, Pages, or Custom Post types like Products. This can be easily managed from the plugin’s settings.
- Go to the FIFU → Settings menu in your WordPress dashboard.
- The Settings page has multiple tabs (like image, video, slider, audio, etc.). This plugin supports more than just images.
- Open the Image tab and scroll down to the “Hide Featured Media” section (just above the default featured image setting).
- Enable the Hide toggle and in the next post type filter tab, specify the post types like “page, post” you want to exclude.
- This will remove the meta box from those post types.
Note: Once you installed the FIFU plugin, the featured image meta box will automatically display inside the post types(posts, pages, and products).
How to Add a Default Featured Image for a Post
The Default Featured Image option is useful if you create or update a post, page, or custom post type without assigning a featured image. Instead of leaving it blank, the plugin will automatically use the default image you set.
To configure this:
- Go to the FIFU → Settings page.
- Scroll down to the Default Featured Image section.
- Enable the Default featured image toggle.
- Paste the URL of the image you want to use as the default into the Image URL field.
- (Optional) If you want this to apply only to specific post types, add their values in the Post Type filter field. Example: post, page. This ensures the default image is applied only to those post types.
- Once configured, the image will automatically be assigned as a featured image to any post type (post, page, product, etc.) that doesn’t have one.
Method 2: Set featured images from URL programmatically in WordPress
To set a featured image in WordPress programmatically from a URL, you can use the media_sideload_image() function along with the wp_insert_post() function. Here’s an example of how you can achieve this:
function set_featured_image_from_url($post_id, $image_url) {

$image_id = media_sideload_image($image_url, $post_id, ‘Image Description’);

// Set Featured Image

if (!is_wp_error($image_id)) {

     set_post_thumbnail($post_id, $image_id);

}

}

// Usage

$post_id = 123; // Replace with your post ID

$image_url = ‘https://example.com/image.jpg’; // Replace with the URL of the image

set_featured_image_from_url($post_id, $image_url);
In this example:
- Replace $post_id with the ID of the post to which you want to set the featured image.
- Replace $image_url with the URL of the image you want to set as the featured image.
This function downloads the image from the provided URL, attaches it to the specified post, and sets it as the featured image. The media_sideload_image() function downloads the image and returns the attachment ID, and then set_post_thumbnail() sets this attachment ID as the featured image for the specified post.
Ensure you add this code to your theme’s functions.php file or a custom plugin. Also, be aware that this method relies on the allow_url_fopen setting in your PHP configuration. If it’s disabled on your server, you might need to use alternative methods or enable this setting.
Method 3: Add Image from URL Using Elementor
If you’re already building your pages with Elementor Pro, you don’t need a separate plugin to insert images from external URLs. Elementor’s built-in image widget includes a direct URL import option that lets you pull any externally hosted image into your layout without going through the WordPress media library.
This method is best used when you’re working inside Elementor’s editor and want to place an image from an external source directly into a specific section of your page, not as a post thumbnail set from the post editor, but as a placed image element within the design itself.
Note: This method adds an image to your Elementor layout, not to the WordPress featured image field. If you need the image to appear as the featured image in search results, social shares, or archive pages, use Method 1 (FIFU) instead.
- Open your page in the Elementor editor and drag the Image widget to where you want the image to appear
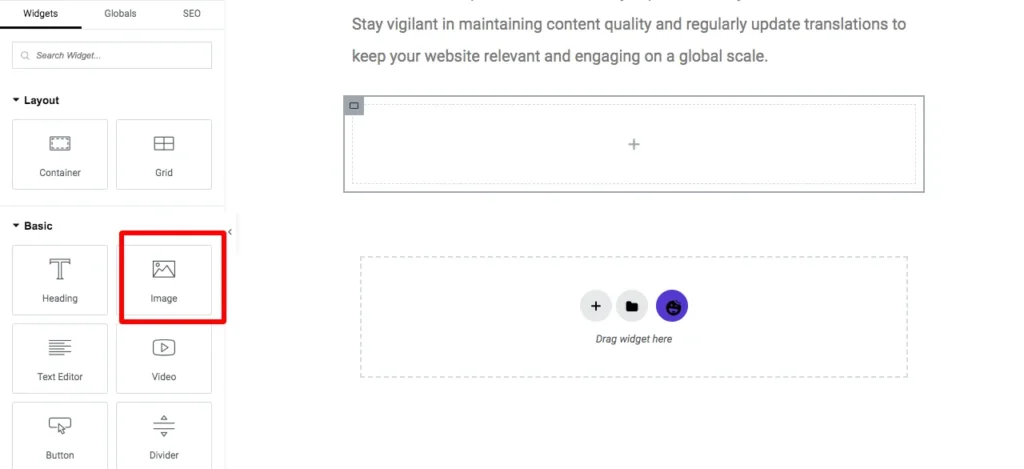
- Click Choose Image in the widget settings panel on the left
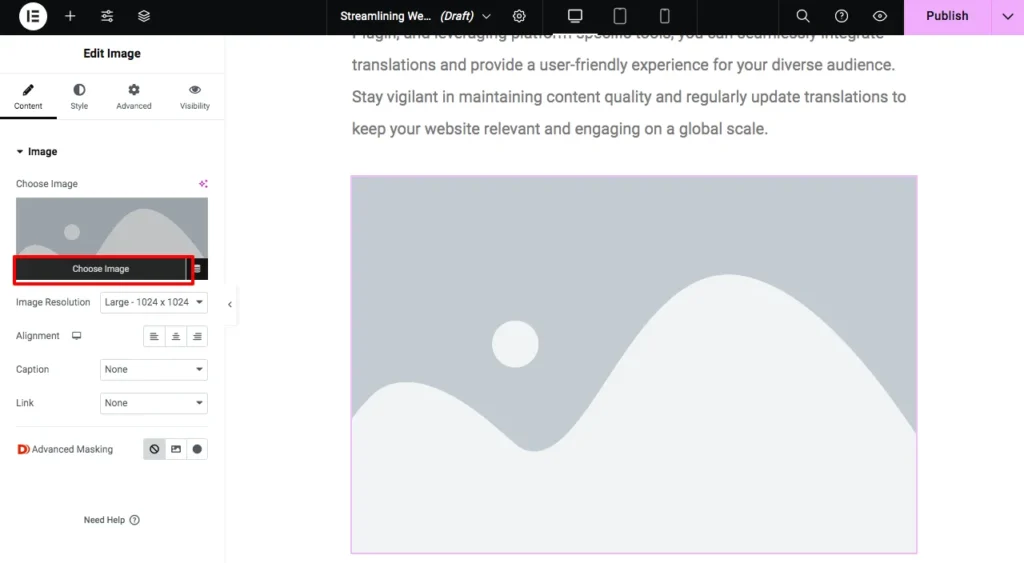
- Select the Upload Files tab, then click Insert from URL
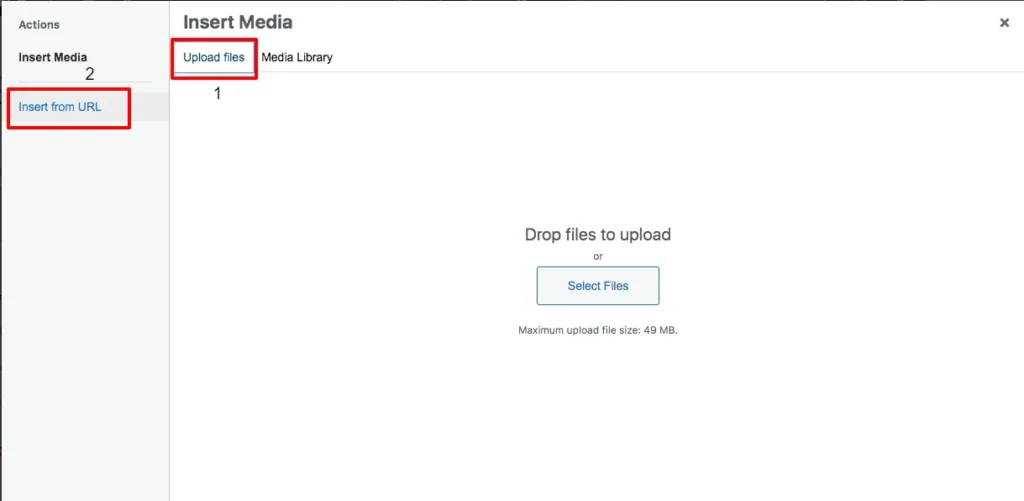
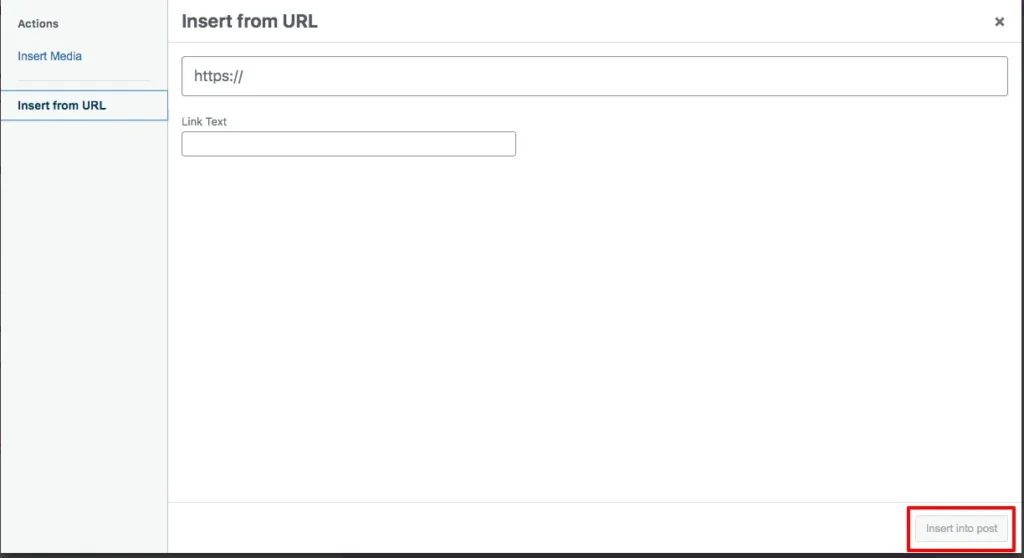
- Paste the external image URL into the field and add alt text in the Link Text box
- Click Insert into post, and the image loads directly from the external source into your Elementor layout
Now your images from the URL have been uploaded to your post successfully.
FIFU vs Downloading Images Locally: Which One Should You Use?
Both approaches get the job done, but they work differently and suit different situations. Here is a straightforward breakdown to help you decide which one fits your site.
| Factor | FIFU (External URL) | Downloading Locally |
| Storage Usage | No server storage used | Image saved to your media library |
| Setup Speed | Paste a URL and you’re done | Requires upload or programmatic download |
| Image Availability | It depends on external host | Fully under your control |
| SEO Stability | Vulnerable if external source changes | More stable and reliable long-term |
| Media Library | Stays clean, no new files added | The image becomes a permanent attachment |
| Hotlinking Risk | Yes, external host can block it | No risk, image is self-hosted |
| Best For | High-volume publishing, CDN-hosted images, bulk imports | Long-term content, SEO-critical pages, evergreen posts |
Use FIFU When:
You are running a content-heavy site, and storage is a concern. Your images are already sitting on a reliable CDN or external server you manage. You are doing bulk imports where manually uploading hundreds of images is not realistic. Speed of publishing matters more than long-term image control.
Download Images Locally When:
The content is evergreen and needs to stay intact for years from now. You are building pages where SEO performance is a top priority, and image availability cannot be left to chance. You do not own or manage the external source hosting the image. You want full control over image optimization, file names, and alt text from within your own media library.
The Bottom Line:
FIFU is the smarter choice for speed and scale. Local hosting is the smarter choice for stability and SEO. Many sites use both depending on the content type. No rule says you have to pick one and stick with it across every post.
Advanced Help Topics
The methods above work well for individual posts. If you’re managing a large WordPress site, hundreds or thousands of posts, a WooCommerce product catalog, or content migrated from another platform, manually adding external image URLs one post at a time isn’t realistic. The following workflows use WP Ultimate CSV Importer to handle featured image URLs at scale, including both bulk import and export.
How to Import External Image URLs as Featured Images in WordPress Posts, Pages, and Custom Posts
When you are dealing with a large number of records, manually adding external image URLs as featured images can be extremely time-consuming. The WP Ultimate CSV Importer plugin makes this process much easier by allowing you to bulk import external image URLs into WordPress Posts, Pages, and WooCommerce Products, complete with their alt texts.
Here’s how to import external image URLs step by step:
Note that the same import steps are followed for posts, pages, and products. The only difference is in configuring the post type.
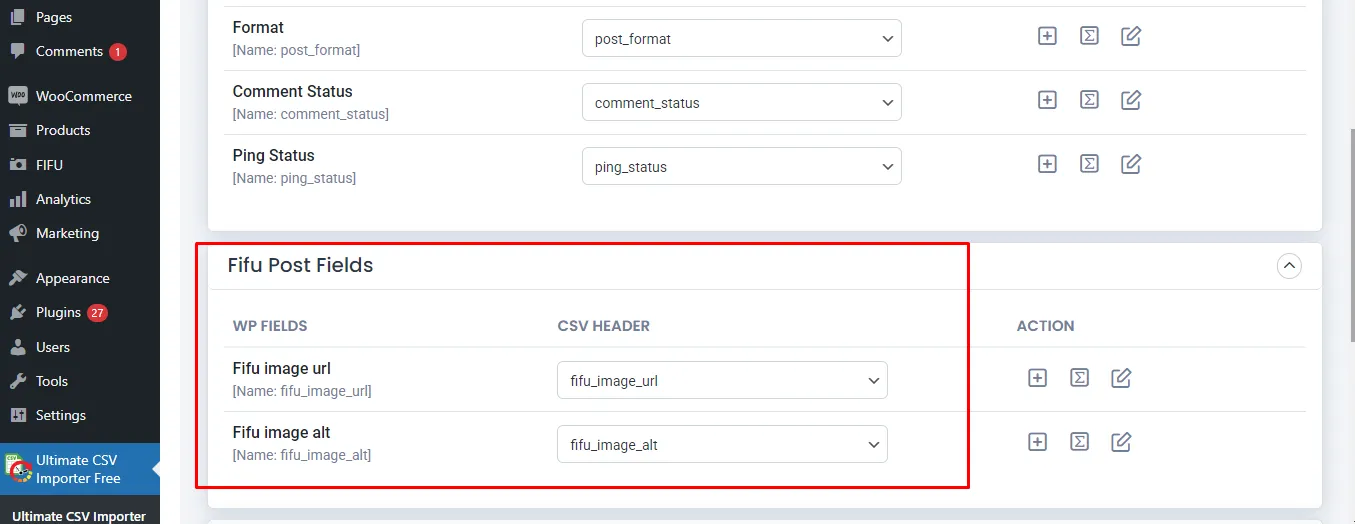
1. Prepare your import file: Create a file like a CSV, XML, Excel, or Google Sheet that includes the FIFU featured image URL and image alt text columns(as shown in the example screenshot below). The easier way is to export the records with WP Ultimate CSV Importer and add the image column and its values.

2. Upload your file: In your WordPress dashboard, go to the Ultimate CSV Importer plugin page. Browse and open your CSV file(or other type of file), or upload it using another available method.
3. Select the post type: Choose whether you want to import into Posts, Pages, or Products.
4. Map your fields: Match the columns in your import file with WordPress fields. Make sure to match the FIFU Post Fields for image url and alt text.
5. Run the Import: Click Import to begin. Once the process is complete, review the import log and verify the results both in the WordPress admin and on the front end.
WP Ultimate CSV Importer Pro
Get Ultimate CSV/XML Importer to import data on WordPress faster, quicker and safer.
How to Export FIFU featured image URLs and alt texts from WordPress
WP Ultimate CSV Importer also lets you export FIFU fields data from WordPress alongside posts, pages, custom posts, and products.
If you are using the free plugin, then we offer an export add-on to extract your FIFU fields.
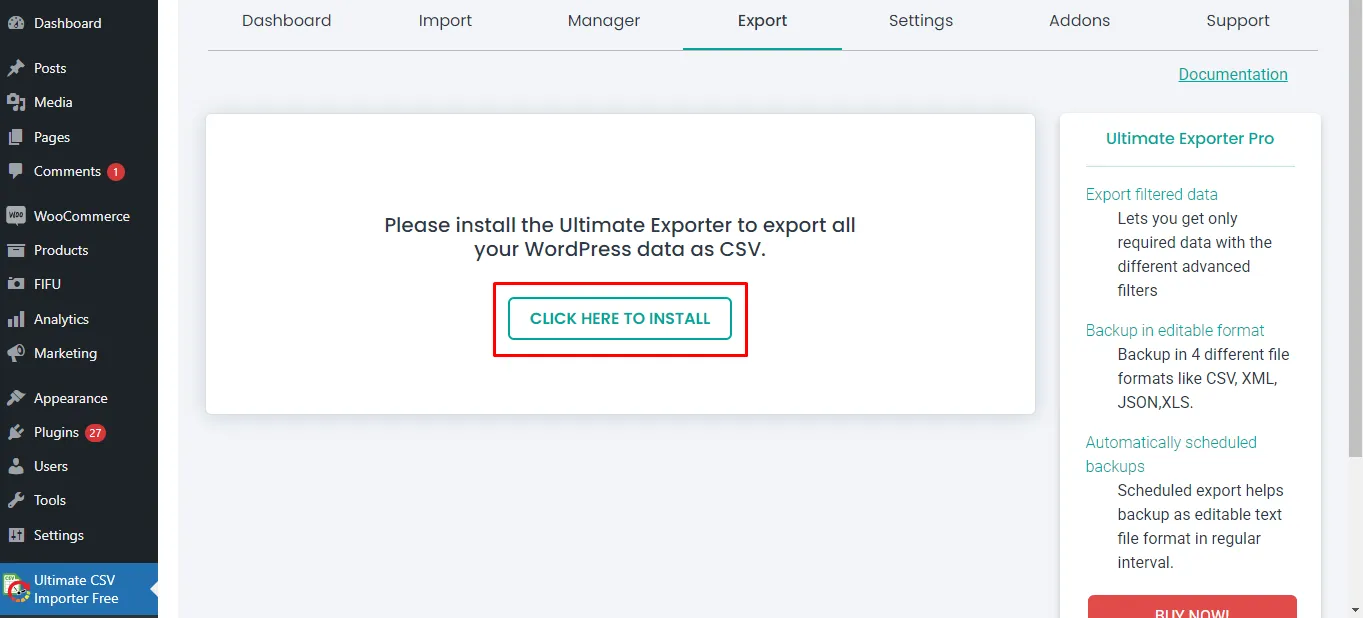
Move to the Export tab. The export page tells you to install the Ultimate Exporter plugin by providing a button link to install. The export plugin is also free to use.
This takes you to the manage add-ons page, where you can see all the supported add-ons listed.
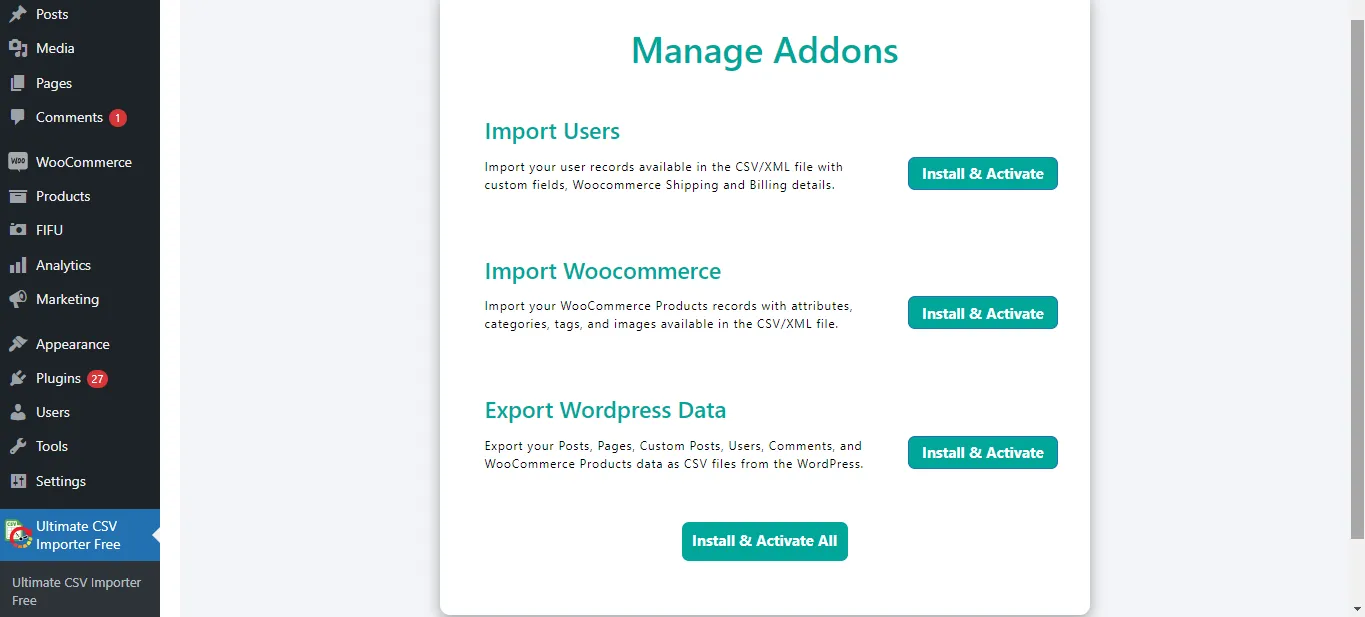
You can install and activate all the add-ons or specific add-ons you need.
When you activate the exporter addon, the export page will look like this.
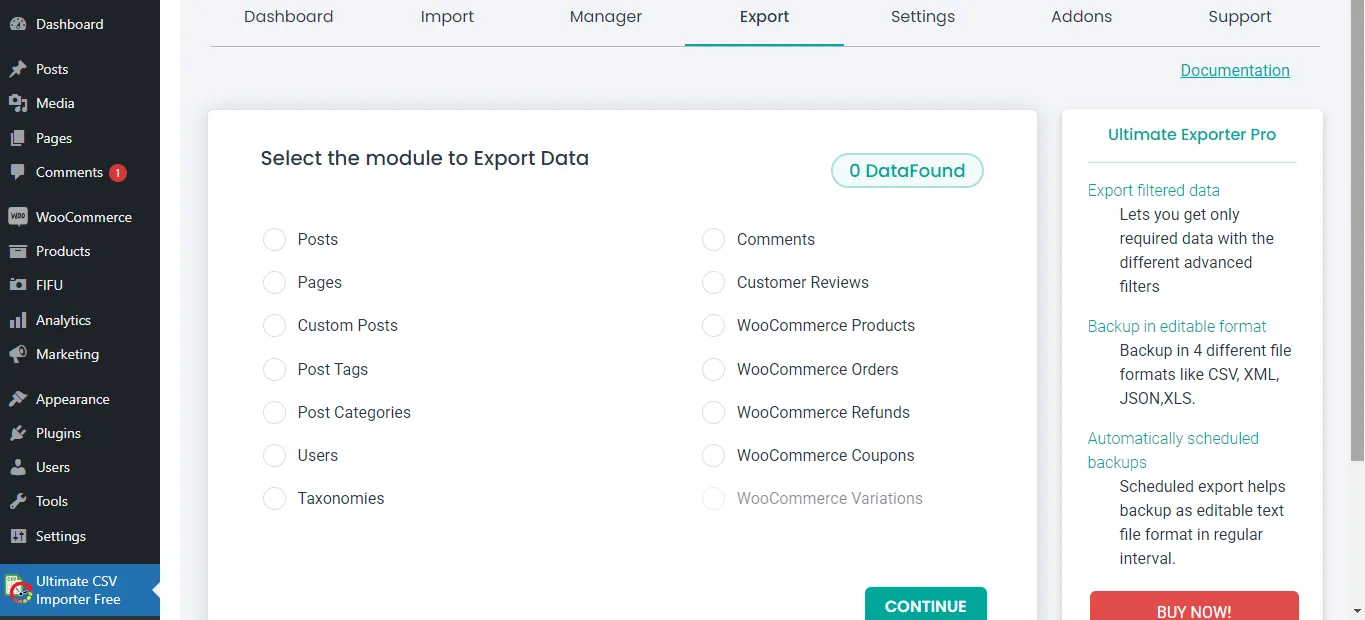
Select the post type here. Note that you can only export FIFU-featured image fields assigned to post types like Posts, Pages, Custom Posts, and WooCommerce Products.
On the next page, provide an export file name, then choose a file type.
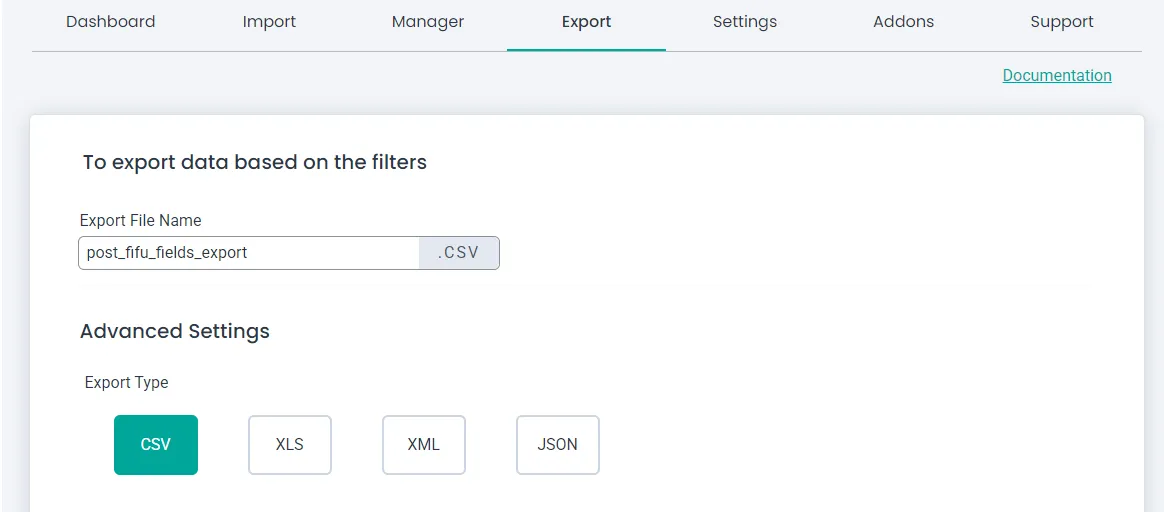
Configure filters like export for specific periods and export records of specific authors. If you don’t need filters and want to export all records of the chosen post type, just click Export without configuring the filters.
Finally, download the export file and verify the exported field data, including the FIFU Featured image and alt text columns, to confirm the successful export.
WP Ultimate CSV Importer Pro
Get Ultimate CSV/XML Importer to import data on WordPress faster, quicker and safer.
Frequently Asked Questions
1. How can I set a featured image from an external URL in WordPress?
WordPress keeps this locked by default, so you need either a plugin or a bit of custom code to make it happen. Most people go with the FIFU plugin since it is straightforward. You install it, open any post, and paste your image URL into the featured image field it adds. That is really all there is to it. If you are comfortable with PHP, the media_sideload_image() function is another route that downloads and stores the image directly on your server instead.
2. Can I use an image URL as a featured image without uploading it?
Yes, and that is exactly the problem FIFU was built to solve. Instead of downloading anything, it just saves the URL and pulls the image from wherever it is hosted. Your media library stays untouched, which is a genuine relief when you are managing a site with a lot of content.
3. Does using external images affect SEO?
It depends on how you handle them. Adding proper alt text keeps them indexable and visible in Google Image Search. What catches people off guard is availability. If the site hosting your image goes down or pulls the file, your featured image is just gone. For posts you really care about ranking, hosting the image yourself is worth the extra step.
4. How can I find and use a WordPress featured image URL?
If you are using FIFU, the URL is sitting right there in the featured image field of your post editor. For regular WordPress images, head to your media library, click the image you want, and the full URL shows up in the details panel on the right side of the screen. Developers can also pull it using get_the_post_thumbnail_url() directly in their theme or plugin code.
Conclusion
Setting featured images from external URLs in WordPress comes down to one decision: do you need speed and flexibility, or stability and long-term control?
For most content-heavy sites, FIFU handles the day-to-day, paste a URL, save, done. For evergreen content or SEO-critical pages where a broken image would cost you rankings and click-throughs, downloading the image locally gives you the reliability that external hosting can’t guarantee. And for sites managing content at scale, combining FIFU with a bulk import workflow through WP Ultimate CSV Importer removes the bottleneck entirely.
The method you choose today shapes how much maintenance you’re doing a year from now. Get the foundation right, use external images where speed matters, local hosting where permanence does, and your media management stays clean as your content library grows.
If you have questions about the import or export workflow, the WP Ultimate CSV Importer support team is available to help.
WordPress SEO: The Complete Guide to Ranking Higher in 2026
19 Mar 2026, 11:54 am
Table of Contents
WordPress is one of the most search-engine-friendly platforms ever built. Most WordPress sites are not. That gap comes down to one thing: configuration.
The platform ships with everything Google needs to rank your content, semantic HTML, fully customizable URLs, a plugin ecosystem that rivals what enterprise CMS platforms charge tens of thousands of dollars for. But it also ships with a visibility setting that actively tells Google to stay away, a permalink structure that communicates nothing about your content, and no XML sitemap whatsoever. None of these are bugs. They’re appropriate defaults for a platform installed in every context imaginable. But they will silently suppress your traffic until you fix them.
In 2026, that fix matters more than ever. Google’s AI Overviews pull answers from well-structured, trustworthy pages before a user clicks anything. Perplexity and ChatGPT cite sources they consider authoritative, not just keyword-rich. The sites collecting organic traffic in this environment are the ones where every SEO decision has been made deliberately.
This guide covers all of them: the technical settings inside WordPress that form the foundation, the plugins that give you precise optimization control, and the content structures that position your pages to rank in traditional search and surface across every AI-powered discovery channel your audience is already using.
What you’ll walk away with:
- The exact WordPress settings that most site owners never touch, and how to fix them in under 10 minutes
- A clear comparison of the top SEO plugins in 2026, with a recommendation based on your site type
- The content and structural signals that determine whether AI engines cite your page or skip it
Why WordPress SEO Hits Differently in 2026:
The SEO playbook has shifted, and not in a minor way.
Google’s AI Overviews now answer questions directly at the top of search results, before a single blue link appears. For WordPress site owners, this means a page can rank in position one and still lose the click, because the AI pulled its answer from a competitor’s better-structured content instead. The pages getting cited in AI Overviews share three characteristics: they answer questions directly in the first sentence under each heading, they’re built on sites Google already considers trustworthy, and they use clear content hierarchies that AI crawlers can parse without ambiguity.
Traditional SEO optimized for the click. In 2026, you’re also optimizing for the citation.
Generative tools like Perplexity and ChatGPT work the same way. When a user asks “what’s the best WordPress SEO plugin,” these tools pull from pages that make a clear, direct recommendation, not pages that hedge with “it depends on your situation.” Specificity is now a ranking signal in ways it never was before.
Zero-click searches are eating into click-through rates on informational queries, but this isn’t a reason to deprioritize SEO. It’s a reason to optimize more precisely. A page that gets cited as a source in an AI Overview still drives brand recognition, direct traffic, and secondary clicks, often more valuable than a traditional position-three ranking that users scroll past.
WordPress powers over 43% of the internet, which means your competition on any given keyword is substantial. The differentiator in 2026 isn’t more content, it’s more deliberately structured content that answers questions directly, signals genuine authority, and gives both search engines and AI crawlers exactly what they need to confidently surface your pages.
Essential WordPress SEO Techniques That Actually Move the Needle:
1. Check Your WordPress Visibility Setting First:
Before you write a word of content or configure a single plugin – check this. WordPress ships with a built-in feature designed for developers working on sites in a staging environment. It fires a noindex signal directly at Google that translates to one clear message: don’t crawl this site yet.
That’s intentional during development. The problem is that a surprising number of site owners launch their sites without ever flipping this switch back off. Meanwhile, they’re publishing content, building links, and wondering why nothing appears in Google Search Console.
How to do it: Go to WordPress dashboard → Settings → Reading → confirm “Discourage search engines from indexing this site” is unchecked → Save changes.
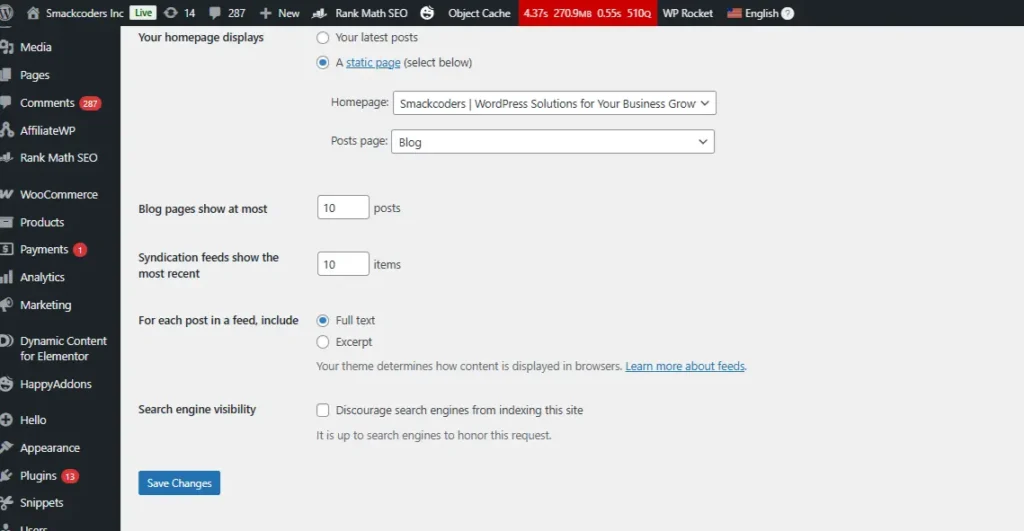
2. Lock In Your Preferred Domain Format:
Google treats yoursite.com and www.yoursite.com as two completely separate URLs. If both versions load without a redirect, your backlink authority and crawl signals get split between two addresses – neither of which builds enough strength to rank well.
How to do it: Go to Settings → General. Set both the WordPress Address (URL) and Site Address (URL) to whichever version you prefer with or without www. Stick with that version on every external platform: Search Console, Bing Webmaster Tools, and every link you control.
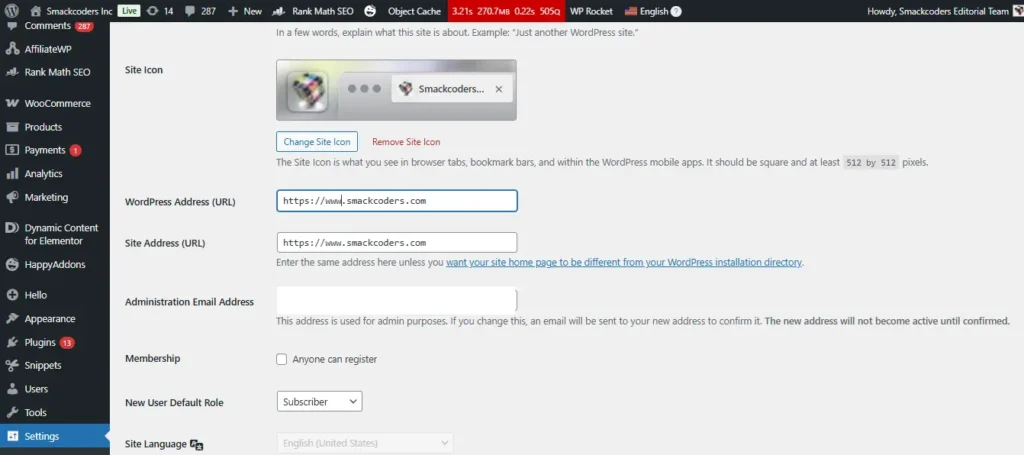
3. Set a Clean Permalink Structure:
Your URL is the first signal Google reads when it crawls a page. A URL like yoursite.com/?p=143 tells a search engine absolutely nothing. A URL like yoursite.com/wordpress-seo-guide tells it exactly what the page covers and it communicates the same clarity to your reader before they click.
How to do it: Go to Settings → Permalinks → Select “Post Name” → Click Save Changes.
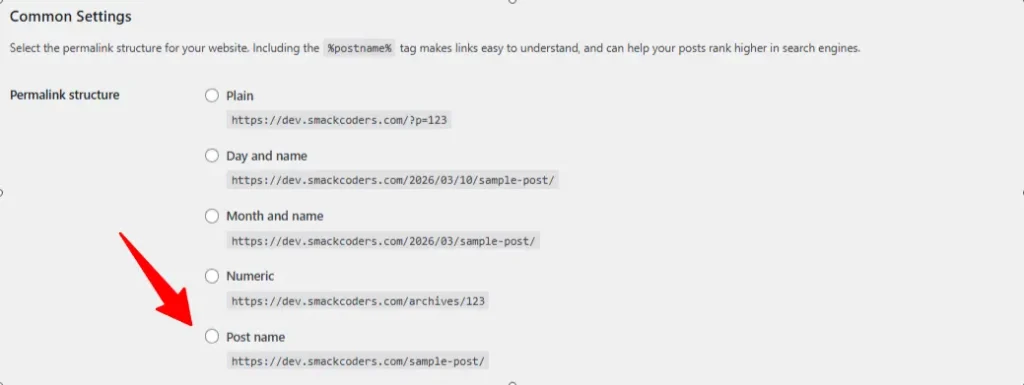
4. Use Categories and Tags Strategically, Not Just as Labels:
Categories and tags aren’t organizational fluff, they’re the architecture that tells search engines what your site is structurally about and which topics you own with depth.
Categories are the broad chapters of your site. A WordPress-focused blog might have categories like SEO, Plugins, Performance, Security, and Themes. Every post should belong to exactly one primary category. Multiple categories on a single post splits its topical signal across two archive pages, diluting both.
Tags are the granular connective tissue between posts. A post on WordPress SEO plugins might carry tags like Yoast SEO, Rank Math, and on-page optimization. The SEO rule with tags: only create a tag you’ll use on at least three posts. A tag applied to a single post creates an orphaned archive page, a URL with one piece of content that earns no links, ranks for nothing, and wastes crawl budget Google could spend on your real content.
The larger risk most site owners miss: WordPress automatically generates a public archive page for every category and tag you create. If those archive pages are thin, duplicate-content-heavy, or poorly linked, they become a drag on your whole domain’s authority, not just the archive itself.
How to do it: Go to Posts → Categories to create and manage categories.
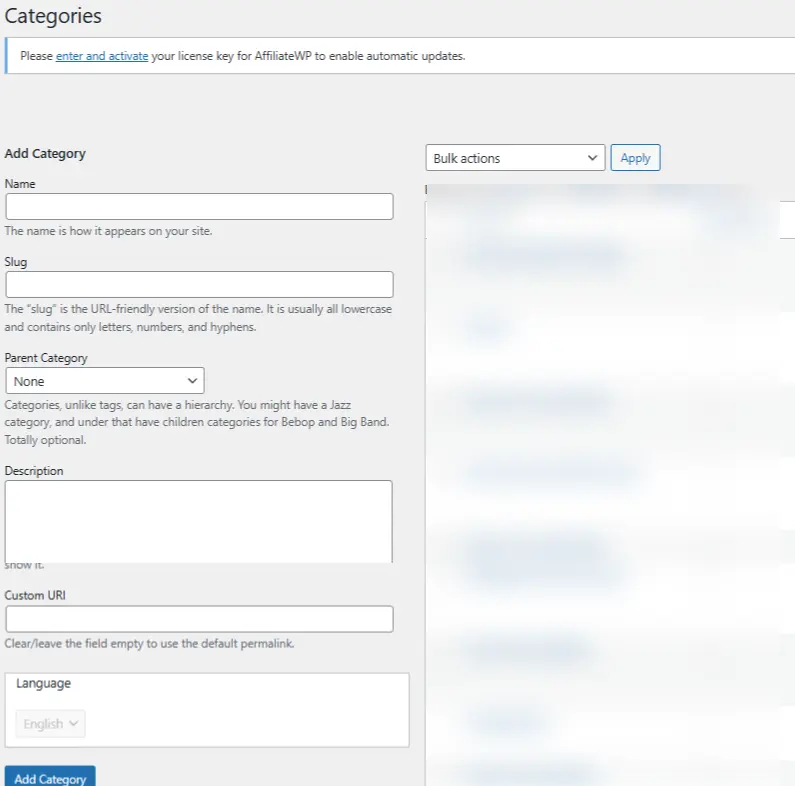
Go to Posts → Tags to manage tags. Apply tags only when they’ll be reused across at least three posts.
5. Turn On Manual Comment Approval:
Spam comments are a quiet SEO liability. A comment section full of links to unrelated sites or keyword-stuffed anchor text sends a trust signal to Google that you’re not curating your own site’s environment and trust is a core component of EEAT.
The flip side is worth noting: genuine comment conversations you actively respond to are a positive EEAT signal. They show Google that real people engage with your content and that you’re present enough to respond.
How to do it: Go to Settings → Discussion → Check “Comment must be manually approved.”
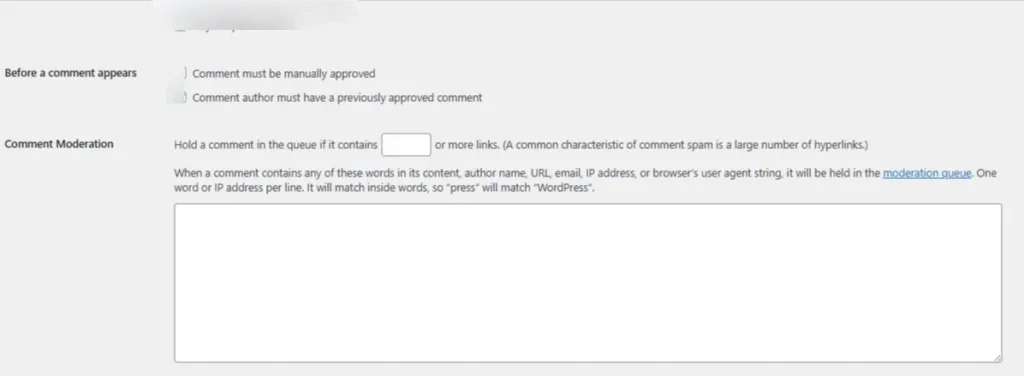
6. Install a WordPress SEO Plugin and Actually Use It:
An SEO plugin won’t rank your site by itself – but it surfaces controls that WordPress keeps hidden by default. Think of it as the cockpit instrumentation for your site. The plane flies without it, but you’re operating blind on everything that matters: meta tags, canonical URLs, schema markup, sitemap generation, breadcrumbs.
How to do it: Go to Plugins → Add New → Search for your chosen plugin → Click Install Now → Activate.
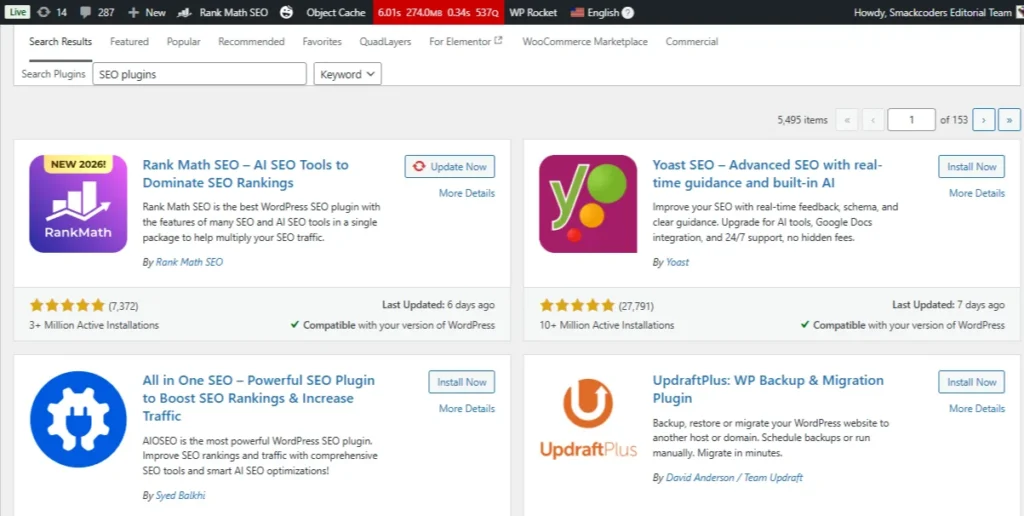
7. Submit an XML Sitemap to Google:
Your XML sitemap is the most direct communication channel you have with Google’s crawlers. It lists every URL you want indexed, signals how frequently your content updates, and helps search engines allocate crawl resources efficiently, which matters on larger sites where newly published pages can sit undiscovered for weeks.
What most site owners don’t realize is that WordPress generates no sitemap by default. Without one, Google reverse-engineers your site structure through internal links alone, a slower, less reliable process that delays indexing and leaves your newest content invisible longer than it needs to be.
A properly configured sitemap, submitted through Google Search Console, eliminates that guesswork. In 2026, it also signals your site’s structure to the AI crawlers powering Google’s AI Overviews, Perplexity, and other discovery engines your audience is already using, making it one of the few technical SEO steps that simultaneously improves traditional rankings and generative engine visibility.
Most SEO plugins generate your sitemap automatically. For Yoast, it lives at yoursite.com/sitemap_index.xml. For Rank Math, it’s at yoursite.com/sitemap.xml.
How to do it: Open Google Search Console → Sitemaps → Paste your sitemap URL → Click Submit.
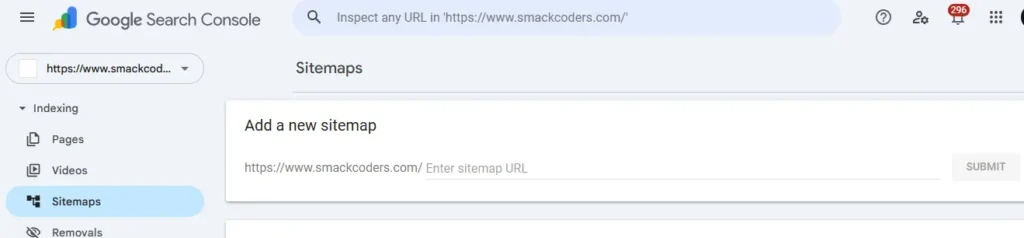
8. Build Internal Links Like a Web, Not a Hierarchy:
Internal linking is one of the highest-leverage, zero-cost SEO activities available on any WordPress site. Every time you link from one post to another, you’re simultaneously helping readers explore more of your content and distributing link equity – ranking authority between your own pages.
A simple system that scales: every time you publish a new post, go back to three to five older posts on related topics and add a contextual link pointing to the new article. Over time this builds a content cluster – an interconnected network of pages that collectively signal to Google that your site covers a topic in depth.
How to do it: In the WordPress block editor, highlight relevant anchor text → Click the link icon → Search for and select an internal page or post.
9. Optimize Every Image Before It Enters Your Media Library:
Every unoptimized image on your WordPress site functions as a quiet tax on your page speed. A 3.5MB hero image that takes seven seconds to load doesn’t just frustrate visitors, it pushes them back to google before they’ve read your first paragraph. Page speed is a confirmed ranking factor, and in 2026, Google’s Core Web Vitals assessment weighs Largest Contentful Paint (LCP) heavily. Your hero image is almost always the LCP element.
How to do it: Use WebP format for all images. Resize to actual display width before uploading. Use a plugin like ShortPixel or Imagify for automatic compression. Write descriptive alt text on every image.
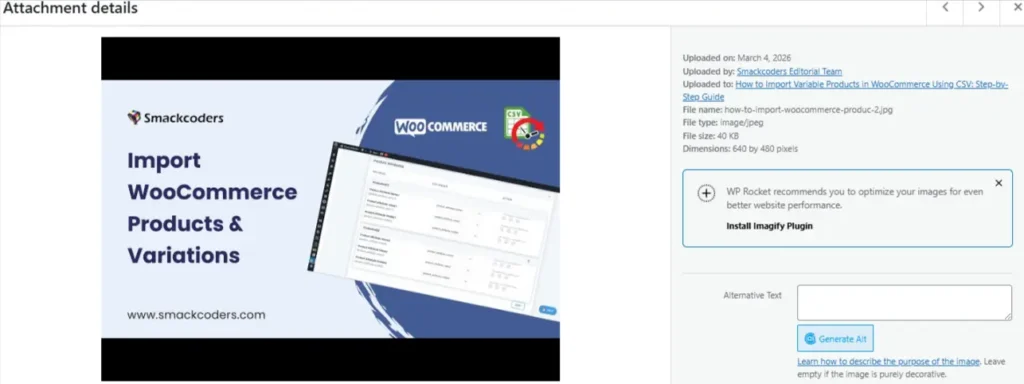
10. Enable HTTPS – SSL Is Non-Negotiable in 2026:
A site still running on HTTP in 2026 isn’t just losing an SEO signal, it’s actively driving visitors away before your content loads. Chrome, Firefox, and Safari display “Not Secure” warnings on HTTP sites that destroy user trust at the exact moment you’re trying to earn it.
SSL encrypts the connection between your server and your visitors, and protects data like form submissions and login credentials. Most modern WordPress hosts, including SiteGround, WP Engine, Bluehost, and Kinsta, provide free SSL certificates through Let’s Encrypt, often activated with a single click from your hosting dashboard.
How to do it: Enable SSL via your hosting panel → Update WordPress Address and Site Address to https:// in Settings → General → Verify the padlock icon appears in your browser address bar.
After you enable SSL, check these three things before moving on:
Switching to HTTPS is a one-way migration and most of the problems happen after the switch, not during it.
First, check for mixed content warnings. If your pages still load images, scripts, or stylesheets over http://, browsers will flag the page as insecure even with SSL active. Install the Better Search Replace plugin and run a find-and-replace from http://yoursite.com to https://yoursite.com across your database to catch these in bulk.
Second, update your internal links. Any hardcoded http:// links inside your posts and pages won’t redirect automatically on every server configuration. The same Better Search Replace pass handles this simultaneously.
Third, resubmit your sitemap in Google Search Console under the https:// property. Google treats http:// and https:// as separate sites, your SSL switch effectively creates a new property from Google’s perspective. Add the https:// version in Search Console, verify ownership, and resubmit your sitemap so Google begins crawling the correct version of your site immediately.
BONUS: CORE WEB VITALS – THE 2026 RANKING SIGNAL YOU NEED TO KNOW:
Core Web Vitals have been a Google ranking factor since 2021. That’s not new. What’s still surprising is how many WordPress site owners have never checked their scores – partly because the names sound intimidating, partly because the fixes get assumed to be complex. For most WordPress sites, they’re not.
Three metrics. Each one measures something specific about how your page actually feels to a real user on a real device:
- LCP – Largest Contentful Paint: (Target: 2.5s or under)
How long it takes your biggest visible element to fully load.
Fix: compress images, use a CDN. - CLS – Cumulative Layout Shift: (Target: 0.1 or under)
Whether the page jumps around while loading.
Fix: set image dimensions, avoid late-loading content that shifts layout. - INP – Interaction to Next Paint: (Target: 200ms or under)
How fast the page respond when someone clicks or taps.
Fix: defer non-critical JavaScript.
CHECK YOUR SCORES – IT’S FREE:
Run your URL through PageSpeed Insights at pagespeed.web.dev. It shows your score, flags what’s dragging it down, and gives a prioritized fix list. WP Rocket, LiteSpeed Cache, or W3 Total Cache resolve the majority of what gets flagged on most WordPress sites.
WordPress SEO Plugin Comparison – 2026
Before the detailed breakdowns, here’s a side-by-side comparison of every major WordPress SEO plugins in 2026 – so you can make the right call for your site at a glance.
| Plugin | Best for | Free | Premium |
| Yoast SEO | Beginners & heavy content blogs | Yes | $118.80/year |
| Rank Math SEO | Intermediate to advanced users wanting pro features free | Yes | $107.88/year |
| All In One SEO | Business sites, local SEO & WooCommerce stores | Yes | $49.60/year |
| The SEO Framework | Developers & critical performance sites | Yes | $84/year(Extension Pack) |
| SEOPress | Budget-conscious owners wanting full feature set | Yes | $49/year |
| Site Kit by Google | Site owners fully invested in Google’s ecosystem | Yes | Free |
Best WordPress SEO Plugins in 2026 – Detailed Breakdown:
Choosing the right SEO plugin comes down to what kind of site you’re running and how much configuration you want to manage manually. Here’s an honest breakdown of what each major plugin is genuinely good at.
1. Yoast SEO – Best for: Beginners & content-heavy blogs
Real-time content + readability analysis, traffic light scoring, automatic canonical tags, breadcrumb support, XML sitemap generation
Installs: 10M+ · Rating: 4.8/5 · Premium: $118.80/year
2. Rank Math SEO – Best for: Intermediate – advanced users wanting pro features free
Multi-keyword tracking (free), Search Console data inside dashboard, 404 monitoring, granular schema builder, automated image SEO
Installs: 2M+ · Rating: 4.9/5 · Premium: $107.88/year
3. All In One SEO – Best for: Business sites, local SEO & WooCommerce stores
Smart schema markup, local SEO module, WooCommerce product schema, Link Assistant for internal linking, TruSEO on-page scoring
Installs: 3M+ · Rating: 4.7/5 · Premium: $49.60/year
4. The SEO Framework – Best for: Developers & performance-critical sites
Zero database bloat, fully automated technical SEO, no configuration required for basics, conflict-free with page builders
Installs: 100K+ · Rating: 4.9/5 · Premium: $84/year (Extension Pack)
5. SEOPress – Best for: Budget-conscious owners wanting full features
Unlimited content analysis, social media meta tags, Google Analytics integration, 301 redirects, white-label option for agencies
Installs: 300K+ · Rating: 4.8/5 · Premium: $49/year
6. Site Kit by Google – Best for: Site owners deep in Google’s ecosystem
First-party data from GA4, Search Console, PageSpeed Insights & AdSense – all inside WordPress dashboard. No third-party data aggregation.

Installs: 3M+ · Rating: 4.6/5 · Premium: Free
Frequently Asked Questions:
1. What is SEO for WordPress?
WordPress SEO is the process of configuring your site so search engines can read, understand, and rank it. It covers URL structure, internal linking, meta tags, XML sitemaps, and page speed, all of which WordPress lets you control without touching a line of code.
2. Can WordPress be used for SEO?
Yes, WordPress is one of the strongest platforms for SEO. Its clean code output, fully customizable URL structure, and plugin ecosystem make it the platform of choice for high-traffic publishers and global brands that need serious organic growth at any scale.
3. Is WordPress SEO free?
Yes. WordPress’s built-in settings cover the fundamentals, and free versions of Rank Math and Yoast SEO handle everything else most sites need. Paid plans unlock advanced features, but a well-configured free setup is enough to rank competitively.
4. Which SEO plugin is best for WordPress?
Rank Math is the best starting point for most sites, it offers more features in the free version than any competitor. Yoast suits beginners who want live writing feedback. All In One SEO is the strongest choice for WooCommerce stores and local businesses.
5. Is WordPress SEO worth it?
Yes, and the results compound in a way most marketing channels don’t. Content you optimize today can generate traffic for years without additional spend. As AI search tools increasingly surface answers from trusted, well-structured pages, getting your WordPress SEO right means showing up not just in Google but everywhere your audience is looking.
You now have everything a WordPress site needs to compete in 2026, not just in traditional search, but across every AI-powered discovery channel your audience is already using.
Most WordPress sites stay invisible not because the content is bad, but because the foundation was never properly configured. The visibility setting nobody checks. The permalink structure nobody changes. The sitemap nobody submits. Small oversights that quietly suppress every piece of content published on top of them.
The sites collecting consistent organic traffic in 2026 aren’t the ones that published the most. They’re the ones that built correctly first, then published on top of something solid. You’ve done the reading. Now go build it.
The Browser is the New Server: Why my.wordpress.net is a Game-Changer
18 Mar 2026, 7:18 am
Table of Contents
For nearly two decades, setting up a WordPress site followed the same ritual. You’d purchase hosting, provision a server, configure a MySQL database, download the WordPress package, upload it via FTP, navigate the famous five-minute install wizard, and only then, after all of that, would you be ready to write your first post. It was the accepted cost of entry. We normalized it. We wrote tutorials about it. We built tools to speed it up.
But in March 2026, that ritual became a relic.
On March 11, 2026, WordPress.org officially launched my.wordpress.net. A free, fully functional, browser-based WordPress environment that requires absolutely nothing from you except a modern web browser. No signup form. No credit card. No domain registration. No server to configure. You navigate to the URL, and in seconds, you are inside a live, fully operational WordPress dashboard.
The setup time went from five minutes to zero seconds. That is not an incremental improvement. That is a paradigm shift.
This article is about understanding why that shift matters, not just for individual developers and content creators, but for the entire WordPress ecosystem and, arguably, for the future of web development as a discipline. We are witnessing the moment WordPress moves from being a destination you travel to, to a workspace that travels with you, living entirely inside your browser.
Key Takeaways
- Zero Setup, Instant Access — my.wordpress.net eliminates the traditional WordPress setup process entirely. No hosting, no database configuration, no domain required, just open your browser, and you’re inside a live WordPress dashboard in seconds.
- Your Data Never Leaves Your Device — Built on WebAssembly and SQLite, the entire WordPress stack runs client-side inside your browser. Your content is stored in IndexedDB, private by architecture, not just by policy.
- Persistent, Not Temporary — Unlike the original WordPress Playground, my.wordpress.net saves your work permanently in your browser’s local storage. Close the tab today, pick up exactly where you left off tomorrow.
- AI-Powered Built Right In — A native AI assistant is embedded directly into the environment, capable of writing code, modifying your site, and offering context-aware suggestions based on your actual local WordPress data. No third-party plugins needed.
- A Prototype Today, A Live Site Tomorrow — my.wordpress.net is not a dead end. Use it to design, test, and build. Then export your project with one click and import it into any traditional WordPress hosting environment when you’re ready to go live.
What is my.wordpress.net?
At its core, my.wordpress.net is a private, persistent, browser-based WordPress environment. Let’s break down each of those words because each one carries significant meaning.
Defining the Platform
- It is private: your site is invisible to the public internet. Unlike a traditionally hosted WordPress site, my.wordpress.net does not have a public IP address, DNS records, or a URL that anyone else can visit. It exists only in your browser’s local storage, accessible only to you on your device.
- It is persistent: unlike a demo or a staging environment that resets or expires, your my.wordpress.net site saves its state continuously. Close the tab and reopen it tomorrow. Your posts, settings, plugins, and theme customizations will all be exactly where you left them.
- It is browser-based: the entire WordPress stack, the PHP runtime, the database, and the file system run inside your web browser using WebAssembly technology. There is no server in the traditional sense. Your laptop or phone is the server.
Persistent vs. Temporary: The Evolution from WordPress Playground
If you’ve been in the WordPress community for a while, you’ll likely recognize the DNA of my.wordpress.net. It is the evolved, permanent successor to the WordPress Playground project, which launched as a temporary demo tool. The playground was revolutionary but ephemeral. Close the tab, lose everything. It was perfect for quick tests but impractical as a working environment.
my.wordpress.net solves that fundamental limitation. It introduces full persistence backed by the browser’s IndexedDB storage system. This transforms the concept from a cool technical demo into a genuinely useful tool you can build on day after day. Your private workspace is always there when you come back to it.
Privacy by Design
This is one of the most philosophically interesting aspects of my.wordpress.net. Privacy is not a setting you turn on. It is the architectural default. Because the site lives in your browser and not on any server connected to the web, there is simply no mechanism by which it can be publicly accessed. It is structurally private.
This makes it uniquely suited for use cases where confidentiality matters: personal journaling, private notes, drafting sensitive documents, or prototyping business ideas you are not ready to share. Your content is yours, stored on your device, not on someone else’s server.
WP Ultimate CSV Importer Pro
Get Ultimate CSV/XML Importer to import data on WordPress faster, quicker and safer.
The Technical Engine: PHP, Meet WebAssembly
To truly appreciate what my.wordpress.net achieves, you need to understand the technology that makes it possible. We are talking about a genuine engineering marvel, running a server-side scripting language inside a web browser.
WASM & SQLite: WordPress Runs Client-Side
Traditionally, WordPress requires a PHP-capable server and a MySQL or MariaDB database to function. Both of these are server-side technologies. A web browser is a client-side environment. Getting WordPress to run in a browser was, for a long time, considered impractical.
WebAssembly (WASM) changed the rules of that game entirely.
WebAssembly is a binary instruction format that allows code written in languages like C, C++, and Rust to run inside a browser at near-native speeds. The WordPress core team compiled the PHP interpreter itself into WebAssembly. This means your browser is literally executing PHP code, the same language that WordPress is written in, right there in the browser tab.
In place of MySQL, my.wordpress.net uses SQLite, a lightweight, serverless, file-based database, also running entirely within the browser environment. Together, PHP-WASM and SQLite create a complete WordPress stack without a single external server call after the initial page load.
Data Sovereignty: IndexedDB and Full Control
So where does your data actually live? It resides in IndexedDB, a low-level browser API designed for storing significant amounts of structured data on the client side. Think of it as a persistent database built directly into your browser.
The implications for data sovereignty are profound. Your WordPress posts, pages, settings, media, and plugin data are stored on your device, in your browser, not uploaded to a third-party server. No company has access to your content. There are no data residency concerns, no terms-of-service debates about content ownership, and no risk of a hosting provider going offline and taking your work with it.
You have 100% control over your data because it literally never leaves your computer. This is the local-first computing philosophy in its purest form.
WP Ultimate CSV Importer Pro
Get Ultimate CSV/XML Importer to import data on WordPress faster, quicker and safer.
The Integrated AI Workspace
If the browser-based WordPress runtime is the foundation, the integrated AI assistant is the feature that elevates my.wordpress.net from a technical curiosity to a productive, creative workspace.
The Built-in Assistant
my.wordpress.net ships with a native AI chat interface embedded directly into the environment. This is not a third-party plugin you need to configure or a bolt-on extension. It is a first-class citizen of the platform. You can open the AI assistant and use natural language to accomplish tasks that would otherwise require writing code or navigating complex menus.
Need to modify a theme’s color palette? Ask the assistant. Want to write a custom PHP function to filter your post query? Describe what you want. Need to generate a block of content for a page you’re drafting? The AI handles it. The entire conversation and the resulting code changes are applied directly to your local WordPress environment in real time.
Knowledge Base Integration
What makes this AI assistant particularly powerful is its awareness of your local data. Because your WordPress site lives in the browser, the AI assistant has contextual access to your stored content, configuration, and structure. It’s not giving you generic WordPress advice. It can see your site’s specific setup and tailor its suggestions accordingly.
Imagine asking the assistant to review your existing posts and suggest a better content calendar structure, or to analyze your plugin configuration and flag potential conflicts. This level of context-aware assistance is only possible because of everything. The site, the data, and the AI coexist in the same browser-based environment.
How to Use my.wordpress.net: A Step-by-Step Guide
One of the great joys of my.wordpress.net is its simplicity. Here’s a complete walkthrough to get you from zero to a working WordPress environment.
Step 1: Instant Launch
Open any modern web browser and navigate to https://my.wordpress.net. That’s it. No account creation prompt will appear. No email verification required. Within a few seconds, you will be looking at a fully functional WordPress admin dashboard. The experience is genuinely startling the first time you see it; there’s a cognitive dissonance in seeing the familiar WordPress backend load without any of the preceding setup steps.
Open any modern web browser and navigate to https://my.wordpress.net. The moment the page loads, WordPress begins preparing itself automatically. No account to create, no email verification, no setup required.
Once it’s ready, a prompt will appear on the same screen asking you to enter two things: a site name and a website URL to import blog posts from. This step is required to proceed. The URL tells WordPress Playground where to pull content from, and you can import up to 50 blog posts from that site to instantly populate your environment with real content.
Once you’ve filled in both fields, click Continue. The importer gets to work pulling in the blog posts from that URL and displaying them inside your new WordPress site. In moments, you’re inside a fully configured WordPress dashboard with actual content already loaded.
What would normally take hours of hosting setup and content entry happens automatically in under a minute, right inside your browser.
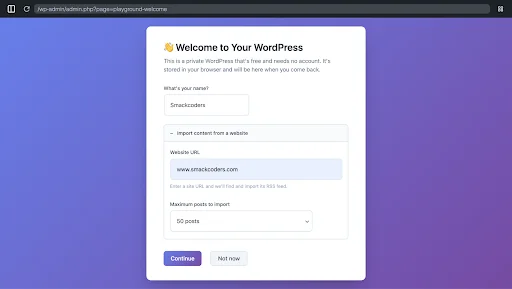
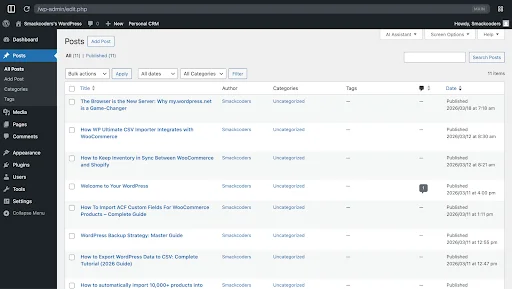
Step 2: Exploring the App Catalog
Once WordPress loads, you’ll land on your site’s dashboard with your imported blog posts already displayed. To explore the App Catalog, look for the grid icon (⊞) in the top-right corner of the admin bar, this is the App Launcher. Click it to open the WordPress Playground panel.

Inside the panel, you’ll find the Install Apps section with six ready-to-install tools, each adding a new capability to your WordPress with a single click:
- AI Assistant: An AI-powered chat interface that can modify your WordPress to your liking. You can bring your own API key or use a local LLM.
- App Launcher: Adds a quick-access app launcher directly to your WordPress admin bar.
- Chat to Blog: Import media from Beeper chats and turn them into blog posts. Requires Beeper Desktop running.
- Collect Posts from the Web: Uses the Post Collection Plugin to save articles from around the web directly into your WordPress.
- Personal CRM: Manage your contacts and relationships directly from WordPress, built by Alex Kirk.
- RSS Reader: Follow friends and consume their content inside your own WordPress.
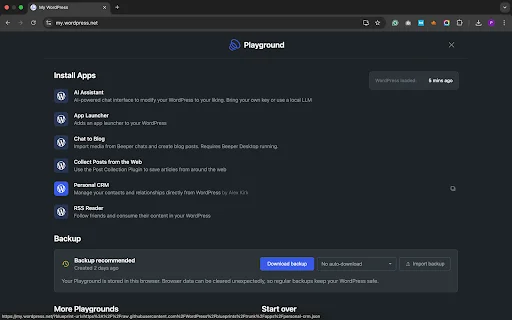
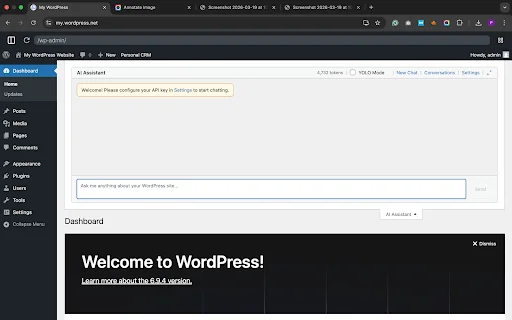
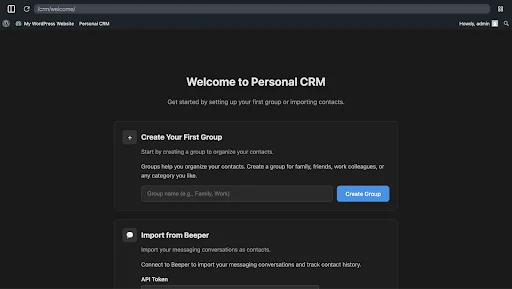
Step 3: Backing Up Your Work
Since your entire WordPress site lives in the browser, protecting your work with regular backups is essential. The Playground panel makes this straightforward, click the grid icon in the top-right corner to open the panel and scroll down to the Backup section.
From here you can click Download backup to save a complete copy of your site to your device. You can also set up auto-downloads so backups happen automatically without you having to remember. The panel reminds you clearly: “Browser data can be cleared unexpectedly, so regular backups keep your WordPress safe.”
If you ever need to restore your site, simply click Import backup and upload your saved file to pick up exactly where you left off.
Bonus Point: Customizing with Blueprints
For power users and developers, Blueprints are where my.wordpress.net becomes extraordinarily flexible. A Blueprint is a JSON configuration file that defines a complete WordPress environment, which plugins are installed, which theme is active, what initial content is loaded, what settings are configured, and even custom PHP code to execute on initialization.
You can create a Blueprint for your standard development setup and load it with a single click, spinning up a fully configured WordPress environment in seconds. You can share Blueprints with colleagues or clients so they can replicate your exact setup without any manual configuration. For WordPress educators and workshop facilitators, Blueprints are a revolution; you can ensure every participant in a training session starts from the same environment.
Step 3: Customizing with Blueprints
For power users and developers, Blueprints are where my.wordpress.net becomes extraordinarily flexible. A Blueprint is a JSON configuration file that defines a complete WordPress environment, which plugins are installed, which theme is active, what initial content is loaded, what settings are configured, and even custom PHP code to execute on initialization.
You can create a Blueprint for your standard development setup and load it with a single click, spinning up a fully configured WordPress environment in seconds. You can share Blueprints with colleagues or clients so they can replicate your exact setup without any manual configuration. For WordPress educators and workshop facilitators, Blueprints are a revolution; you can ensure every participant in a training session starts from the same environment.
my.wordpress.net vs. Traditional Setup: Which is Right for You?
| Feature | my.wordpress.net | Traditional Hosting | Local Dev (DevKinsta etc.) |
|---|---|---|---|
| Setup Time | 0 seconds | 5–30 minutes | 10–20 minutes |
| Persistence | Browser Cache | Server Storage | Local Hard Drive |
| Public Access | No (Private) | Yes | No (by default) |
| Cost | Free | Paid Hosting | Free |
| Database | SQLite (browser) | MySQL/MariaDB | MySQL |
| Internet Required | Initial load only | Yes (for hosting) | No |
| Storage Limit | ~100MB | Hosting plan | Disk space |
| Portability | Export only | Full | Full |
When to Choose my.wordpress.net
my.wordpress.net is the right choice when your primary goals are speed, privacy, or experimentation. Specifically, consider using it for:
- Personal journaling and private writing: Because your content never leaves your browser, it offers a level of privacy no hosted service can match.
- Prototyping and concept testing: Spin up a new layout concept, test a plugin combination, or build a proof-of-concept without provisioning any infrastructure.
- Testing risky updates: Before applying a major plugin update or a PHP version upgrade to a production site, test it here first with zero risk.
- Learning and education: For anyone learning WordPress development, my.wordpress.net removes every infrastructure barrier. The focus can be entirely on learning the platform.
- Offline work: Once loaded, the environment functions without an active internet connection, making it useful for working on planes, trains, or anywhere connectivity is unreliable.
When to Stick with Traditional Hosting
my.wordpress.net is not a replacement for traditional hosting in every scenario. Choose a conventional hosting setup when:
- Your site needs to be publicly accessible, whereas my.wordpress.net is private by design.
- You are running an e-commerce store that processes real transactions.
- Your site receives significant traffic and requires server-side performance optimization.
- You need server-side caching, CDN integration, or server-level security configurations.
- Your site’s content must be accessible across multiple devices or shared with a team.
WP Ultimate CSV Importer Pro
Get Ultimate CSV/XML Importer to import data on WordPress faster, quicker and safer.
The Power & The Pivot: Key Features vs. Practical Reality
The Standout Features: Killer Apps of my.wordpress.net
Let’s give credit where it’s absolutely due. Several features of my.wordpress.net are genuinely category-defining:
- WASM-Powered Speed: The WebAssembly PHP runtime is remarkably fast. Navigating the admin interface feels snappy in a way that even some traditionally hosted WordPress sites struggle to match, because there are no network round-trips to a remote server.
- Local-First Privacy: As detailed above, the structural privacy guarantee is something no hosted alternative can provide. Your data literally cannot be accessed by anyone else.
- The Integrated AI Assistant: Having an AI that understands your specific local environment and can modify it through natural language is a genuine productivity multiplier, particularly for developers.
- Blueprint System: The ability to define, share, and instantly deploy fully configured WordPress environments as a JSON file is powerful for education, development workflows, and client onboarding.
- Zero Barrier to Entry: The complete elimination of setup friction is historically significant for the WordPress community’s mission to democratize publishing.
Why This Matters for the Industry
The WordPress mission statement is “democratize publishing.” For twenty years, even the most simplified WordPress hosting setups required a credit card, a domain name, a hosting account, and at least some patience with technical processes. That friction excluded millions of potential users.
my.wordpress.net eliminates that friction entirely. A student in a developing nation with only a borrowed laptop and a library’s WiFi connection can now be working in a full WordPress environment within seconds. A first-time creator who has never heard of cPanel or phpMyAdmin can explore the world’s most popular CMS without any of the traditional gatekeeping.
This is not a minor product launch. This is a structural shift in how WordPress enters the world.
The Constraints: A Reality Check
A balanced assessment requires acknowledging the current limitations:
- The 100MB Storage Limit: The browser’s IndexedDB storage is not unlimited. my.wordpress.net operates within a roughly 100MB environment. For a text-heavy personal site or a development sandbox, this is ample. For a media-rich portfolio or a large content library, it can become a genuine constraint.
- Cache Dependency: Your site’s persistence is tied to your browser cache. If you clear your browser’s storage, whether intentionally or through a privacy-clearing tool, your my.wordpress.net data will be deleted. Regular exports are strongly recommended as a backup habit.
- Single Device: Because the data lives in one browser on one device, you cannot pick up your work seamlessly on another machine without going through an export-import process.
- No Public Sharing: While this is a privacy feature, it is also a limitation for anyone who wants to share work-in-progress with a client or collaborator. You can share a Blueprint, but not a live, browseable site URL.
- Plugin Compatibility: While the vast majority of plugins work correctly, plugins that rely on server-side infrastructure (specific server modules, command-line tools, or certain filesystem operations) may not function as expected in the WASM environment.
Frequently Asked Questions (FAQs)
1. Is my site on my.wordpress.net public?
No. Your site exists only in your browser’s local storage (IndexedDB). It has no public URL, no server IP address, and no DNS record. No one can access or discover your site unless you explicitly export it, import it to a live hosting environment, or share a Blueprint configuration file.
2. Does it cost anything?
No. my.wordpress.net is a completely free service provided and maintained by the WordPress.org project. There are no plans, tiers, or hidden costs. Like WordPress core itself, it is open-source and free to use.
3. Will I lose my data if I close the tab?
No, not just from closing the tab. Your data is saved in your browser’s IndexedDB storage, which persists across sessions. You can close the tab, restart your browser, or even restart your computer, and your my.wordpress.net environment will be waiting for you when you return. However, if you use your browser’s “Clear Browsing Data” or “Clear Cache and Site Data” function, that storage will be wiped. Exporting your site regularly is the recommended safeguard against accidental data loss.
4. Can I install any plugin or theme?
Yes, with one practical caveat. You can install plugins directly from the official WordPress.org plugin repository or upload your own custom plugin files, just as you would on a traditionally hosted site. Similarly, you can install and switch themes freely. The only constraint is the overall 100MB environment limit. If installing a large plugin or uploading a media-heavy theme would push your environment over that storage ceiling, you may encounter issues. For the vast majority of plugins designed for standard WordPress use, this limit is not a practical obstacle.
5. Can I move my site from my.wordpress.net to a real host?
Yes, and this workflow is well-supported. my.wordpress.net includes a built-in Export function that generates a downloadable archive of your site’s content, settings, and (in some cases) file assets. You can then use the standard WordPress import tools on any traditionally hosted WordPress installation to bring that content across. For a more complete migration, including plugin files and theme customizations, you can export a full site zip and import it using migration plugins like Duplicator or All-in-One WP Migration on your destination host.
Conclusion: The Future of the WordPress Ecosystem
There is a version of this story that is purely technical, about WebAssembly, SQLite, and IndexedDB. That version is interesting and worth telling. But the larger story is about something more fundamental: a shift in what we believe software can be.
For decades, we accepted that a server-side application required a server. We accepted that “setting up WordPress” was a multi-step, multi-tool process that required at least some technical literacy. We built an entire industry of hosting providers, setup wizards, managed services, and migration tools around the assumption that WordPress fundamentally needed a server to exist.
my.wordpress.net challenges that assumption at its root. It demonstrates that WordPress is not a server-dependent application, it is a set of software logic that can run anywhere the right runtime exists. And increasingly, that runtime exists everywhere: in your browser, on your phone, in environments we haven’t even imagined yet.
WordPress is no longer just a Content Management System. With my.wordpress.net, it is becoming something closer to an operating system for digital work, a complete, self-contained environment for writing, building, prototyping, and thinking that lives entirely in your browser and travels with you wherever you go.
The five-minute install was a milestone. Zero seconds is a revolution. And for anyone paying attention to the future of the open web, that revolution is just getting started.
WP Ultimate CSV Importer Pro
Get Ultimate CSV/XML Importer to import data on WordPress faster, quicker and safer.
How WP Ultimate CSV Importer Integrates with WooCommerce
12 Mar 2026, 8:30 am
Table of Contents
Managing a growing online store requires more than just listing products and processing orders. As your catalog expands and customer data increases, handling everything manually within the dashboard can become time-consuming and prone to errors. This is where automation plays a critical role.
WP Ultimate CSV Importer Pro integrates directly with WooCommerce to simplify large-scale data management. It allows store owners to import, export, and update products, customers, orders, coupons, and reviews using structured CSV or XML files. Instead of editing each item individually, you can manage thousands of records through a single, streamlined workflow. This guide explains how the integration works, the real-world benefits it offers, and how WooCommerce users can use it efficiently for scalable store management.
Key Takeaways
- Manage WooCommerce products, customers, orders, coupons, and reviews efficiently in bulk, rather than updating records one by one.
- Always include a unique identifier, such as SKU, Product ID, Order ID, or Customer Email, to prevent duplicates.
- Keep your CSV or XML files clean by adding only the necessary WooCommerce fields.
- Use field mapping and selective updates to change specific data (price, stock, status) without affecting other details.
- Export store data before major updates for backup, reporting, or migration needs.
- Schedule imports (Pro feature) to automate recurring updates such as stock sync.
- Test with a small file and maintain backups before running large imports to safeguard live store data.
Understanding WooCommerce Data Management
Efficient data management is the backbone of every successful WooCommerce store. As product catalogs expand and customer transactions increase, managing data accurately becomes more complex. To keep operations smooth, store owners must understand how WooCommerce organizes and stores information behind the scenes. This knowledge becomes especially important when integrating tools like WP Ultimate CSV Importer, which rely on structured data mapping for accurate imports and updates.
WooCommerce operates within the WordPress database structure, storing information in organized tables and linking related data through IDs and metadata. When this structure is maintained properly, bulk updates, migrations, and synchronization tasks can be performed without disrupting store functionality.
Core WooCommerce Data Types
At its foundation, WooCommerce manages several key types of data that power an online store:
1. Product Data
This includes simple products, variable products, grouped products, and external products. Each product contains fields such as title, SKU, price, stock status, product description, images, and attributes.
2. Product Variations and Attributes
Variable products depend on attributes like size, color, or material. These variations are connected to a parent product, forming a structured relationship within the database.
3. Categories and Tags
Taxonomies help organize products for navigation and filtering. Categories group products broadly, while tags provide more specific classification.
4. Customer Information
WooCommerce stores customer billing details, shipping addresses, and purchase history for order processing and reporting.
5. Orders and Transaction Data
Order records include purchased products, payment details, order status, and timestamps. This data is essential for fulfillment, accounting, and analytics.
6. Custom Fields and Metadata
Additional product information, such as custom pricing rules, SEO details, or third-party plugin data, is stored as metadata.
Each of these data types is interconnected. A change in one area, such as deleting a product or altering a SKU, can affect inventory tracking, reporting, and even search visibility.
Why Structured Data Matters in eCommerce
Structured data management is essential for long-term store growth. Here’s why:
1. Inventory Accuracy
Incorrect stock values can lead to overselling or missed sales opportunities. Proper data handling ensures inventory levels are always updated.
2. Pricing Consistency
Maintaining accurate pricing prevents confusion and protects profit margins.
3. Operational Efficiency
Organized data enables faster updates, better automation, and reduced manual effort.
4. Better Reporting and Insights
Clean data improves analytics accuracy, helping store owners make informed decisions about sales trends and product performance.
5. Scalability
As your store expands to hundreds or thousands of products, structured data management becomes essential for handling growth without performance issues.
Risks of Unstructured Data
Without a structured approach, common issues begin to surface. Duplicate SKUs may appear, stock counts can become inaccurate, and product variations may disconnect from their parent items. These problems not only complicate backend management but can also damage customer trust if shoppers encounter incorrect pricing or unavailable products. Over time, poor data organization can slow down store operations and create unnecessary administrative work.
Role of WP Ultimate CSV Importer in Maintaining Data Integrity
This is where WP Ultimate CSV Importer becomes valuable. The plugin works alongside WooCommerce by matching CSV file columns with the appropriate product fields in the database. Because WooCommerce follows a structured data system, the importer can update product details—such as prices, stock levels, attributes, and metadata—without disturbing existing relationships. This ensures that bulk imports and updates remain accurate and secure.
WP Ultimate CSV Importer Free Vs Pro Version
Choosing between the Free and Pro versions of WP Ultimate CSV Importer Pro depends on your WooCommerce store size, update frequency, and automation needs. The Free version is suitable for basic imports and small websites, while the Pro version is designed for advanced WooCommerce integration, large catalogs, and scheduled automation.
Below is a clear comparison to help you understand the differences:
| What you’re looking for | Free Version | Pro Version |
Basic CSV Imports | Yes, you can import standard CSV files for simple WordPress content. | Yes, plus advanced support for CSV, XML, and large WooCommerce datasets. |
WooCommerce Product Support | Limited WooCommerce handling with basic features. | Full WooCommerce integration, including simple, variable, grouped, and external products. |
Bulk Product Updates | Basic update capability with limited flexibility. | Update products using SKU or Product ID without creating duplicates. |
Price & Stock Updates | Manual process with limited bulk control. | Easily bulk update regular price, sale price, stock quantity, and stock status. |
Handling Product Variations | Not fully optimized for complex variations. | Complete support for attributes and product variations. |
| Customer & Order Management | Limited or unavailable. | Import and export customers and orders with full field support. |
| Coupons & Reviews | Not supported. | Bulk import and export of coupons and product reviews. |
| Scheduled Imports (Automation) | Not available. | Yes — automate imports using cron scheduling. |
| Selective Field Updates | Basic control. | Update only specific fields like price or stock without affecting other data. |
| Large Catalog Handling | Suitable for small to medium stores. | Optimized for large stores with thousands of products. |
Import Rollback | Not available. | Available to safely undo changes if needed. |
| Support & Advanced Features | Standard/basic support. | Priority support with advanced performance optimization. |
Which Version Should You Choose?
- Choose the Free version if you run a small website and occasionally import basic data.
- Choose the Pro version if you manage a growing WooCommerce store, frequently update prices and stock, handle large product catalogs, or require automation and advanced control.
For businesses aiming for scalability and efficiency, the Pro version offers the tools necessary to streamline store data management while minimizing manual effort.
WP Ultimate CSV Importer Pro
Get Ultimate CSV/XML Importer to import data on WordPress faster, quicker and safer.
How WP Ultimate CSV Importer Integrates with WooCommerce
Managing large volumes of store data inside WooCommerce can become time-consuming when handled manually. Whether you are updating product prices, importing new inventory, or syncing customer data, doing it one record at a time slows down operations.
WP Ultimate CSV Importer Pro integrates directly with WooCommerce to simplify this process. It acts as a bridge between structured data files (such as CSV or XML) and your WooCommerce database, allowing bulk creation, updates, and exports without technical complexity.
Built-In WooCommerce Module Support
WP Ultimate CSV Importer comes with a dedicated WooCommerce module designed specifically to understand WooCommerce’s data structure. When you select the WooCommerce option during import, the plugin automatically loads all relevant fields related to products, customers, orders, coupons, and reviews.
This built-in support means the plugin recognizes important fields such as:
- Product name and description
- SKU and Product ID
- Regular and sale price
- Stock quantity and stock status
- Categories and tags
- Attributes and variations
- Billing and shipping details
Seamless Data Flow Between CSV and WooCommerce
The integration process follows a clear and organized workflow. First, you prepare your CSV or XML file with properly structured columns. These columns represent WooCommerce fields such as price, stock, attributes, or order details.
Next, you upload the file to WP Ultimate CSV Importer. During the import setup, you map each column from your file to the corresponding WooCommerce field using a simple mapping interface. This ensures that data is aligned correctly before processing begins.
Once mapping is complete, you can choose how the data should behave:
- Create new records
- Update existing records using SKU or ID
- Skip duplicate entries
The plugin then processes the file and inserts or updates the data inside WooCommerce without disrupting the rest of your store.
This seamless data flow allows store owners to:
- Add hundreds of new products in one import
- Update only price and stock without affecting descriptions
- Sync supplier inventory files regularly
- Import historical customer or order records
Additionally, the Pro version supports scheduled imports using cron jobs. This means files can be automatically processed at set intervals, making supplier data synchronization and stock updates fully automated.
Why This Integration Matters
By connecting structured CSV files directly with WooCommerce’s database, WP Ultimate CSV Importer removes the need for repetitive manual edits. It ensures accuracy through proper field mapping and controlled updates, while also improving efficiency for growing stores.
For WooCommerce users managing expanding catalogs, seasonal price changes, or frequent inventory updates, this integration provides a scalable and reliable data management solution.
Managing WooCommerce Products Efficiently
Managing products effectively is one of the most important responsibilities of any online store owner. As your catalog grows, updating product information manually inside WooCommerce can quickly become repetitive and time-consuming. From adding new items to modifying prices or stock levels, handling everything individually increases the risk of errors.
This is where WP Ultimate CSV Importer Pro plays a vital role. By integrating directly with WooCommerce, it enables structured, bulk product management through CSV or XML files, making the entire process faster and more accurate.
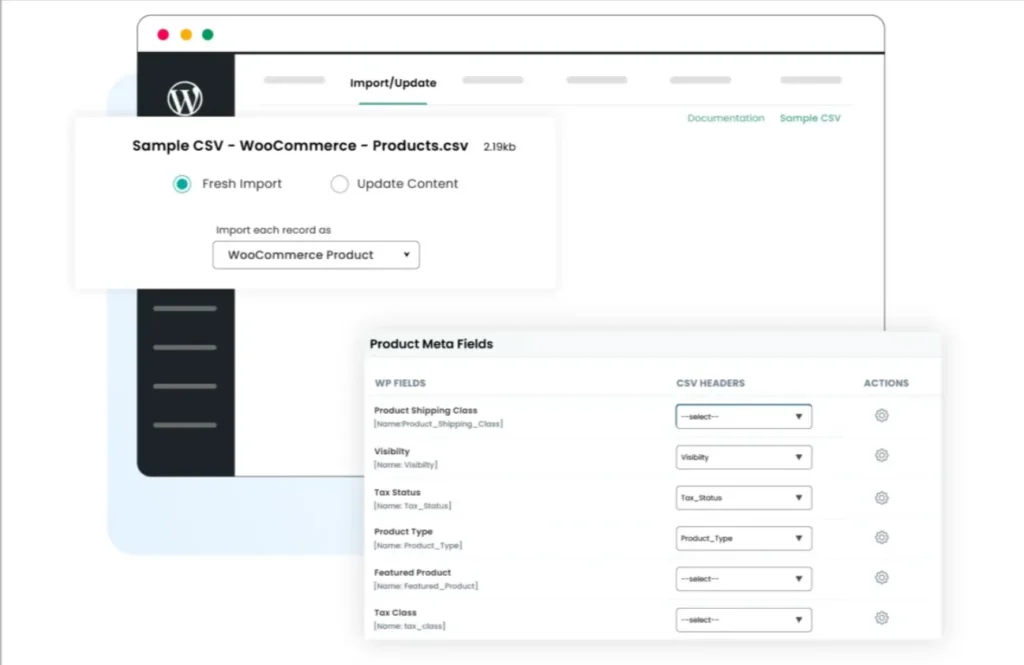
Importing New Products in Bulk
- Create a structured CSV file with product details (Name, SKU, Price, Stock, Images, etc.).
- Open WP Ultimate CSV Importer in your WordPress dashboard.
- Upload the CSV file
- Select the WooCommerce Products module and map the fields correctly.
- Click Run Import to add products in bulk.
Updating Existing Products
- Export current product data to verify correct SKU or ID references.
- Edit only the necessary fields in your CSV file, such as price, stock, or description.
- Open WP Ultimate CSV Importer and upload the updated file.
- Choose the option to update existing products using SKU or ID in WooCommerce.
- Run the update to modify products without creating duplicates.
Export WooCommerce Products
- Open the Export section in WP Ultimate CSV Importer.
- Select the WooCommerce Products module.
- Choose the required fields such as price, stock, attributes, or categories.
- Click Export and download the CSV file for backup, reporting, or further editing.
Bulk Price and Inventory Management
Managing prices and inventory in bulk is essential for maintaining profitability and operational efficiency in an online store. As product catalogs expand, updating each item manually becomes time-consuming and increases the risk of pricing errors or stock mismatches. A structured bulk management approach ensures that pricing strategies and inventory levels remain accurate across the entire store.
With the right integration tools, store owners can make large-scale adjustments quickly while preserving product relationships and database integrity.
Regular and Sale Price Update
Price changes are common in e-commerce due to seasonal promotions, supplier cost variations, or competitive strategies. Updating regular and sale prices individually inside the dashboard is not practical when dealing with hundreds of products. Bulk price management allows store owners to revise pricing fields efficiently without disrupting other product data.
By using WP Ultimate CSV Importer, pricing updates can be applied through structured CSV files. Store owners can modify regular prices, add or remove sale prices, and schedule promotional adjustments in one streamlined process. Because the plugin works directly with WooCommerce product fields, price updates reflect accurately across product pages, category listings, and checkout.
This method ensures consistency in promotional campaigns and eliminates the risk of outdated or inconsistent pricing.
Stock Quantity and Stock Updates
Accurate inventory tracking is critical for customer satisfaction and smooth order fulfillment. Incorrect stock quantities can lead to overselling, order cancellations, and negative customer experiences. Bulk stock management helps maintain real-time accuracy, especially when managing large or frequently changing inventories.
Through structured updates, stock quantities and stock status (in stock, out of stock, backorder) can be modified across multiple products at once. The importer matches products using unique identifiers such as SKUs, ensuring that only the intended items are updated without creating duplicates.
Bulk inventory updates not only save time but also keep product availability synchronized across variations and categories. This improves operational control and supports scalable growth.
WP Ultimate CSV Importer Pro
Get Ultimate CSV/XML Importer to import data on WordPress faster, quicker and safer.
Importing and Managing Customers
Customer data plays a vital role in running a successful online store. From order processing to personalized marketing, maintaining accurate customer information ensures smooth communication and efficient service. As the customer base grows, manually adding or editing individual records becomes inefficient. A structured import and export process helps store owners manage customer information quickly and accurately.
When integrated properly with WooCommerce, bulk customer management becomes streamlined and reliable.
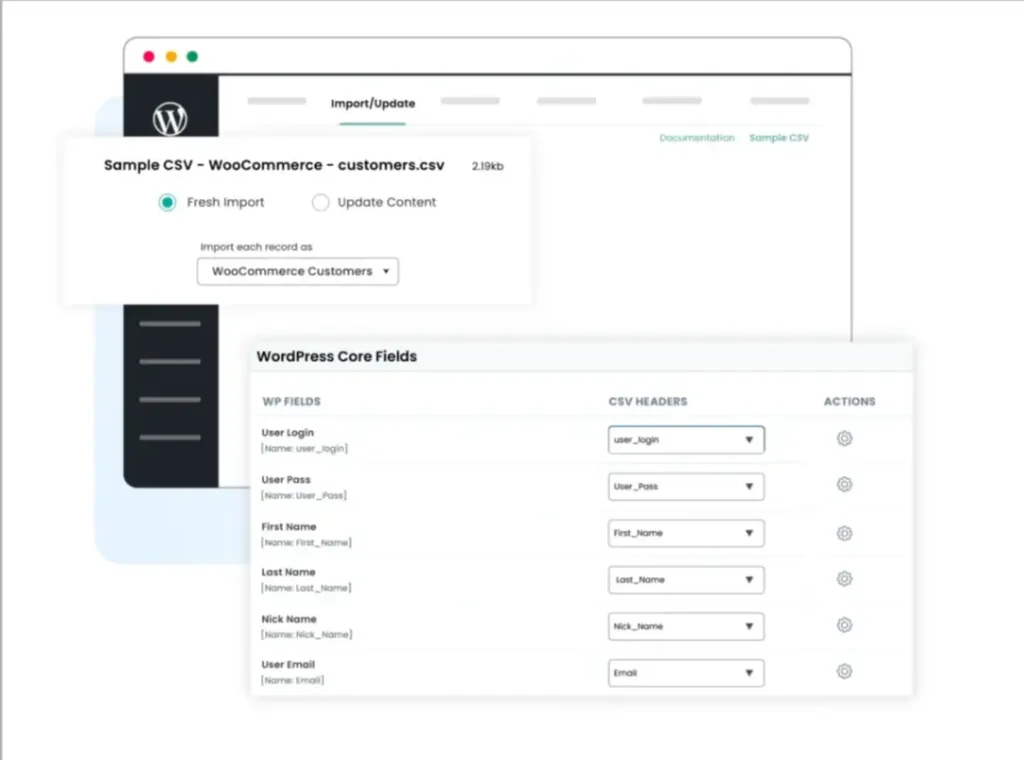
Bulk Customer Import
- Open WP Ultimate CSV Importer from your WordPress dashboard.
- Upload your prepared CSV file containing customer details.
- Select the WooCommerce Customers module under WooCommerce.
- Map the CSV columns to the correct customer fields.
- Choose whether to create new customers or update existing ones.
- Click Import to complete the bulk upload.
Updating Customer Details
- Export current product data to confirm correct SKU or ID references.
- Edit only the required fields in your CSV file, such as price, stock, or description.
- Open WP Ultimate CSV Importer from your WordPress dashboard.
- Upload the updated CSV file.
- Select the option to update existing products using SKU or ID.
- Click Import to apply the changes without creating duplicate products.
Export WooCommerce Customers
- Open WP Ultimate CSV Importer from your WordPress dashboard.
- Go to the Export section.
- Select the WooCommerce Customers module.
- Choose the customer fields you want to export (Name, Email, Billing details, etc.).
- Click Export and download the CSV file for backup or reporting purposes.
WooCommerce Order Management
Managing orders efficiently is crucial for maintaining accurate sales records and smooth business operations. Whether you are migrating from another platform, updating order statuses in bulk, or generating reports, having a structured workflow simplifies the entire process. When integrated properly with WooCommerce, bulk order handling saves time and reduces manual errors.
Importing Historical Orders
- Open WP Ultimate CSV Importer from your WordPress dashboard.
- Upload the CSV file containing past order details (Order ID, Customer Email, Products, Total, Status, Date, etc.).
- Select the WooCommerce Orders module.
- Map the CSV columns to the correct order fields.
- Review the configuration settings.
- Click Import to add historical orders into WooCommerce without affecting existing records.
Updating Order Status
- Prepare a CSV file with Order ID and updated Status fields (Processing, Completed, Cancelled, etc.).
- Open WP Ultimate CSV Importer and upload the updated file.
- Choose the WooCommerce Orders module.
- Set Order ID as the matching identifier.
- Select the update existing records option.
- Click Import to apply the status changes in bulk.

Exporting WooCommerce Orders
- Open WP Ultimate CSV Importer in your WordPress dashboard.
- Navigate to the Export section.
- Select WooCommerce Orders.
- Choose the required fields such as Order ID, Customer details, Order total, Status, and Date.
- Click Export and download the CSV file for reporting or backup purposes.
WP Ultimate CSV Importer Pro
Get Ultimate CSV/XML Importer to import data on WordPress faster, quicker and safer.
Coupon and Review Imports
Coupons and product reviews play a major role in driving sales and building customer trust in an online store. While coupons help attract new buyers through promotional campaigns, reviews influence purchasing decisions by providing social proof. Managing both elements individually can become time-consuming, especially for stores with large product catalogs. A bulk import approach simplifies this process and ensures consistency across your WooCommerce store.
Managing Coupons in Bulk
Creating multiple discount codes manually is not efficient when running seasonal sales or large promotional campaigns. By preparing a structured CSV file with details such as coupon code, discount type, amount, expiry date, and usage limits, store owners can generate multiple coupons at once. This method reduces repetitive tasks and ensures that all campaign rules are applied accurately.
Bulk coupon management also makes it easier to modify or deactivate multiple codes when promotions end. Instead of editing each coupon separately, updates can be applied through a structured import process, saving both time and effort.
Creating Discount Campaigns
- Open WP Ultimate CSV Importer from your WordPress dashboard.
- Prepare a CSV file with coupon details such as Coupon Code, Discount Type (Percentage or Fixed), Discount Amount, Expiry Date, Usage Limit, and Applicable Products.
- Upload the CSV file to the importer tool.
- Select the WooCommerce Coupons module.
- Map the CSV columns to the appropriate coupon fields.
- Click Import to create multiple discount coupons in bulk.
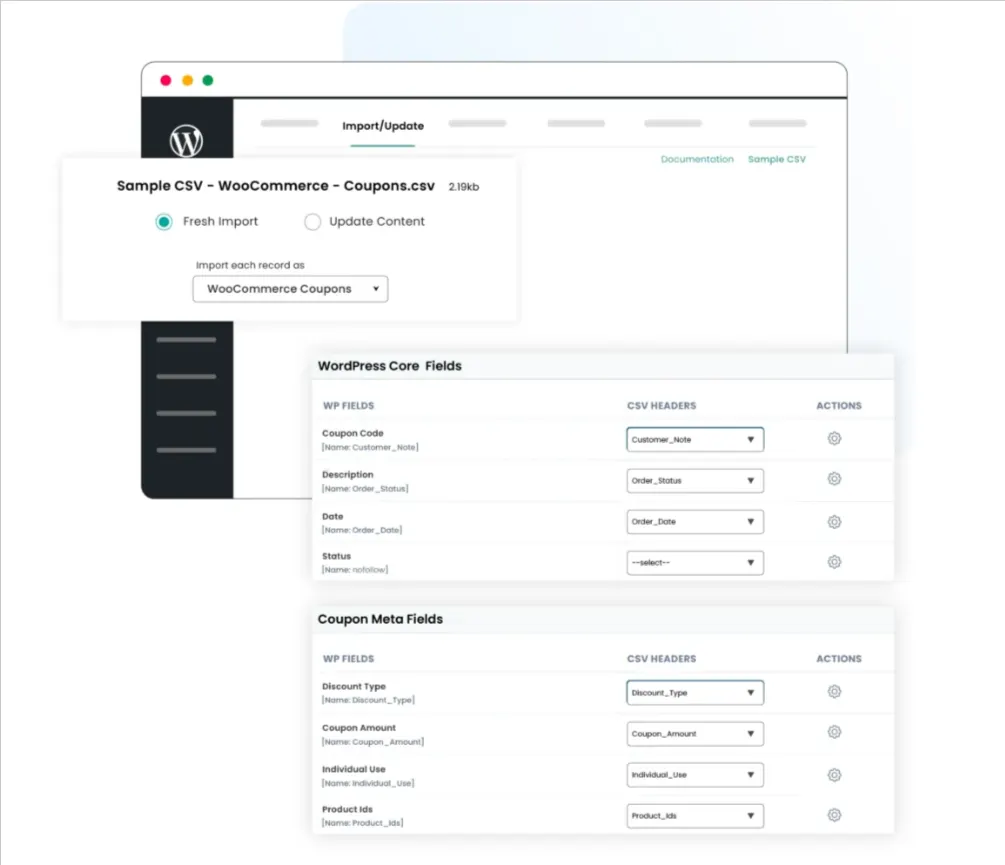
Import WooCommerce Coupons and Reviews
Importing Product Reviews
- Prepare a CSV file containing review details such as Product SKU/ID, Reviewer Name, Email, Rating, Review Content, and Review Date.
- Open WP Ultimate CSV Importer in your dashboard.
- Upload the review CSV file.
- Select the WooCommerce Reviews module.
- Map the fields correctly to match product and review data.
- Click Import to add product reviews in bulk without manual entry.
How to Export Coupons and Reviews from WooCommerce
- Open WP Ultimate CSV Importer from the WordPress dashboard.
- Go to the Export section.
- Select either the WooCommerce Coupons or the WooCommerce Reviews module.
- Choose the required fields to export.
- Click Export and download the CSV file for reporting, backup, or marketing analysis.
Advanced WooCommerce Integration Features
As WooCommerce stores grow, basic import and export functions are no longer enough. Store owners often need automation, precise control over updates, and safeguards to protect live data. The integration between WP Ultimate CSV Importer Pro and WooCommerce includes advanced features designed specifically for high-volume and frequently updated stores. These features help maintain data accuracy, reduce manual effort, and minimize risks during bulk operations.
Scheduled Imports Using Cron
One of the most powerful advanced features is scheduled importing through cron jobs. Instead of manually uploading CSV files every time you receive updated data from suppliers or inventory systems, you can automate the entire process.
With scheduled imports, you can:
- Set daily, weekly, or custom intervals for data updates
- Automatically sync product prices and stock levels
- Import new product listings at predefined times
- Keep inventory aligned with external systems.
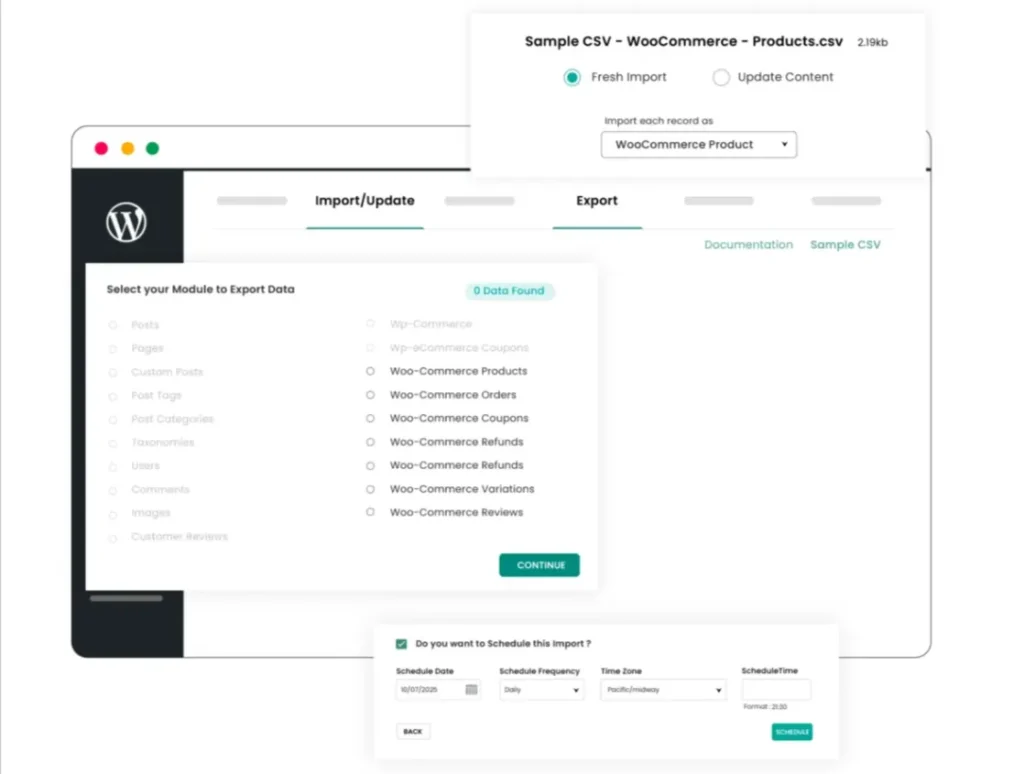
For example, if a supplier sends a stock update file every night, the system can automatically fetch and process the file without human intervention. This ensures your WooCommerce store always displays accurate availability and pricing.
Automation reduces repetitive tasks and ensures consistency, especially for businesses managing large catalogs or multiple suppliers.
Selective Field Updates
When performing bulk updates, one of the biggest concerns is accidentally overwriting important product information. WP Ultimate CSV Importer solves this issue by allowing selective field updates.
Instead of updating every field in a product record, you can choose to modify only specific data, such as:
- Regular price
- Sale price
- Stock quantity
- Stock status
- Specific custom fields
This means you can update pricing and inventory without touching product descriptions, images, SEO data, or categories.
Selective updates provide greater control over your WooCommerce database and help maintain data integrity during bulk operations. It ensures that only intended changes are applied while the rest of the product information remains intact.
Import Rollback
Even with careful planning, mistakes can happen during large imports. An incorrect file structure or mapping error could lead to unwanted changes. To protect against such scenarios, the plugin includes an import rollback feature.
Import rollback allows you to:
- Revert recent import actions
- Restore previous data states
- Correct errors without permanent damage
This feature acts as a safety net for live WooCommerce stores. Instead of manually fixing hundreds of affected records, you can undo the import and reprocess the corrected file.
Rollback functionality is particularly valuable for large-scale updates where even small mistakes can have a significant impact.
Why These Advanced Features Matter
Advanced integration features are essential for growing WooCommerce businesses. Automation through cron scheduling ensures continuous data accuracy. Selective updates provide precise control. Rollback functionality offers protection against errors.
Together, these capabilities make WP Ultimate CSV Importer more than just a bulk import tool. They transform it into a structured data management system that supports scalability, efficiency, and long-term storage reliability.
WP Ultimate CSV Importer Pro
Get Ultimate CSV/XML Importer to import data on WordPress faster, quicker and safer.
Real-World Use Cases of WooCommerce Integration
Understanding how integration works is important, but seeing how it applies in real business situations makes the value even clearer. When WP Ultimate CSV Importer Pro integrates with WooCommerce, it becomes a practical solution for everyday operational challenges faced by online stores.
Below are some common real-world scenarios where this integration proves especially useful.
Store Migration
Migrating an online store from one platform to another can be complex and risky if not handled carefully. Whether you are moving from another eCommerce platform to WooCommerce or transferring data between WordPress installations, maintaining data accuracy is critical.
With structured CSV imports, you can migrate:
- Product catalogs
- Customer records
- Order history
- Coupons and reviews
By exporting data from the old system and importing it into WooCommerce using properly mapped fields, you can preserve product details, pricing, stock levels, and customer information. Using identifiers like SKU and Order ID ensures records are correctly assigned during migration.
This structured process minimizes downtime and reduces the risk of data loss, making store migration smoother and more controlled.
ERP or Supplier Data Sync
Many growing businesses rely on external systems such as ERP software or supplier inventory feeds. These systems often generate CSV files containing updated pricing, stock quantities, or new product information.
Instead of manually copying this data into WooCommerce, the integration allows you to:
- Import supplier stock updates in bulk
- Adjust prices based on ERP data
- Add new product listings automatically
- Keep inventory aligned with warehouse systems
With scheduled imports, updates can even run automatically at fixed intervals. This ensures your store reflects real-time inventory availability and accurate pricing without requiring daily manual work.
For businesses managing multiple suppliers or warehouses, this level of synchronization significantly improves operational efficiency.
Managing Large Product Catalogs
As a WooCommerce store grows, handling hundreds or thousands of products becomes increasingly complex. Manual updates are not scalable, especially during pricing changes or inventory adjustments.
Through CSV-based bulk management, store owners can:
- Update prices across entire categories
- Modify stock levels for large product batches
- Change product attributes or descriptions efficiently
- Maintain consistency across extensive catalogs
The integration helps prevent errors that commonly occur during repetitive manual editing. It also ensures that all updates follow a structured and organized format. For stores with large inventories, this method saves time and maintains database accuracy.
Seasonal Campaign Preparation
Seasonal sales, holiday discounts, and promotional campaigns require rapid pricing and inventory adjustments. Preparing for these campaigns manually can be stressful and time-consuming.
Using structured imports, you can:
- Apply sale prices to multiple products at once
- Schedule campaign-related updates in advance
- Update stock levels before high-demand periods
- Create bulk discount codes for promotions
Why These Use Cases Matter
These real-world examples highlight how integration between WP Ultimate CSV Importer and WooCommerce goes beyond simple data import. It supports business growth, operational efficiency, and strategic planning.
Whether you are migrating a store, syncing supplier data, managing a large inventory, or preparing for seasonal promotions, structured bulk data management ensures accuracy, saves time, and reduces operational stress.
Best Practices for Successful WooCommerce Imports
When integrating WP Ultimate CSV Importer Pro with WooCommerce, following a structured approach is essential. Bulk imports can save time and improve efficiency, but they must be handled carefully to protect your store data.
By applying a few proven best practices, you can ensure that every import runs smoothly, accurately, and safely.
Always Use SKU for Matching
The SKU (Stock Keeping Unit) acts as a unique identifier for each product in WooCommerce. When updating existing products, using SKU for matching ensures the plugin modifies the correct product instead of creating duplicates.
If you attempt to update products without a unique identifier, the system may not correctly recognize existing records. This can lead to duplicate entries or incorrect updates.
For bulk updates such as price or stock adjustments, always include the SKU column in your CSV file. This guarantees accurate product mapping and prevents confusion within your catalog.
Validate the Import File Before Import
Before uploading your CSV or XML file, take time to review its structure. Ensure that:
- Column headers are clear and correctly labeled
- Required fields such as SKU, price, or stock are included
- There are no empty mandatory fields
- Data formats are consistent (for example, numbers are not mixed with text)
Cleaning and organizing your file before import reduces the chances of errors during processing. A well-structured file improves mapping accuracy and ensures WooCommerce receives the correct data in the right format.
Backup Your Store
No matter how careful you are, it is always wise to create a complete backup before running bulk imports on a live store. A backup ensures that you can restore your website if something unexpected occurs during the import process.
Backing up protects:
- Product data
- Customer information
- Order history
- Store settings
Although the plugin includes advanced safety features, maintaining a recent backup provides an additional layer of security and peace of mind.
Test with Sample Data or Small Data First
Instead of importing thousands of records immediately, start with a small test file. This allows you to:
- Confirm correct field mapping
- Check how data appears in WooCommerce
- Identify potential formatting issues
- Verify that updates behave as expected
Testing with a small dataset helps you catch mistakes early without affecting your entire store. Once the test import works correctly, you can confidently proceed with the full dataset.
Why These Best Practices Matter
Bulk imports are powerful tools for managing WooCommerce stores efficiently. However, structured preparation is key to avoiding costly mistakes. Using SKU for matching, validating your import file, backing up your store, and running test imports all contribute to safer and more reliable data management.
By following these best practices, you can fully benefit from the integration between WP Ultimate CSV Importer and WooCommerce while maintaining data accuracy and store stability.
Common Mistakes to Avoid
When using WP Ultimate CSV Importer Pro with WooCommerce, bulk imports can significantly simplify store management. However, improper preparation or incorrect settings can lead to data inconsistencies, duplicate records, or unwanted changes.
Understanding the most common mistakes helps you avoid costly errors and ensures smooth integration.
- Ignoring Unique Identifiers
One of the most frequent mistakes is failing to include a reliable unique identifier such as SKU, Product ID, Order ID, or Customer Email. Without proper matching fields, the system cannot determine whether it should update an existing record or create a new one.
This often results in duplicate products or misplaced updates. Always include a consistent identifier in your import file to maintain accurate record matching.
- Incorrect Field Mapping
Field mapping is a crucial step during the import process. Assigning the wrong CSV column to a WooCommerce field can lead to misplaced data — for example, price values appearing in stock fields or descriptions replacing product titles.
Carefully review each mapped field before running the import. Taking a few extra minutes to verify mapping prevents hours of manual corrections later.
- Importing Without Reviewing the File
Uploading a file without checking its formatting is another common issue. Inconsistent column headers, missing mandatory fields, extra spaces, or incorrect data formats can cause import failures or unexpected results.
Always open your CSV file and ensure it is clean, organized, and structured properly before uploading it to the plugin.
- Overwriting Unintended Data
Bulk imports can overwrite existing product information if selective update options are not used correctly. For example, updating prices without disabling other fields may accidentally modify descriptions or categories.
To avoid this, use selective field updates when you only need to change specific data, such as price or stock. This ensures the rest of the product information remains unchanged.
- Skipping Backup Before Import
Running large imports on a live WooCommerce store without creating a backup is risky. Even a small formatting mistake can affect hundreds of products.
Creating a full backup before executing major updates gives you the option to restore your store if needed. It acts as a safety net for unexpected issues.
- Importing Large Files Without Testing
Directly importing thousands of records without a trial run increases the chances of large-scale errors. A safer approach is to test with a smaller dataset first.
Testing helps confirm correct mapping, formatting, and behavior before processing the full file. Once validated, you can confidently proceed with the complete import.
- Not Monitoring Import Logs
After running an import, some users overlook the import log or summary report. These logs provide valuable insights into successful records, skipped entries, or errors.
Reviewing logs ensures that the import completed as expected and allows you to address any issues immediately.
WP Ultimate CSV Importer Pro
Get Ultimate CSV/XML Importer to import data on WordPress faster, quicker and safer.
FAQ- WP Ultimate CSV Importer integrates with WooCommerce
1. What is WP Ultimate CSV Importer and how does it work with WooCommerce?
WP Ultimate CSV Importer is a WordPress plugin designed to import and update data in bulk using CSV or XML files. When integrated with WooCommerce, it connects your file columns to WooCommerce fields such as product name, SKU, price, stock, customer details, and order information. After mapping the fields, the plugin processes the file and either creates new records or updates existing ones based on your chosen settings.
2. Can WP Ultimate CSV Importer update existing WooCommerce products?
Yes. The plugin can update existing products by matching them with a unique identifier like SKU or Product ID. This ensures that only the intended products are modified without creating duplicates. You can also choose to update specific fields, such as price or stock, while keeping other data unchanged.
3. What WooCommerce data can be imported using WP Ultimate CSV Importer?
The plugin supports importing and updating various WooCommerce data types, including products (simple, variable, grouped, and external), categories, tags, customers, orders, coupons, and reviews. It also allows bulk management of pricing, inventory, attributes, and order details.
4. How to automatically import products into WooCommerce?
Automatic product imports can be configured using the scheduling feature available in the Pro version. By setting up a cron-based schedule and linking it to a CSV or XML file (via URL, FTP, or server path), the plugin can run imports at predefined intervals without manual action.
5. Can I bulk update WooCommerce prices and stock using this plugin?
Yes. You can prepare a CSV file containing product identifiers along with updated price and stock columns. During import, map only the required fields and choose the update option. This allows you to modify hundreds or thousands of products in one session.
6. Can I schedule WooCommerce imports automatically?
Yes, scheduled imports are available in the Pro version. You can configure daily, weekly, or custom intervals to automate tasks such as stock synchronization, supplier updates, or price revisions. This reduces manual workload and ensures data remains current.
7. Is it safe to use WP Ultimate CSV Importer for live WooCommerce stores?
Yes, when used correctly. The plugin provides options like selective field updates and rollback support to minimize risks. It is recommended to validate your file, test with a small dataset, and maintain a backup before performing large imports on a live store.
8. Why should WooCommerce store owners use WP Ultimate CSV Importer?
Store owners benefit from faster data management, improved accuracy, and reduced manual effort. The plugin helps manage large product catalogs, automate repetitive updates, and maintain structured store data. This allows business owners to focus more on growth and customer experience instead of manual data entry.
Integrating WP Ultimate CSV Importer with WooCommerce provides a structured and dependable solution for managing large volumes of store data efficiently. As WooCommerce stores grow, manually updating products, customers, orders, coupons, and inventory inside the dashboard becomes time-consuming and increasingly prone to errors. By enabling bulk imports, controlled updates, and automation, this integration simplifies complex data operations while maintaining accuracy and consistency across the entire store.
Developed by Smackcoders, WP Ultimate CSV Importer is built to support expanding WooCommerce businesses with advanced field mapping, selective update options, scheduled imports, and rollback safety features. These capabilities allow store owners to manage structured data confidently, reduce operational risks, and maintain full control over store information.
For WooCommerce stores that frequently update pricing, synchronize supplier inventory, manage large product catalogs, or import customer and order records, adopting a CSV-based workflow is a practical step toward long-term scalability. A well-organized bulk data strategy not only improves efficiency but also strengthens data accuracy and overall store performance.
If this guide helped you better understand how WP Ultimate CSV Importer integrates with WooCommerce, feel free to reference it in your blog or share your feedback with us at support@smackcoders.com. We’re always open to collaboration and committed to supporting better, more efficient WooCommerce workflows.
How to Keep Inventory in Sync Between WooCommerce and Shopify
12 Mar 2026, 8:21 am
Table of Contents
Syncing inventory between WooCommerce and Shopify ensures both stores reflect accurate stock levels in real time, preventing overselling, order cancellations, and manual update errors.
By default, WooCommerce and Shopify operate as separate systems. A sale on one platform does not update stock on the other, which creates discrepancies that affect fulfillment and customer experience.
A two-way API-based sync connects both platforms so any stock change, from an order, edit, or bulk update, reflects across both stores automatically. This requires proper API setup, consistent SKU mapping, and a reliable integration plugin.
This guide covers everything, from initial configuration and plugin setup to variable product sync, order-based stock updates, and troubleshooting, so you can manage multichannel inventory without confusion or revenue loss.
Understanding Inventory Synchronization Between WooCommerce and Shopify
Inventory synchronization means keeping stock levels automatically updated between WooCommerce and Shopify so both stores always show the correct number of items available.
When a customer buys something on one platform, the stock should drop immediately on the other platform too, no manual work needed.
- WooCommerce manages stock inside your WordPress database. You get full control: allow backorders, send low-stock alerts, and set custom rules per product.
- Shopify uses a central inventory system that easily tracks stock across multiple locations and stores, which is great when your business grows bigger.
- There are two main types of syncing WooCommerce to Shopify
One-way sync
Data flows in a single direction, such as from WooCommerce to Shopify. This is useful for migrations where one platform is primary.
Two-way (bi-directional) sync
Changes in either store update the other. This is ideal for parallel operations, preventing discrepancies in real-time.
For non-technical users, think of it like syncing your phone contacts with your computer; changes on one device appear on the other without manual input.
Why Inventory Synchronization Is Important for Multi-Store Sellers
For sellers managing multiple stores, inventory sync is more than a convenience; it’s a business necessity. Here’s why
Prevent Overselling:
Accurate stock visibility ensures you don’t sell unavailable items, reducing refund rates by up to 30% in multi-channel setups.
Accurate Stock Visibility:
Real-time updates provide a single source of truth, helping you make informed decisions on restocking or promotions.
Better Customer Trust:
Customers expect reliable availability; sync eliminates “out of stock” surprises post-purchase, boosting satisfaction and repeat business.
Reduced Manual Work:
Automation frees up time for growth activities, cutting down hours spent on spreadsheets or manual entries.
For example, a clothing retailer selling on both platforms might run a flash sale on WooCommerce. Without sync, Shopify could show outdated stock, leading to unfulfilled orders and unhappy customers.
Common Inventory Management Challenges
Multi-store sellers often face hurdles that disrupt smooth operations.
Overselling and Stock Mismatch
Overselling occurs when stock isn’t updated across platforms in time. Consider this scenario: Your WooCommerce store shows 5 units of a popular gadget. A customer buys 3 on Shopify, but without sync, WooCommerce still displays 5, allowing another sale that can’t be fulfilled. This mismatch results in cancellations, refunds, and potential chargebacks, harming your reputation.
Manual Stock Updates
Relying on spreadsheets or manual logins to update stock is error-prone and inefficient. As order volume grows, tracking changes becomes overwhelming. For instance, updating 100 products daily across platforms could take hours, and human errors like forgetting a variation amplify problems.
Delayed Order Sync
When orders aren’t synced promptly, stock availability appears incorrect. A delay of even a few minutes during peak hours can lead to multiple sales of the same item. This is common in setups without real-time WooCommerce Shopify inventory sync, causing inventory discrepancies and operational delays.
WooCommerce vs Shopify Inventory Handling
Understanding platform differences is key to effective sync. Here’s a comparison:
| Feature | WooCommerce | Shopify |
| SKU Handling | Allows custom SKUs for every product and variation. Very flexible structure. | Requires a unique SKU for each product and variant. Strict SKU management. |
| Product Variations | Supports unlimited attributes like size, color, and material. Each variation can have its own stock. | Supports up to 100 variants per product. Variants can track stock individually. |
| Stock Management Rules | Supports backorders, hides out-of-stock items, and low-stock thresholds. | Uses location-based inventory tracking with automatic stock adjustments. |
| Inventory Tracking Method | Managed at the product and variation level within the WordPress dashboard. | Managed per product and per location inside the Shopify admin. |
| Stock Notifications | Email alerts for low stock (requires configuration). | Built-in low stock alerts and detailed inventory reports. |
| Order-Based Stock Deduction | Stock reduces based on order status settings. | Stock reduces immediately after order placement. |
| Multi-Location Support | Requires extensions for advanced multi-location support. | Built-in multi-location inventory tracking. |
WooCommerce offers more customization for developers, while Shopify prioritizes simplicity for business owners. Sync tools bridge these gaps by mapping data appropriately.
Pre-Sync Requirements
Before setting up sync, ensure your stores are prepared. This minimizes errors and ensures smooth integration.
Store Access and Permissions
You need admin access to both WooCommerce and Shopify.
For WooCommerce
Go to Settings, open Advanced, and select REST API from your WooCommerce dashboard. Click on Add Key or Create API Key to generate new credentials. Set the permissions to Read and Write to allow full synchronization access, then generate the key and securely save the Consumer Key and Consumer Secret for use in the integration plugin.
For Shopify
Log in to your Shopify Admin panel and open Apps, then select Develop apps to begin creating a custom app. Click on Create an app and proceed to the Admin API access settings. Enable the necessary permissions for Products and Inventory to allow proper data synchronization. After configuring the permissions, install the app and copy the generated Admin API access token for authentication within the sync plugin.
Product SKU Consistency
SKUs must match exactly between stores for accurate mapping. Audit your products: Export CSVs from both, compare SKUs, and standardize them, e.g., use “PROD-001” consistently. Inconsistent SKUs are a top cause of sync failures.
API and Integration Readiness
Verify API limits-Shopify has rate limits,e.g., 2 requests/second, so choose tools that handle throttling. Test connections in a staging environment to avoid disrupting live stores.
Inventory Data That Can Be Synced
Not all data syncs equally; focus on essentials for efficiency.
Stock Quantity
Core to sync, this updates available units. Tools can push/pull quantities bi-directionally, ensuring real-time accuracy.
Product Variations
For items with options like sizes or colors, sync at the variant level. Map WooCommerce attributes to Shopify variants using SKUs.
Price and Product Status
Sync prices to maintain consistency and avoid pricing errors. Product status active/draft can also sync, along with limited metadata like descriptions. Limitations include images often requiring separate handling, and custom fields may need advanced tools.
| Data Type | Can Be Synced | Sync Direction | Notes |
| Stock Quantity | Yes | One-way / Two-way | Real-time supported |
| Product Variations | Yes | Bi-directional | SKU required |
| Price | Yes | Configurable | Avoid pricing conflicts |
| Product Status | Yes | Configurable | Active/Draft |
| Images | Limited | Usually One-way | May require separate handling |
| Custom Fields | Limited | Depends on the plugin | Advanced setup needed |
Methods to Keep Inventory in Sync
Several approaches exist, each suited to different needs and technical levels.
Plugin-Based Sync Method (Recommended) – WooCommerce to Shopify
Plugins are ideal for non-technical users, offering user-friendly interfaces and automation. They handle API connections, mapping, and scheduling without coding. Recommended for most sellers due to ease and reliability.
Manual Inventory Update Method
This involves logging into each platform and updating stock manually or via CSV imports. It works for very small stores under 50 products with low order volume, but fails as businesses scale, leading to errors and time loss.
Custom API Integration Method
Developers can build integrations using WooCommerce and Shopify APIs. Pros include full customization; cons are high development costs and maintenance needs. Suitable for large enterprises with unique requirements.
| Method | Technical Skill | Cost | Scalability | Recommended For |
| Plugin-Based Sync | Low | Medium | High | Most businesses |
| Manual Updates | None | Free | Very Low | Small stores |
| Custom API Integration | High | Expensive | Very High | Enterprises |
Step-by-Step Guide to Sync Inventory Between WooCommerce and Shopify | Plugin-Based Sync Method
Synchronizing inventory between WooCommerce and Shopify becomes much easier when you use a dedicated integration plugin instead of manual CSV exports or custom API scripts. The W2S – WooCommerce to Shopify Sync plugin by Smackcoders helps automate product, stock, order, and customer synchronization using native APIs from both platforms.
Below is a technical, implementation-focused breakdown of how to configure inventory sync properly.
Install and Configure the W2S – WooCommerce to Shopify Sync Plugin
Start by installing the plugin on your WordPress site where WooCommerce is active.
After activation:
1. Generate WooCommerce REST API Keys
Go to WooCommerce, open Settings, navigate to Advanced, and select REST API. Create a new API key with Read and Write permissions, then copy the generated Consumer Key and Consumer Secret for later use in the integration process.
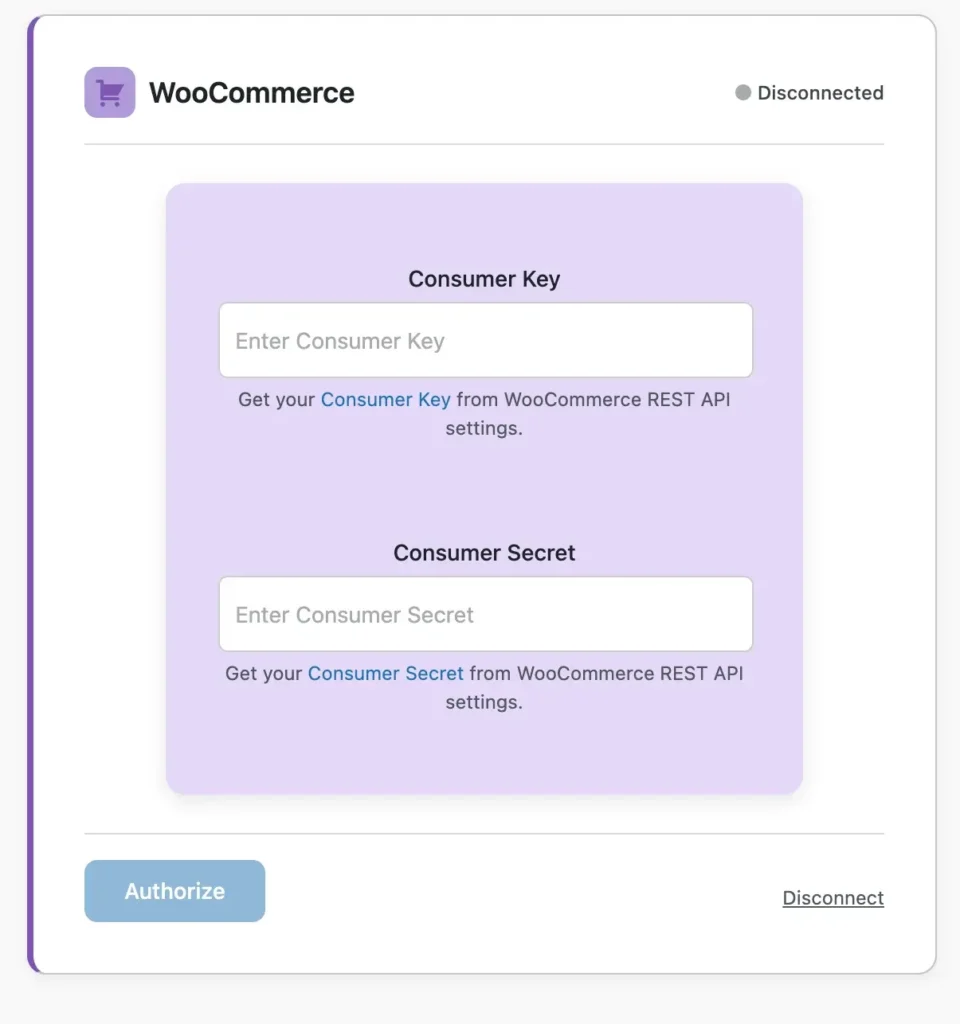
2. Create a Shopify Custom App
Log in to your Shopify Admin dashboard, open Apps, and select Develop apps to create a new custom app. Enable the required Admin API scopes, such as Products, Inventory, Orders, and Customers,s based on your synchronization needs, then generate and copy the Admin API access token.
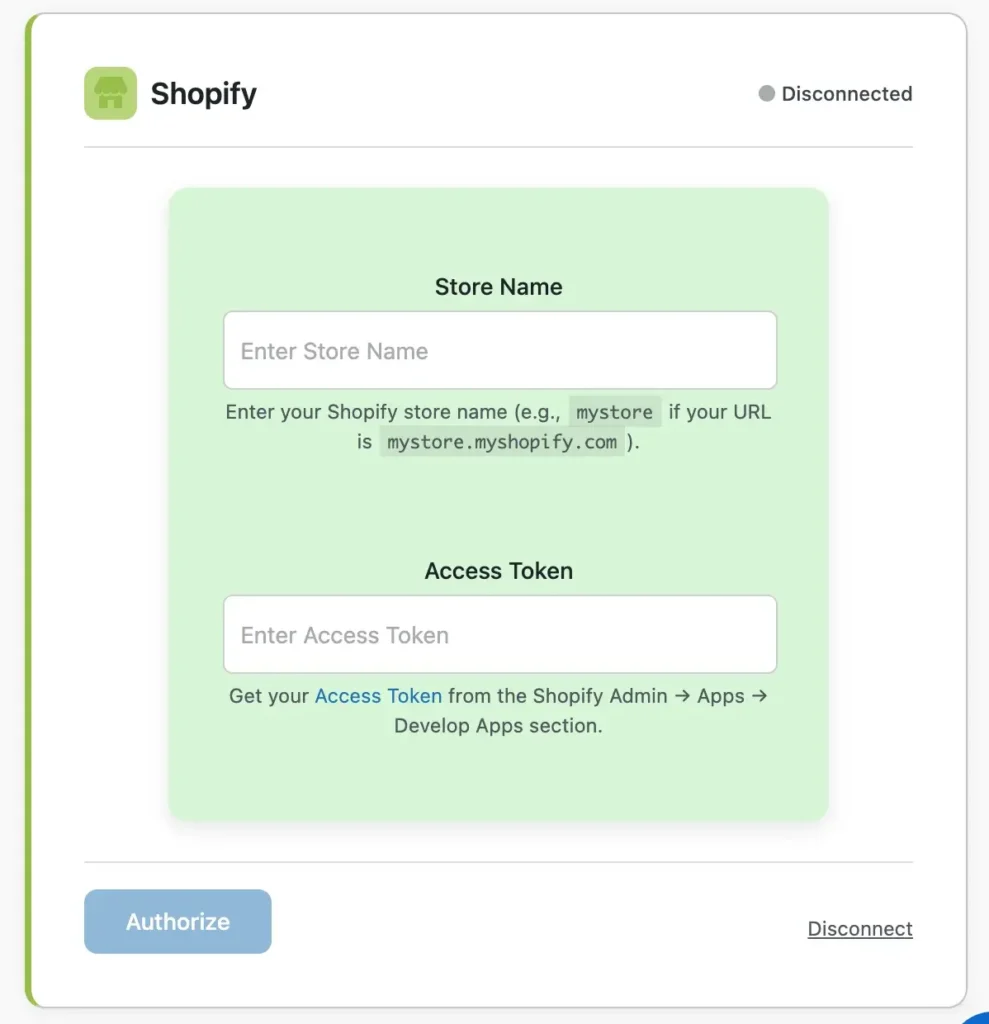
3. Authenticate Both Stores in the Plugin
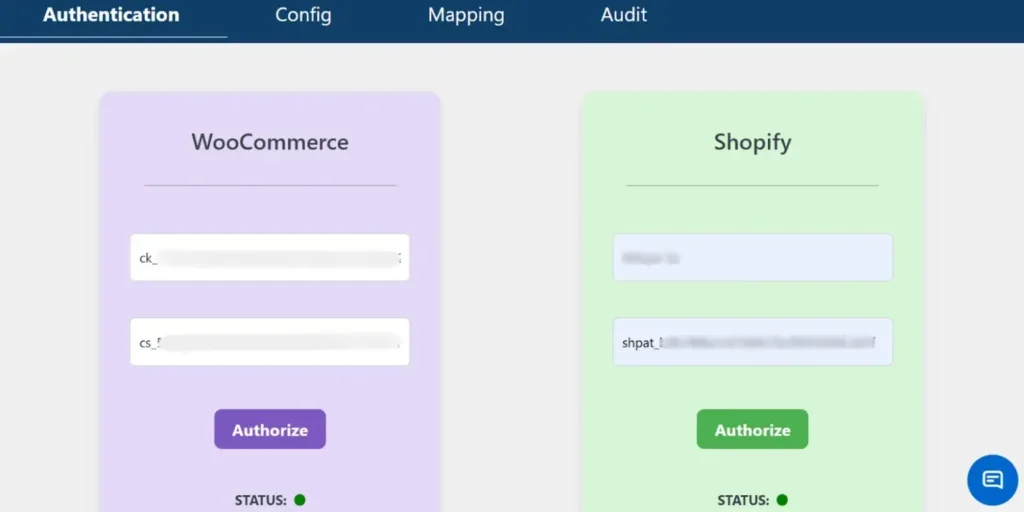
Open the sync plugin settings in your WordPress dashboard and enter the WooCommerce API credentials along with your Shopify store URL and Admin API access token. After entering the required details, validate the connection status to successfully authenticate both stores and establish secure communication between the platforms.
The plugin uses secure API-based communication. Once authentication is successful, you can proceed with inventory and product sync configuration.
Map Products Using SKU (Automatically Mapped)
Accurate inventory sync depends on consistent SKU mapping between platforms.
The plugin automatically matches products using
- SKU Primary identifier
- Product variations if SKUs are unique per variation
For technical setups
- Ensure all WooCommerce products have unique SKUs
- Ensure Shopify variants also use matching SKUs
- Avoid duplicate SKUs across variable products
If SKU values match correctly, stock updates sync seamlessly without creating duplicate products.
For stores with large catalogs, SKU consistency is critical to prevent incorrect stock adjustments.
Configure Sync Direction and Rules
The plugin allows you to define how inventory data flows between platforms.
You can configurew2s
- WooCommerce → Shopify (common for content-first stores)
- Shopify → WooCommerce (common for Shopify-primary sales)
- Bi-directional sync (for dual-active stores)
Sync Direction Options Between WooCommerce and Shopify
When configuring inventory synchronization, choosing the correct sync direction is critical. The direction determines which platform acts as the primary source of truth for product and stock data.
WooCommerce to Shopify
In this setup, WooCommerce acts as the main store where products and inventory are managed, and updates are pushed to Shopify. This approach is common for content-first stores that use WordPress for blogging, SEO, and content marketing while using Shopify as an additional sales channel. Any stock updates, product edits, or changes made in WooCommerce are automatically reflected in Shopify, ensuring consistency across platforms.
Shopify to WooCommerce
Here, Shopify becomes the primary sales platform, and WooCommerce mirrors its product and inventory data. This configuration is ideal for businesses that process most of their sales through Shopify and want WooCommerce to function as a secondary storefront. Stock updates triggered by Shopify orders are pushed to WooCommerce, helping prevent overselling and keeping inventory aligned.
Bi-Directional Sync
Bi-directional synchronization allows both WooCommerce and Shopify to update each other. If a sale occurs on either platform, the inventory is updated across both stores automatically. This method is suitable for dual-active stores where both platforms are used equally for sales. However, it requires careful configuration to avoid circular updates or conflicting data changes.
Selecting the right sync direction ensures accurate inventory management and prevents stock discrepancies across your multi-store setup.
For inventory management,
- Create new products on destination store
- Update stock levels automatically
- Enable or disable deletion sync
- Control which modules to sync (Products, Orders, Customers)
Technical users should carefully plan direction rules to avoid circular updates or unintended overwrites.
If Shopify is your primary checkout system, inventory should typically sync from Shopify to WooCommerce to avoid overselling.
Enable Real-Time or Scheduled Sync
- The plugin supports two primary synchronization modes that allow you to control how and when inventory updates are pushed between WooCommerce and Shopify. Choosing the right mode depends on your store traffic, sales volume, and operational workflow.
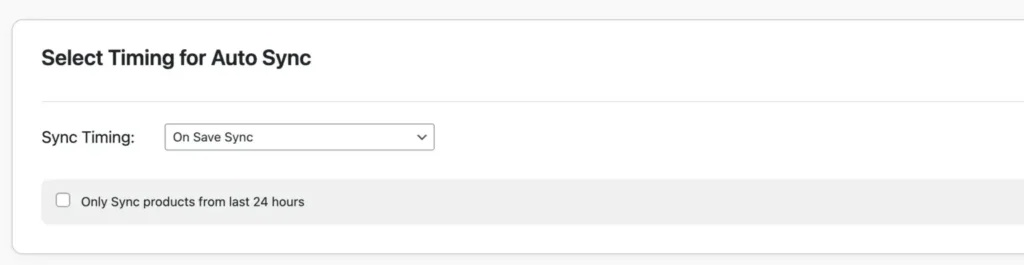
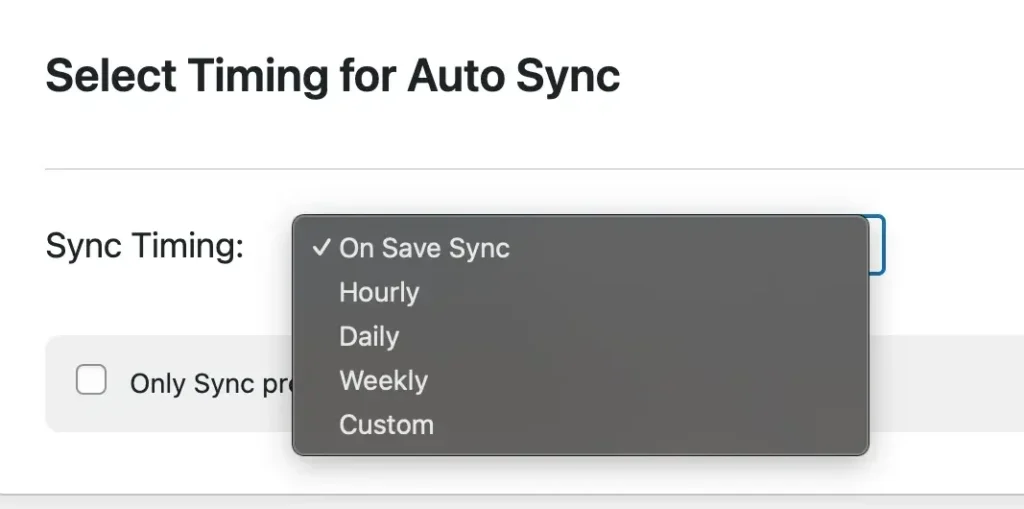
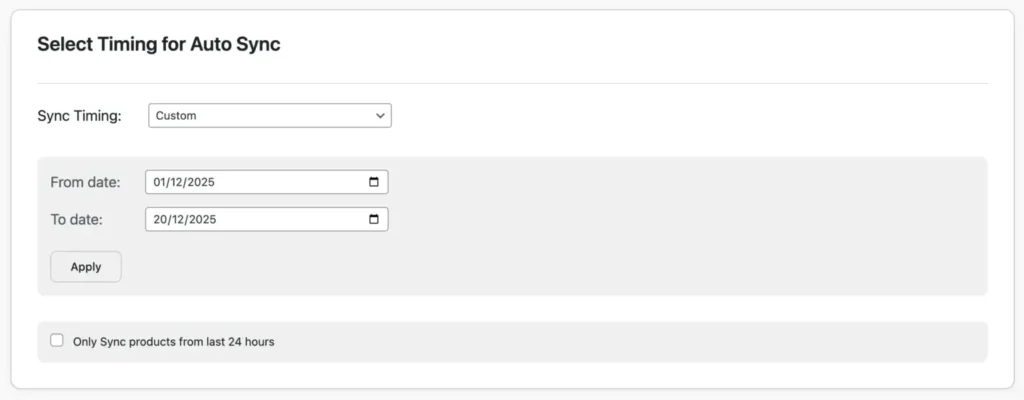
Real-Time Sync
- Real-Time Sync automatically triggers whenever a product is updated or an order is placed. As soon as stock levels change on one platform, the update is instantly pushed to the connected store. This ensures inventory accuracy across both systems without delay.
- This mode is ideal for high-volume stores where products sell frequently throughout the day. Immediate stock updates reduce latency between transactions and inventory adjustments, significantly minimizing the risk of overselling or stock mismatches. For businesses running flash sales, limited stock items, or fast-moving inventory, real-time synchronization provides maximum reliability and accuracy.
Scheduled Sync
- Scheduled Sync updates inventory at predefined intervals such as hourly, daily, weekly, or a custom time frame configured within the plugin settings. These updates run using WordPress Cron, which automates background synchronization tasks without manual intervention.
- This method is suitable for moderate-traffic or low-volume stores where real-time updates may not be necessary. It helps reduce server load while still maintaining consistent stock alignment between WooCommerce and Shopify. Scheduled sync is also useful when performing bulk product updates or managing larger catalogs where periodic synchronization is sufficient.
- By selecting the appropriate sync mode based on your business needs, you can ensure efficient inventory management while maintaining optimal store performance.
| Feature | Real-Time Sync | Scheduled Sync |
| Update Speed | Instant | Based on the interval |
| Best For | High-volume stores | Low/medium stores |
| Server Load | Higher | Lower |
| Overselling Risk | Very Low | Moderate |
Technical recommendation
- Use real-time sync for fast-moving inventory
- Use scheduled sync for bulk updates or low-traffic environments
- Ensure WP-Cron is functioning properly on your server
Monitoring can be done via the plugin’s audit logs to track sync status and troubleshoot failures.
For a stable WooCommerce Shopify inventory sync
- Maintain SKU consistency across platforms
- Avoid manual stock edits on both platforms simultaneously
- Test with a few products before enabling full sync
- Monitor logs after initial deployment
- Confirm Shopify API rate limits are not exceeded
Using a plugin-based sync method eliminates manual exports and reduces inventory errors, making it ideal for businesses running multi-platform e-Commerce operations.
Syncing Inventory for Variable Products
Variable products, like t-shirts in different sizes and colors, require precise mapping. In W2S Sync:
- Ensure each variation has a unique SKU in both platforms.
- The plugin syncs attributes automatically if SKUs match.
For example, if WooCommerce has a “Large-Red” variant with SKU “TSH-LR”, map it to Shopify’s equivalent.
- Test by placing an order: Stock should be deducted from the specific variant across stores.
Limitations: Complex bundles may need Pro features or custom tweaks.
This prevents partial overselling, where one size sells out but others remain available.
Handling Order-Based Stock Updates
Orders directly impact inventory. With sync enabled
- When an order is placed on Shopify, the plugin detects it and reduces stock in WooCommerce automatically.
- Vice versa for WooCommerce orders.
- Real-time sync is crucial here to avoid delays. Set it up to trigger on order creation or status change.
- For refunds or cancellations, enable reverse sync to restore stock.
This automation ensures stock reflects true availability, reducing manual interventions.
Error Handling and Troubleshooting
Common issues include
Missing SKU: Products won’t sync; fix by auditing and standardizing SKUs.
API Limits Exceeded: Shopify throttles requests; use plugins with retry logic or schedule during off-peak hours.
Connection Failures: Check API keys; regenerate if invalid.
Sync Conflicts: Set priority rules in the plugin.
Debugging: Use the Audit Log to view errors; export CSVs for analysis.
If issues persist, contact plugin support or test in staging.
Best Practices for WooCommerce–Shopify Inventory Sync
To maximize efficiency
- Regularly audit SKUs for consistency.
- Start with a small product set for testing.
- Use bi-directional sync only if both stores are active.
- Monitor audit logs weekly for anomalies.
- Set low-stock alerts on both platforms.
- Avoid manual edits during sync to prevent conflicts.
- Backup stores before initial sync.
- Optimize for performance: Limit sync to essential data.
- Update plugins and platforms regularly.
- Train the team on sync processes to avoid errors.
Following these ensures long-term accuracy.
Frequently Asked Questions (FAQs)
1. Can I sync products and inventory between WooCommerce and Shopify?
Yes, it is possible to sync products and inventory between WooCommerce and Shopify using a dedicated integration plugin such as W2S Sync. These plugins allow you to synchronize product details, stock quantities, variations, pricing, and other related data across both platforms. Many solutions also support bi-directional syncing, meaning updates made in either store can reflect automatically in the other, ensuring consistent product and inventory information.
2. How to keep WooCommerce and Shopify in sync?
To keep both platforms synchronized, you need to install a compatible sync plugin and connect the two stores using their respective APIs. Once connected, products are typically mapped using SKUs to ensure accurate matching. After mapping, you can enable real-time or scheduled synchronization so that inventory, product updates, and order-related stock changes remain aligned continuously without manual intervention.
3. How to enable inventory sync in the WooCommerce to Shopify sync plugin?
After installing and activating the plugin, navigate to its configuration settings within your WordPress dashboard. Enable the inventory or stock synchronization module, then choose the desired sync direction, such as WooCommerce to Shopify, Shopify to WooCommerce, or bi-directional. Finally, activate either real-time or scheduled synchronization based on your store’s needs to ensure stock levels update automatically.
4. How does WooCommerce Shopify inventory sync work?
Inventory synchronization works through secure API communication between the two platforms. When a change occurs in one store, such as a stock reduction after an order is placed, the plugin detects the update and pushes or pulls the corresponding data to the connected store. This automated data exchange ensures both systems reflect the same stock levels, minimizing discrepancies.
5. Can I sync inventory between WooCommerce and Shopify in real time?
Yes, most advanced sync plugins support real-time synchronization. In this mode, events such as product updates, stock edits, or order placements immediately trigger inventory updates on the connected platform. This helps prevent delays in stock adjustments and reduces the risk of overselling, especially in high-volume stores.
6. What happens if the SKU doesn’t match?
If SKUs do not match between WooCommerce and Shopify, the plugin cannot correctly identify corresponding products. As a result, those products may not sync, or the system may generate error logs. To resolve this, you need to manually correct the SKUs or map the products properly so that the plugin can establish accurate product relationships.
7. Can variable products be synced?
Yes, variable products can be synced effectively as long as each variation has a unique SKU. The plugin uses these unique identifiers to match variations such as size, color, or other attributes across both platforms. When configured correctly, inventory changes for each variation are updated automatically without affecting other variants of the same product.
Keeping inventory in sync between WooCommerce and Shopify transforms multi-store management from a challenge into a true growth advantage. By preventing overselling, reducing manual work, and maintaining accurate stock levels, real-time WooCommerce Shopify inventory sync builds customer trust and supports scalable multichannel selling. The key is proper setup begin with pre-sync checks, choosing a reliable plugin-based synchronization method, and following proven inventory management best practices. Instead of depending on manual updates that cause costly errors, automate your inventory syncing today and implement a professional WooCommerce-Shopify sync solution to eliminate stock confusion, streamline operations, and focus confidently on growing your eCommerce business.
How To Import ACF Custom Fields For WooCommerce Products – Complete Guide
11 Mar 2026, 1:11 pm
If you are looking for how to import ACF custom fields for WooCommerce products, the most reliable method is using WP Ultimate CSV Importer with properly structured CSV, XML, Excel, or Google Sheets files. ACF WooCommerce custom fields are stored as meta keys, which must be mapped correctly during import. For growing stores, manually adding additional product data is time-consuming and error-prone. Bulk importing ensures consistency across large product catalogs. It also enables faster updates, easier migrations, and structured data management. WP Ultimate CSV Importer supports multiple file formats and cloud sources like Dropbox. This makes it suitable for SMBs, developers, and high-volume WooCommerce stores. With proper field configuration, even repeaters and complex ACF metafields can be imported accurately. Automation further reduces repetitive manual work. Let us break down how ACF works with WooCommerce before starting the import process.
Key Takeaways
- ACF WooCommerce fields are saved as post meta (meta keys).
- Import files can be CSV, XML, Excel, Google Sheets, or Dropbox-based.
- Correct meta key mapping is critical for successful imports.
- Repeater and complex ACF fields require structured formatting.
- WP Ultimate CSV Importer enables scalable and automated WooCommerce product imports.
How to Add Custom Fields to WooCommerce Products using ACF?
Before starting the import process, you must first create the custom fields properly using ACF.
WooCommerce manages your products, and Advanced Custom Fields allows you to extend those products with additional data. When both WooCommerce and ACF are installed and activated, you can easily create structured advanced product fields for WooCommerce.
After activating the plugins, go to the Custom Fields or ACF section in your WordPress dashboard and click the Field group.
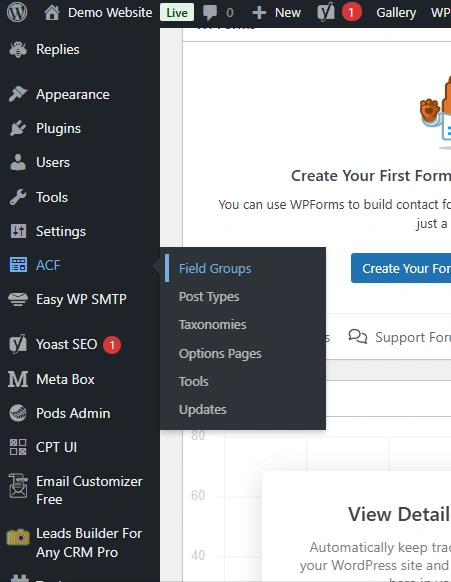
Then click the Add “New button”. This creates a new Field Group.
At the top of the page, you must enter a Field Group Title. This title is only for admin reference. For example, you can name it “Product Specifications” or “Additional Product Details.” This name helps you organize your fields in the backend.
Inside the field group, click Add Field to create your custom fields. For each field, you need to fill in the Field Label, Field Name, and choose the Field Type. The Field Label appears in the product edit screen. The Field Name is the internal key stored in the database. This Field Name is very important because it must match exactly when importing WooCommerce ACF custom fields using a CSV file.
For example, if your Field Label is “Brand,” your Field Name can be “brand.” If your Field Label is “Warranty Period,” your Field Name can be “warranty_period.” During import, the CSV column header must use these exact field names.

After adding all required fields, scroll to the Location section and set the rule so that the field group appears when the Post Type is equal to Product. This ensures the custom fields are displayed on the WooCommerce product edit page.
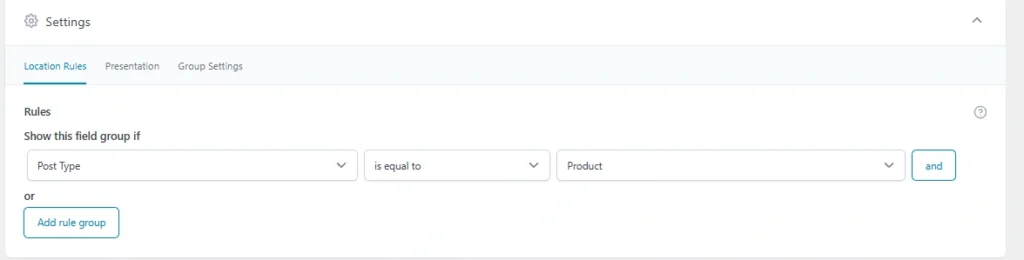
If multilingual settings are enabled on your site, you will see translation options within the same field group screen. Here you can decide whether the field values should be copied across languages or translated separately, depending on your store’s configuration.
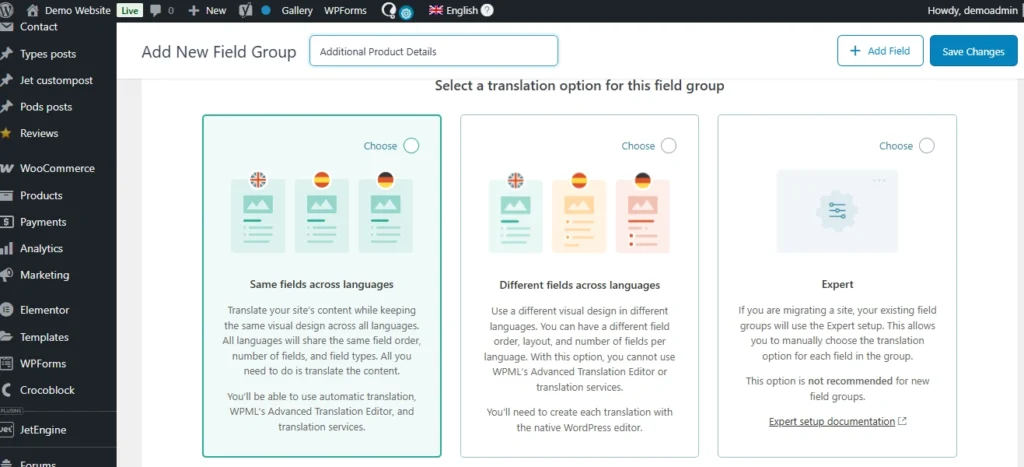
Once everything is configured, click Publish or Save to activate the field group, which is in the top right corner of the page.

To verify the setup, open any WooCommerce product in the admin area and scroll down the page. Your newly created custom fields should appear there. Enter some sample data and update the product to confirm that the fields are working correctly.
Once confirmed, your custom product fields are properly configured and ready for bulk import.
WP Ultimate CSV Importer Pro
Get Ultimate CSV/XML Importer to import data on WordPress faster, quicker and safer.
Prerequisites Before Importing
Before importing ACF custom fields for WooCommerce products, make sure WooCommerce and ACF are installed, and your field group is fully created and verified.
Next, install WP Ultimate CSV Importer Pro. Go to the Smackcoders website, log in to My Account, download the plugin, then upload, install, and activate it on WordPress. Ensure the WooCommerce and ACF modules are enabled in the plugin settings.
Also, finalize your ACF field names, decide on product types (simple or variable), and ensure each product has a unique SKU if updating existing items. Once this is done, you are ready to prepare your CSV file for import.
Preparing the Import File for ACF Fields
Before importing, your product data file must be structured correctly so WooCommerce and ACF fields can be mapped properly. The Importer supports multiple file formats including CSV, XML, Excel (XLS/XLSX), and Google Sheets, giving you flexibility depending on your data source.
Include all required product details such as Product Name, SKU, Price, Categories, and Product Type. For variable products, make sure parent and variation details are structured correctly. Using a template from the importer is recommended to prevent errors.
For ACF fields, the file headers must exactly match the Field Names you created in your field group. This ensures the custom product data is imported correctly. Any mismatch in field names will prevent data from appearing in the product editor.

Check for common formatting issues like empty headers, duplicate SKUs, or missing mandatory fields. Each row should represent a single product, and all essential fields must be filled. Correct preparation ensures your WooCommerce ACF import runs smoothly.
For a deeper understanding of how ACF field exports and imports work in WordPress, you can explore our detailed guide here:
WP Ultimate CSV Importer Pro
Get Ultimate CSV/XML Importer to import data on WordPress faster, quicker and safer.
Importing ACF Custom Fields Using WP Ultimate CSV Importer
This section covers the full step-by-step process of importing WooCommerce products along with ACF custom fields using WP Ultimate CSV Importer Pro.
Step 1: Uploading the Import File
First, go to the plugin in your WordPress dashboard and select Import. Upload your prepared file, which can be CSV, XML, Excel (XLS/XLSX), or Google Sheets.
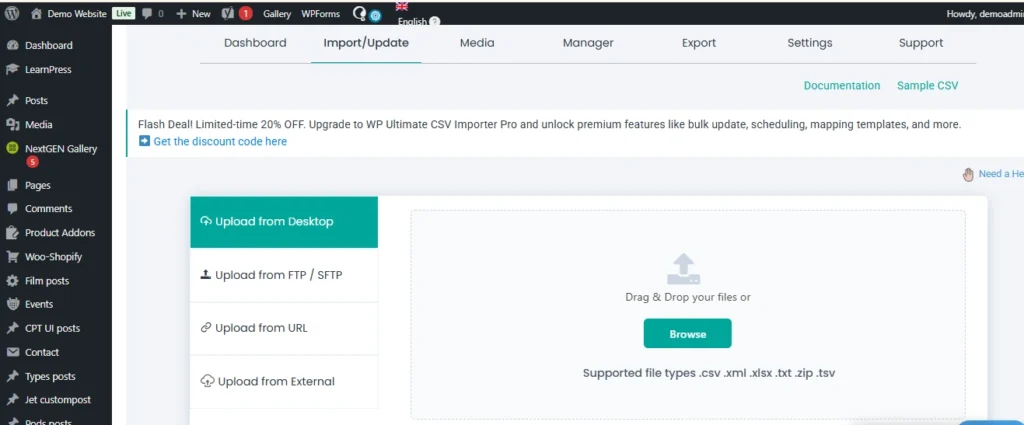
Then choose the fresh import and change the import record as “WooCommerce Product”.
Step 2: Mapping WooCommerce Product Fields
Next, map your standard WooCommerce product columns. Assign your file columns to fields such as Product Name, SKU, Price, Categories, and Product Type. Correct mapping ensures each piece of data goes to the right place in WooCommerce. For variable products, make sure parent and variation details are correctly matched.
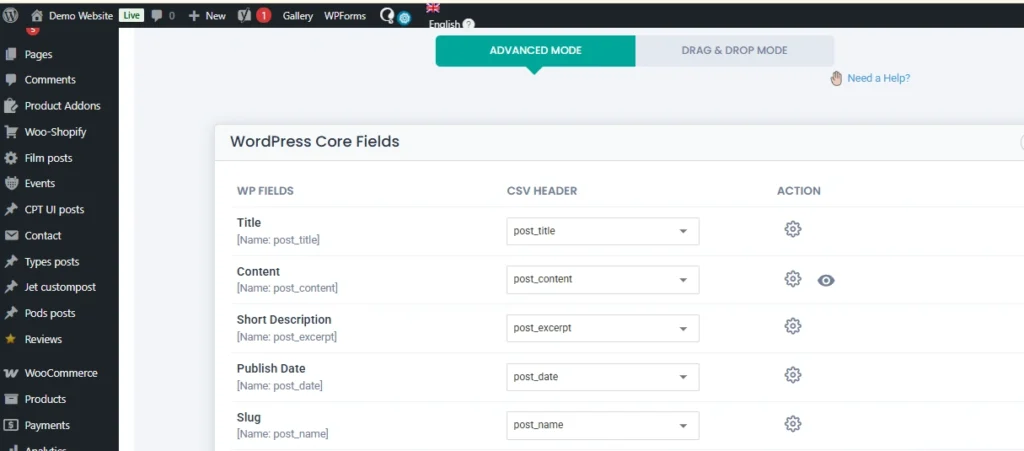
Step 3: Mapping ACF Custom Fields
After mapping the standard fields, map your ACF custom fields. Match each column header in your file to the corresponding Field Name in ACF. The importer supports complex fields such as repeaters or grouped fields. Ensure each ACF field is mapped correctly so that the data appears properly in the product editor.
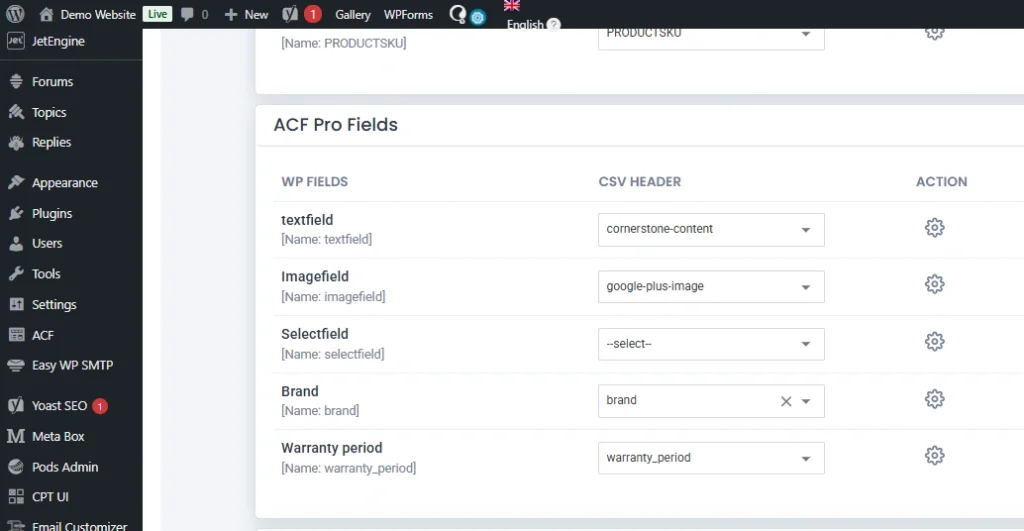
Step 4: Running the Import Process
Once mapping is complete, run the import. The plugin will validate your data, execute the import, and generate a log. For large catalogs, the plugin processes products in batches to prevent server timeouts.

If you are updating existing products, include a unique identifier such as SKU or Product ID. WP Ultimate CSV Importer also allows scheduling imports, enabling WooCommerce to import products automatically on a regular basis.
After the import finishes, review the logs for any errors. Fix any issues and rerun the import for the affected products. Correct mapping and a clean file ensure that all WooCommerce and ACF custom fields display properly.
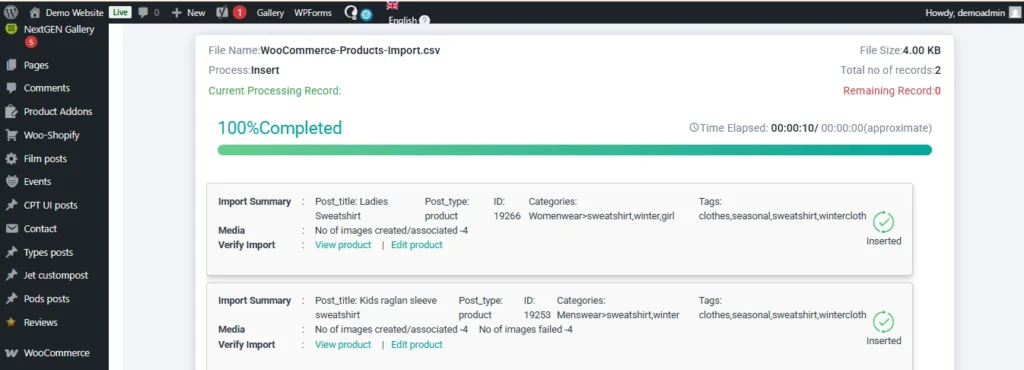
Verifying Imported ACF Data
After the import is completed, you need to check whether the data has been imported correctly.
First, go to the WordPress admin area and open any imported WooCommerce product. Scroll down to the product edit page.
The ACF custom fields you created should be visible, and the imported values should be correctly filled in those fields.
Next, open the same product on the frontend of your website. Check whether the custom field values are displaying properly on the product page.
If the values are visible in the backend and displayed correctly on the frontend, it means the import was successful.
WP Ultimate CSV Importer Pro
Get Ultimate CSV/XML Importer to import data on WordPress faster, quicker and safer.
Common Issues and Troubleshooting
When importing WooCommerce ACF custom fields, small configuration mistakes can prevent data from appearing correctly. Below are the most common issues and how to resolve them.
| Issue | Possible Cause | Solution |
| ACF field not showing in product editor | Field group not assigned to Product post type | Edit the field group and ensure the location rule is set to Post Type = Product |
| ACF data not imported | Field Name does not match file header | Ensure the file column header exactly matches the ACF Field Name |
| Data saved but not visible on frontend | Theme/template not displaying ACF fields | Update your product template to retrieve the field using get_field(‘field_name’) |
| Variable product import errors | Parent and variation structure incorrect | Ensure parent product and variations are properly structured and linked via SKU or parent ID |
| Duplicate products created | SKU not used for updates | Use SKU or Product ID as a unique identifier when updating existing products |
| Special characters or broken values | File formatting issues | Clean the file and check delimiter, encoding, and empty headers |
| Import stops midway | Server timeout or large file size | Split the file into smaller batches or increase server limits |
Most problems occur due to meta key mismatches or incorrect product structure. Always double-check field names, SKU values, and mapping settings before running large imports.
With proper preparation and correct mapping in the Importer, WooCommerce ACF imports work reliably even for large product catalogs.
Best Practices for Small and Medium Businesses
For small and medium businesses managing WooCommerce stores, structured imports are not just about convenience. They are about saving time, reducing errors, and preparing for growth.
Before running any large import, always take a complete website backup. This gives you a safe recovery point if something unexpected happens. Even when using reliable tools like WP Ultimate CSV Importer, backups are a standard best practice.
If possible, test your import on a staging site first. Import a small batch of products with WooCommerce ACF custom fields and verify everything. Once confirmed, proceed with the full catalog import on the live site.
Maintain a structured master file for your products. Whether you use CSV, Excel, XML, or Google Sheets, keep a clean and standardized format. Use consistent column headers that match your ACF field names. This makes future updates and scaling much easier.
For growing catalogs, always use SKU as the unique identifier. This helps when you need to update pricing, stock, or advanced product fields for WooCommerce without creating duplicates.
When dealing with large product databases, avoid importing thousands of records immediately. Split files into manageable batches if necessary. This reduces server strain and improves stability.
If your business frequently updates product data from external systems, consider configuring scheduled imports. This allows WooCommerce to import products automatically at defined intervals, reducing manual work.
Finally, document your field structure. Maintain a clear list of all ACF field names and their purpose. This helps developers, marketers, and operations teams stay aligned when modifying or expanding your WooCommerce ACF custom fields.
A structured approach today prevents data chaos tomorrow.
Frequently Asked Questions (FAQs)
1. How can you add custom fields to products in WooCommerce?
You can add custom fields to WooCommerce products using the Advanced Custom Fields plugin. After installing ACF, create a Field Group, add your required fields, and set the location rule to Post Type equal to Product. Once saved, the fields will appear on the WooCommerce product edit page.
2. How Do I Import Custom Fields to WooCommerce Products?
To import custom fields, prepare your product data file with column headers that exactly match your ACF Field Names. Then use WP Ultimate CSV Importer Pro to upload the file, map the WooCommerce fields, and map the ACF fields correctly before running the import.
3. How to import variable products in WooCommerce?
When importing variable products, you must structure the parent product and its variations correctly in your file. Each variation should be linked to the parent using SKU or a parent identifier. During mapping, ensure the Product Type is set correctly for both parent and variations.
For a detailed step-by-step explanation on how to import variable products in WooCommerce.
4. How to use ACF with WooCommerce?
ACF works with WooCommerce by attaching custom fields to the Product post type. You create a field group in ACF, assign it to Products, and then use those fields to store additional product information such as specifications, technical details, or extra attributes.
5. Does ACF work with WooCommerce?
Yes. ACF integrates seamlessly with WooCommerce because WooCommerce products are a custom post type. ACF allows you to extend product data without modifying WooCommerce core files.
6. What additional product options are available in WooCommerce?
WooCommerce supports simple products, variable products, grouped products, and external products. Using ACF, you can also create advanced product fields for WooCommerce such as brand details, specifications, warranty information, compatibility data, and more.
7. How to get an ACF field in WordPress?
You can retrieve an ACF field value using the function get_field(‘field_name’). When working with WooCommerce products, you can pass the product ID if needed to fetch the correct value.
8. What should be done if the ACF-imported data is not showing on the WooCommerce product frontend?
First, confirm the data is visible in the product editor in the backend. If it is saved but not displaying on the frontend, check your theme or product template. Ensure the correct ACF field name is being used in the template and that the field group is properly assigned to Products.
Importing structured product data into WooCommerce becomes straightforward when your ACF fields are configured correctly and your import file is properly prepared. The success of importing ACF fields into WooCommerce depends on accurate field names, correct mapping, and using a reliable import solution.
With WP Ultimate CSV Importer Pro, you can import WooCommerce products along with ACF custom fields from CSV, XML, Excel, or Google Sheets, update products using SKU, and manage even complex field structures efficiently.
If you have any questions about setup, mapping, or advanced imports, you can contact the Smackcoders support team directly at:
support@smackcoders.com
Start streamlining your WooCommerce ACF imports today and manage your product data with confidence.
WordPress Backup Strategy: Master Guide
11 Mar 2026, 12:55 pm
Table of Contents
A solid WordPress backup strategy is not optional; it’s a core part of running a reliable website. Whether you manage a blog, business site, or eCommerce store, losing your data can mean lost revenue, traffic, and reputation. A proper backup ensures your site can be restored quickly if something goes wrong.
If you use WordPress, you must assume that your website will at some point face issues such as hacking, server failures, or accidental data loss. A well-planned backup strategy acts as your safety net, allowing you to recover your entire website without panic or downtime.
This complete WordPress backup guide focuses on real-world implementation. You’ll learn how to back up a WordPress website, where to store backups, how often to run them, and how to test restores properly. Whether you’re a beginner or a developer managing multiple sites, this guide will help you build a practical, reliable backup strategy.
Key Takeaways
- Every WordPress website needs a structured backup strategy
- Backups protect against hacks, crashes, and human errors
- The 3-2-1 backup rule is the safest approach
- Multiple backup methods (plugin, hosting, manual) provide better protection.
- Testing restore is just as important as taking backups
Why Your Website Needs a Backup Strategy (The Risks of No-Backup)
A proper backup strategy is essential for every website running on WordPress because unexpected issues can occur at any time. Websites can crash due to failed updates, plugin or theme conflicts, or server errors, often without warning. Security threats like hacking and malware attacks can corrupt or delete important files and databases, while hosting failures can also result in permanent data loss.
Human errors are another common cause of website issues. Accidental deletions, incorrect configuration changes, or editing the wrong files can quickly break a website. Even experienced developers sometimes make small mistakes that lead to major problems if there is no reliable backup available.
Without a proper WordPress backup strategy, recovering your website can become stressful, time-consuming, and expensive. For business and e-commerce sites, this may lead to lost sales, reduced search rankings, and damaged customer trust. Regular backups ensure that no matter what goes wrong, your website can be restored quickly and continue running smoothly with minimal disruption.
The 3-2-1 Backup Rule for WordPress
A strong WordPress backup strategy starts with the simple and reliable 3-2-1 backup rule. If your website runs on WordPress, this rule helps protect your data from crashes, hacks, and server failures. The idea is always to keep three copies of your website, store them in two different storage types, and maintain one backup in an off-site location.
In practical terms, your live website is the first copy, your hosting or plugin backup can be the second, and a cloud or remote backup becomes the third. Using different storage types like hosting, backup, and cloud storage ensures that if one fails, the other is still safe. Most importantly, keeping at least one off-site backup protects your website even if your main server crashes or gets hacked.
Following the 3-2-1 rule creates a reliable safety net. It ensures that no matter what happens, whether it’s a technical failure or human error, you can quickly restore your website without major downtime or data loss.
WP Ultimate CSV Importer Pro
Get Ultimate CSV/XML Importer to import data on WordPress faster, quicker and safer.
Types of Backups You Should Know
Understanding backup types is an important part of building a reliable WordPress backup strategy. If you run a site on WordPress, knowing what exactly needs to be backed up and how to ensure complete protection of your website.
Files vs Database
A WordPress website consists of two main components: files and the database, and both are equally important. Website files include themes, plugins, core WordPress files, images, media uploads, and configuration files that control how your site looks and functions. The database, on the other hand, stores all your posts, pages, user information, comments, and site settings. If you back up only the files but ignore the database, your content and configurations will be missing during restore. Similarly, backing up only the database without files means your design and media elements won’t be recovered. A complete WordPress backup always includes both files and the database to ensure full restoration.
Full, Incremental, and Real-Time Backups
There are different types of backups based on how data is stored and updated. A full backup creates a complete copy of your entire website, including files and database, and is usually taken weekly or monthly for complete safety. Incremental backups store only the changes made since the last backup, which helps save storage space and speeds up the backup process, making it ideal for regularly updated websites. Real-time backups work continuously by saving changes instantly as they happen, which is especially useful for e-commerce or high-traffic websites where every update or transaction matters. Using the right combination of these backup types helps create a balanced and effective WordPress backup and restore strategy.
3 Ways to Backup Your WordPress Site
There are multiple ways to implement a reliable WordPress backup strategy, and the right method depends on your technical comfort level, hosting setup, and website type. If your site runs on WordPress, you can choose from plugin-based backups, hosting backups, or manual backups. Many professionals use a combination of all three for maximum protection.
Plugin Method (The Easiest Way)
Using a backup plugin is the most popular and beginner-friendly way to backup a WordPress website. Backup plugins allow you to automate the entire process, including scheduling daily or weekly backups, storing files securely, and restoring the site when needed. To implement a reliable WordPress backup process, start by installing a trusted backup plugin, then configure it to back up both your website files and database regularly according to your site’s activity, whether daily, weekly, or in real-time for high-traffic sites. Choose secure storage locations, including cloud services like Google Drive or Dropbox, to ensure off-site safety, and run an initial manual backup to verify everything is working correctly. Finally, test your backups by restoring them on a staging or local environment to confirm that all pages, media, plugins, and settings are intact, and make testing a recurring habit to ensure your website can be quickly recovered from crashes, hacks, or accidental data loss.
Recommended Plugins
- UpdraftPlus – best for easy automated backups with cloud storage and one-click restore.
- BlogVault – ideal for real-time, secure offsite backups for eCommerce and high-traffic websites.
- Jetpack Backup – perfect for fully automated, hands-off backups with quick and reliable restore.
Managed Hosting Backups (The Set-and-Forget Way)
Many managed hosting providers offer built-in backup solutions as part of their hosting plans. These backups usually run automatically daily and can be restored with a single click from the hosting dashboard. This method is convenient because it requires no setup or maintenance from the user. However, hosting backups should not be your only backup method. In some cases, hosting backups may have limited retention periods or may not include complete off-site storage. That’s why it’s best to combine hosting backups with another backup method for a safer and more reliable website backup strategy for WordPress.
Recommended Hosting Providers for WordPress
- Kinsta – Offers automatic daily backups, manual backups, and one-click restore with secure offsite storage, making it ideal for business and high-traffic WordPress sites.
- WP Engine – Provides daily automated backups, on-demand restore points, and easy rollback options directly from the dashboard for safer updates.
- Pressable – Includes daily site backups, hourly database backups, and one-click restore on all plans, ensuring strong backup protection for WordPress and WooCommerce sites.
Manual Backup (FTP & phpMyAdmin – For Techies)
Manual backups are best suited for developers and advanced users who want full control over their website data. This method involves downloading website files using FTP or a file manager and exporting the database through tools like phpMyAdmin. Manual backups are useful before major updates, migrations, or custom development changes. Although this approach provides complete control, it requires technical knowledge and regular attention to ensure backups are taken correctly. It is not the most convenient method for daily use, but it works well as an additional safety layer in a complete WordPress backup guide.
Where to Store Your Backups (Off-site Storage Options)
Choosing the right storage location is a crucial part of any WordPress backup strategy. If your website runs on WordPress, storing backups only on the same hosting server is risky because server crashes, hacking incidents, or data corruption can wipe out both your website and its backups. Keeping backups in a separate location ensures that even if your main site goes down, you still have a safe and accessible copy to restore quickly.
Cloud storage is one of the most reliable off-site backup options because it allows automatic and secure storage of your website data. Many website owners also maintain additional copies on external drives or remote servers for extra safety. The best approach is to store backups in more than one location, such as cloud storage plus a local or remote copy, so your website data remains secure and recoverable in any situation.
Frequency: How Often is Enough?
How often you back up depends on how active your site is. If you run a website on WordPress, your backup frequency should match how often content or data changes. Personal blogs can be backed up weekly, while business websites should have daily backups to avoid losing important updates.
For eCommerce or high-traffic sites, more frequent or real-time backups are recommended because every order and user action matters. The safest approach is to automate regular backups so your latest data is always protected and ready to restore if needed.
The Most Important Step: Testing Your Restore Process
Creating backups is important, but testing your restore process is what truly makes your WordPress backup strategy reliable. If your site runs on WordPress, you should never assume your backups will work perfectly until you test them. Many website owners only discover backup issues when a real problem occurs, and by then, it may be too late.
A simple restore test ensures your backup files are complete, usable, and up to date. You can test by restoring your backup on a staging site or local environment instead of your live site. Check whether pages, images, plugins, and settings load correctly. Make this a regular habit, such as once a month, so you always know your website can be restored quickly and safely whenever needed.
Common Mistakes & Best Practices
Even with a backup system in place, many website owners make mistakes that put their data at risk. If your site runs on WordPress, avoiding these common errors will make your backup strategy more reliable and effective.
Common Backup Mistakes
- Not testing backups regularly
- Storing backups only on the same hosting server
- Forgetting to automate backups
- Taking backups too infrequently
- Not backing up both files and the database
- Overwriting old backups without keeping versions
These mistakes often go unnoticed until a website crash or data loss occurs, making recovery difficult.
WordPress Backup Best Practices
- Automatically perform backups daily or weekly, tailored to site activity.
- Follow the 3-2-1 backup rule for better protection
- Store backups in secure off-site locations
- Keep multiple backup versions instead of one
- Test the restore process at least once a month
- Take manual backup before major updates or migrations
Following these best practices ensures your WordPress backup and restore process is reliable, secure, and ready whenever you need it.
WP Ultimate CSV Importer Pro
Get Ultimate CSV/XML Importer to import data on WordPress faster, quicker and safer.
Frequently Asked Questions
1. How do I backup my WordPress site completely?
To backup your site completely on WordPress, you need to back up both website files and the database. This can be done using a backup plugin, hosting backup feature, or manual method. A complete backup includes themes, plugins, media files, and all website content stored in the database.
2. What is the best backup method for WordPress?
The best method is a combination of plugin backups, hosting backups, and off-site storage. Plugin-based backups are easiest and allow automation, while hosting backups provide an extra safety layer. Using multiple methods creates a reliable WordPress backup strategy.
3. How often should I backup my website?
Backup frequency depends on how often your site updates. Blogs can be backed up weekly, business sites daily, and eCommerce or high-traffic websites should use daily or real-time backups to avoid data loss.
4. Are hosting backups enough for WordPress?
Hosting backups are helpful, but should not be your only backup. If the hosting server fails or backups get corrupted, you may lose everything. Keeping an additional off-site backup ensures full protection and control over your data.
5. Where should I store WordPress backups?
WordPress backups should be stored in secure off-site locations such as cloud storage, remote servers, or external drives. Storing backups in multiple locations ensures your website can always be restored even if one storage option fails.
Conclusion
Setting up a structured WordPress backup system is simple when your backup tools are properly configured and your storage plan is well thought out. The success of a WordPress backup strategy depends on proper scheduling, secure off-site storage, reliable automation, and regularly testing your restore process to ensure your data is always recoverable.
With the right combination of plugin backups, hosting backups, and manual backup options, you can protect your website from crashes, hacking, server failures, and accidental data loss. A well-implemented backup strategy not only safeguards your content but also ensures business continuity and peace of mind while managing your website.
If you have any queries about backup setup, restore testing, or advanced WordPress backup strategies, you can contact us directly at support@smackcoders.com
Start implementing your WordPress backup strategy today and keep your website secure, recoverable, and ready for growth.
Morbi lectus risus, iaculis vel, suscipit quis, luctus non, massa. Fusce ac turpis quis ligula lacinia aliquet. Mauris ipsum. Nulla metus metus, ullamcorper vel, tincidunt sed, euismod in, nibh.
Proin quam. Etiam ultrices. Suspendisse in justo eu magna luctus suscipit. Sed lectus. Integer euismod lacus luctus magna.
Nulla facilisi. Ut fringilla. Suspendisse potenti. Nunc feugiat mi a tellus consequat imperdiet. Vestibulum sapien. Proin quam. Etiam ultrices. Suspendisse in justo eu magna luctus suscipit. Sed lectus. Integer euismod lacus luctus magna.