
“OceanWP is a versatile WordPress theme that combines flexibility and ease of customization, making it ideal for creating diverse websites.”
WP Ultimate CSV Importer Pro 9.0: A Complete Rebuild of the Plugin You Import With
12 Aug 2026, 11:35 am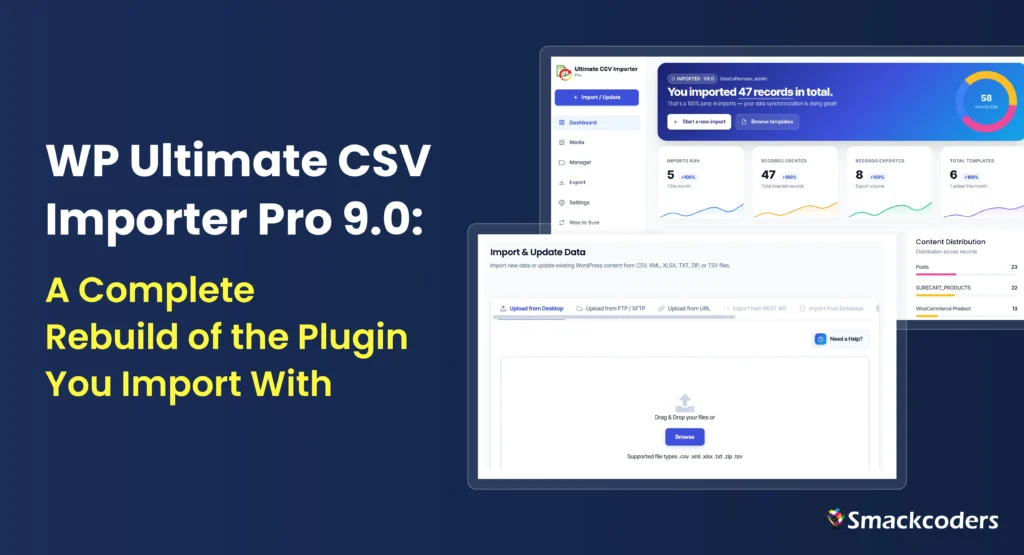
Version 9.0 of WP Ultimate CSV Importer Pro is here, and it is the largest release in the plugin’s history.
Every screen has been rebuilt. Imports run roughly 37.5% faster. The plugin is now modular, so you can switch off anything you do not use and keep it from loading at all. On top of that sit four new integrations, page builder support, a pre-flight file scanner, resumable imports, and a retry queue that reruns only the rows that failed.
If you have used this plugin for years, the version you open after updating will look and behave like a different product. This post walks through what changed and why.
What’s New in 9.0 at a Glance
- Complete admin redesign across every screen, with a consolidated seven-section navigation
- Roughly 37.5% faster batch times compared with 8.15.5
- Feature Modules, so unused functionality can be switched off with zero runtime overhead
- Reorganised settings grouped into General, Performance, Connectors, and Features
- Page builder support for WPBakery, Bricks, and Oxygen
- CSV pre-flight validation with a health score before a single row processes
- Auto recovery and resume for interrupted imports
- Failed record retry queue with a full audit trail
- Spreadsheet live editor inside the WordPress admin
- Google Drive and OneDrive import, including scheduled imports from cloud folders
- The Events Calendar Pro and YIKES WooCommerce Product Tabs import and export
- WooCommerce built-in import/export compatibility
- Bulk image export as a single ZIP download
- AI-assisted categories, SEO copy, and translations with mandatory human review
- German, Italian, and French full localization support added
The Whole Plugin Was Rebuilt
Most releases add features to an existing interface. This one rebuilt the interface first, then added the features into it.
One Action, Seven Sections
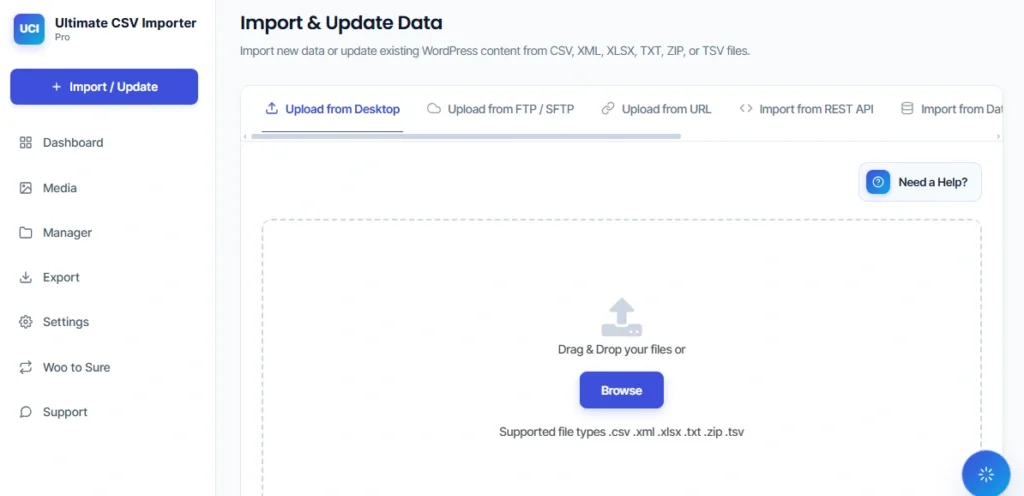
The plugin’s navigation is now a single prominent Import / Update action followed by seven sections: Dashboard, Media, Manager, Export, Settings, Woo to Sure, and Support.
The new structure puts the thing you came to do at the top and organises everything else behind it in a predictable order.
Every Screen Matches Modern WordPress Design
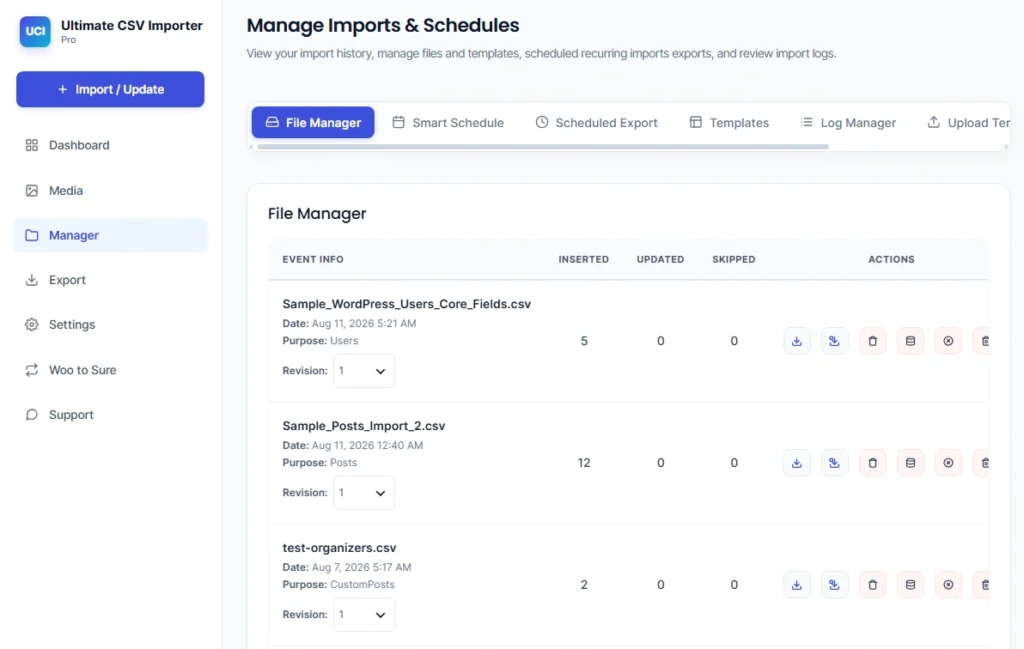
Every major section has been redesigned: the dashboard, import screens, export screens, file manager, media manager, template manager, smart schedule, database migration, AI review, spreadsheet editor, and settings.
The result follows current WordPress admin conventions closely, so the plugin reads as a natural part of your dashboard rather than a separate tool bolted onto it. The Import Each Record section in particular has been rebuilt with a fully responsive layout.
Colour usage, headers, the Need Help panel, the Spreadsheet section, and the Support screen have all been brought into line with the same design language, so no corner of the plugin still looks like the previous generation.
Settings Organised by What You Are Trying to Do
Settings are now grouped into four categories instead of one long list:
- General, covering general settings and documentation access
- Performance, covering Security and Performance plus Database Optimization
- Connectors, covering external service connections such as Google Sheets
- Features, covering AI Import, Import API & Webhooks, Media Download Settings, and Feature Modules
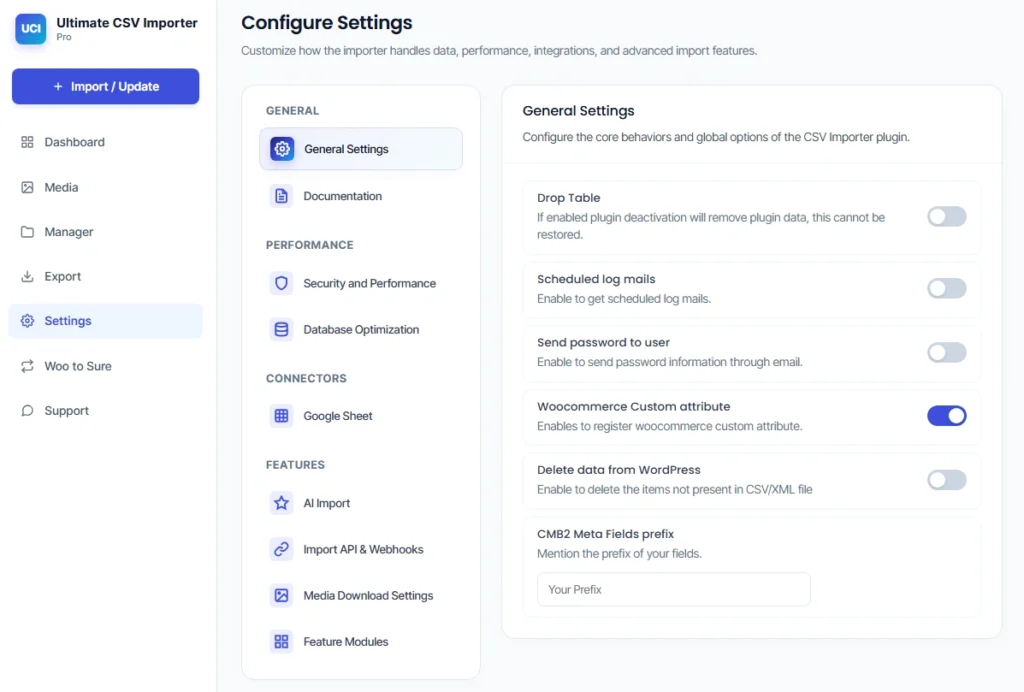
Finding the right control now means picking a category rather than scanning a wall of options. It also makes the plugin’s capabilities visible to people who did not know they existed.
Works Just as Well on a Tablet as on Desktop
Screens adapt properly to different monitor sizes and tablet widths, so managing an import from a smaller screen does not mean fighting a layout built for wide desktop monitors.
For anyone checking an import’s progress from a tablet between other tasks, this is genuinely usable rather than just technically accessible.
Imports Run About 37.5% Faster
Speed is the first thing you notice in 9.0. Batch processing times are approximately 37.5% faster than 8.15.5 on comparable workloads.
That difference compounds on large jobs. A run that previously occupied an evening finishes in a fraction of the time, which matters most on shared hosting where long-running processes are the first thing to hit a resource limit.
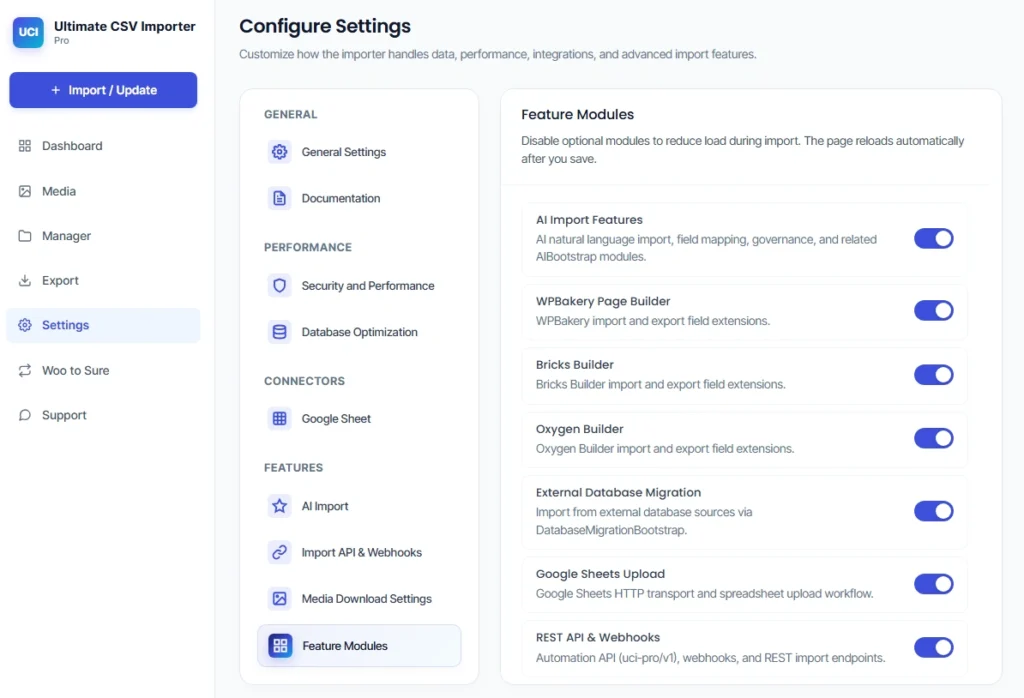
Feature Modules: Turn Off What You Do Not Use
The bigger structural change is the Feature Modules system. Optional modules can be switched on and off individually from Settings, and a disabled module carries zero runtime overhead rather than simply hiding itself from the interface.
The modules you can control include:
- AI Import Features, covering natural language import, AI field mapping, and governance
- WPBakery Page Builder field extensions
- Bricks Builder field extensions
- Oxygen Builder field extensions
- External Database Migration
- Google Sheets Upload
- REST API & Webhooks, covering the automation API, webhooks, and REST import endpoints
- And many more
On fresh installations, these default to off. If your store only imports WooCommerce products from a supplier CSV, you are no longer carrying the cost of page builder extensions, AI bootstrapping, and REST endpoints you will never call.
Existing sites keep their current configuration when they upgrade. Nothing you already rely on switches itself off.
Everything Else We Tuned
Several smaller optimisations sit underneath the headline number:
- Dashboard analytics cache with a five minute TTL, cutting repeated database load
- AI generation runs in configurable batches to stay inside memory limits on large catalogs
- The media download queue uses configurable timeouts to handle large files without stalling
- Export All processes modules in batches with live progress tracking
- The spreadsheet editor paginates at 500 rows per page, so large files stay responsive
A Dashboard Worth Opening
The dashboard was rebuilt from scratch into a genuine reporting screen rather than a landing page.
See Your Import Activity at a Glance
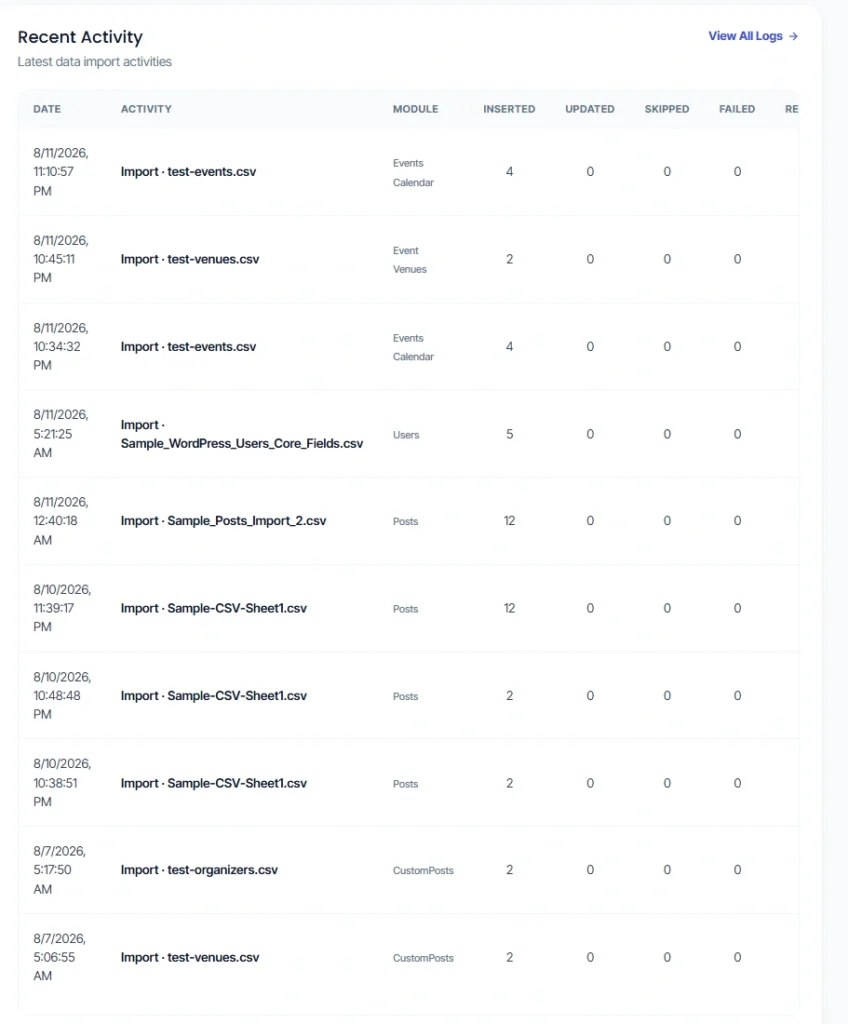
Four KPI cards track imports run, records created, records exported, and total templates, each with a period-over-period change and a trend sparkline. A records total ring gives you the overall figure at a glance.
You no longer need to open a log file to answer basic questions about what your site has been doing.
Trends Over Weeks, Months, or Years
The import volume chart covers records imported across all sources combined, with filters for weekly, monthly, and yearly views.
For agencies reporting to clients or store owners tracking seasonal catalog updates, this is the view that shows whether import activity is growing, flat, or spiking at predictable times.
Content Distribution by Type
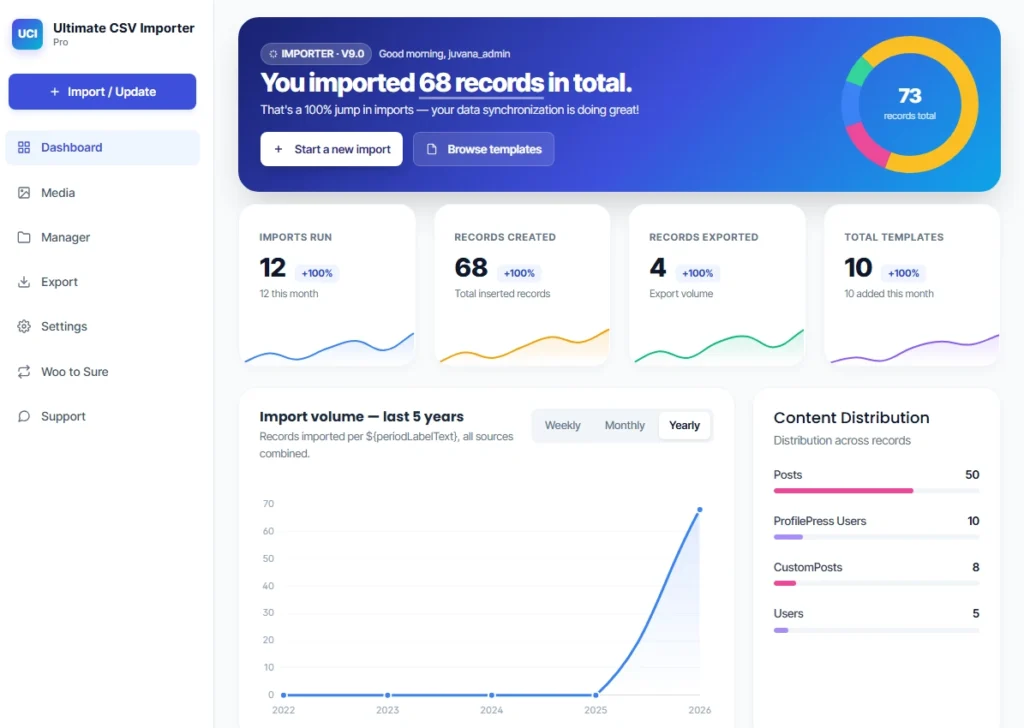
A content distribution panel breaks your records down by post type, so you can see how many posts, WooCommerce products, SureCart products, or custom post type entries the plugin has handled.
Logs are accessible directly from the same screen, so investigating a failed import does not mean navigating away.
Know Your File Is Ready Before You Import
The most expensive mistake in any import is discovering a problem after ten thousand rows have already processed. This release pushes that discovery earlier, so you know exactly where a file stands before a record touches your site.
A Health Check for Your File Before You Commit
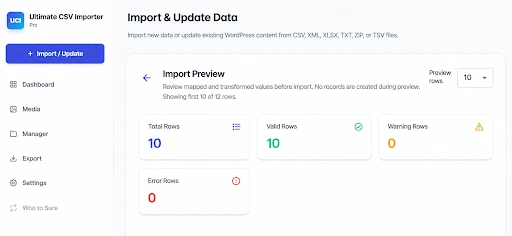
The pre-flight scan reads your file before the import begins. Run a quick check on the first 10 or 50 rows, or scan the entire file, and you get a health score plus a breakdown of issues such as encoding problems, missing fields, invalid dates, or broken rows.
If you are about to import a supplier feed with ten thousand products, this tells you upfront whether your column mapping and data quality are ready. A guessing game becomes a visible checklist before you commit server resources to a full run.
See What’s Wrong in Plain Words, Not Error Codes
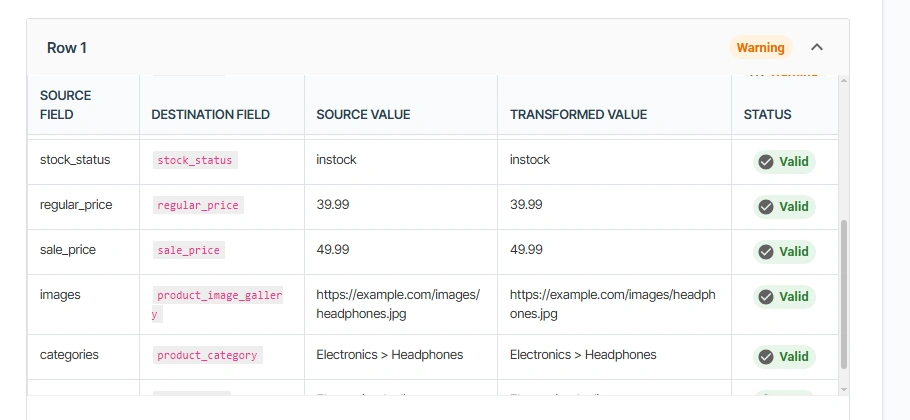
When something needs attention, you get a plain-language explanation rather than a cryptic error string. Each flagged issue comes with a description of what is wrong and a suggested fix.
A missing SKU, an unrecognised date format, or a mismatched column is explained in terms you can act on immediately, without hunting through documentation to decode a validation code.
Preview Up to 25 Rows Before Anything Runs
Import Preview shows how the first 25 rows will look after transformation, not just how they look in the file. Field mappings, formulas, and custom functions are all applied.
This is where SKU mapping problems and misaligned custom fields surface while fixing them still costs nothing. It is the cheapest checkpoint in the whole workflow.
Clean Up Mistakes Right Inside Your Browser
Instead of downloading your file, fixing it in a spreadsheet program, and re-uploading, you can edit it directly inside the WordPress admin. The editor supports CSV, TSV, XLS, XLSX, and JSON, and your edits save as a corrected copy used for the actual import.
Combined with the pre-flight scan, validation and correction become one step rather than a back-and-forth between tools. Our documentation and FAQ page covers the specifics for each supported file type.
Recover From Any Interruption Automatically
Large imports take time, and time introduces risk: a server timeout, a closed tab, or a dropped connection. Auto recovery and resume makes sure none of that means starting over.
Pick Up Exactly Where an Import Left Off
Progress saves automatically as an import runs. If a fifty thousand row import stops at row thirty-two thousand, you do not re-run the whole file. A resume banner appears on the import screen the moment you return.
Status indicators show whether an import is running, paused, interrupted, completed, or failed. You continue from the precise point it stopped, which saves both time and server load.
Only Redo the Rows That Actually Failed
Not every failure needs a full restart. The retry queue captures rows that failed during an import along with the reason each one did not go through.
You can review failure details, download a CSV of the failed records, fix them offline, and retry only those rows. If two hundred out of ten thousand orders fail on a formatting quirk, you resubmit exactly those two hundred, with an audit trail of every retry attempt.
New Integrations in 9.0
Version 9.0 adds import and export support for the plugins our users ask about most often.
Page Builders: WPBakery, Bricks, and Oxygen
Field extensions for WPBakery Page Builder, Bricks Builder, and Oxygen Builder mean layouts built with these tools can move through import and export rather than needing manual rebuilding on the destination site.
For agencies migrating client sites, this closes one of the longest-standing gaps in WordPress content migration. Each builder is an independent module, so you enable only the one your site actually uses.
The Events Calendar Pro
Complete import and export support for The Events Calendar Pro. Event data, recurring event structures, and associated custom fields move through the same mapping and validation pipeline as any other content type.
Sites managing large event catalogs no longer need a separate tool or manual entry to populate a season of listings.
YIKES WooCommerce Product Tabs
Custom product tabs created with YIKES WooCommerce Product Tabs now import and export alongside the rest of your product data.
Previously, migrating a store meant rebuilding those tabs by hand after the products landed. Now they travel with the products.
WooCommerce Built-in Import and Export Compatibility
WooCommerce ships its own CSV importer, and stores often use both tools for different jobs. Version 9.0 adds explicit compatibility so files and workflows do not conflict between the two.
Use WooCommerce’s native importer for simple jobs and switch to Ultimate CSV Importer when you need custom fields, media handling, or scheduling, without one breaking the other.
SureCart Variant Support and ID Cross-Resolution
SureCart migration gains variant support, along with cross-resolution between SureCart and WordPress IDs in export workflows. WooCommerce to SureCart migration has been improved throughout, and the Woo to Sure section now sits directly in the main navigation.
For stores evaluating a move from WooCommerce to SureCart, variant-level data survives the migration rather than needing manual reconstruction afterwards. The Woo to Sure tab only appears when both WooCommerce and SureCart are active, so sites running neither are not shown a section they cannot use.
Better WooCommerce Handling Throughout
Beyond the new integrations, several WooCommerce-specific improvements address friction our support team sees regularly.
Attribute Fields Map Themselves
When your CSV headers match WooCommerce product attribute names, the plugin now maps those fields automatically. Setup on a wide product feed drops from dozens of manual selections to a quick review.
Galleries From Multiple Image Columns
Product gallery import now supports multiple mapped image columns rather than a single delimited field. Supplier feeds that list images across separate columns work as they are, with no preprocessing.
Export Exactly the Product Types You Need
Filter WooCommerce exports by product type, including simple, variable, grouped, external, and their variations. A full catalog export is no longer your only option.
WooCommerce’s official product management documentation is a useful reference on how these types are structured before you set up a filtered export.
Correct Product Matching Across Languages
On WPML-powered multilingual stores, product updates now match by title and language together rather than by title alone.
This reduces the chance of an update landing on the wrong language version or creating a duplicate, saving stores running several translated catalogs a meaningful amount of manual cleanup.
Fewer Broken Images, More Reliable Media Imports
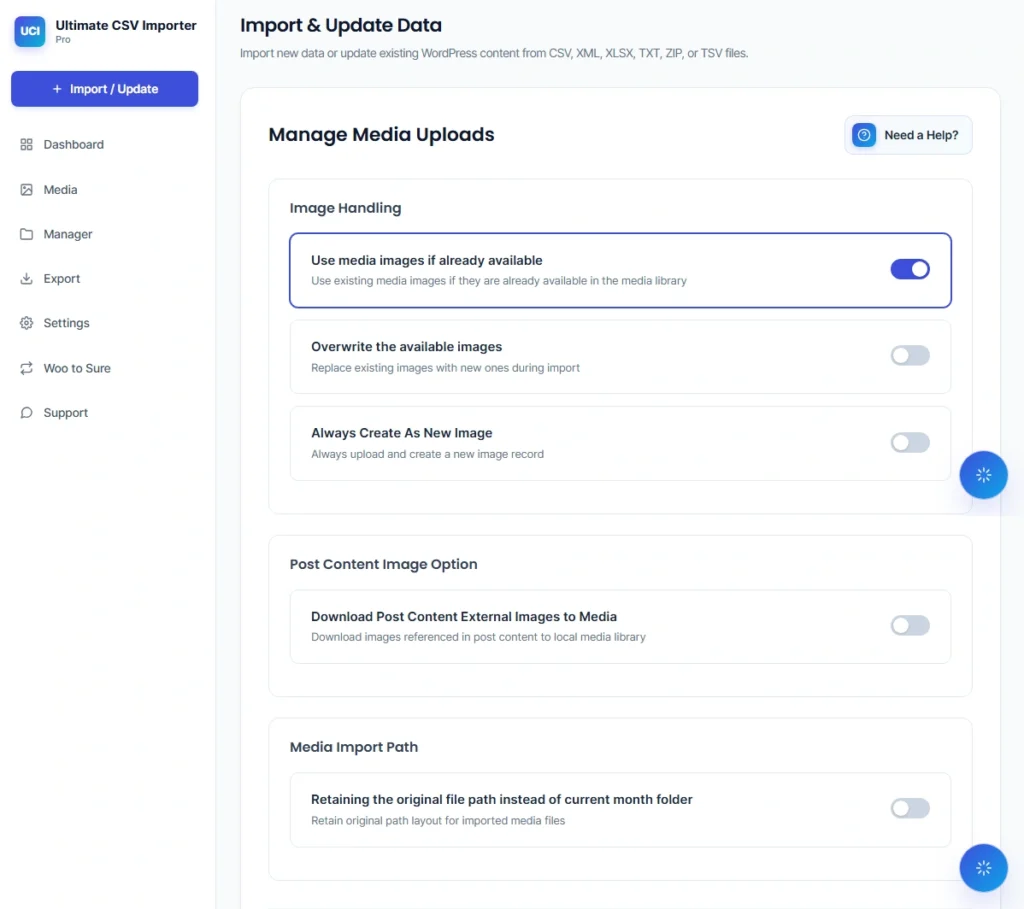
The media download engine has been rebuilt with configurable timeouts, duplicate detection, gallery import support, metadata mapping, featured image fallback, and queue management. Media Download Settings now has its own section under Features.
Automatic retries handle images that fail on a first attempt, so importing a few thousand product images from external supplier URLs is far less likely to leave you with missing or duplicated media files.
Bring Data In From Wherever It Lives
A local CSV upload is now one option among several rather than the default path.
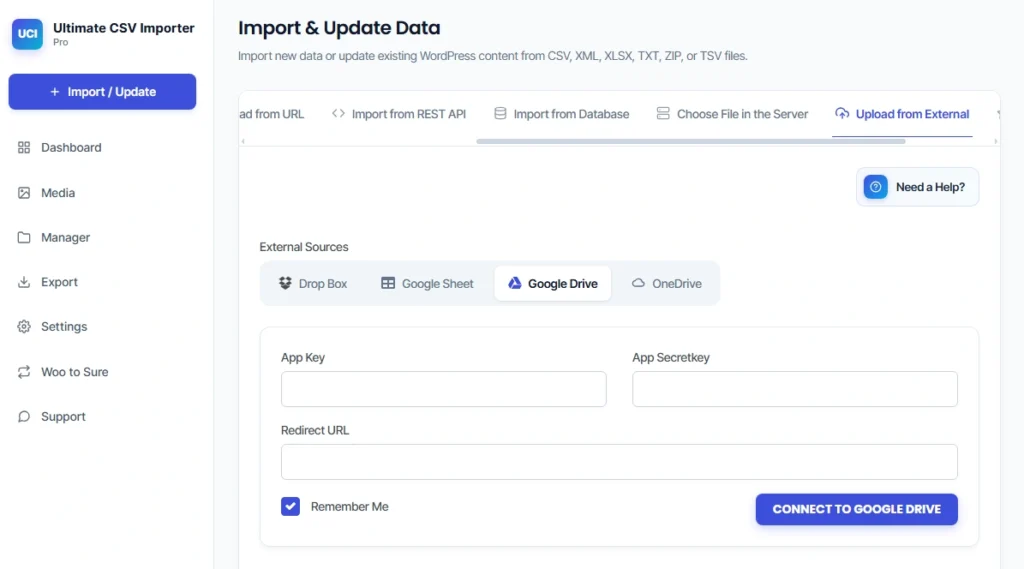
Connect Google Drive or OneDrive Directly
Connect Google Drive or Microsoft OneDrive and import files straight from cloud storage, including scheduled imports that run on their own.
If your team keeps a shared feed in a company Drive folder, there is no need to download it before uploading it into WordPress. The connection stays authorised, so every import after the first takes a few clicks rather than a round trip through your desktop.
Google Sheets
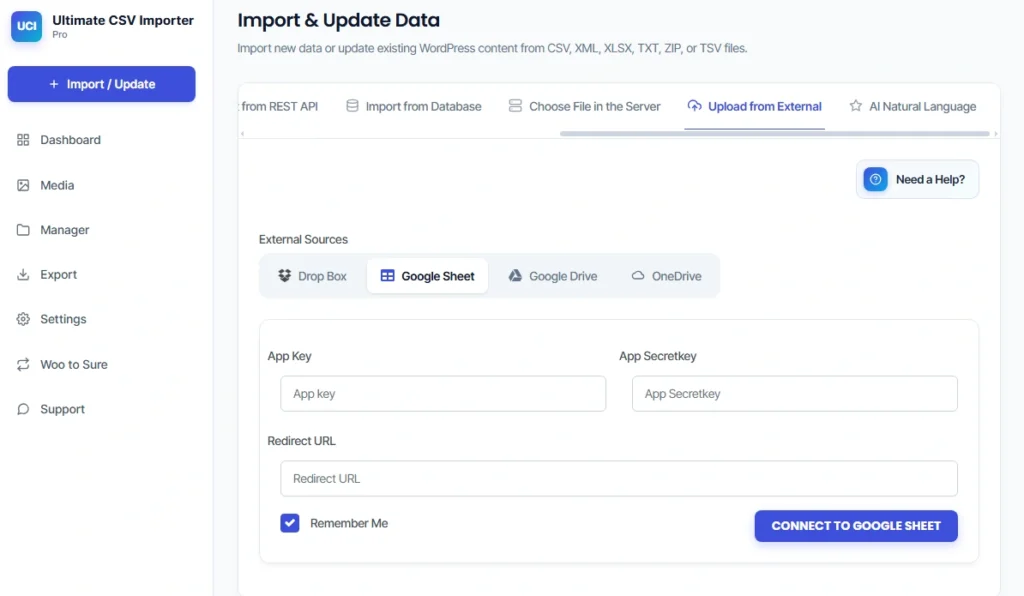
Google Sheets connects as a dedicated connector, with a matching Google Sheets Upload module handling the HTTP transport and spreadsheet upload workflow.
Teams that maintain product data or member lists in a shared Sheet can import from it directly, and publish-to-URL uploads that previously failed now work correctly.
Import Straight From an External Database
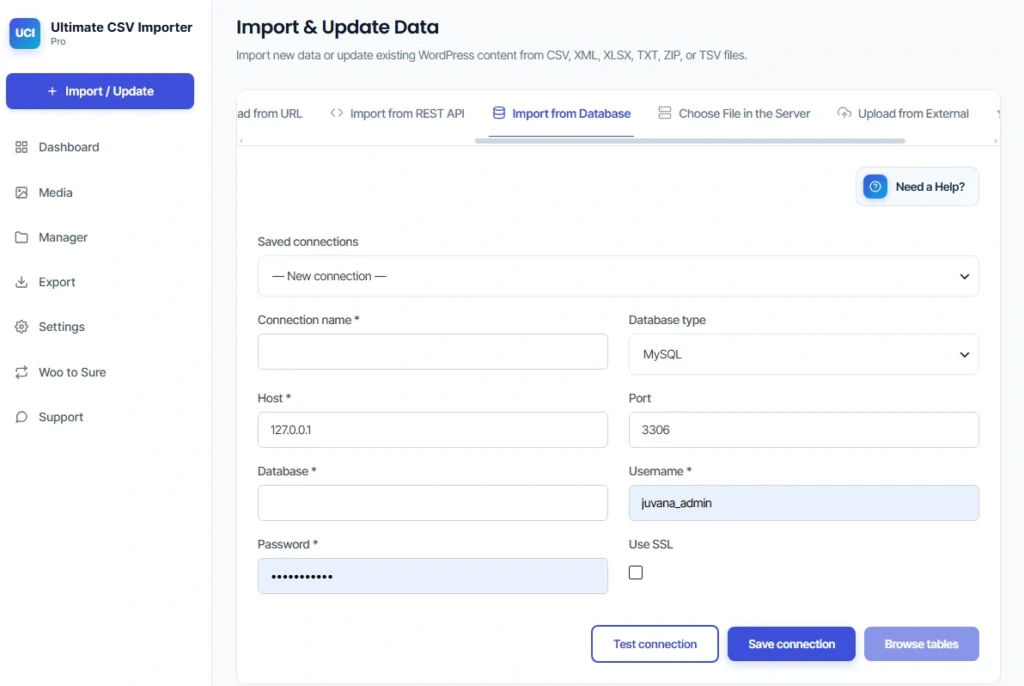
External Database Migration pulls records from MySQL, MariaDB, PostgreSQL, and SQL Server into WordPress through the same import pipeline as file uploads. Saved connections store credentials encrypted, and you can preview source tables and columns before importing.
Migrating from a legacy CRM or ERP no longer requires an intermediate CSV export, which removes an entire step where data commonly gets mangled.
Let Other Systems Trigger Imports for You
Imports can be triggered through the REST API or incoming webhooks using your saved templates, with API key management, IP whitelisting, and webhook signature validation. The automation API is exposed under the /uci-pro/v1 namespace.
When your inventory system finishes generating a feed, it can fire a webhook and the import runs on its own. This is how the plugin fits into a Zapier, Make, or in-house automation pipeline without anyone opening WordPress.
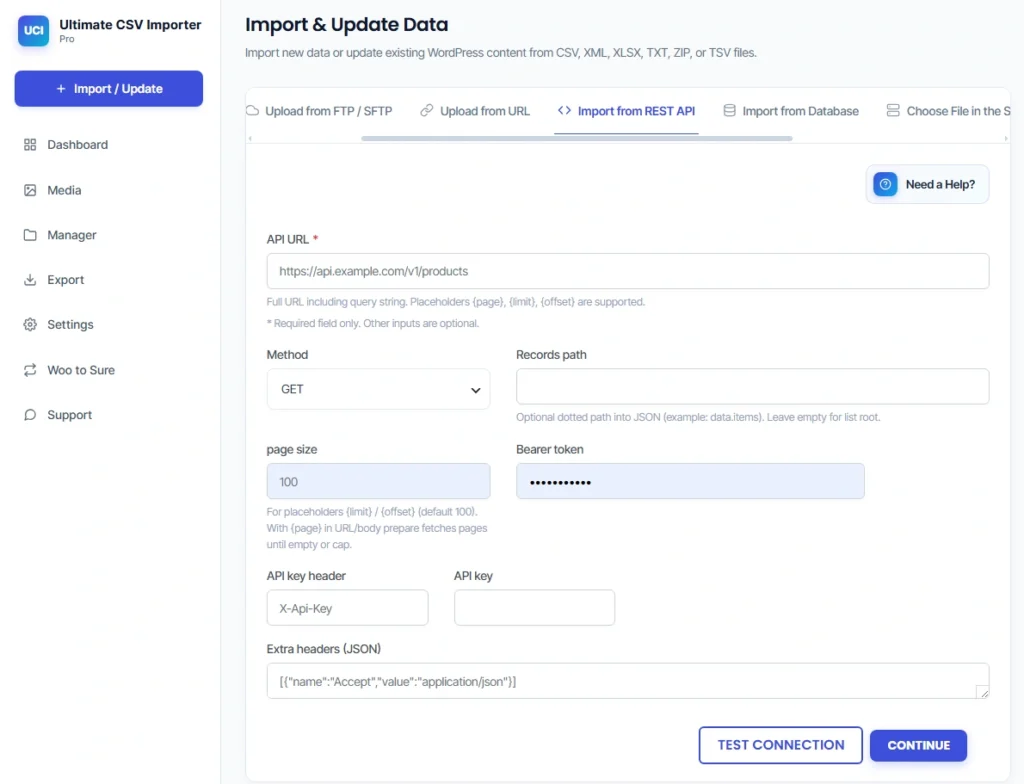
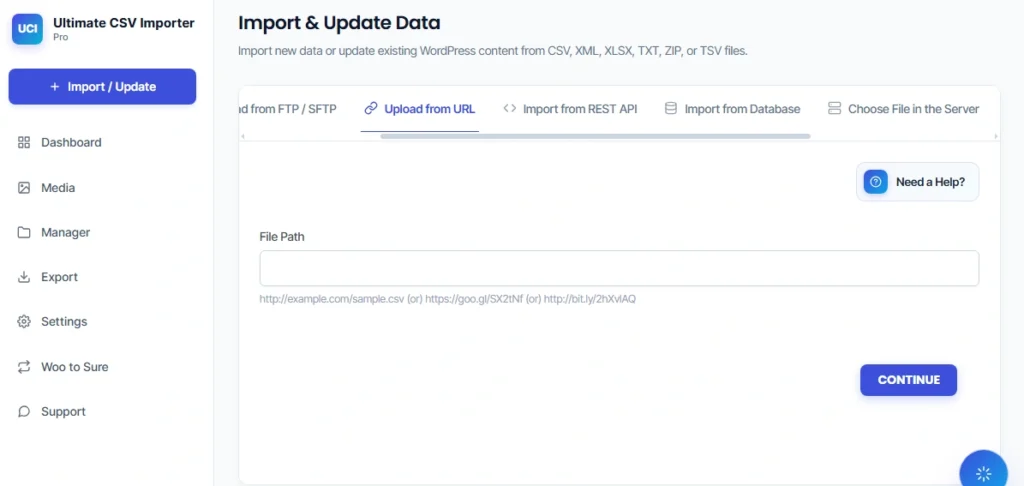
More Reliable FTP and Remote URL Uploads
FTP and remote URL sources have had a reliability pass in this release, addressing failures that previously affected files pulled from remote servers rather than uploaded from a desktop.
If your workflow depends on a file dropped onto an FTP server by a supplier or generated at a fixed URL, those imports should now complete more consistently.
Let AI Handle the Boring Part of Content Prep
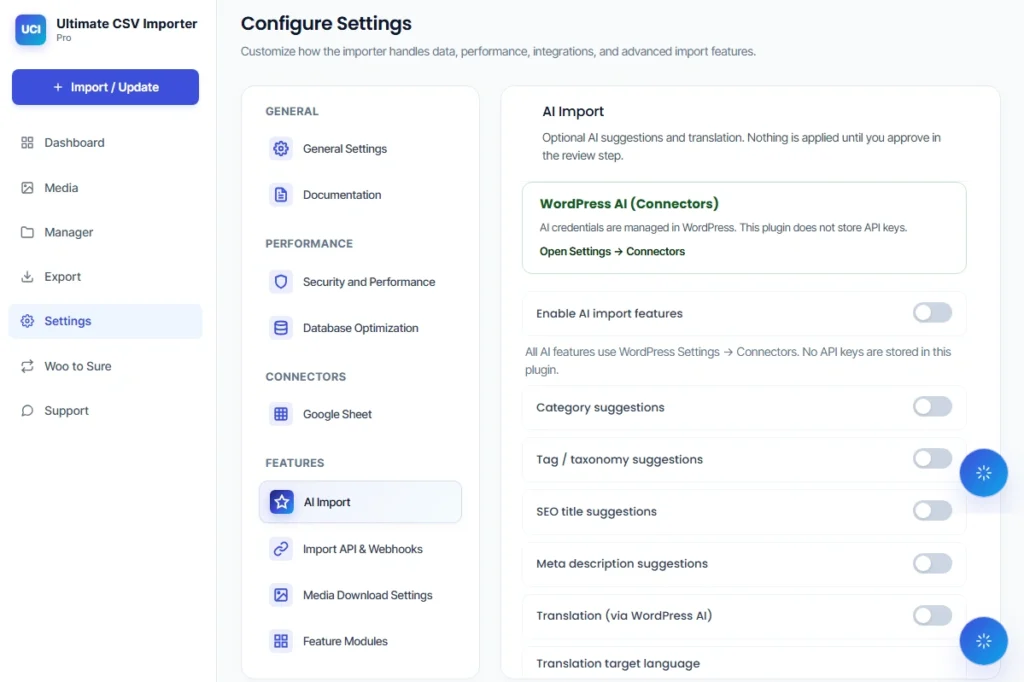
Version 9.0’s AI module covers both configuring an import and enriching the content inside it, with a human in the loop for every decision.
Auto-Suggested Categories, SEO Copy, and Translations
The plugin can suggest categories, taxonomies, SEO titles, meta descriptions, and translations as part of the import process, drafted from the content already in your file.
For a catalog of two thousand products, the groundwork for search-friendly titles and organised categories is prepared before you start reviewing. Hours of manual writing become a review task instead.
Nothing Goes Live Without Your Approval
Every AI suggestion passes through a mandatory review step. You approve, reject, or edit each one before it becomes part of your live content, so nothing publishes without a person checking it.
Provider settings and usage governance, including cost estimation, prompt templates, and fallback providers, sit under the AI Import section in Settings. If you do not use AI at all, the entire module can be switched off from Feature Modules.
Export Your Whole Site in One Action
Migrations and disaster recovery plans depend on getting a full copy of your data quickly, without exporting one module at a time.
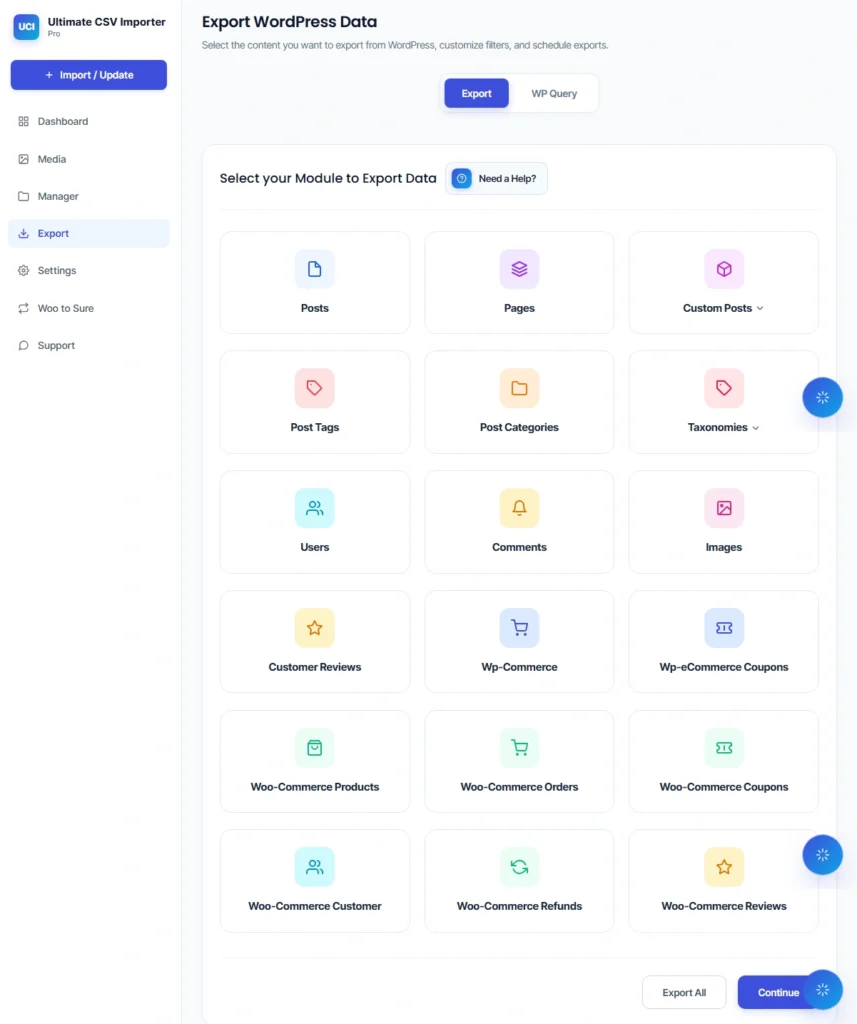
Export All Discovers Every Module Automatically
The Export All action finds every exportable module on your site and packages everything into a single downloadable archive, with no need to configure each export separately.
You do not have to remember which modules exist or export posts, products, users, and taxonomies one by one. Several separate export jobs become a single operation, processed in batches with progress tracking.
Bulk Image Export as a Single ZIP
Media files can now be exported in bulk and downloaded as one ZIP archive rather than pulled individually or through FTP.
For migrations and staging copies, this closes the last gap where you still needed a separate tool to move the media library alongside the content it belongs to.
Export Custom WordPress Fields
Custom fields created through the plugin’s Create WP Custom Fields option now export correctly, so a round trip out of one site and into another preserves fields the plugin itself generated.
Set It Up Once, Use It Every Time
Recurring imports should not mean rebuilding your column mapping every week.
Save Your Column Mappings and Reuse Them
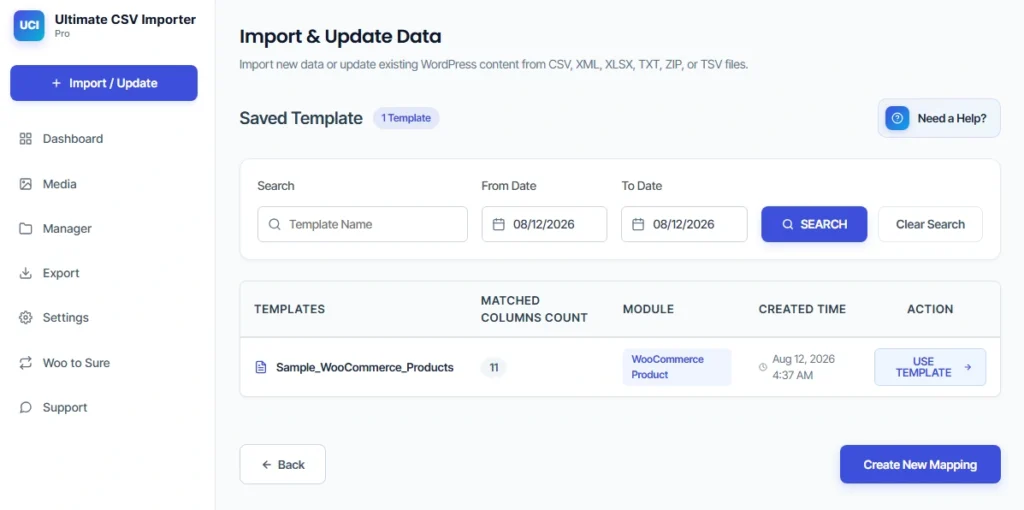
The Manager section lets you save, organise, download, and reload mapping templates. Templates work consistently across Advanced Mode, Simple Mode, and media imports, including manual template name entry.
A mapping built once for a WooCommerce product feed loads again for every weekly supplier update. Templates can be downloaded and shared, which is useful when more than one person runs the same import.
Guided Setup for Plugin Requirements
A dependency manager and onboarding flow checks Pro plugin requirements and walks you through anything missing on first run.
Instead of discovering a missing dependency partway through configuring an import, you find out at install time with a clear path to resolving it.
Now Speaking Your Customers’ Language
A global user base needs an admin interface that does not force everyone into English.
German, Italian, and French Added
This release adds German, Italian, and French translations covering the admin interface across import and export workflows.
Teams working in these languages can navigate the full process, including validation messages and templates, without switching mentally between languages mid-task.
Spanish and Japanese Refined
Spanish translations have been corrected and expanded, while Japanese translations have been completed across the admin UI, closing gaps that previously left some screens only partially translated.
Translation keys have also been synchronised across all supported language files, which reduces the chance of untranslated strings appearing in future updates.
Security and Stability
Version 9.0 includes a hardening pass across the plugin. AJAX authorization and nonce handling have been tightened, import workflows validate user capabilities at every step, and a SQL injection vulnerability has been fixed with hardened database queries throughout.
Custom formula calculations run through a sandboxed evaluator rather than direct code execution, and FTP, database, and API credentials are masked so they never appear in logs or responses. A centralised authorization layer applies these protections consistently, and export and media operations are gated alongside the AI module.
No configuration is required on your side. These protections apply automatically once the update is active.
Fewer Conflicts With Other Plugins
Two long-running compatibility problems are resolved in 9.0.
Fixed a Guzzle library conflict affecting sites where other plugins use different versions of Guzzle. Handling for PHP 8.x environments has also improved across the plugin.
Separately, the FluentCart export module no longer triggers a fatal error on plugin activation, so sites running FluentCart can activate and use the plugin normally.
Fixed in This Release
A substantial round of bug fixes landed alongside the new features:
- Imports crashing when a CSV row had more or fewer columns than the header
- Custom function calculations returning incorrect results during mapped imports
- Google Sheets published URL upload from a URL source
- FTP and remote URL upload reliability
- CPT and ACF export hanging after the first post in a batch
- ACF field value import and import summary log issues
- Meta Box custom fields export, and group cloneable field export truncation
- Media remote upload import failures
- Product tags not being removed on a blank import
- WooCommerce product brand updates during import
- WooCommerce product image and gallery import issues
- Export failures on specific custom post types
- Smart Schedule cron execution stuck in a pending state
- Scheduled import and header manipulation issues
- Rank Math Dataset schema auto-generation during import
- Dashboard record count calculation and display
- Custom Fields Mapping section UI and responsiveness
- Mapping section UI and functionality in the Import and Manager tabs
- Activity status display in the Manager section
- FluentCart export causing a fatal error on plugin activation
- Guzzle library version conflict with other plugins
- A wide round of release QA fixes across the plugin for general stability
For the complete list, including everything shipped since your current version, see the full changelog.
Where to Go Next
Learning the new features: Our documentation covers each capability in detail, including pre-flight validation, template management, external database migration, and REST API setup. The Settings screen also links to documentation directly under the General group.
Catching up on what you missed: If you are updating from an older version, the full changelog lists every change between your version and 9.0, not just what is covered here.
Getting help: If something does not behave as expected after updating, our support team is available through the Support section inside the plugin or directly from our site.
Telling us what is not working: If you ever deactivate the plugin, an optional feedback prompt now lets you tell us why in a sentence. It is entirely optional, and it is the fastest route for a problem you hit to reach the people who can fix it.
Frequently Asked Questions
Is 9.0 a free update for existing Pro licence holders?
Yes. Smackcoders licences include lifetime updates, so 9.0 costs nothing extra regardless of when you purchased.
Log in to your account and download the latest version from the Downloads section.
Feature modules default to off. Will my active features be disabled when I upgrade?
No. The default-off behaviour applies to fresh installations only. Existing sites keep their current configuration after upgrading.
You can review and adjust which modules are active at any time from Settings, under Feature Modules.
Do I need to reconfigure my existing import templates after updating?
No. Saved mapping templates continue to work without changes. Template management has been improved in this release, not replaced.
Mappings already built for recurring imports remain usable exactly as they were, so weekly and monthly routines need no extra setup.
Will the update affect my current WooCommerce product data?
Updating the plugin does not modify existing product data. Nothing in your catalog changes automatically because of a version change.
WooCommerce improvements such as the product type export filter and title-and-language matching apply to new exports and updates going forward, not retroactively.
What happens to an import that was already running when I update?
Let an active import finish or fail before applying the update. Updating mid-run is not recommended.
Once 9.0 is active, any new import benefits from auto recovery and resume, so future interruptions do not force a restart.
How do I update to 9.0?
Log in to your Smackcoders account and open the Downloads section to get the latest version, then install and activate it on your site.
If you are updating a live store, take a backup first and test on staging where possible, as you would with any major version upgrade.
Update Today
If you already have a Pro licence, 9.0 is waiting in your account at no cost. Download it from your account, and check the full changelog to see everything that has shipped since the version you are on.
If you are on the free plugin, 9.0 is the release worth upgrading for. Faster imports, resumable runs, the retry queue, page builder support, external database migration, and the AI module are all Pro capabilities. See what Pro includes.
If you are new here, WP Ultimate CSV Importer Pro is a one-time purchase with lifetime updates and no recurring fees. Releases like this one arrive at no additional cost, permanently. Get started with Pro.
Version 9.0 reworks the import experience around four ideas: run faster, catch problems early, never lose progress, and carry only the weight you actually need. If you rely on this plugin for regular imports, exports, or migrations, it is worth the time the upgrade takes.
Sample CSV & XML files for WordPress Import – WP Ultimate CSV/XML Importer (Trial & Testing Guide)
23 Jul 2026, 10:37 am
Table of Contents
Getting a WordPress import right starts with a correctly structured file, and that’s exactly what this page gives you.
WP Ultimate CSV Importer supports CSV and XML imports for posts, pages, WooCommerce products, users, custom fields, and more. Below you’ll find free, pre-formatted sample files for every major content type. Download the one you need, swap in your data, and import it in minutes.
What is a CSV file?
A CSV (Comma-Separated Values) file is a plain-text file where each row is a record and each column is a field. It’s the most widely used format for bulk-importing content into WordPress because it’s simple, universal, and compatible with tools like Excel, Google Sheets, and virtually every CRM or eCommerce platform.
Download Sample Files for WordPress CSV/XML Import
WP Ultimate CSV/XML Importer Pro makes it simple to transfer WordPress data. To help you get started, we’ve prepared sample CSV and XML files for the most common use cases. Below you can download them. Each file contains properly structured data, so you can understand the formatting requirements and easily test imports.
Quick Tip: If you didn’t find a sample file here for your post type, just follow this. Create a record in that post type, export it using our plugin, and you’ll have a ready-made sample file to use for testing the imports.
You can try the test import in any of the following sources we offer:
– WP Ultimate CSV Importer Pro Demo (test in a public WordPress instance, used by all users) or
– WP Ultimate CSV Importer Trial (test in private WordPress demo instance, created only for you)

WP Ultimate CSV Importer Pro
Get Ultimate CSV/XML Importer to import data on WordPress faster, quicker and safer.
Each file includes pre-set column headers mapped to WordPress fields, open it, fill in your data, and it’s ready to import. The same value formats apply whether you’re using CSV, TSV, Excel, or Google Sheets.
Samples CSV & XML Files for WooCommerce Import (Products, Orders, Reviews, Customers, Coupons)
Moving data to your new WordPress store is easy. WordPress Ultimate CSV/XML Importer Pro plugin supports WooCommerce data import, including Products, Coupons, Orders, Customers, and Reviews. Below are the sample files for WooCommerce. (CSV sample file)
Click on the links and download the sample CSV files you want.
- WooCommerce Customers Import CSV – sample customer profile and billing/shipping data
- WooCommerce Products Import CSV – Woocommerce Sample product CSV file download, contains product details like title, description, price, SKU, categories, stocks, attributes, etc.
- WooCommerce Variable Products CSV – variable product details with parent and child(variations) products
- WooCommerce Product Bundles Import CSV – example of bundled product setup
- WooCommerce Group Products Import CSV – shows how to group multiple products
- WooCommerce Orders Import CSV – sample customer order records
- WooCommerce Coupons Import CSV – contains coupon codes with discount rules
- WooCommerce Reviews Import CSV – example customer reviews with ratings
Third-Party WooCommerce Extensions
- Yith WooCommerce Order Tracking Import – sample data for adding order tracking codes
- PPOM WooCommerce Order Import CSV – sample orders with PPOM fields
Download the Sample XML files for WooCommerce below:
- WooCommerce Variations Import XML – sample variable products data in XML format
- WooCommerce Product Bundles Import XML – sample bundled product data
Events Manager Import
The WordPress Ultimate CSV/XML Importer Pro plugin supports the Events Manager Plugin. You can import the custom post-types like events, locations, recurring events, and bookings. Also, you can import events manager categories and tags.
- Events Import CSV – example event records with title, description, date, time, day, location, and other details
- Events Import XML – example event records in XML format
- Recurring Events CSV – sample recurring events in CSV
- Recurring Events XML – sample recurring events in XML
- Event Location CSV – example venue/location details in CSV
- Event Location XML – example venue/location details in XML
- Event Categories Import CSV – categorization samples for events in CSV
- Event Categories Import XML – categorization samples for events in XML
- Event Tags Import XML – sample tags for events in XML
Multilingual Pages, Posts, and Products Import Samples
If you’ve built a multilingual website using plugins like WPML, qTranslateX, or Polylang, the importer supports importing multilingual data into them. Import translated data in many languages via CSV or XML. Engage the audience worldwide and get more visits to your website. WP CSV/XML importer supports importing translated data of posts, pages, custom post types, and WooCommerce.
Sample CSV and XML files are given below,
- WPML Sample CSV – CSV with language and translated post fields
- WPML Sample XML – XML with language and translated post fields
- Polylang with WooCommerce Product CSV – sample multilingual product records
Sample CSV & XML for SEO fields Import
Millions of websites created using WordPress are getting higher ranks in search results with the help of smart WordPress SEO plugins. Due to the increased demand to boost the rankings of websites, they are used by many WordPress administrators across the globe. Many SEO plugins are available for free at WordPress.org.
WP Ultimate CSV/XML Importer integrates with these SEO plugins: Yoast SEO, RankMath SEO, All in One SEO, SEOPress, and Slim SEO plugin. You can import these plugin fields using WordPress CSV/XML Importer Pro.
Download sample files for data import to SEO fields.
- Yoast SEO Import Sample CSV – contains Yoast fields like meta titles, descriptions, focus keywords, etc.
- Yoast SEO Import Sample XML – contains meta titles, descriptions, and focus keywords, etc. in XML format
- All In One SEO Import CSV – sample AIOSEO meta fields
- All In One SEO Import XML – sample AIOSEO meta fields in XML
- RankMath SEO Import CSV – example RankMath fields like focus keyword, schema, etc.
NextGEN Gallery Import Samples
The CSV/XML Importer offers support for the free version of NextGEN Gallery. If you have existing galleries in the NextGEN Gallery plugin, you can import new images into that gallery using the WordPress CSV/XML Import plugin. You can import images along with the post metadata and relate those images to the corresponding Post, Page, or Custom Posts.
Download the sample files below for NextGEN Gallery import.
- NextGEN Gallery Import CSV – example post fields with gallery IDs
- NextGEN Gallery Import XML – example post fields with gallery IDs in XML
WP Ultimate CSV Importer Pro
Get Ultimate CSV/XML Importer to import data on WordPress faster, quicker and safer.
Custom Fields Import CSV & XML Samples
Add custom fields to extend your default WordPress post type or include them inside the Custom Post Type. WP Ultimate CSV Importer supports importing data for the default custom fields and custom fields created with other plugins. It supports custom field plugins like JetEngine, ACF(Free & Pro), Pods, Meta Box, CFS, Toolset Types, CMB2, CCTM, and default WordPress custom fields. You can import custom fields assigned to Posts, Pages, Custom Posts, WooCommerce Products, Users, Categories, Tags, and Custom Taxonomies.
Get samples below:
- ACF Custom Fields Import CSV – sample post with acf meta fields
- ACF Custom Fields Import XML – sample post with acf meta fields in XML
- ACF Repeater Fields CSV – example repeater field structures
- ACF Repeater Fields XML – example repeater field structures in XML
- ACF Flexible Content Import CSV – sample flexible layouts with content blocks
- Toolset Types Import CSV – basic Types custom fields
- Toolset Types Import XML – basic Types custom fields in XML
- Toolset Types Repeater Field Sample CSV – example repeater field and values
- Toolset Types Repeater Field Sample XML – example repeater fields and values in XML
- Toolset Types Intermediate Sample CSV – example intermediate posts CSV
- Toolset Types Intermediate Sample XML – example intermediate posts XML
- Toolset Types One-to-One Relationship CSV – example one-to-one relationship fields CSV
- Toolset Types One-to-One Relationship XML – example one-to-one relationship fields XML
- Toolset Types Two-to-One Relationship CSV – example two-to-one relationship fields CSV
- Toolset Types Two-to-One Relationship XML – example two-to-one relationship fields XML
- Toolset Types One-to-Many Relationship CSV – example one-to-many relationship fields CSV
- Toolset Types One-to-Many Relationship XML – example one-to-many relationship fields XML
- Toolset Types Many-to-Many Relationships Import CSV – example many-to-many relationship fields CSV
- Toolset Types Many-to-Many Relationships Import XML – example many-to-many relationship fields XML
- JetEngine metabox Import Sample CSV – sample meta box fields
- JetEngine 1 to 1 Relation Import Sample CSV – sample jetengine one-one relation fields
- JetEngine 1 to many Relation sample CSV – sample jetengine 1 to many relation fields
- JetEngine Many to Many Relation sample CSV data – sample jetengine many to many relation fields
- Pods Import CSV – sample pods fields
- CFS Import CSV – sample cfs fields
- Meta Box Custom Fields CSV – sample meta box custom fields
- Meta Box Group CSV – sample meta box group fields
- Meta Box Field Clone CSV – sample meta box clone fields
- Meta Box Group Subfield Clone CSV – sample meta box group subfield clone fields and values
Custom Post Import Samples
WP Ultimate CSV Importer supports all types of custom posts created with default WordPress fields and custom posts created using plugins like Custom Post Type UI, Types, JetEngine, ACF, Meta Box, BuddyPress, LearnPress, Pods, CCTM, CustomPress & default WordPress custom posts.
Get the samples for custom posts below,
- Custom Post Import XML – example of a custom post with title, content, taxonomy, and metadata
Post & Page Import
WP Ultimate CSV & XML Importer/Exporter plugin offers complete support for the Posts and Pages import export. You can bulk import Posts and Pages with core content and all the attributes to WordPress. WP Import XML plugin lets you import all the important fields data, including images, categories, tags, taxonomies, page attributes, menu orders, featured images, post dates, post status, and more.
Sample data is available for you to download in the form of CSV or XML. (WordPress XML file download)
Download the posts and pages samples below.
- Post Import CSV – All post fields with sample data
- Post Import XML – All post fields with sample data in XML
- Page Import CSV – All page fields with sample data
- Page Import XML – All page fields with sample data in XML
WP Ultimate CSV Importer Pro
Get Ultimate CSV/XML Importer to import data on WordPress faster, quicker and safer.
Comments Import
WordPress Ultimate CSV Importer Pro Plugin lets you export comments from your old site and import them into the new one. If you have already imported all your post in WordPress, the CSV Importer plugin will use the post id to match and import all the comments under the individual posts.
You can download the comments sample below,
- Comments Import CSV sample – example comments with author, email, and post references
Note: Replace sample post ids with your own site’s post ids before importing to ensure correct mapping.
WP Customer Reviews Import Samples
The WordPress Ultimate CSV/XML Importer plugin supports WP Customer Reviews field data import and export. You can import bulk user reviews with meta field information like review content, rating, business name, review format, address data, and more.
- WP Customer Reviews Import CSV Sample – example reviews with rating, reviewer details, and meta fields
Users Import CSV & XML samples
Import or update all the default User fields data in bulk with ease. WordPress CSV/XML Import plugin supports import & export for the WooCommerce plugin fields (billing and shipping information), along with default WP user fields. It also supports third-party custom field plugins like WP-Members, MemberPress, Members, and Ultimate Member.
Below are the CSV & XML sample files to download.
- Users Import CSV – example user records
- Users Import XML – example user records in XML
- Users with WooCommerce billing & shipping data CSV – sample WooCommerce customer profiles
CSV & XML for Categories, Tags & Taxonomies Import
Using Ultimate CSV & XML Importer, you can import/update, and export your Categories, Tags, and Custom Taxonomies data like slug, description, image, and more.
It supports categories, tags, and taxonomies, along with custom fields created with plugins like JetEngine, Toolset, Meta Box, Pods, and ACF.
Sample content is available to download in the CSV & WordPress XML formats below.
- Category Import CSV – example categories with name slug, and description
- Category Import XML – example categories with name slug, and description in XML
- Tags Import CSV – sample tags data
- Tags Import XML – sample tags data in XML
- Taxonomies Import XML – sample custom taxonomy structures
If you are using the other importer and exporter plugins, the above CSV and XML files might not help you with the evaluation. All the sample files are prepared to test only with the WP Ultimate CSV Importer plugin.
If the CSV or XML header names are the same as the WordPress field names, then the WordPress CSV Importer Plugin will auto-map fields during import. You can also create with any header names, but make sure to map correctly during import configuration.
BBPress Import Samples
- BBPress Forum Import CSV – example forum records
- BBPress Topic Import CSV – sample topics under forums
MemberPress User Import Samples
- MemberPress User Import CSV – example membership user data
LearnPress Import Samples
- LearnPress Courses Import CSV – sample course structure
- LearnPress Quizzes Import CSV – example quiz data
- LearnPress Lessons Import CSV – lesson content samples
- LearnPress Orders Import CSV – sample course orders
- LearnPress Questions Import CSV – example quiz questions
Navigation Menu Import Samples
Import menus to your website using CSV/XML Importer. Simply export them with our plugin to move menu items to the new website.
Download the sample below for import testing:
- Sample CSV for Navigation Menu – example WordPress menu structure
Basic requirements for CSV
- The CSV file needs to be in UTF-8 format.
- Any delimiters can be used, but each cell needs to be properly escaped.
- The Importer can handle any large CSV files based on your server configuration.
- The headers can be of your choice. To automate mapping (relating the CSV headers with their corresponding WordPress fields), keep the CSV file headers the same as WordPress field names.
Basic XML Files requirements
- The XML file needs to be in a valid format. You can do the xml validation here.
- The plugin can handle any large XML files based on your server configuration.
- The headers can be of your choice, but you have to map the right header with WordPress fields in the mapping section. If you keep the XML file headers the same as the WordPress field slug name, the fields will get auto-mapped on the mapping page.
Need a Step-by-Step Guide?
These sample files cover the file structure, but if you need help with the full import process, the official documentation walks you through field mapping, advanced settings, and troubleshooting in detail. Prefer a visual walkthrough? Our YouTube tutorial covers the entire import process from upload to completion. If you’re exploring the plugin’s full feature set or looking for pricing, visit the WP Ultimate CSV Importer.
Frequently Asked Questions (FAQ)
1. What should a CSV file look like?
A CSV (Comma Separated Value) file stores tabular data in plain text format with a list of data separated by commas. The first row in CSV is used as headers, and the remaining rows are values. Each column represents a field, and each row is a record.
For example,
Name, Mailid, DOB, Address
Tanny, tan@mail.com, 12/03/1978, Sample Address
Benno, ben@mail.com, 11/09/1972, Example Address
You can open the CSV file in any text editor, but most of them use a Microsoft Excel sheet.
2. How do I create a CSV file format?
Creating a CSV (Comma-Separated Values) file format is relatively simple.
Follow these steps to create a CSV file:
1. Open a Text Editor: You can use any text editor, such as Notepad (Windows), TextEdit (Mac), or any code editor like Visual Studio Code, Sublime Text, etc.
2. Enter Data: Input your data in a tabular format, with each cell separated by a comma and each row separated by a new line.
For example,
Name, Age, City
John, 25, New York
Alice, 30, London
Bob, 28, Paris
3. Save as CSV: Save the file with a .csv extension. For example, data.csv.
3. How do I format a CSV file to import?
Formatting a CSV file for import typically involves ensuring the data is structured correctly and follows specific guidelines to be successfully imported into the target system, like WordPress. Each CSV file should have a specific structure depending on what you’re importing (users, posts, etc.). Ensure that column headers match the fields in WordPress.
Here’s a general guide on formatting a CSV file for import:
– Headers: Include headers at the top of the CSV file. These headers should accurately describe the data contained in each column.
– Delimiter: Choose a delimiter to separate the values within each row. Comma (,) is the most common delimiter, but other options like semicolon (;) or tab (\t) can be used depending on your requirements.
– Quoting Values: If your data contains special characters (like the delimiter itself), whitespace, or line breaks, you may need to enclose values within quotes (“). This helps the importer distinguish between actual data and separators within the data.
– Consistent Structure: Ensure that each row of data has the same number of columns and that the data in each column adheres to the expected format. Inconsistent structure can cause errors during the import process.
– Encoding: Save the CSV file with an appropriate character encoding to support special characters and ensure compatibility with the import tool. UTF-8 encoding is commonly used and recommended.
– Clean Data: Remove any unnecessary whitespace, special characters, or formatting from the CSV file to prevent errors during import.
– Handle Empty Values: If a column doesn’t have data for a particular row, leave it empty or use a placeholder value as needed. Ensure that the CSV file handles empty values consistently throughout.
Following these guidelines will help ensure your CSV file is properly formatted for import into WordPress.
4. How do I import a CSV file into WordPress?
1. Format the CSV File: Ensure that your CSV file is properly formatted with the required data for import. WP Ultimate CSV Importer supports importing various data types, including users, posts, and custom post types.
2. Access the Import Tool & Upload CSV: In your WordPress admin dashboard, go to Ultimate CSV Importer Pro → Import/Update. Upload the desired CSV file.
3. Configure Post Type & Mapping: Configure the post type and map the CSV columns to the corresponding WordPress fields.
4. Run the Importer: Then, run the import. All CSV file data will be imported into WordPress.
5. Can I create a CSV file without Excel?
– Yes, you can do that. Use a text editor like Notepad or a code editor to create and edit CSV files.
– Provide the column headers and subsequent rows for the data corresponding to columns.
– Separate data with commas (,), and use new lines for each row.
– Ensure you have saved the file with the ‘.csv’ extension. For example (Lead.csv)
Now your CSV file has been created without Excel.
6. Can I use these sample files as templates for my real data?
Yes, that’s exactly what they’re designed for. Open the file in Excel or Google Sheets, delete the example rows, and fill in your actual content. Keep the header row exactly as it is. Then upload the file and import as normal.
7. How do I fix CSV formatting?
Fixing CSV formatting involves identifying and resolving any issues with the structure or content of the CSV file. Here are some common steps to fix CSV formatting issues:
Check for missing or extra commas.
– Ensure consistency in quoting values if necessary.
– Verify that the CSV structure matches the import requirements of your target system.
– Confirm that the headers at the top of the CSV file accurately describe the data in each column.
– Headers should be clear, concise, and correctly spelled to avoid confusion during import.
– If your data contains special characters (like commas), whitespace, or line breaks, ensure that values are properly enclosed within quotes (“). This prevents the importer from misinterpreting the data structure.
8. What’s the difference between importing CSV and XML in WordPress?
Both formats work the same way in WP Ultimate CSV Importer, you upload the file, map fields, and run the import. CSV is easier to create and edit in a spreadsheet. XML is better suited for structured or hierarchical data and is commonly used when migrating from other CMS platforms.
9. How do I import an XML file into WordPress?
You can import an XML file into WordPress using the WordPress built-in tool or using the WP Ultimate CSV importer plugin.
Using WordPress Built-in Tool
– Importing an XML File into WordPress involves the following simple steps:
– Navigate to Tools → Import in the WordPress admin dashboard.
– Here, click on Install WordPress → Run Importer.
– Browse the XML file you want to import and click on Upload File, and then hit Import.
Using CSV Importer Plugin
– Install and activate the WP Ultimate CSV importer plugin.
– Browse and open the XML file of your post, page, or custom posts. The plugin supports many ways to upload the XML file.
– Choose the content type, map the XML fields, and configure the import settings.
– Finally, click on Import. Your XML file has been successfully imported into your WordPress site.
10. How do I download an XML file from WordPress?
You can download an XML file from WordPress in two ways.
With WordPress’s Built-in Export tool
– You can export content from WordPress into an XML file using the default export tool located in the Tools menu.
– Choose the content types you want to export and click the Download Export File button.
– The selected content type(posts, pages, or other) will be exported as an XML file and saved to your device’s downloads folder.
With WP Ultimate CSV Importer Plugin
– Install and activate this plugin on your WordPress.
– Access the plugin page and navigate to its Export tab.
– Choose the content type, such as posts, pages, or WooCommerce products.
– Provide the file name and choose the file type as XML.
– Configure any filters to extract selective data when exporting.
– Click on Export, then Download to download your WordPress data as an XML file.
WP Ultimate CSV Importer Pro
Get Ultimate CSV/XML Importer to import data on WordPress faster, quicker and safer.
Sync WooCommerce and Shopify More Reliably: What’s New in W2S Sync
13 Jul 2026, 3:06 am
If you run WooCommerce and Shopify side by side, you already know the drill: products need to match, orders need to land correctly, customers need to stay updated, and stock can never be allowed to drift apart. W2S (WooCommerce to Shopify) Sync exists to handle exactly that, connecting WooCommerce and Shopify so you can manage products, orders, customers, and inventory from a single place instead of juggling two admin panels all day.
Version 3.0’s headline change opens the door to marketplace sellers: if you run Dokan, WCFM, or WC Vendors, your store can now run a WooCommerce Shopify sync with vendor-level control instead of treating every product as if it came from one seller.
Alongside that, this release continues the reliability-and-visibility direction from the previous update: you can see what’s happening during a WooCommerce Shopify sync, catch a problem before it reaches your customers, keep inventory accurate in real time, and migrate to Shopify without quietly losing your search rankings along the way.
By the end of this article, you’ll know exactly what’s new, why it matters, and how each feature actually changes the way you manage a woocommerce shopify sync across two platforms.
Key Takeaways
- W2S Sync 3.0 adds native support for multi-vendor marketplaces: Dokan, WCFM, and WC Vendors are automatically detected, with per-vendor routing and vendor-scoped sync rules.
- A new unified multi-store interface organizes everything into four tabs: Configuration, Routing, Vendors, and Monitoring.
- The Reliability & Safety workspace, real-time webhook sync, dedicated inventory engine, and SEO Migration suite from the previous release all carry forward unchanged.
- Product advanced sync filters are more reliable, and Pro now ships with an automated testing framework covering core connector behavior.
- Admin UI improvements land across Inventory, Webhook, and multi-store screens, plus general alignment and responsiveness fixes throughout Pro.
- Security and cleanup fixes: webhook HMAC bypass is now restricted to local/dev environments only, and uninstalling Pro fully cleans up pairing and fulfillment settings.
Sell on a Marketplace? Now W2S Sync Works With It
This is the biggest structural addition in 3.0. Until now, W2S Sync treated every WooCommerce product the same way, regardless of who actually listed it. If you run a multi-vendor marketplace, that’s a real gap: vendor attribution, vendor-specific rules, and vendor-level visibility all matter when you’re syncing to Shopify.
Your Marketplace Plugin Is Detected Automatically
WooCommerce to Shopify Sync now detects Dokan, WCFM, and WC Vendors automatically. There’s no manual configuration step to tell the plugin which marketplace framework you’re running; it identifies the setup and adjusts accordingly.
Route Each Vendor’s Products Your Way
Per-vendor routing rules let you control how each vendor’s catalog behaves during sync, and vendor-scoped sync configuration means those rules live inside your existing multi-store pairings rather than as a separate system to maintain.
Assign, Import, and Monitor Vendor Activity in One Place
Vendor assignment, import handling, and operation monitoring are now part of the same workflow, so marketplace admins can see which vendor a given sync action belongs to instead of treating the whole catalog as one undifferentiated block.
One Interface for Configuration, Routing, Vendors, and Monitoring
All of this lives inside a redesigned, unified multi-store configuration interface, split into four tabs: Configuration, Routing, Vendors, and Monitoring. If you manage a marketplace with several active vendors, this is the single screen where that management now happens.
Manage Multiple Stores with Greater Flexibility and Control
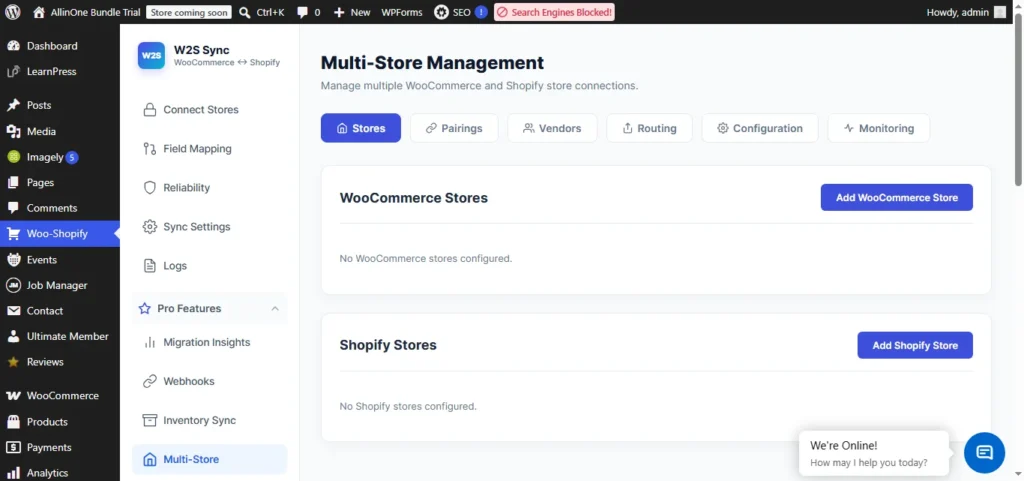
Connect and Manage Multiple Shopify Stores More Efficiently
Running more than one storefront no longer means duplicating your setup work. Each connected Shopify store keeps its own connection status, its own test button, and its own management controls, so agencies and multi-brand merchants can oversee everything from a single WordPress installation.
Configure Store Pairings and Webhooks Independently
Every WooCommerce-to-Shopify pairing behaves as its own unit. You choose the sync direction, the entity types, and the webhook behavior for that specific pairing, without it affecting any other connected store. Vendor routing rules, new in 3.0, now live inside this same pairing structure.
Keep Every Connected Store Synchronized with Better Control
Webhook registration and cleanup are handled per pairing, which means adding or removing a store doesn’t disturb the sync behavior already running for the rest of your stores.
Simplify Multi-Store and Multi-Vendor Operations as Your Business Grows
For agencies managing several client stores, or marketplaces running multiple vendors under one brand, this structure means growth doesn’t equal added manual overhead. Each new store or vendor plugs into the same system with its own isolated configuration.
See Exactly What’s Happening During Every Sync
A dedicated Reliability & Safety workspace gives you visibility that a plain sync tool doesn’t.
Run a Connection Test Before You Touch Live Data
Before committing to a full sync, you can run a read-only check against both WooCommerce and Shopify. Nothing is created, updated, or changed; it simply confirms both connections are healthy so you’re not troubleshooting mid-migration.
Watch Live Sync Progress in Real Time
A live dashboard shows the current step, total items, how many have processed, how many remain, and a visual progress bar. If you’re migrating thousands of products, you’re no longer left wondering whether the sync is still running or stuck.
Know When Products, Orders, and Customers Were Last Synced
Last-successful-sync timestamps are shown in plain, human-readable format for products, orders, and customers separately, so you always know exactly how fresh your data is.
Back Up Your Store Automatically Before Every Sync
Backups can be created automatically whenever you save your configuration, or triggered on demand. Recent backups are listed right in the admin, with configurable retention between 1 and 90 days.
Get Alerted the Moment a Sync Fails or Stock Runs Low
Failed-sync email alerts go to a customizable address, with a cooldown period so you’re not flooded with duplicate notifications. Low-stock alerts work the same way: configurable thresholds, support for both simple and variable products, and a limit of one alert per product every 24 hours.
Catch Duplicate Products and Currency Mismatches Early
Duplicate detection checks SKU, product handle/slug, or existing mapped IDs, and you can choose between Warn Only or Skip Duplicate Creation. The plugin also watches for currency mismatches between your two stores and warns you the moment it spots one, a small detail that stands between a smooth migration and a catalog full of mispriced products.
Keep WooCommerce and Shopify Updated in Real Time
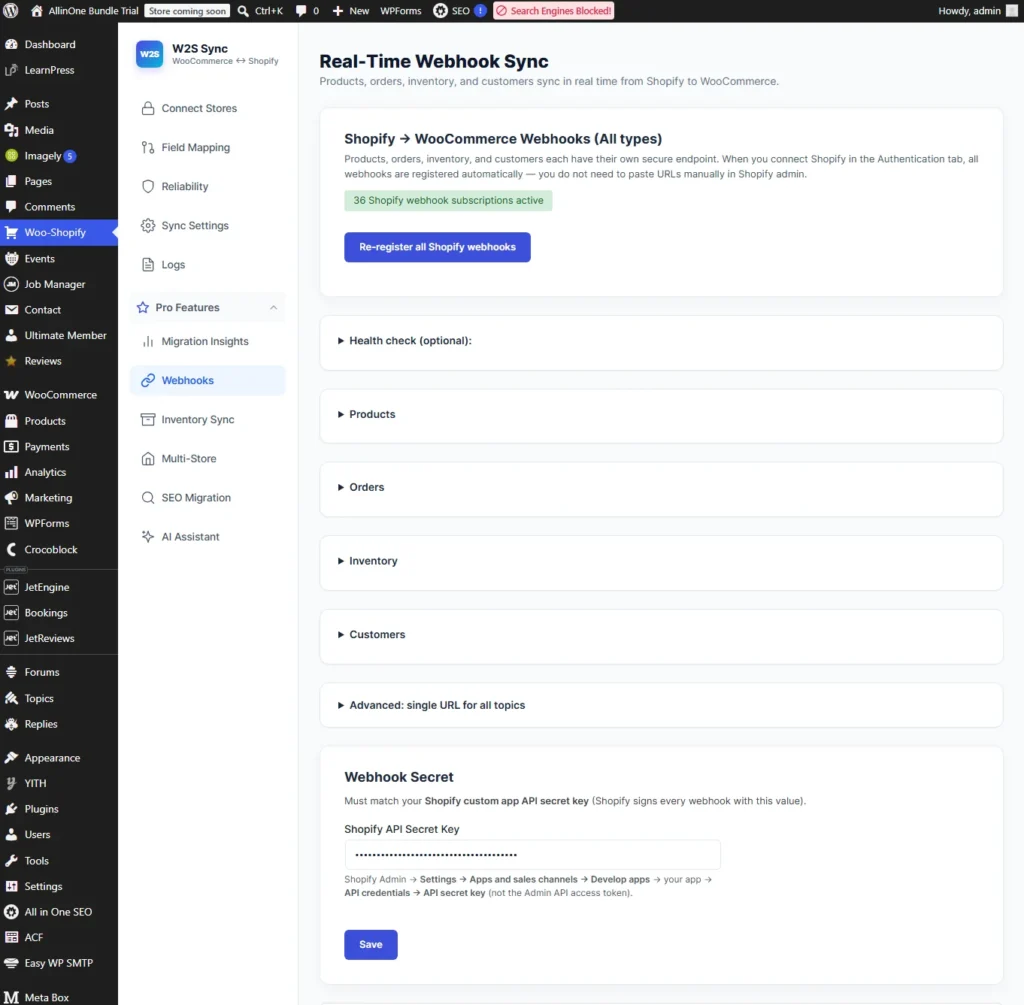
Sync Products, Orders, Customers, and Inventory Instantly
Real-time sync covers products, orders, customers, and inventory. A change on one platform can reach the other without waiting for the next scheduled run.For a complete walkthrough of setting this up, see our guide on how to sync WooCommerce and Shopify in real time.
Configure Webhooks the Way Your Store Needs
Everything webhook-related lives in its own tab: your endpoint URL is right there to copy, the secret key can be set from the same screen, and you can switch individual events on or off or decide which direction orders should flow, with no code editing needed at any point.
Never Lose an Event with Smart Queue and Retry Handling
Incoming webhook events are placed into a queue with retry logic, so a brief outage or a traffic spike doesn’t mean a lost update. Duplicate events are also filtered out automatically.
Automatically Catch Up on Anything Webhooks Missed
A scheduled product catch-up sync acts as a safety net, picking up recent Shopify product changes (creates, updates, deletes, and inventory corrections) that webhooks may have missed.
Keep Inventory Accurate Across Every Sales Channel
Sync Stock in Both Directions Automatically
Inventory syncs WooCommerce to Shopify and Shopify to WooCommerce, so whichever platform a sale happens on, the other reflects it. If you’d like a step-by-step setup walkthrough, our guide on how to sync inventory between WooCommerce and Shopify covers it in detail.
Let Hourly Reconciliation Catch Drift Before It Costs You Sales
Every hour, the system compares mapped products and automatically queues corrections wherever stock levels have drifted apart, guarding against the kind of silent mismatch that leads to overselling.
Choose Exactly Which Shopify Location Gets Updated
You can set a default Shopify location to receive stock updates, which matters if you’re managing multiple warehouses or fulfillment centers.
Run Reconciliation or Process the Queue Manually, Anytime
Beyond the automatic hourly check, manual controls let you trigger reconciliation or process the queue immediately, which is useful right after a bulk stock change or a known discrepancy.
Spot and Fix Inventory Failures Fast
Recent failure reporting surfaces exactly which items failed to sync, so troubleshooting doesn’t mean digging through generic logs.
Migrate to Shopify Without Losing Your SEO Rankings
Search traffic is often the single most valuable asset a store has, and losing it during a platform migration can take months to recover.
Transfer SEO Metadata Automatically
After a product sync, the plugin pulls SEO data from Yoast SEO and Rank Math and migrates titles, descriptions, focus keywords, Open Graph tags, and Twitter metadata directly into Shopify.
Generate 301 Redirects Without Manual Work
Redirects from old WooCommerce URLs to their new Shopify equivalents are created automatically, with no manual CSV uploads and no third-party redirect app required.
Preserve Canonical URLs and Image ALT Text
Canonical URL sync and image ALT text migration are both part of the SEO Migration settings, so the smaller SEO details that are easy to overlook don’t get lost in the move.
Audit SEO Issues Before and After Migration
An SEO Audit Report scans your catalog for missing meta titles, missing meta descriptions, duplicate slugs, and other common issues, both before you migrate and after, so you can confirm nothing slipped through.
Detect Broken URLs Before They Affect Search Rankings
A Broken URL Checker audits your links so you can catch and fix anything broken before it starts hurting your rankings.
Customize Sync to Match How Your Business Actually Works
Map Products, Orders, Customers, and Categories with More Clarity
The field mapping interface is organized with clearer grouping and better layout, supporting additional entity types including tags and collections.
Add Your Own Custom Field Mappings
Beyond the default mapping pairs, you can add your own custom fields, giving you more control over exactly what data moves between platforms.
Keep Shopify’s System Fields Protected Automatically
Reserved field protection prevents system-managed Shopify fields, such as IDs, timestamps, and API identifiers, from being accidentally overwritten during mapping changes.
Map Payment Gateways Accurately
WooCommerce payment methods can be mapped to their Shopify equivalents, so synced orders show the correct payment gateway on both platforms.
Pause, Resume, or Restart a Sync Anytime
Sync operations are no longer all-or-nothing. You can pause an in-progress sync without losing progress, resume exactly where you left off, or clear it entirely to start fresh.
A Cleaner, More Consistent Admin Experience
Inventory, Webhook, and Multi-Store Screens Got a UI Pass
The admin UI for Pro Inventory, Webhook, and the new unified multi-store configuration screens has been improved, so the day-to-day work of managing sync settings feels less cluttered, especially now that multi-store setups also carry vendor routing and monitoring.
Alignment and Layout Fixes Across Pro Admin
A round of fixes addresses UI alignment, responsiveness, and layout issues across Pro’s admin sections, so screens hold together consistently whether you’re on a wide desktop view or a smaller window.
Filter and Sync Products More Precisely
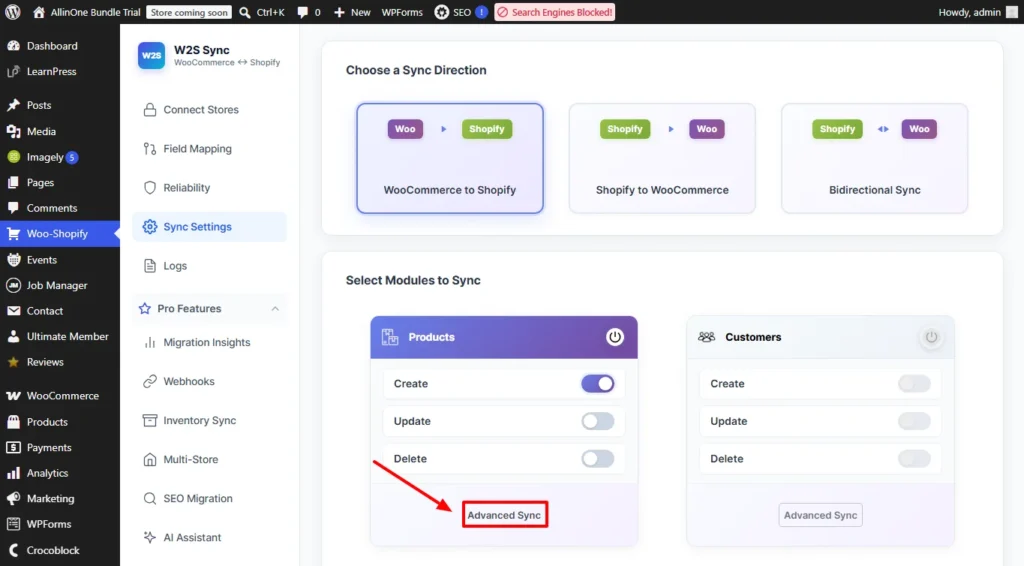
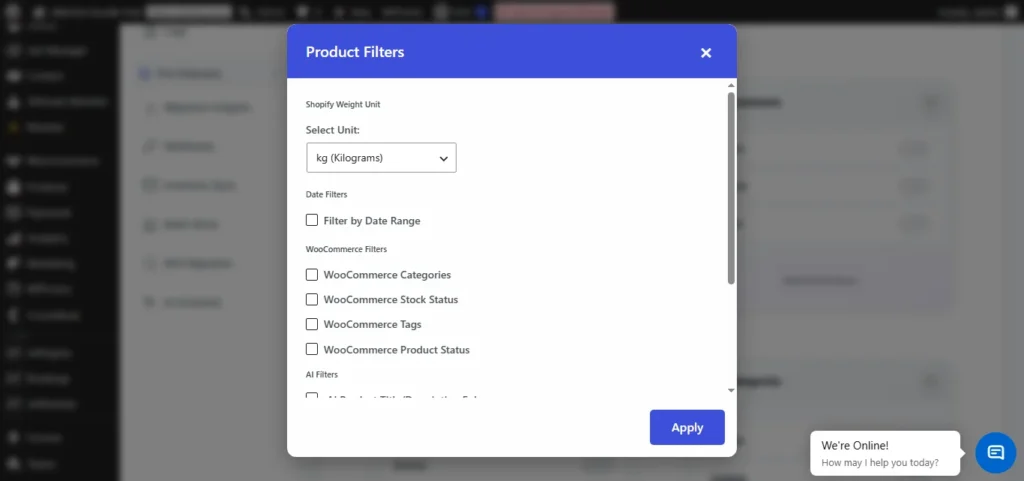
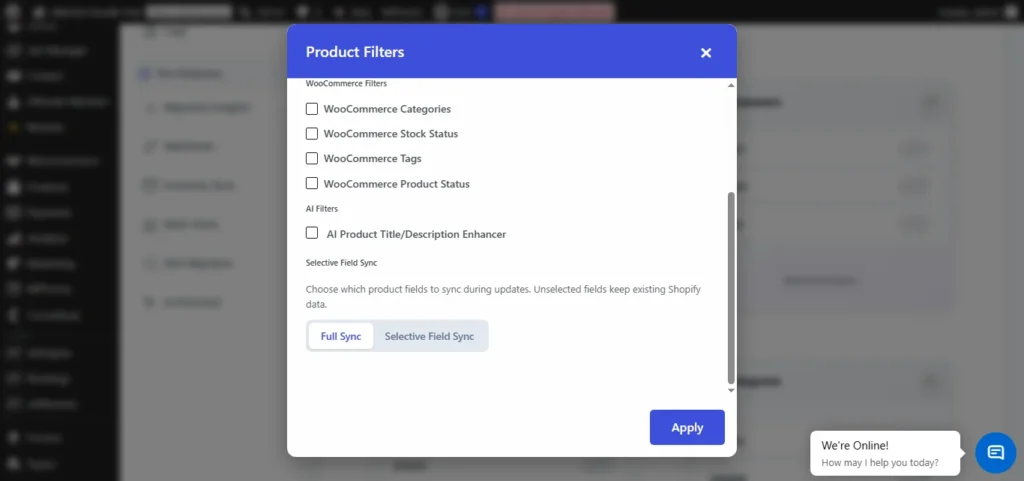
Filter dropdowns in Product Advanced Sync, which previously had loading and reliability issues, now work consistently. This makes partial syncs and staged migrations far easier to control, which is useful if you’re rolling a migration out in phases rather than all at once.
Sync with Stronger Security, Stability, and Confidence
Webhook Security Is Tighter
HMAC signature verification applies to all incoming Shopify webhooks, and the development bypass for HMAC checks is now restricted to local/development environments only; it can no longer be triggered on a live store. For background on how this verification model works, Shopify’s official webhook documentation covers the underlying event and signature system.
Uninstalling Pro Now Cleans Up After Itself
Removing the Pro plugin now clears pairing options and fulfillment service settings along with it, instead of leaving orphaned configuration behind.
Built on an Automated Testing Framework
Pro’s connector and core module behavior are now covered by an automated testing framework, added specifically to support this release. It’s a behind-the-scenes change, but it’s part of the same reliability commitment driving the rest of the release: fewer regressions slipping through between updates.
Admin Actions Stay Protected
Admin capability checks apply across webhook, inventory, mapping, and SEO actions, and nonce verification covers all AJAX endpoints, including the advanced filter dropdowns.
Requires W2S Sync Free 2.0 or Later
Pro 3.0 requires W2S Sync (Free) version 2.0 or higher for full feature integration. If you’re on an older Free version, update it first before activating Pro 3.0.
Frequently Asked Questions
1. What’s new in W2S Sync 3.0?
The biggest addition is native multi-vendor marketplace support: Dokan, WCFM, and WC Vendors are detected automatically, with per-vendor routing and a unified multi-store interface.
2. Do I need Dokan, WCFM, or WC Vendors installed to use 3.0?
No. Multi-vendor support only activates if one of those marketplace plugins is detected on your site. If you’re running a standard single-vendor WooCommerce store, everything works exactly as before.
3. Do I need to reconfigure anything after updating?
No existing configuration needs to change. Multi-vendor detection, the new unified interface, and reliability improvements are additive, so you can adopt them at your own pace without redoing your field mappings or sync settings.
4. What if I’m on an older version of W2S Sync Free?
Pro 3.0 requires Free 2.0 or later for full feature integration. Update the Free plugin first if you’re on an older version.
5. How does real-time sync compare to scheduled sync?
Scheduled sync runs at set intervals, such as hourly, daily, or weekly, which works well for routine catalog alignment. Real-time sync, powered by webhooks, pushes changes the moment they happen, which matters most for order and inventory accuracy where even a short delay can lead to overselling or a customer seeing outdated stock.
6. Will migrating to Shopify hurt my SEO rankings?
Not if the migration is handled correctly. The SEO Migration suite automatically transfers metadata, generates 301 redirects, preserves canonical URLs and image ALT text, and audits your catalog for issues before and after the move, the combination that typically prevents ranking loss during a platform switch.
Final Thoughts
W2S Sync 3.0 opens the plugin up to a segment it didn’t fully serve before: marketplace sellers running Dokan, WCFM, or WC Vendors. Everything else that made the previous release reliable, including live sync visibility, automatic backups, real-time webhook sync, hourly inventory reconciliation, and SEO-safe migration, carries forward untouched.
In practice, that means fewer surprises: marketplace vendors get sync rules that actually reflect how their store works, and the reliability story from the last release keeps holding. For merchants running two platforms long-term or completing a one-time migration, that combination of control and consistency is what actually saves time.
WooCommerce to Shopify Migration Cost Breakdown 2026
8 Jul 2026, 10:04 am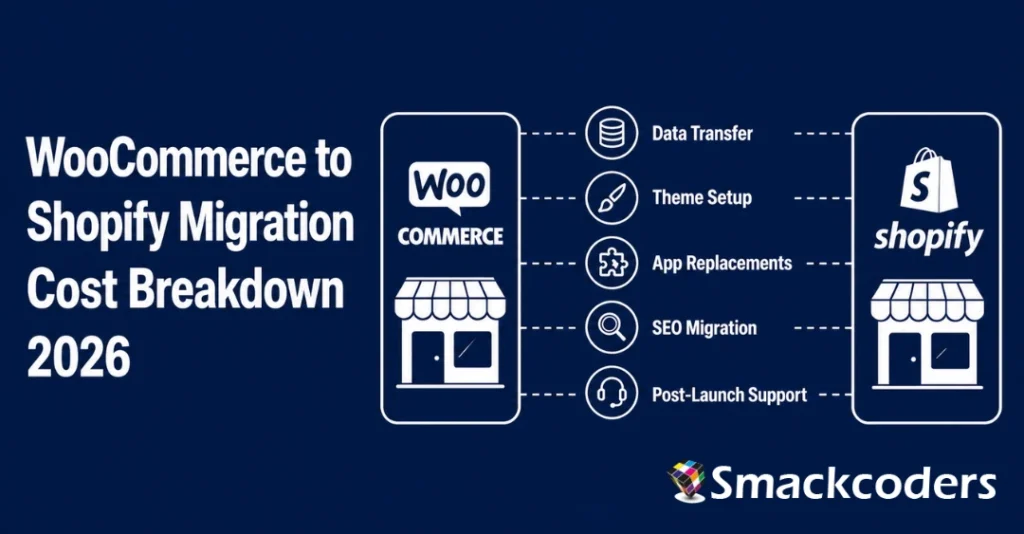
If you’re comparing options for moving from WooCommerce to Shopify, pricing information online is inconsistent. Vague ranges. Feature lists with no prices. Tools that charge per record so you need a spreadsheet to calculate your actual cost. Agency websites that say “contact us” instead of giving you a number.
This guide gives you a real breakdown of what WooCommerce to Shopify migration costs in 2026, across every approach, including the costs most guides leave out.
Why Migration Costs Vary So Much
Two stores can have the same product count and end up with wildly different migration costs. The variables that drive price
Data complexity. A store with 500 simple products is a different project from one with 500 products carrying custom metafields, product bundles, and external-type products with pricing rules.
Custom functionality. Every WooCommerce plugin you depend on needs a Shopify equivalent or a custom rebuild. Subscription billing, complex product configurators, membership access, and role-based pricing don’t migrate automatically. Each gap becomes a development task.
SEO scope. A store with 10 years of indexed URLs and strong organic traffic needs careful redirect mapping and SEO metadata transfer. A newer store has less at stake. Getting this wrong on an established store has real revenue consequences.
Who does the work. The migration approach you choose directly influences the overall cost. Whether you manage the process yourself, use a sync solution, hire a freelance developer, or work with an agency, each option involves a different level of expertise, support, and financial investment.
The Full Cost Picture – What Migration Actually Involves
Most migration cost guides focus only on the tool or service that moves the data. Data transfer is one component of several.
1. Data Transfer
Getting your products, customers, orders, and pages from WooCommerce into Shopify.
2. Theme Setup
Your WooCommerce theme doesn’t transfer to Shopify. You’ll buy a Shopify theme ($180 to $350 for a premium theme), use a free theme, or pay for custom development. Custom Shopify theme development typically ranges from $2,000 to $15,000 or more depending on complexity.
3. App Replacements
Each WooCommerce plugin you depend on needs a Shopify app equivalent. Common ongoing app costs run $10 to $100 per app per month. Stores running five to ten key plugins can easily add $50 to $500 per month in new recurring costs once live on Shopify.
4. SEO Migration
Building a 301 redirect map, transferring meta titles and descriptions, and monitoring Search Console post-launch is real work. If you hire a developer for this piece alone, budget $500 to $3,000 depending on catalog size. If you don’t do it at all, budget for 30 to 60 percent organic traffic loss in the weeks after launch.
5. Post-Launch Support
Something always surfaces after launch. Budget for at least two to four weeks of monitoring and fixes. If you’re working with a developer or agency, agree upfront on what post-launch support is included in the original scope.
WooCommerce to Shopify Migration Cost by Approach
Option 1. Managing the Migration with Shopify’s Free Import Solution
Cost: Free to $500 in your time
Shopify has a native Store Importer app that handles basic WooCommerce migrations at no tool cost. This option is best suited for smaller stores with straightforward product catalogs and minimal migration requirements. It does not migrate orders, complex product metafields, or categories as standalone entities.
For a straightforward store under 200 products with no significant custom functionality and minimal SEO dependency, the DIY route is worth evaluating.
The real cost here is your time. Redirect mapping, SEO metadata transfer, theme setup, and app configuration all still need to happen regardless of how the data moved. If you’re not comfortable with those steps, or if your store has any real complexity, the “free” route typically costs more in cleanup time than a paid approach would have.
Option 2. Using a Sync Solution for Phased or Parallel Migration
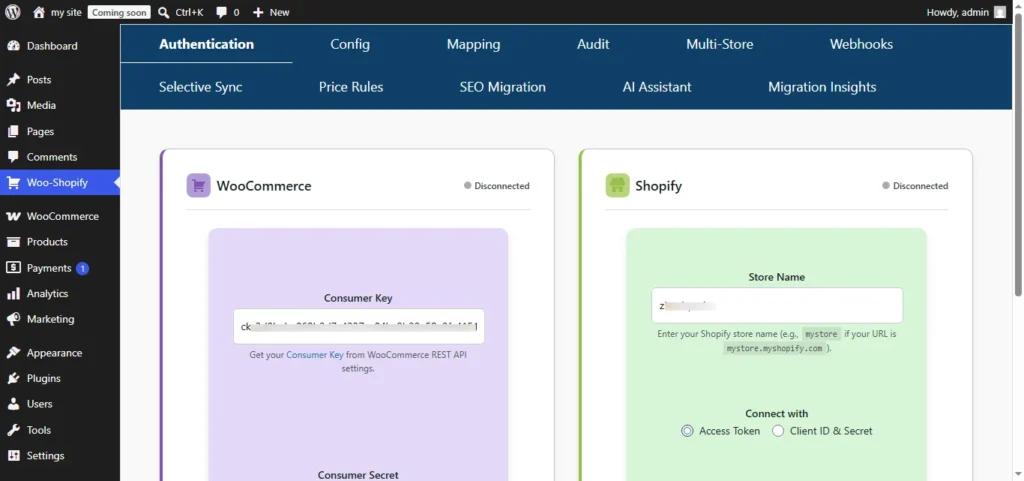
Cost – One-time plugin license from Smackcoders, plus your setup time
This approach is fundamentally different from a one-time data transfer. Rather than a hard cutover from WooCommerce to Shopify, you run both stores in sync and transition gradually, or operate them in parallel long-term. This eliminates the downtime risk of a hard cutover and lets you verify Shopify’s performance before committing to a full switch.
WooCommerce to Shopify Sync (W2S) by Smackcoders handles the technical connection. Here’s what W2S Pro includes that’s relevant to migration costs
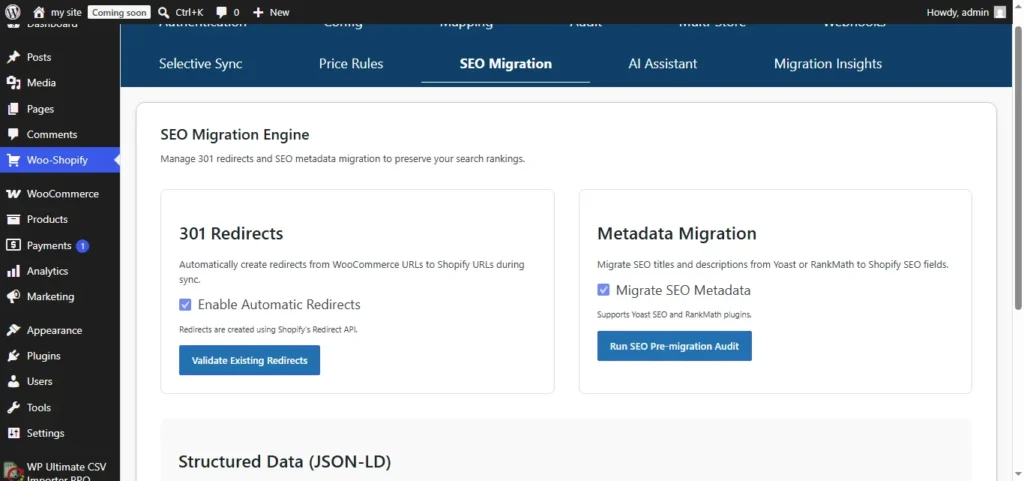
SEO Migration module. W2S Pro runs a pre-migration audit that flags weak titles, missing meta descriptions, duplicate slugs, and broken images across your product catalog. The SEO Migration module automatically generates a CSV redirect map that associates existing WooCommerce URLs with their corresponding Shopify pages, making it easy to implement redirects and preserve search visibility after migration. Yoast and Rank Math meta titles and descriptions transfer directly into Shopify’s SEO fields automatically. This feature alone can replace $500 to $1,500 in consultant SEO migration work.
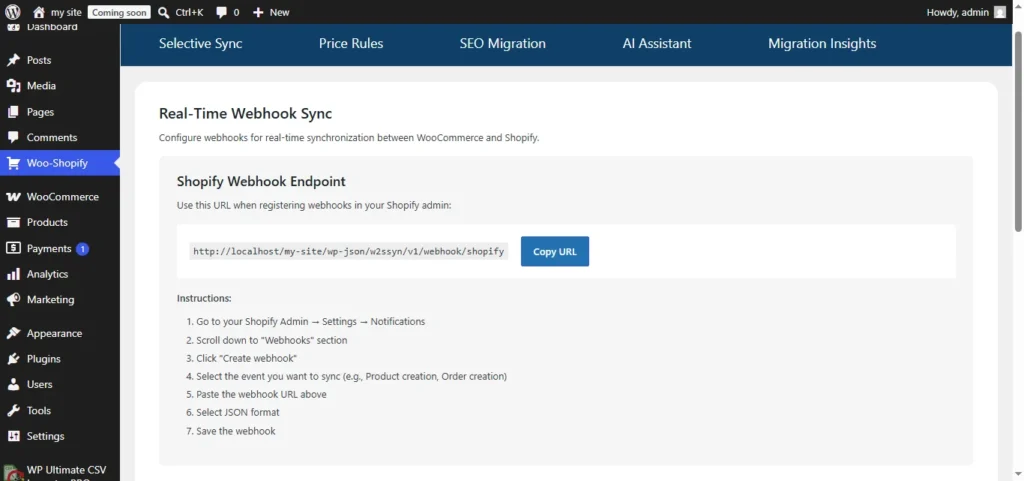
Real-time webhook sync. W2S Pro registers webhooks with Shopify for products, inventory, orders, and customers. A change on either platform pushes to the other within seconds, secured by HMAC verification on every incoming request. This means you can run both stores in live sync during your migration window without any data divergence risk.
Advanced product type preservation. Product bundles, grouped products, and external products are preserved through Shopify metafields when synced, so their WooCommerce-side relationships don’t get lost during the transition.
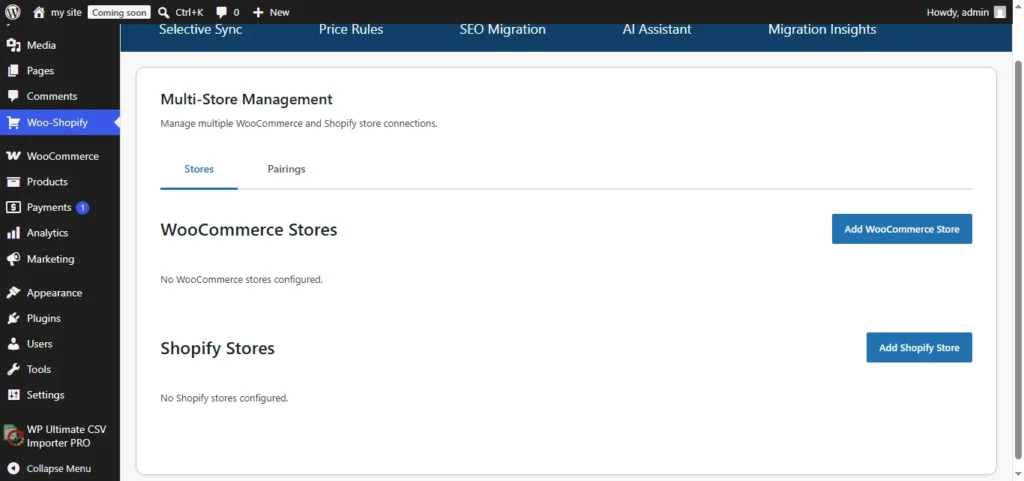
Multi-store pairings. W2S Pro includes centralized multi-store management capabilities, allowing several WooCommerce and Shopify stores to be connected and managed from a single WordPress environment. Each store pairing has its own independent sync direction, schedule, field mappings, and price rules. An agency managing multiple client migrations can handle all pairings from one dashboard.
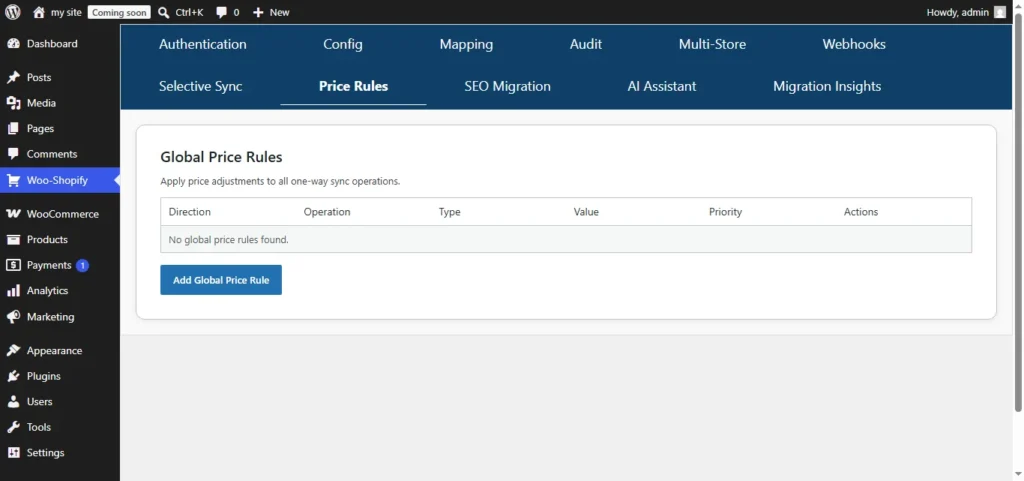
Price rules per pairing. Apply fixed or percentage markup rules during sync. If your WooCommerce store operates in one currency and your Shopify store serves a different market, prices land correctly on the Shopify side without manual adjustment.
Coupon sync. WooCommerce percentage discounts, fixed cart discounts, and free shipping coupons map to their Shopify equivalents, including the code, expiry date, usage limit, and customer restrictions. The coupon module creates new coupons during sync; it doesn’t update or delete existing ones.
Subscription orders. Initial and renewal orders from WooCommerce Subscriptions sync to Shopify as regular orders with subscription metadata preserved. Your Shopify side stays updated through each billing cycle.
Advanced tax. W2S Pro pushes per-line-item tax breakdowns including separate shipping tax and preserved tax classes – critical for VAT compliance and multi-rate sales tax environments.
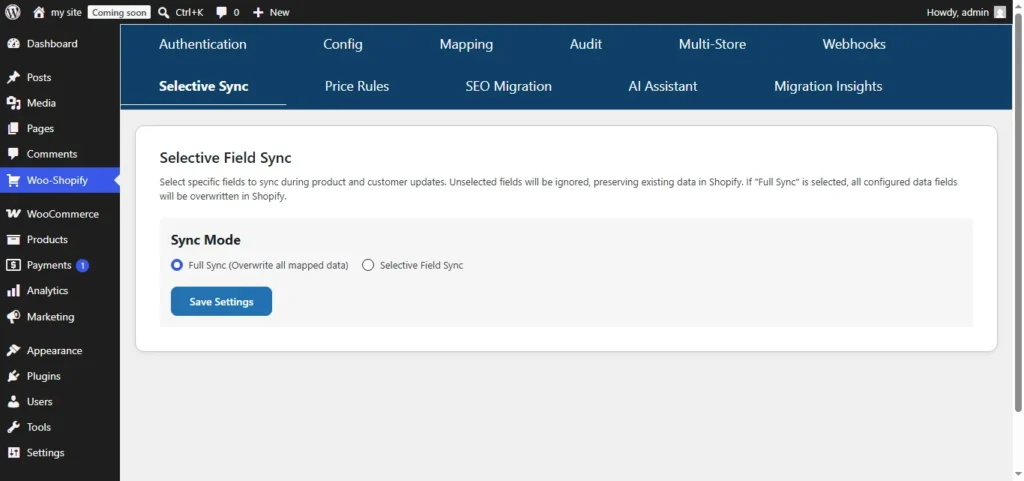
Selective Sync. Re-push specific records after a pricing correction, or QA-test migration by pushing one product at a time, without running a full catalog sync.
Insights Dashboard. Provides a centralized view of synchronization activity, including success and failure trends, frequently affected records, and detailed audit tracking for easier troubleshooting and performance monitoring.
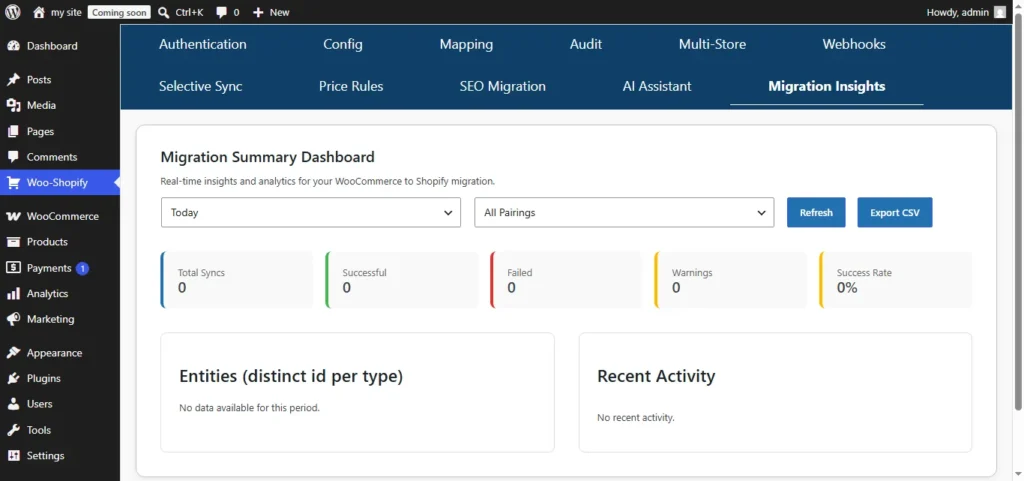
[See W2S Sync Pro pricing and features]
Option 3. Freelance Developer
Cost: $1,000 to $5,000 for a standard migration
A mid-level Shopify developer handles data migration, basic theme setup, redirect mapping, and testing. This is the right call when you want hands-on execution without agency rates and your store doesn’t have extreme complexity.
When scoping with a freelancer, ensure the proposal explicitly covers redirect setup, SEO metadata transfer, and at least one round of post-launch fixes. These are predictable costs that should be in scope upfront, not charged as extras after launch.
Option 4. Full-Service Migration Agency
Cost: $5,000 to $30,000 or more, depending on store complexity
An agency manages the entire migration process, including data transfer, custom functionality redevelopment, theme implementation, SEO migration, redirect configuration, testing, and post-launch assistance. The higher investment reflects the project management, specialized expertise, and accountability that come with a dedicated team.
An agency-led migration is often the most suitable choice for high-revenue stores, businesses with advanced subscription or product customization requirements, and organizations that lack dedicated in-house technical resources.
At this price point, businesses can typically expect a structured migration roadmap, dedicated project oversight, and post-launch SLA coverage with clearly defined response and support commitments.
Approach Comparison at a Glance
| Approach | Cost Range | Order Migration | SEO Redirects | Custom Fields | Ongoing Sync |
|---|---|---|---|---|---|
| Shopify Native Import Tool | Free | No | Manual Setup Required | No | No |
| W2S Sync by Smackcoders | One-time license | Yes | Automated CSV (Pro) | Yes (Pro) | Yes |
| Independent Developer | $1,000 to $5,000 | Yes | Included in Project Scope | Yes | No |
| Agency | $5,000 to $30,000+ | Yes | Included in scope | Yes | No |
The column that matters most depends on your store. For stores with 10 years of SEO history, “SEO Redirects: Automated” in W2S Pro is worth the entire license cost. For stores that need a permanent live sync between both platforms, “Ongoing Sync” rules out everything except W2S. For stores with significant custom functionality to rebuild from scratch, only a developer or agency scope fully addresses it.
What Doesn’t Migrate – The Hidden Cost Driver
Unexpected migration expenses most often arise from data that cannot be transferred automatically and requires additional manual effort or custom development work.
Customer passwords cannot be transferred directly between WooCommerce and Shopify. To ensure a smooth transition, prepare a password reset communication plan and anticipate an increase in customer support requests during the initial weeks after launch.
Product reviews don’t migrate natively. Re-importing historical reviews requires a Shopify review app and additional time. If reviews are important to your conversion rate, factor this into your project plan.
Products that exceed Shopify’s variant limitations require additional planning before migration. Since Shopify supports a maximum of three option types and 100 variants per product, complex WooCommerce products may need to be reorganized to ensure compatibility and prevent migration issues.
WooCommerce Subscriptions is a separate migration project. Active subscribers need to be re-onboarded through a Shopify subscription app, with direct customer communication planned weeks in advance. This is one of the most underestimated cost factors in any migration involving subscription revenue.
Custom plugin data doesn’t migrate automatically. Anything stored in custom WordPress database tables stays in WooCommerce unless a developer extracts and transforms it.
Each of these adds time and cost. Identifying them during the pre-migration audit lets you scope the project accurately rather than discovering them mid-migration.
How Timeline Affects Cost
Migration timeline and cost are directly linked. Longer migrations accumulate more developer hours. But rushing a migration to cut costs is how stores end up with SEO disasters, broken checkouts, and weeks of post-launch firefighting that costs far more than the time saved.
Realistic timelines
- Simple store, DIY or W2S Sync – 2 to 4 weeks from decision to launch
- Standard store, freelancer-assisted – 4 to 8 weeks
- Complex store with custom functionality – 8 to 16 weeks
- Enterprise store with subscriptions and large catalog – 12 to 20 weeks
Migration schedules are most commonly delayed by overlooked functionality requirements, late redirect planning, and unexpected subscription-related complexities. Identifying these factors during the pre-migration assessment helps maintain both project timelines and budget expectations.
Choosing the Right Approach for Your Store
Under 200 simple products, no significant custom functionality, low SEO dependency – Shopify’s native import solution can be a practical starting point. Redirect configuration and SEO metadata migration will still need to be handled separately, so be prepared to invest time in those tasks.
300 to 5,000 products, standard WooCommerce product types, order history matters – A sync plugin or a freelancer gives the best combination of reliability and cost. W2S Sync is particularly well-suited if you want to run both platforms during a transition window.
Complex metafields, product bundles, subscriptions, or large catalogs – W2S Pro handles ongoing sync with built-in support for complex product types and subscription orders. An agency handles the one-time custom functionality rebuild if you have significant WooCommerce-specific code to replace.
Need to run WooCommerce and Shopify simultaneously, or want a phased migration – W2S Sync is designed to support both approaches by keeping data synchronized across platforms throughout the transition. This allows both stores to remain up to date without requiring an immediate cutover to Shopify.
Revenue is high enough that downtime or ranking loss has meaningful financial impact – Investing in a professionally managed migration with a strong SEO strategy helps minimize risk, protect organic visibility, and maintain business continuity throughout the transition.
Frequently Asked Questions
1. What is the most budget-friendly way to migrate from WooCommerce to Shopify?
Shopify’s free Store Importer app has no tool cost. The real investment is your time for redirect setup, SEO metadata transfer, and theme configuration. For stores with any complexity, a sync plugin or freelancer gives better results for a manageable additional cost.
2. Does Shopify charge for migrating data?
No. Shopify doesn’t charge for data migration. The cost comes from whatever tool, plugin, or service you use to move the data.
3. Can I migrate WooCommerce orders to Shopify?
Yes. Shopify’s free importer does not migrate orders, but W2S Sync or a developer-assisted migration can bring order history across.
4. How much does migrating a large store with 10,000 products cost?
At this scale, expect $3,000 to $30,000 or more depending on catalog complexity, custom fields, subscription scope, and whether you use a plugin, a freelancer, or an agency.
5. Do migration tools handle 301 redirects automatically?
W2S Pro generates a redirect CSV as part of its SEO Migration module, which you import directly into Shopify’s redirect manager. For manual or developer-led migrations, redirect setup is a separate step that must be planned and executed before go-live.
6. Is it cheaper to rebuild the Shopify store from scratch rather than migrate?
Usually not. A full rebuild means paying for both data entry and design from zero. A migration preserves your existing data as a starting point, which is almost always faster and less expensive than starting over.
7. What’s the main advantage of W2S Sync over a one-time migration tool?
W2S Sync keeps both stores live and synchronised during and after migration, with no hard cutover deadline. It also includes SEO migration automation (redirect CSV generation, Yoast/Rank Math metadata transfer) that saves meaningful time and cost compared to handling SEO migration manually or through a separate consultant.
Complete Guide to Migrating WooCommerce to Shopify in 2026
8 Jul 2026, 7:00 am
Migrate WooCommerce to Shopify successfully with a structured migration plan that protects your data, preserves SEO rankings, and minimizes disruption to your business operations. WooCommerce to Shopify Migration is one of the most important decisions an ecommerce business can make when moving to a more scalable and managed commerce platform. A well-planned migration can improve store performance, simplify maintenance, and reduce the technical overhead associated with managing a WooCommerce store.
This guide explains what happens during a WooCommerce to Shopify migration, what data can and cannot be transferred, how to protect your SEO rankings, and the steps required to ensure a successful transition in 2026.
Why Stores Leave WooCommerce for Shopify
WooCommerce is self-hosted. You own the infrastructure. That’s a genuine advantage when you have developer resources and need deep platform customisation. It becomes a burden when your team is spending more time managing hosting configurations, plugin compatibility issues, security patches, and performance scaling than building the business.
Shopify is a managed platform. Shopify handles infrastructure, security, uptime, and platform updates. You get a stable, predictable environment that scales without requiring you to think about server configuration.
The migration trigger is almost always one of three things: the operational overhead of WooCommerce has become larger than the value of its flexibility; a desire to access Shopify’s checkout ecosystem and native payment infrastructure; or a team that wants to reduce technical risk, especially around PCI compliance and security.
Worth saying clearly: WooCommerce isn’t inherently inferior to Shopify. It’s a trade-off. WooCommerce gives more control at lower software cost, particularly for stores with complex customisation needs and in-house developers. Shopify wins on reliability, support infrastructure, and a more consistent customer experience out of the box. The right answer depends on your store’s size, team capabilities, and growth trajectory.
What Actually Migrates and What Doesn’t
Before you book a migration window, you need to know precisely what’s coming across and what’s staying behind. This is where most migrations get underestimated.
What Migrates
- Products, including titles, descriptions, images, SKUs, prices, variants, product categories, and tags
- Customers, including names, email addresses, phone numbers, and billing and shipping addresses
- Order history, including line items, totals, and order status
- Blog posts and pages (content migrates; design and templates do not)
- Discount codes and coupons
- Product categories, mapped to Shopify collections
What Does Not Migrate
Customer passwords. WooCommerce and Shopify use incompatible password hashing algorithms. Every customer account will require a password reset on first login after migration. Plan a post-launch reset email campaign before you go live, and brief your customer support team on the expected volume of reset requests.
Product reviews. Shopify doesn’t have a built-in review system. Reviews need to be handled through a third-party Shopify review app, and re-importing historical reviews is a manual process that requires additional tooling.
Custom plugin data. Any data stored in custom WordPress plugin database tables is not automatically migrated. Membership data, custom user fields, and anything stored in non-standard tables need case-by-case handling by a developer.
WooCommerce Subscriptions. Active subscribers cannot be moved automatically to Shopify. They need to be re-onboarded through a Shopify subscription app, which requires direct customer communication planned well in advance – not something to discover two days before launch.
Your WooCommerce theme and design. Shopify uses its own theme system. Your WooCommerce store’s design does not transfer. The Shopify theme must be selected and configured separately, which is its own project.
Products with more than 3 option types or more than 100 variants. Shopify enforces a hard limit of 3 option types per product (for example, size, colour, and material) and 100 variants per product. Any WooCommerce product that exceeds these limits must be restructured before or during migration. These products don’t fail gracefully – they simply don’t migrate correctly if you don’t address them in advance.
Before You Start – The Pre-Migration Audit
Skipping the audit is the single most common reason migrations fail or take far longer than expected. Time spent here prevents it from being spent on post-launch cleanup.
Inventory Your Data
Export and document the total count of your products, variants, customers, orders, and pages. Identify any products with more than 3 option types or more than 100 variants – these need restructuring before migration day.
Audit Your Custom Functionality
List every WooCommerce plugin you depend on and whether Shopify has a native equivalent or an app replacement. Common gaps include complex product configurators, WooCommerce Subscriptions, role-based pricing, custom checkout fields, and membership access control. Each gap becomes a development task during migration.
Capture Your SEO Baseline
This is critical. Before changing anything, export a list of your top-performing URLs by organic traffic from Google Analytics or Search Console. Record the current meta titles and descriptions for those pages. Note your canonical URL structure across products, categories, and blog posts.
Your WooCommerce URL structure (for example, /product/red-running-shoes/) and Shopify URL structure (for example, /products/red-running-shoes) do not match. Every URL that changes needs a 301 redirect pointing to the new Shopify equivalent. Stores that skip this step regularly lose 30 to 60 percent of their organic traffic in the weeks after launch. That’s not recoverable without significant time investment.
Set a Performance Baseline
Record your current Core Web Vitals, page load times, and conversion rate. You’ll use these after launch to confirm the migration improved things rather than hurt them.
How Long Does Migration Take?
Realistic timelines matter for setting stakeholder expectations before the project starts.
Standard stores (under 5,000 products, no complex custom functionality) – 4 to 6 weeks from audit completion to launch.
Medium complexity stores (5,000 to 20,000 products, some custom plugin dependencies, active SEO history)– 6 to 10 weeks.
Complex stores (large catalogs, WooCommerce Subscriptions, custom product types, significant custom development) – 10 to 16 weeks. Compressing this category is the most reliable way to cause a costly post-launch incident.
The time breakdown typically looks like: one to two weeks for audit and Shopify setup, one to two weeks for data migration and testing, one to two weeks for theme configuration and app setup, one week for SEO migration and redirect setup, and one to two weeks of pre-launch QA and staging review.
Most timeline overruns come from three sources: underestimating custom functionality gaps discovered mid-project, not building the redirect map early enough, and discovering subscription data complexity too late. Addressing all three during the pre-migration audit keeps projects on schedule.
Setting Up Shopify Before You Migrate
Don’t migrate data into an unconfigured store. Set Shopify up correctly first so the infrastructure is ready when your content arrives.
Choose your Shopify plan based on current revenue and feature requirements. Select and configure your theme before migration begins. Install apps that replace WooCommerce plugins you depend on. Configure your payment gateway. Set up your domain in Shopify but keep DNS pointing to WooCommerce until your new store is verified, tested, and ready for traffic.
Choosing Your Migration Approach
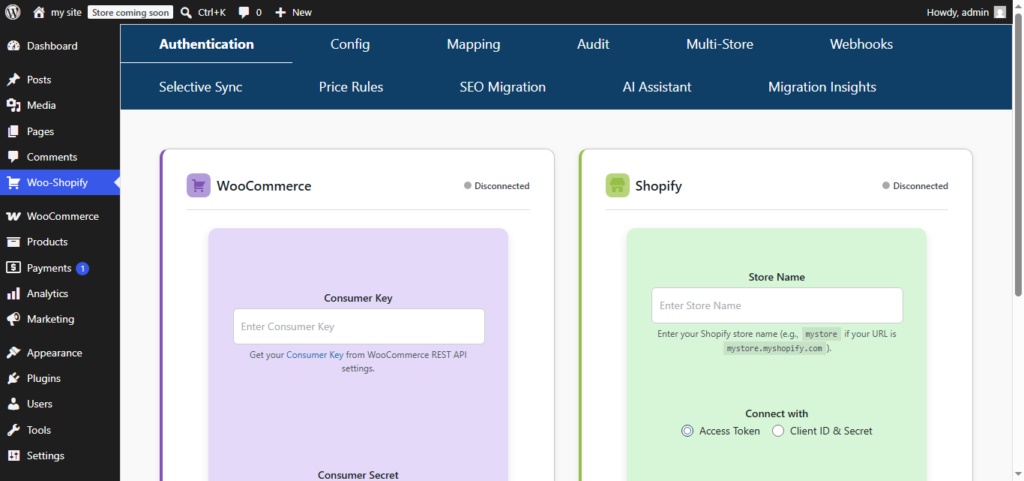
Before you export a single file, decide which migration method fits your store’s size and complexity.
Shopify’s built-in Store Importer (free)
Works for simple stores with a small number of standard products. Does not migrate orders, complex product metafields, or categories as standalone entities. Best as a starting point for small, low-complexity stores that can afford to manually handle the gaps.
WooCommerce to Shopify Sync (W2S by Smackcoders)
Rather than a one-time hard cutover, W2S keeps both stores synchronised in real time. This is the right approach when you want to run both platforms simultaneously during a phased transition, when you’re migrating in stages, or when both platforms serve a permanent long-term role in your operation. W2S Pro handles products, orders, customers, inventory, SEO metadata, and 301 redirect generation. More on this below.
Freelancer or developer-assisted migration
The right call for medium-complexity stores where you want technical execution without agency rates. Budget $1,000 to $5,000 for a properly scoped migration that includes redirect setup and SEO metadata transfer.
Full-service agency migration
For high-revenue stores, complex custom functionality rebuilds, or teams without technical capacity. $5,000 to $30,000 or more depending on scope, with dedicated project management and post-launch SLA support.
How to Migrate WooCommerce to Shopify Successfully
Export from WooCommerce
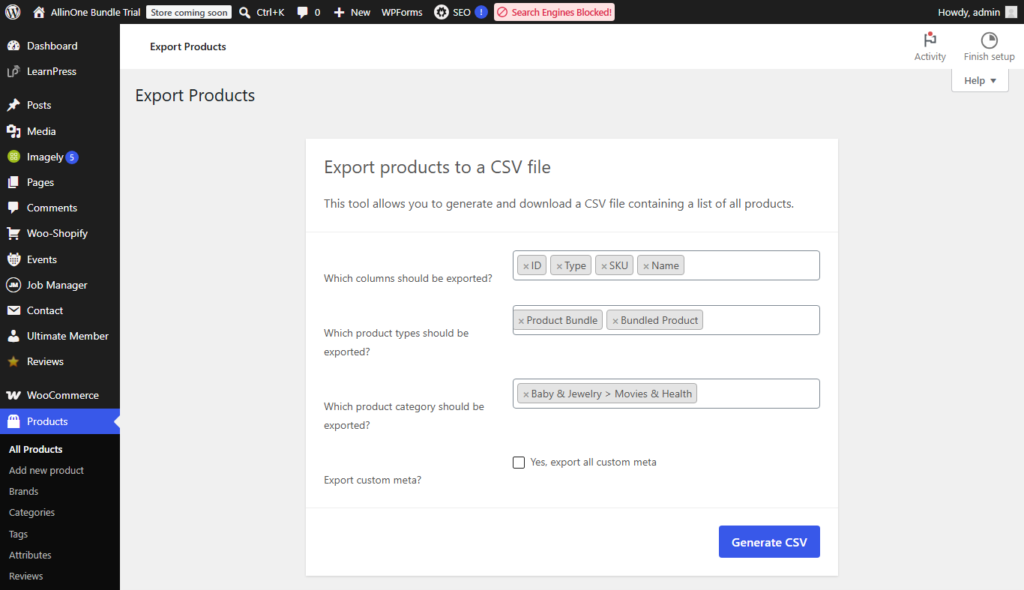
Use WooCommerce’s built-in CSV export for products. Use the WordPress export tool for blog posts and pages. Customer and order records can be extracted using dedicated export tools or direct database exports, depending on the volume and complexity of your store data.
Export your SEO metadata from Yoast or Rank Math before migrating. This data needs to land in Shopify’s SEO fields and won’t transfer automatically through any standard migration path.
Clean Your Data Before Importing
Review your exports for duplicate SKUs, products missing images, products exceeding Shopify’s variant limits, and customer records missing required fields. Cleaning data before import prevents errors mid-migration and avoids a messy cleanup after launch.
Run a Test Migration First
Always validate the migration in a Shopify development or staging store before applying any changes to your production storefront. Check product data completeness. Verify customer records. Confirm order history. Test custom field and metafield mappings. Issues found at this stage cost nothing to fix. Issues found after a live launch cost time, customer trust, and potentially search rankings.
Protecting Your SEO During Migration
Your WooCommerce and Shopify URLs won’t match. Any URL that differs after migration should be redirected using a 301 status code to preserve search visibility and maintain a seamless user experience.
Build your redirect map using the URL list from your pre-migration audit.Create a redirect mapping that connects each existing WooCommerce URL with its corresponding destination in Shopify. Include product pages, category/collection pages, blog posts, and informational pages. Not just product pages – every indexed page needs a redirect.
Transfer SEO metadata from Yoast or Rank Math into Shopify’s page title and meta description fields. Without this, your Shopify pages go live with generic or empty meta tags.
Add redirects in Shopify under Settings > Navigation > URL Redirects. For large stores, Shopify allows bulk redirect uploads via CSV.
Set up Google Search Console on your Shopify store before launch so crawl errors and indexing issues surface immediately when you go live.
Using W2S Sync for a Smarter Migration
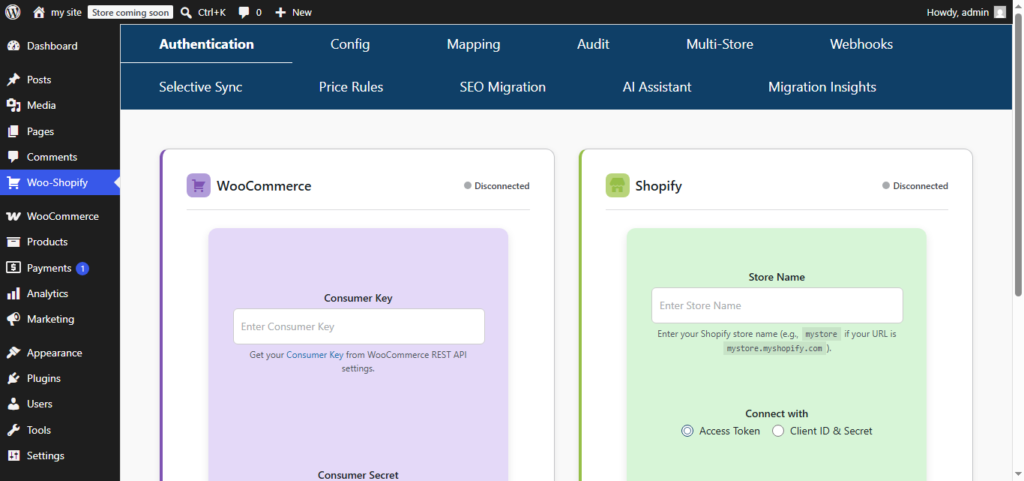
If you’re not ready for a hard cutover from WooCommerce to Shopify, or if you want to run both stores simultaneously during a phased transition, WooCommerce to Shopify Sync (W2S) by Smackcoders offers a fundamentally different approach.
W2S keeps your WooCommerce and Shopify stores synchronised automatically. Rather than a one-time migration, changes on one platform are pushed to the other without manual intervention. Here’s what the Pro version handles, as documented in the official W2S feature documentation:
Real-time sync via webhooks. W2S Pro registers webhooks directly with Shopify for supported events, including products/create, products/update, inventory_levels/update, orders/create, orders/updated, and customers/create. When a change happens in Shopify, it reaches WooCommerce within seconds.
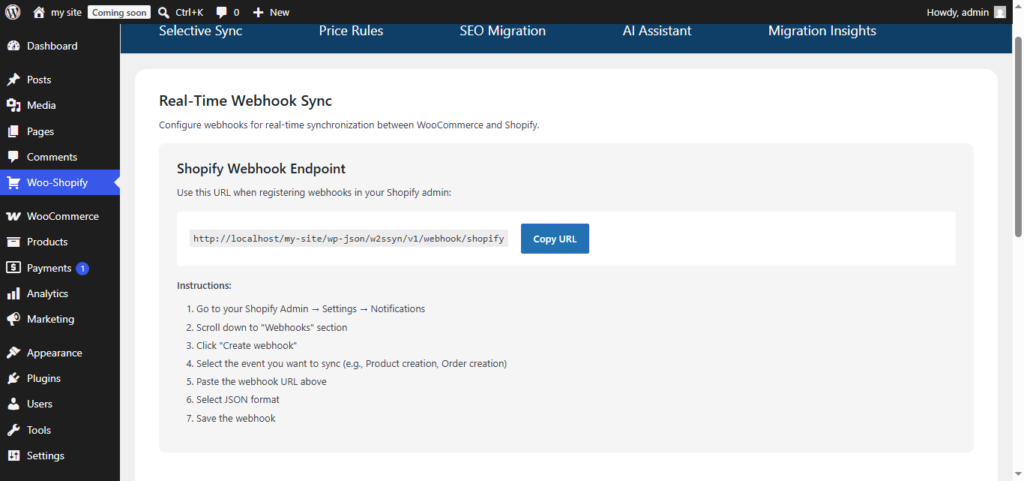
HMAC verification on every incoming webhook request ensures only legitimate Shopify requests are processed. Each incoming webhook request undergoes HMAC signature validation to confirm its authenticity before any data is processed. Bad signatures are rejected and logged.”
Automatic 301 redirect generation. W2S Pro’s SEO Migration module runs a pre-migration audit that flags weak titles, missing meta descriptions, duplicate slugs, and broken product images. It then generates a CSV of every old WooCommerce product URL mapped to its Shopify equivalent, ready to import directly into Shopify’s redirect manager. No manual URL mapping spreadsheet required.
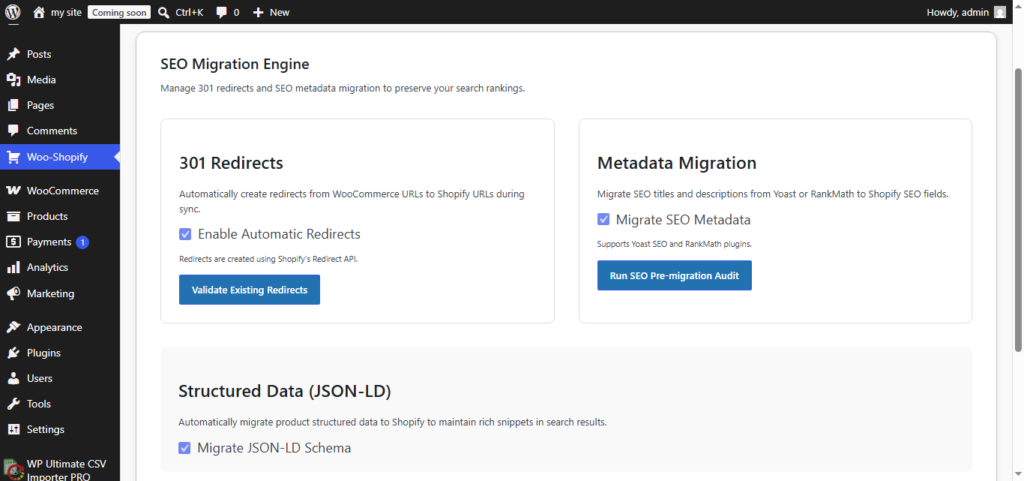
SEO metadata migration ensures that titles and meta descriptions from popular WordPress SEO plugins are transferred into the corresponding Shopify SEO fields during the sync process. Your SEO equity moves with your products without a separate metadata migration step.
Multi-store many-to-many pairings. W2S Pro’s Multi-Store tab lets you connect any number of WooCommerce stores to any number of Shopify stores from one WordPress install. Multiple WooCommerce brands can sync to one consolidated Shopify storefront, or one WooCommerce store can push to regional Shopify stores in different markets. Each pairing has its own independent sync direction, schedule, field mappings, filters, and price rules.
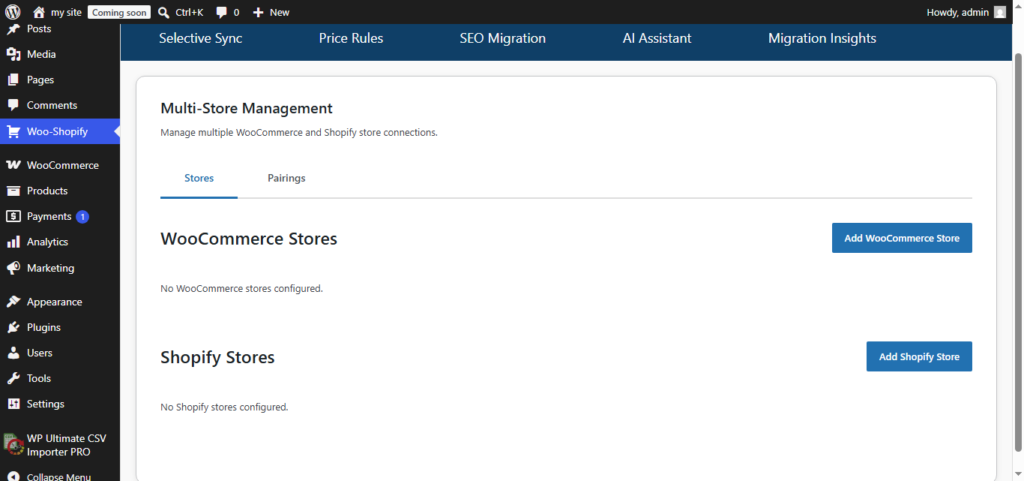
Price rules per pairing. If you’re syncing a WooCommerce store in one currency to a Shopify store in another market, W2S Pro applies fixed or percentage markup rules during sync. Prices land correctly on the Shopify side without manual adjustment.
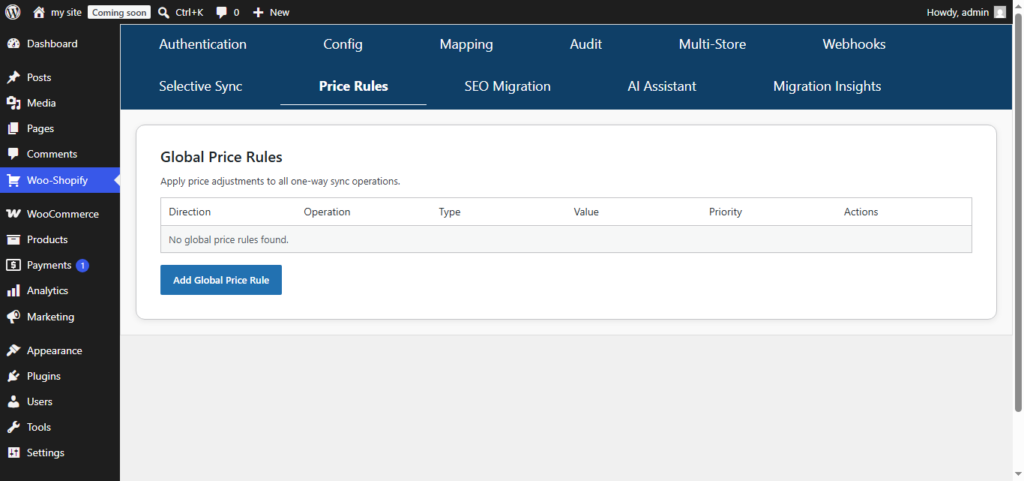
Coupon and discount sync. WooCommerce percentage discounts, fixed cart discounts, fixed product discounts, and free shipping coupons all map to their Shopify equivalents – syncing the code, expiry date, usage limit, and customer restrictions. The coupon module creates new coupons; it doesn’t update or delete existing ones.
Subscription order support. Initial and renewal orders from WooCommerce Subscriptions sync to Shopify as regular orders with subscription metadata preserved. Your Shopify store stays updated through each billing cycle.
Advanced tax handling. W2S Pro pushes per-line-item tax breakdowns to Shopify, including separate shipping tax and preserved tax classes. This is critical for stores dealing with VAT, multi-rate sales tax, or any scenario where a combined tax total isn’t sufficient.
Advanced product type preservation. Product bundles, grouped products, and external products are preserved via Shopify metafields when synced, so their WooCommerce relationships remain accessible on the Shopify side.
Selective sync. Need to re-push 20 specific SKUs after a pricing correction without running a full sync?Selective Sync allows you to filter and choose specific products, orders, or customer records for processing, making it easier to sync only the data that requires updates. One audit log entry per record.
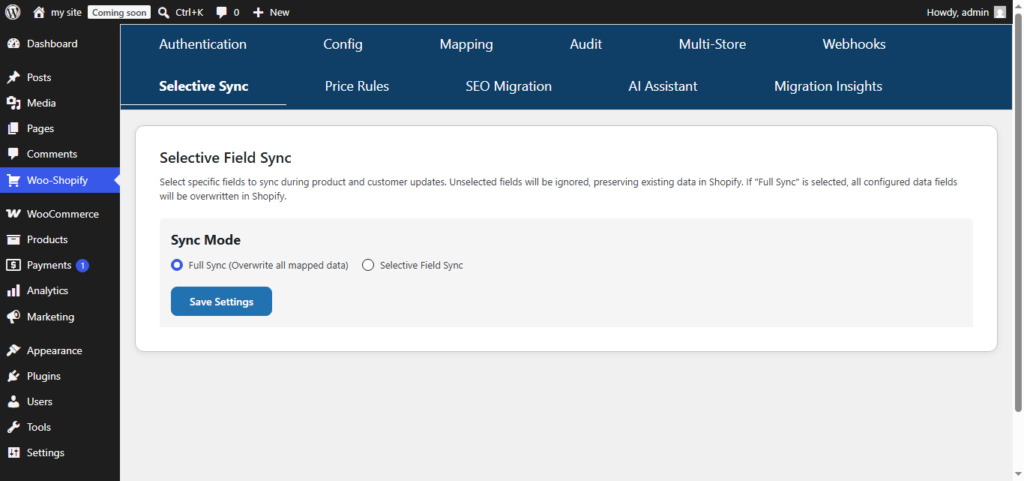
Insights dashboard. A visual analytics view showing total syncs, success and failure rates, top failing entities, and an activity timeline. Click any number and it opens the filtered audit log for those exact records.
AI Assistant. W2S Pro includes a title and description enhancer that processes up to 25 products per batch, improving product copy quality during the migration window.
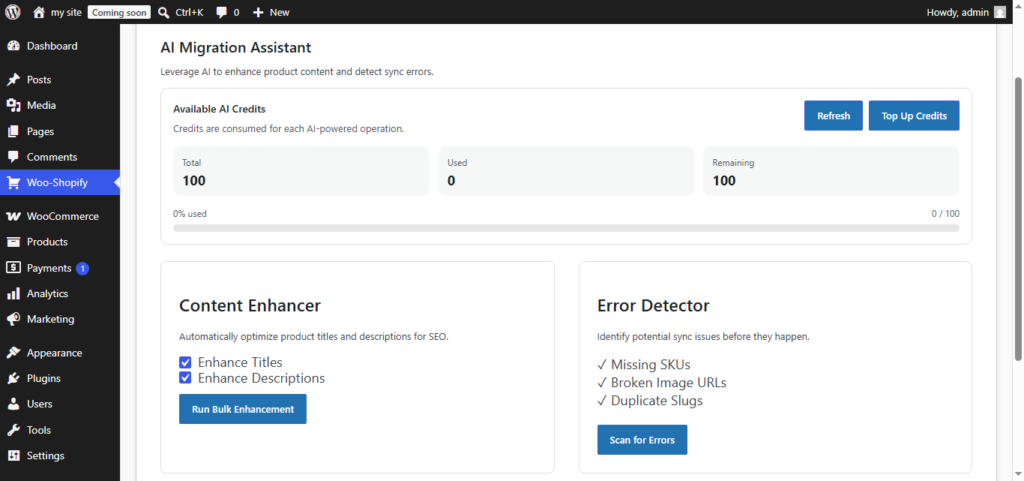
The sync approach works particularly well for stores that want to test Shopify performance before committing to a full cutover, for teams doing a phased migration, or for businesses running WooCommerce as a backend system while using Shopify as a sales channel.
Going Live
When your Shopify store is tested and verified
1. Point your domain DNS to Shopify
2. Remove Shopify’s password protection
3. Confirm all 301 redirects are working for your top-traffic URLs
4. Submit your new Shopify sitemap to Google Search Console
5. Notify migrated customers about account access and provide instructions for setting a new password
6. Monitor Search Console for crawl errors in the first 72 hours
Post-Migration Performance Checks for the First Two Weeks
The first two weeks after launch are where problems surface. Budget monitoring time accordingly.
Check Google Search Console daily for crawl errors and coverage drops. Watch your analytics for traffic drops on previously strong pages. Compare your conversion rate against the pre-migration baseline. Keep track of support inquiries related to account access, password resets, and checkout issues to identify and resolve customer-facing problems quickly.
Most ranking fluctuations after a properly executed migration settle within 4 to 8 weeks, assuming your redirects and SEO metadata are correctly in place. If you see sustained drops beyond 8 weeks, the most common causes are missing redirects on non-product pages (blog posts, category pages, informational content) and SEO metadata that wasn’t transferred.
Common Mistakes That Derail Migrations
Not building a redirect map. Every indexed URL that changes without a redirect is a lost ranking signal and a wasted backlink. This is the most expensive mistake to fix after launch.
Migrating directly to a live production store. Always test in a development environment first. There’s no good reason to skip this step.
Forgetting blog posts and category pages. Most stores redirect product URLs and forget everything else. All indexed content needs redirects.
Not testing the password reset flow before launch. If the reset email or reset page is broken on day one, migrated customers can’t log in and your support queue fills up with avoidable tickets.
Underestimating the subscription migration. Active subscribers need to be re-onboarded through a Shopify subscription app. This is a separate project requiring direct customer communication. Start planning it weeks before migration day, not days.
Going live before the theme is fully configured. The Shopify theme isn’t just design – it controls how product data is displayed, how checkout flows work, and how the mobile experience renders. Launching before the Shopify theme is fully configured can lead to usability issues, display inconsistencies, and avoidable customer experience problems after go-live.
Frequently Asked Questions
1. How long does WooCommerce to Shopify migration take?
Most standard migrations take 4 to 8 weeks. Stores with custom functionality, large catalogs, or active subscriptions should plan for 8 to 16 weeks.
2. Will I lose my Google rankings?
You can lose rankings if 301 redirects aren’t correctly set up or if SEO metadata isn’t transferred. When 301 redirects and SEO metadata are properly implemented, most websites regain their search visibility and traffic levels within 4 to 8 weeks after the migration.
3. Can customer passwords be migrated?
No. Customer passwords cannot be transferred directly because WooCommerce and Shopify store authentication credentials using different encryption and password management systems. Plan a post-launch password reset email for all migrated customers.
4. What happens to WooCommerce Subscriptions?
Active subscribers cannot be automatically migrated. They need to be re-onboarded through a Shopify subscription app. This requires direct customer communication planned well in advance.
5. Does Shopify have a product variant limit?
Yes. Shopify allows 3 option types and 100 variants per product. Products exceeding these limits need restructuring before migration.
6. Can I run WooCommerce and Shopify simultaneously during migration?
Yes, and it’s the recommended approach. Keep WooCommerce live while setting up and testing Shopify. Use W2S Sync to keep both stores in sync during the transition. Switch DNS only at the final go-live step.
7. Can WooCommerce and Shopify be used together as a long-term setup?
Yes. Many businesses operate WooCommerce and Shopify side by side to support different sales channels, regional storefronts, or operational workflows. Using a synchronization solution helps keep products, customers, inventory, and orders consistent across both platforms.
8. Does W2S Sync handle SEO during migration?
Yes. W2S Pro’s SEO Migration module runs a pre-migration SEO audit, generates a 301 redirect CSV ready for Shopify’s redirect manager, and transfers Yoast and Rank Math meta titles and descriptions directly into Shopify’s SEO fields.
How to Import JetEngine Custom Fields and CCTs from CSV in WordPress
7 Jul 2026, 11:50 am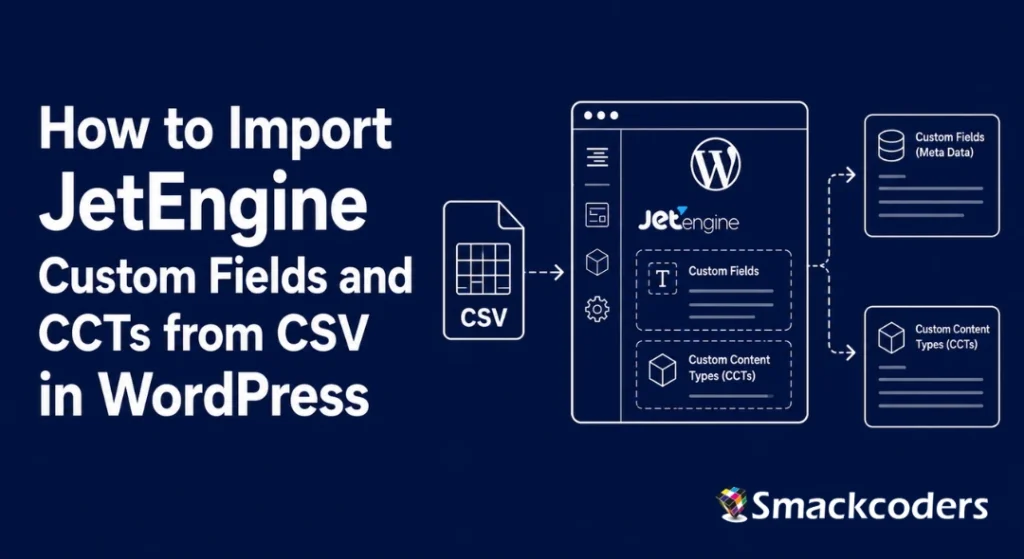
JetEngine CSV Import helps WordPress users bulk import custom fields, Custom Content Types (CCTs), and structured data without manual entry. If you’ve built anything serious with JetEngine, you already know the challenge – the plugin is excellent for managing dynamic content but does not include a native CSV import feature.
When you need to migrate, update, or import large datasets, having a reliable import workflow becomes essential.
That gap is where most JetEngine projects hit a wall.
In this tutorial, you’ll learn how to import JetEngine custom fields and Custom Content Types (CCTs) from CSV files into WordPress using WP Ultimate CSV Importer Pro. We’ll cover field setup, CSV formatting, field mapping, CCT imports, data validation, and troubleshooting. WP Ultimate CSV Importer Pro is officially recognised by Crocoblock (the developer behind JetEngine) for importing JetEngine data, and the steps in this guide are based on the official Smackcoders documentation. [JetEngine Import documentation at Smackcoders]
[Try WP Ultimate CSV Importer Pro free]
What Are JetEngine Custom Fields and CCTs ? (And Why They’re Different)
Understanding the difference between JetEngine meta fields and CCTs matters before you prepare a single CSV row, because the import path for each is different.
JetEngine meta fields attach to WordPress post types. They’re stored in WordPress’s standard `wp_postmeta` table alongside regular post metadata. When you define a meta field group in JetEngine and assign it to a Custom Post Type, every post of that type gets those fields in the editor. The import plugin maps your CSV data to those fields through WordPress’s standard metadata system.
Custom Content Types (CCTs) are a different beast. CCTs create their own dedicated database tables outside of `wp_posts` and `wp_postmeta`. This is what makes CCTs fast for data-heavy applications like job boards, real estate listings, and event databases, but it also means they require specific import support. Most standard WordPress CSV import tools are designed to work with posts and post meta data only. Because JetEngine Custom Content Types (CCTs) store data in their own database tables rather than WordPress’s default post tables, importing them requires a tool that is specifically designed to support CCT structures.
This distinction shapes everything about how you prepare your CSV and run your import, which is why so many teams hit problems when they try to use generic tools.
JetEngine CSV Import – Supported Field Types
WP Ultimate CSV Importer Pro is compatible with the full range of field types available in JetEngine, enabling seamless data imports across different field configurations. Knowing the full list matters when you’re building your CSV – some types have specific formatting requirements that aren’t obvious from the field label.
The supported field types are – Text, Number, Textarea, WYSIWYG, Date, Time, DateTime, Switcher, Checkbox, Radio, Select, Media (single image), Gallery (multiple images), Colorpicker, Iconpicker, Post (relationship field), HTML, and Repeater.
That’s 18 standard types plus Repeater – every field type JetEngine ships with. If you use any of these in your JetEngine setup, they can be imported from a CSV file without any workarounds.
Configure Your JetEngine Fields Before Preparing the Import File
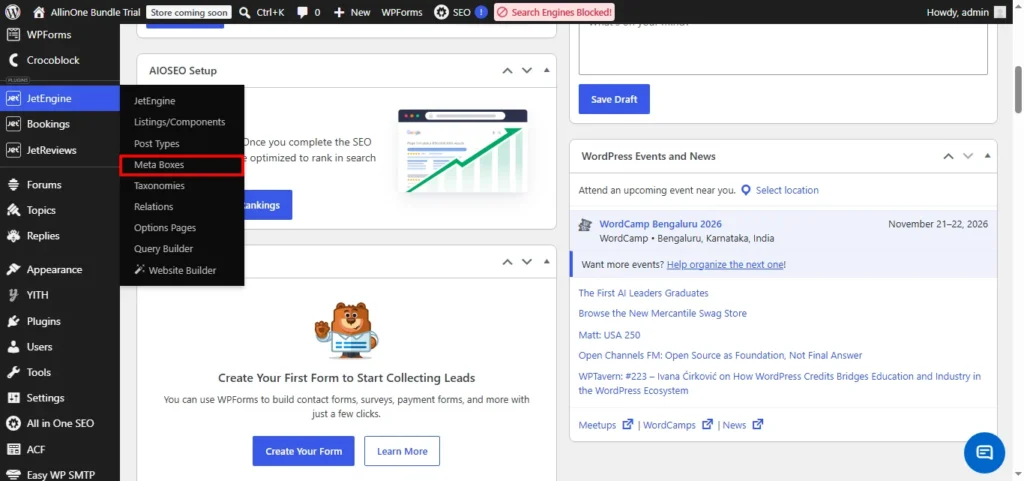
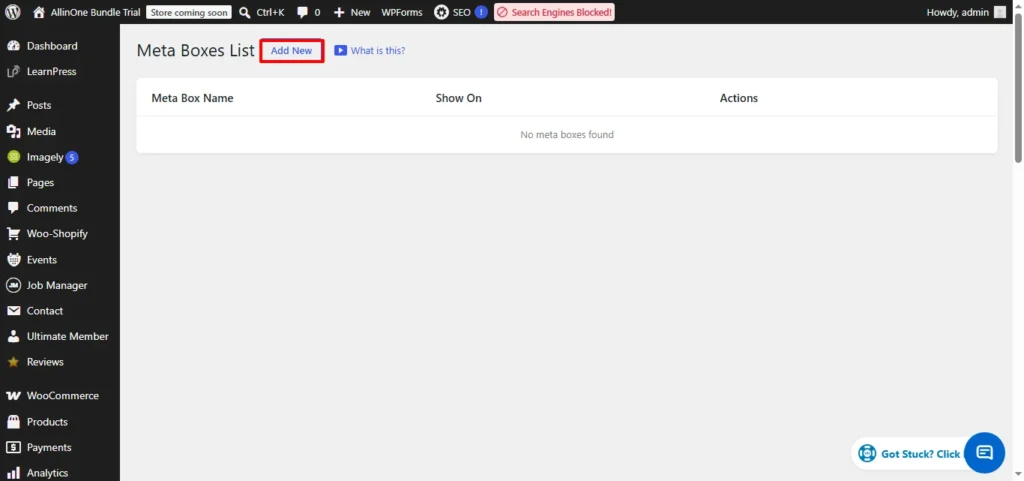
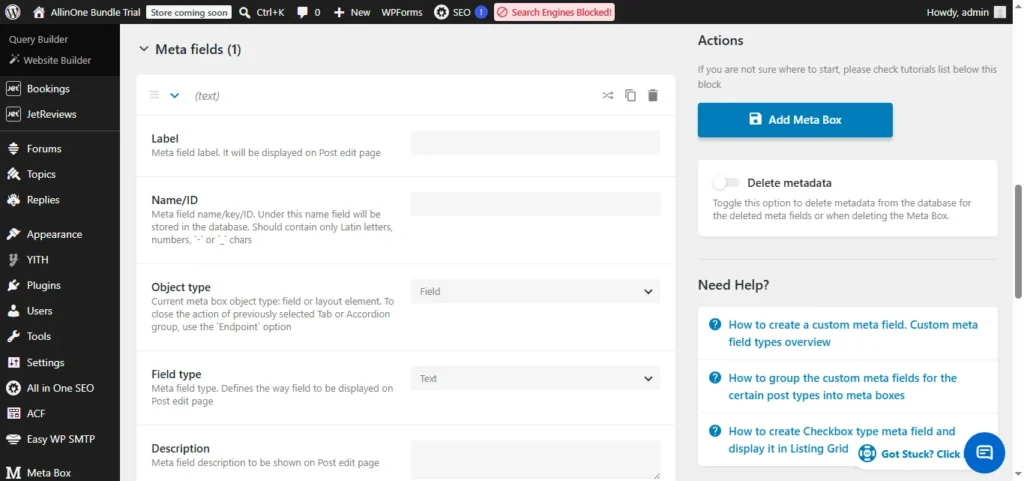
Although often overlooked, this preparation step is essential for ensuring a smooth and error-free import experience.
WP Ultimate CSV Importer Pro maps incoming CSV data to existing JetEngine fields. It does not create new field groups or define new fields automatically during import. Your JetEngine field structure needs to exist before you run a single import.
As documented in the [JetEngine Import guide], the sequence is
1. Open JetEngine in your WordPress dashboard and create your meta field group (or CCT structure)
2. Define every field you plan to import inside that group
3. Associate the field group with the custom post type that will receive the imported data.
4. Note the field key (sometimes called field ID) for each field
This is one of the most frequently overlooked requirements during CSV preparation and a common reason for field mapping issues during import. Every JetEngine field has two identifiers: the display label you see in the editor (e.g., “Listing Price”) and the field key used internally (e.g., `listing_price`). The display label is for humans. During the import process, the plugin relies on the field key to identify the correct destination for each value and store the data accurately. Find field keys in JetEngine’s field group settings or in the `id` key in your PHP registration code.
If your CSV column headers match the JetEngine field keys exactly, the import plugin can auto-map them without manual drag-and-drop configuration. On a dataset with 40 fields, this saves significant time.
[Download sample JetEngine CPT CSV]
CSV Formatting Reference – Getting the Values Right
The format of values in each CSV column depends on the field type. Getting this wrong is the most common source of failed imports, and it’s preventable.
| Field Type | Recommanded CSV Format | Example Value |
| Text / Number | Plain value | `John Smith` or `299` |
| Date | PHP strtotime-compatible | `2024-06-15` or `June 15 2024` |
| Time | HH:MM format | `09:30` |
| Checkbox | Comma-separated option values | `option_a,option_b` |
| Select / Radio | The option value, not the display label | `option_key` |
| Media (single image) | Absolute URL | `https://yoursite.com/image.jpg` |
| Gallery (multiple images) | Comma-separated absolute URLs | `https://site.com/img1.jpg,https://site.com/img2.jpg` |
| Repeater | Pipe-separated values | `item1\|item2\|item3` |
| WYSIWYG | HTML or plain text | `Content here` |
| Relationship | Post ID or post title of related post | `245` or `Related Post Title` |
Why pipe-separators for Repeater and not commas?
Because commas are the CSV column delimiter. Using commas within a Repeater field can disrupt the CSV structure, as the importer may interpret them as column separators and map the data incorrectly. The pipe character `|` is not a standard CSV delimiter, which makes it safe for multi-value fields. This is documented behaviour in WP Ultimate CSV Importer Pro.
Why absolute URLs for images?
The plugin downloads the image from the URL during import and adds it to your WordPress Media Library. It needs a publicly accessible URL to fetch from. To access and download images during import, the plugin requires publicly accessible URLs. Local file paths and relative URLs cannot be retrieved externally and therefore cannot be used for media imports.
Why use the field option value for Select fields, not the display label?
In JetEngine, a Select field stores an `option_value` in the database but shows an `option_label` to the user. The import plugin writes to the database, so it needs the stored value. If you provide the display label instead, the field either imports with the wrong value or fails silently.
Step 1. Prepare Your CSV
For Custom Post Type (CPT) Imports
Your CSV needs at minimum
- `post_title` – the title of each post
- `post_status` – typically `publish` or `draft`
- One column per JetEngine meta field, using the field key as the column header
Include any taxonomy terms (categories, tags, custom taxonomies) as additional columns if you need them assigned during import.
For Custom Content Type (CCT) Imports
CCTs don’t use WordPress’s post title or status fields. Your CSV columns should match the fields defined in your CCT structure directly – no `post_title`, no `post_status`.
Step 2. Import JetEngine Custom Field Data into Custom Post Types
This follows the [documented import workflow] for CPTs.
Upload Your File
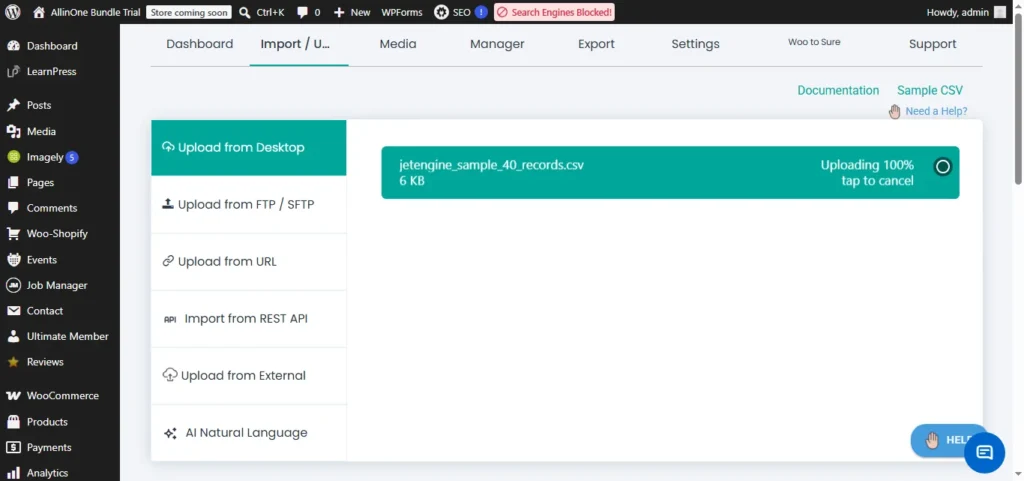
Go to WP Ultimate CSV Importer in your WordPress dashboard and select Import/Update. Upload your CSV. The plugin accepts local file uploads, direct URLs, Google Sheets, FTP, and cloud storage sources. If a client sends you a Google Sheet link, you can import directly from the URL without downloading and re-uploading.
Select the Post Type
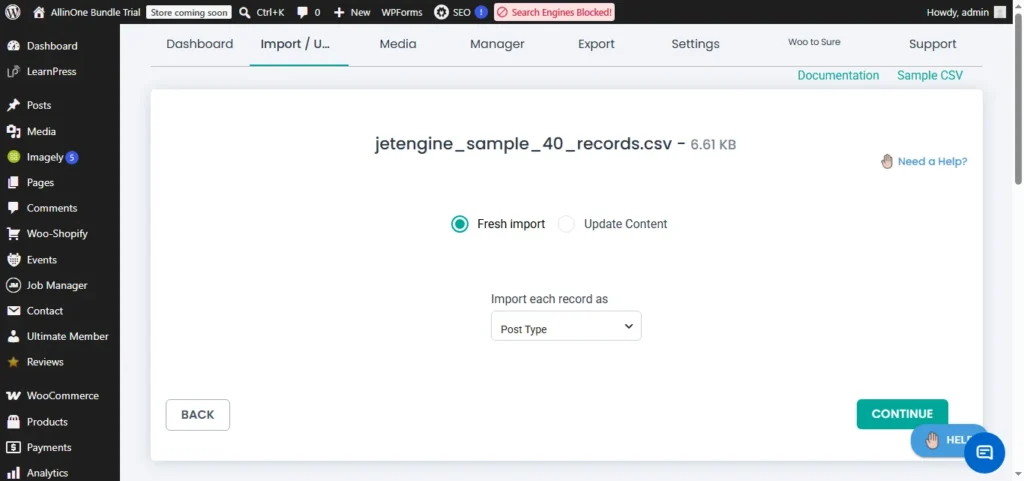
Choose the post type that has your JetEngine field group assigned. Click Continue.
Map Your Fields
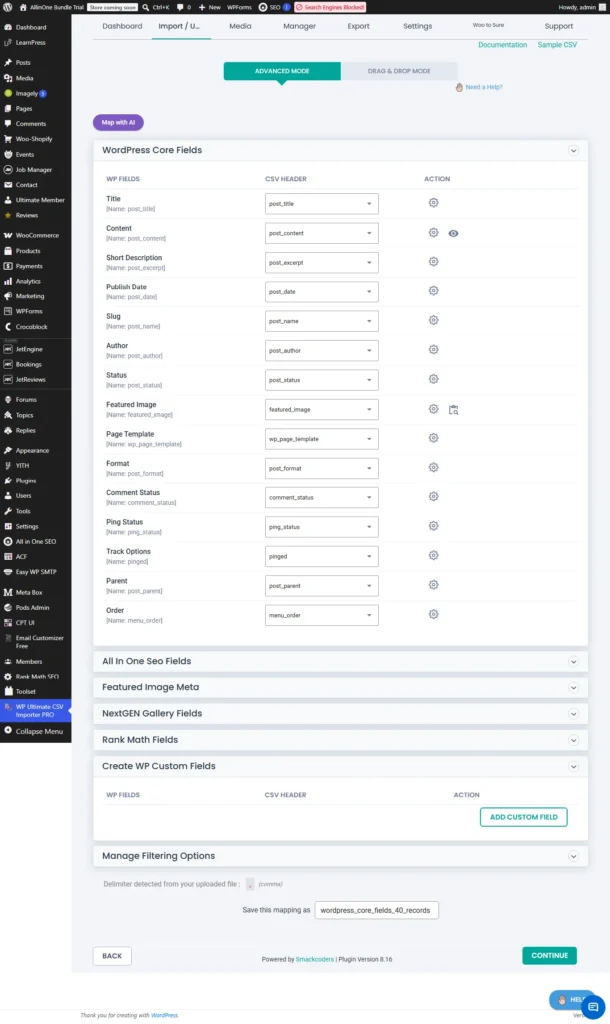
The mapping screen shows your CSV column headers on one side and available WordPress and JetEngine fields on the other. Drag and drop to connect each column to its field. If your CSV column headers match the JetEngine field keys, most fields auto-map.
Check the mapping carefully before proceeding. Pay particular attention to Repeater fields and Relationship fields – these are the most structurally complex and most likely to need manual confirmation.
Save the mapping with a name using the “Save this mapping as” option. On the next import of the same structure, you load the saved mapping and skip the entire mapping step.
Configure Media Handling
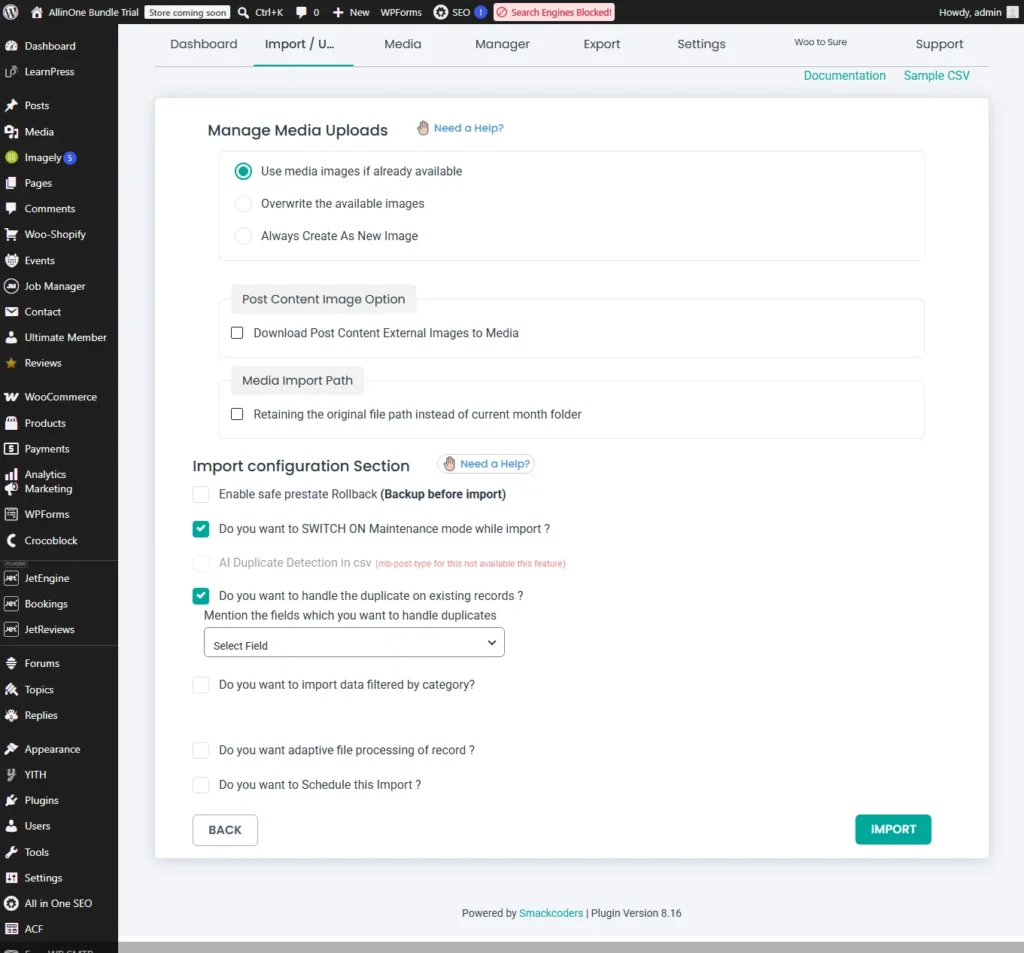
If your import includes image URLs for Media or Gallery fields, set media handling to Download from URL. During the import process, the plugin downloads each image from its source URL, stores it in the WordPress Media Library, and automatically associates it with the corresponding field.
Run the Import
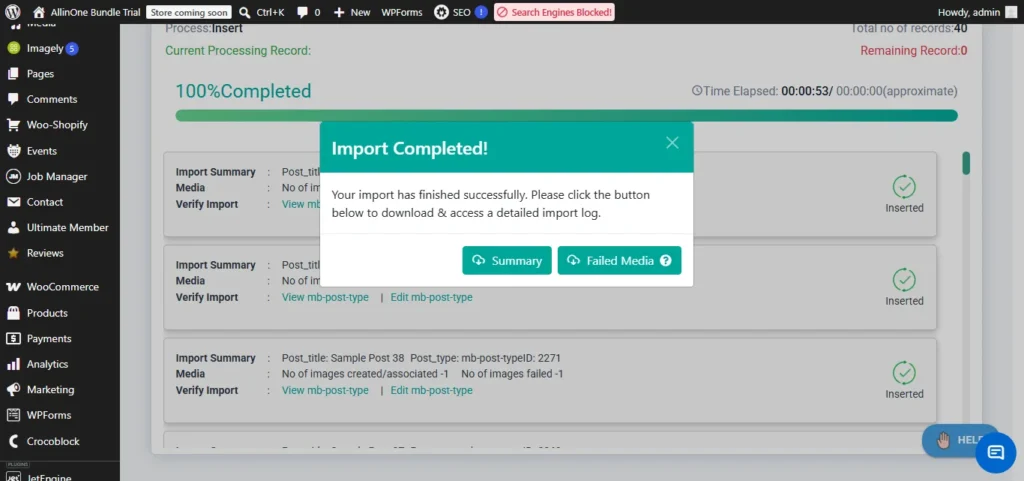
Click Import. The plugin uses iteration-based processing – it works through your records in batches so large files don’t hit PHP memory limits or timeouts. You can watch progress in real time.
Review the Import Log
When the import finishes, check every category in the log – Imported (new records created), Updated (existing records modified), Skipped (no changes), and Failed (errors with details). Failed records show the specific error so you know exactly what to fix and re-run.
Step 3. Import JetEngine Custom Content Types (CCTs)
As documented in the [JetEngine Import guide], CCT imports follow a slightly different path because CCTs are not post types in the WordPress sense.
1. Go to WP Ultimate CSV Importer and upload your CCT data file
2. On the post type selection screen, look for your JetEngine CCT listed in the dropdown alongside standard post types – CCTs appear in the same selector, clearly labelled
3. Select Fresh Import to add new records, or Update Content to modify existing ones
4. Map your CSV columns to the CCT fields in the mapping screen
5. Run the import and review the log
Critical for CCT updates – When modifying existing CCT records, your CSV must include a unique identifier column (a record ID or unique field value) so the importer can match each incoming row to the correct existing record. Without it, every row creates a new record instead of updating the existing one.
[Download sample JetEngine CCT CSV]
Step 4: Verify the Imported Data
Don’t rely on the import log alone. Open actual records after the import.
For CPT imports – open individual posts in the WordPress editor and check that meta field values appear correctly in the JetEngine fields section. For CCT imports: go to JetEngine and view the CCT records directly in the CCT management screen.
Pay particular attention to Repeater fields and Relationship fields. If Repeater values imported as a single concatenated string (all items joined instead of separate entries), the pipe separator was missing or wrong in your CSV. If Relationship fields show no content, the referenced posts don’t exist yet in this WordPress installation – import the referenced post type first, then import the content that points to it.
Updating Existing JetEngine Data Without Creating Duplicates
After your first import, data changes. A real estate platform receives updated property prices. A directory site gets new phone numbers. You need to update specific fields without recreating all the records.
Use Update Content mode. Include a unique identifier column in your CSV (a post ID or a slug that’s unique per record) and map it during setup. The importer matches each incoming CSV row to the existing post by that identifier and updates only the mapped fields. Everything else stays untouched.
The same approach can be used to correct incomplete imports by updating only the affected records instead of reprocessing the entire dataset. If the first run failed on 50 records, fix those rows in your CSV and re-import in Update Content mode. Only the records that failed get touched.
Custom PHP Hooks for Developer-Level Control
For developers who need more control over how data lands, WP Ultimate CSV Importer Pro exposes custom PHP hooks that let you extend the import pipeline.
You can hook into the import process to manipulate data before it’s written to the database, apply conditional logic based on field values (e.g., set a status field based on a price threshold), restructure incoming data to match your JetEngine field format, or apply transformations like currency conversion during import.
This is particularly valuable when the source data structure doesn’t match your JetEngine field setup exactly and you need a transformation layer between them – for example, importing a feed from an external property database that uses different field names and value formats than your JetEngine CPT.
Preserving SEO Metadata During JetEngine Imports
If you’re migrating a JetEngine-powered site between environments or rebuilding it from a data export, SEO metadata should migrate in the same pass as your content.
WP Ultimate CSV Importer Pro supports Yoast SEO, Rank Math, All in One SEO, and SEOPress. Add columns for your SEO meta title, meta description, focus keyword, canonical URL, and Open Graph data, map them during setup, and they import alongside your JetEngine fields in one operation. Your rebuilt site keeps the
search visibility of the original without a separate SEO migration step.
Importing JetEngine Fields on WooCommerce Products
JetEngine meta fields on WooCommerce products work exactly the same way. Select your WooCommerce product post type during import setup and map both standard WooCommerce fields (title, price, SKU, stock, images) and JetEngine fields in the same import pass. This works for all WooCommerce product types: simple, variable, grouped, and external.
Scheduling Recurring JetEngine Imports
For sites where JetEngine data updates regularly – a property listing platform receiving weekly feeds, a job board syncing with an external database – you can schedule imports to run automatically.
During import setup, enable the “Schedule this Import” option. Set the start time, frequency (hourly, daily, weekly, monthly), and time zone. The import runs on schedule without any manual intervention, keeping your JetEngine content current automatically.
This requires WP-Cron to be active on your server. For low-traffic sites, set up an OS-level cron job to trigger WP-Cron reliably. Without a reliable cron trigger, scheduled imports will only run when a visitor happens to load a page fine on a high-traffic site, unreliable on a low-traffic one.
Exporting JetEngine Data
The same plugin handles exports. Go to Export, select your post type or CCT, choose your output format (CSV, XML, or Excel), and apply filters to export exactly what you need. Export filters allow you to narrow the dataset based on criteria such as date range, author, post ID, or taxonomy, making it easier to generate only the records you need.
This is especially useful when migrating JetEngine content to a new WordPress install, sharing data with a third-party system, or creating a backup of specific content types before a major change.
Common Import Errors and How to Fix Them
Fields appear empty after import
The most common cause: column headers in the CSV don’t match JetEngine field keys exactly. Field keys are case-sensitive. Export an existing record with known values to see the exact key format, then update your CSV headers to match.
CCT not visible in the import dropdown
Either the CCT was created recently and the page needs a reload, or the CCT has no fields defined. Verify the CCT has at least one field in JetEngine, then reload the import screen.
Repeater data imports as a single string instead of separate items
The pipe separator is missing or incorrect in your CSV. Your repeater column should contain item1|item2|item3, not comma-separated values.
Gallery images not attaching
Image URLs in the CSV are either not publicly accessible or contain special characters. Test each URL directly in a browser. Use absolute URLs only. If the images are behind authentication or a Cloudflare challenge, they can’t be fetched during import.
Relationship field shows no content
The related post doesn’t exist yet in this WordPress installation. For sites with cross-referencing content, always import the referenced post type first, then import the content that references it.
Import stops partway through a large file
In most cases, this issue is caused by server resource restrictions, such as PHP execution time limits or insufficient memory allocation. WP Ultimate CSV Importer Pro uses iteration-based processing to avoid this, but extremely restrictive hosting environments may need the iteration batch size reduced in plugin settings. Contact Smackcoders support with your error log for specific guidance.
Frequently Asked Questions
1. Do I need to create JetEngine fields before importing?
Yes. The importer fills existing fields. It does not create new JetEngine field groups or field definitions during the import process.
2. Can I import JetEngine CCT data and CPT data in the same file?
No. CCTs and CPTs are separate database structures. Use separate files and separate import passes for each.
3. What happens if I run a Fresh Import a second time on the same data?
Fresh Import creates new records every time. Running it twice on the same data creates duplicates. Use Update Content mode with a unique identifier column if you need to re-run an import on existing content.
4. Can I import Repeater field data from CSV?
Yes. Use pipe-separated values (item1|item2|item3) for Repeater items in a single CSV column.
5. Does the plugin support JetEngine Relations?
Yes. Specify the related post using either its unique ID or post title in the corresponding CSV field to establish the relationship during import.
6. Is there a record limit?
No hard limit. The plugin uses iteration-based processing that handles large datasets tested across thousands of records – without timing out.
7. Can I import multilingual JetEngine content with Polylang or WPML?
Yes. Include the language_code column in your CSV and map it to the Polylang or WPML field during setup. All languages can be in the same import file.
8. What file formats are supported beyond CSV?
XML, Excel (.xlsx), and Google Sheets are also supported. The mapping and field support is identical across all formats.
9. Can I schedule JetEngine imports to run automatically?
Yes. Enable the scheduling option during import setup and configure frequency, start time, and time zone. The import runs without any manual action.
If you manage JetEngine-powered sites at any scale, the difference between a manual entry process and a working CSV import pipeline is the difference between a project that scales and one that doesn’t. WP Ultimate CSV Importer Pro closes that gap.
[Try WP Ultimate CSV Importer Pro free ]
Full documentation – JetEngine Import & Export guide on Smackcoders
How to Import wordpress pages: A step-by-step guide (2026)
7 Jul 2026, 6:02 am
Looking for the easiest way to import WordPress pages? Whether you’re migrating from another website, importing pages from a CSV file, transferring content between WordPress sites, using the REST API, or creating pages programmatically with wp_insert_post(), WordPress provides multiple ways to streamline the process.
In this guide, you’ll learn how to import WordPress pages using the plugin WP Ultimate CSV Importer, the built-in WordPress Importer, the REST API, HTML import methods, and custom PHP functions. We’ll also cover media handling, scheduling, security best practices, and common troubleshooting tips to ensure a smooth migration experience.
Quick Comparison: Best Ways to Import WordPress Pages
| Method | Best For | Difficulty |
| WP Ultimate CSV Importer | Bulk Imports, Migrations, Scheduled Imports | Easy |
| WordPress Importer | WordPress-to-WordPress Migration | Easy |
| REST API | Automated Imports & Headless WordPress | Medium |
| wp_insert_post() | Developers & Custom Integrations | Advanced |
| HTML Import | Static HTML Websites | Medium |
If you’re looking for the fastest and easiest way to import WordPress pages in bulk, using a plugin like WP Ultimate CSV Importer is the recommended option. Developers can use the REST API or wp_insert_post(), while site owners migrating from another WordPress website can use the built-in WordPress Importer.
Why Import Pages Into WordPress?
Importing pages into WordPress can be beneficial for several reasons. First, it saves you time and effort by eliminating the need to recreate pages from scratch. If you are migrating from another content management system (CMS) or a website builder, importing your existing pages allows you to seamlessly transition to WordPress without losing valuable content.
Additionally, importing pages from another website can be useful when you want to merge or consolidate multiple websites into one WordPress installation.
Types of Pages You Can Import
Before we delve into the methods of importing pages into WordPress, it is important to understand the different types of pages you can import. WordPress allows you to import various types of pages, such as static pages, blog pages, and eCommerce product pages. Let’s take a closer look at each of these page types.
Static Pages
Static pages are the cornerstone of any website. These pages contain fixed content and are not influenced by the dynamic nature of blog posts or other types of content. Importing static pages into WordPress is a common requirement, especially when you are migrating from another CMS or website builder.
Blog Pages
If you have a blog hosted on a different platform and want to migrate it to WordPress, you can easily import your blog pages. WordPress offers seamless integration for importing blog posts, preserving the content, images, and even publishing dates.
E-commerce Product Pages
For those running an online store, importing e-commerce product pages is crucial. Whether you are moving from another e-commerce platform or want to consolidate multiple stores, WordPress provides robust solutions for importing and managing product pages efficiently.
Common Scenarios and Methods to Import Pages into WordPress
WordPress offers built-in tools and functionalities to facilitate the importing process. The method you choose will depend on the source of your pages and your specific requirements. Let’s take a look at some of the common scenarios and the corresponding methods to import pages into WordPress.
How to Import a Page from Another Website in WordPress
If you want to import a page from another website into WordPress, you can use the WordPress plugins available for this purpose. One such popular plugin is “WP Ultimate CSV Importer.” Here’s how you can use it to import pages from another website
Preparing for Import
Before diving into the importing process, it is essential to make sure you have everything in order. Here are a few crucial steps to prepare for a successful import.
Step 1. Backup your website
Before importing any pages, it is vital to create a backup of your WordPress website. This precautionary step ensures that even if something goes wrong during the import process, you can easily revert to the previous state of your site without losing any valuable data.
Step 2. Export Pages from the Source
If you are importing pages from a different WordPress installation, head over to the source site and export the relevant pages. You can use our export tool to select specific pages or export the entire content from the source site as an XML or CSV file.
Also, you can install WP Ultimate CSV Importer Pro, which efficiently helps in both import and export processes.
To export pages from your website
- Install and activate WP Ultimate CSV Importer Pro
- Access the extension and navigate to the export option from the top-side menu.
- Select the post type as pages. It shows the number of pages present on your site in the top right corner.
- Check and confirm the number of pages to be exported.
- Click Continue.
- Add file name and choose type. Configure additional filter settings that you need.
- Click on Export.
- You can export your file in CSV/XML/Excel/ZIP format.
Quick Tip: You can also export your files to a Google Sheet. Configure your Google Sheets credentials inside Settings and in the Export Advanced Settings, enable the Google Sheet Export. Your data will be exported to your Google Account’s Sheet.
Step 3. Review the Exported File
Once you have exported the pages, take a moment to review the exported file. Ensure that all the pages are included and that the fields contain data. Carefully examine the content, formatting, and any associated media files to ensure a smooth import.
Importing pages in WordPress
Now that you have prepared adequately, it is time to proceed with the actual import of your WordPress pages. Here is a step-by-step guide on how to import pages seamlessly:
Step 1. Get Started with Plugin Installation
Head over to our website, download the WP Ultimate CSV Importer plugin. Once you have it, follow these steps to install the plugin into your WordPress environment
- Navigate to the “Plugins” section within your WordPress dashboard.
- Click on “Add New” and find the “Upload Plugin” button.
- Select the downloaded zip file and hit “Install Now.”
- Once WP Ultimate CSV Importer is installed, activate it by clicking the “Activate” button.
Step 2. Prepare Your CSV/XML/Excel File
To get started, it’s important to organise your pages data in a structured file format. The WP Ultimate CSV Importer plugin supports different file types like CSV, XML, XLSX, TSV, TXT, ZIP, and Google Sheets. But since CSV and XML are the most commonly used and easiest to work with, we’ll stick to them for our examples here.
Structure it with columns like “Title,” “Content,” “Parent Page,” “Slug,” and other relevant information. Follow the instructions to prepare a CSV.
Note: It will be a lot easier for you to prepare the file if you export the Pages with the plugin. Follow the steps provided above.
- Open your preferred spreadsheet software, whether it’s Microsoft Excel or Google Sheets.
- Organise your data neatly into the appropriate columns.
- Once your data is organised, save the file in CSV format.
If you need a reference, our blog includes sample CSV and XML files to guide you.
Step 3. Accessing the Importer
With your CSV (import) file ready, it’s time to access the WP Ultimate CSV Importer tool.
- Within your WordPress dashboard, you will see “Ultimate CSV Importer” in the left-hand menu.
- Click on it to access the plugin.
Step 4: Importing CSV/XML data into WordPress
Now comes the exciting part: uploading your file and initiating the import process.
- Start by uploading your prepared CSV or XML file using the Importer tool.
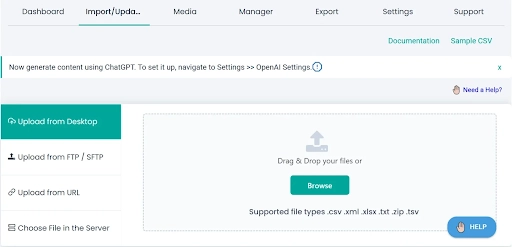
- You have many options for file upload: desktop, FTP/SFTP, google sheet, dropbox, external URL, and server.
” and choose categories from the list to import records of those categories only.
- After uploading, a new window will pop up, prompting you to select the post type. Since we’re dealing with pages, opt for “Pages.” Here, you can also select your import type as Fresh content or Update content.
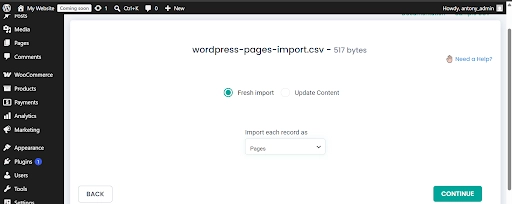
Step 5. Mapping File Headers with WordPress Fields
- You can map the columns using AI mapping by clicking the button provided above.
- Mapping ensures a smooth transition of your CSV or XML data into the corresponding WordPress fields.
- With the post type chosen, the importer will display relevant WordPress fields for that type, in our case, “Page” fields. Map the headers from your CSV/XML file to the appropriate WordPress fields. This step ensures data accuracy within WordPress.
- If file headers and WordPress fields match, the plugin handles the mapping automatically. For any discrepancies, manually select the right field from the dropdown or use the drag-and-drop mode.
- You can customize your data imports with the user-friendly mapping section. With the advanced features, you can view the setting icons corresponding to each field. Clicking on this will lead to four tabs: static, formula, custom, and AI. Learn more about the advanced features here.
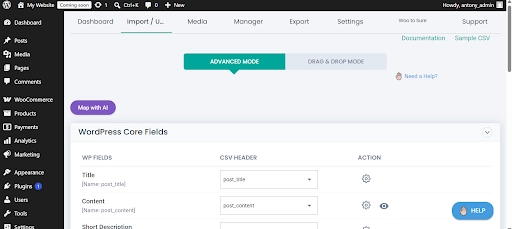
Adding Conditional Filters to Extract & Import Specific Pages
At the end of the mapping page, you will see a section called Advanced Filters, where you can add rules for extracting a certain group of pages to import. For instance, you can add rules like post_status contains publish. This will only import the pages with status ‘publish’ in your file.
Step 6. Handling Media
- Managing media, such as images, is a breeze during the import process with the WP Ultimate CSV Importer.
- Whether you’re importing images in bulk or along with your pages, the plugin offers seamless solutions.
- Download external images to your media. You can decide whether the image (inline image, featured image, or gallery image) imported with your post should be in the Media Library or not in this section.
- Image Handling: WP Ultimate CSV Importer handles efficient media handling on data imports. This is useful for managing media on your import.
- Choose options like use available media images, overwrite existing ones, or always create new images.
- Enable the “Download the post content external images to media” option, and you can download all the media inside your post content into the media library.
- On the media import path, enable “Retaining the original file path instead of the current month folder” to use your media file’s original path instead of creating a new one when importing.
Step 7. Import Configuration Section
- In this section, you can take a safe backup before importing. You can also notify your visitors that the site is in maintenance mode and skip duplicates while importing the data based on title or name.
- Enable “Do you want to import data filtered by category?” Enable category-based filtering to import only records from selected categories. Choose one or more categories from the list, and the importer will process only matching records.
- Configure the “Do you want adaptive file processing of records?” option if you have bulk records to import. Learn more about iteration-based importing here.
- Additionally, you can set up a scheduled import by selecting a specific date, time, timezone, and frequency.
- Once done, click Import to import all your data into the WordPress instance.
- Refer to the WP Ultimate CSV Importer documentation for detailed guidance.
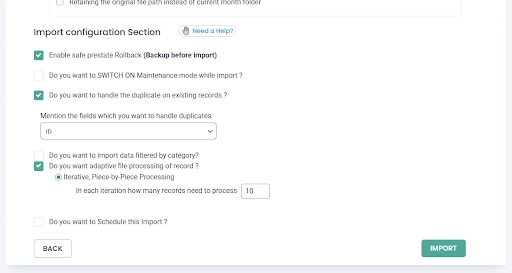
Step 8. Finalizing the import
With all the steps in place, it’s time to finalize the import process and review the results.
- Click “Import” to begin the process. The plugin handles each CSV row or XML record, either creating new WordPress pages or updating existing ones.
- After the import is complete, thoroughly inspect page content, titles, and relationships to ensure they align with your expectations.
- Once you’re satisfied with the results, revel in the success of your newly imported WordPress pages!
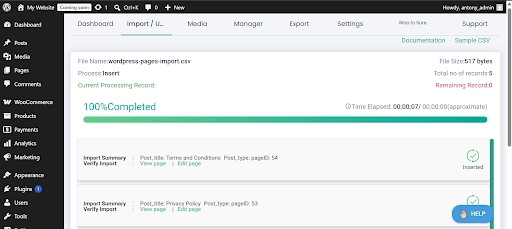
How To Import an Existing Website into WordPress
If you want to import an entire existing website into WordPress, including all its pages, blog posts, and other content, you can use the available WordPress migration plugins or try a popular plugin like “WP Ultimate CSV Importer.”
How to Import an HTML Page in WordPress
Option 1 – Use the “HTML Import 2” Plugin
A free, lightweight plugin for importing static HTML files into WordPress pages or posts (listed on WordPress.org under the slug import-html-pages).
Plugin – HTML Import 2
Note: This plugin hasn’t seen a major feature update in years check its “Tested up to” WordPress version before installing it on a current site. For an actively maintained alternative, WP All Import is regularly updated and tested up to WordPress 7.0.
Features
- Converts local HTML files into WordPress pages or posts.
- Maps folders and file names to page slugs.
- Requires minimal setup.
- Supports static HTML migrations.
Steps
- Install & activate the plugin
- Upload your .html files to /wp-content/uploads/import-html-pages/
- Go to Tools > Import HTML Pages
- Select files and import them as Pages
- Clean/convert content into Gutenberg blocks manually (next step)
Option 2 – Manual HTML-to-Gutenberg Block Conversion
Once HTML is imported, you often get a single Custom HTML block or raw content in the Classic Editor.
You can manually convert this HTML into native Gutenberg blocks in two ways
Method A – Use Gutenberg’s “Convert to Blocks” Tool
If content is placed inside a Classic block, click “Convert to Blocks.” Gutenberg will try to auto-convert paragraphs, headings, images, etc.
Method B – Use HTML Comment-Based Block Syntax
You can manually structure the HTML as Gutenberg blocks using HTML comments. Use exact double-hyphen comment markers and straight quotes curly quotes or em/en-dashes from a word processor will break block parsing. Example
<!– wp:heading {“level”:2} –>
<h2>Welcome to the Imported Page</h2>
<!– /wp:heading –>
<!– wp:paragraph –>
<p>This content was imported from a static HTML file. </p>
<!– /wp:paragraph –>
<!– wp:image {“id”:123,”sizeSlug”:”large”} –>
<figure class=”wp-block-image size-large”><img src=”image.jpg” alt=”Example”/></figure>
<!– /wp:image –>
Add this to the content field when importing via REST API or directly into the post editor (in code mode). WordPress will render these as real blocks.
Bonus Tools to Help with Conversion
| Tool | Purpose |
| Blockify HTML to Blocks | Converts HTML into block syntax |
| Postman / REST Client | Test REST imports |
| VS Code + Regex Replace | Bulk conversion |
| Custom Script (Python/Node) | Automated HTML conversion |
What to Avoid
Avoid relying on raw HTML inside Custom HTML blocks, as it breaks block editing, disables visual editor functionality, and makes future edits harder.
How to Import Pages from A WordPress Website to Another with Built-in WordPress Importer
If you want to import pages from one WordPress website to another, you can use the WordPress export and import feature. Here’s how
- Log in to the WordPress admin dashboard of the website from which you want to export pages.
- Choose the “Pages” option and select the specific pages you want to export.
- Click on the “Download Export File” button to save the exported pages to your local computer.
- Log in to the WordPress admin dashboard of the website you want to import the pages into.
- Go to the “Tools” menu and select “Import.”
- You will be prompted to install the WordPress importer plugin if you haven’t already.
- Activate the plugin and choose the “WordPress” option for import.
- Select the file you downloaded in step 4 for import.
- Complete the import process by following the on-screen instructions.
You can also use other plugins, or the WP Ultimate CSV Importer plugin, for importing pages from one WordPress website to another.
To import WordPress pages using the REST API, you can use the WordPress REST API POST /wp/v2/pages endpoint. This is useful for programmatically creating or updating pages from external systems, content migrations, or headless WordPress setups.
Step-by-Step: Import WordPress Pages via REST API
1. Enable REST API Access
WordPress comes with the REST API enabled by default. You need an authenticated user with permissions (usually editor or administrator).
2. Authentication Setup
You must authenticate your requests. Common methods
A. Application Passwords (Recommended)
1. Go to Users > Profile > Application Passwords
2. Generate one, e.g., “Page Import Tool”
3. Use Basic Auth with: Authorization: Basic base64(username:application_password)
B. JWT Auth (Advanced)
Install an actively maintained option like JWT Auth – WordPress JSON Web Token Authentication (the older “JWT Authentication for WP REST “API” plugin hasn’t kept pace with recent WordPress releases)
Use Bearer tokens for more secure, scalable cross-domain authentication
3. POST Data to Create a Page
POST https://yourdomain.com/wp-json/wp/v2/pages
Example JSON Payload
{
“title”: “Imported Page Title”,
“content”: “<h2>This is imported content</h2><p>From external source.</p>”,
“status”: “publish”,
“slug”: “imported-page”,
“author”: 1
}
Headers
Content-Type: application/json
Authorization: Basic base64encoded(username:app_password)
4. Example with curl
curl -X POST https://yourdomain.com/wp-json/wp/v2/pages \
-u “yourusername:yourapplicationpassword” \
-H “Content-Type: application/json” \
-d ‘{
“title”: “Imported via API”,
“content”: “<p>This is a test import.</p>”,
“status”: “publish”
}’
5. Batch Importing Multiple Pages
If you have an array of pages, loop through them in a script (e.g., Python, Node.js), POST each page to /wp/v2/pages, and handle throttling/rate limits with delays or retries.
6. Optional Fields You Can Use
- excerpt: Short description of
- parent: Parent page ID
- template: Page template (e.g., template-about.php)
- meta: Custom fields (if enabled via register_meta)
- featured_media: ID of an uploaded media item
Notes & Troubleshooting
- 401 Unauthorized – check the application password or token
- 403 Forbidden – user lacks permissions
- 404 Not Found – REST API may be blocked (e.g., via a security plugin)
- HTML not rendering – ensure content is wrapped in allowed HTML tags
Programmatic Import Option: Creating Pages with wp_insert_post()
If you need to create WordPress pages programmatically, such as during theme or plugin setup or when migrating content, you can use the built-in wp_insert_post() function.
Here’s a simple example
$page = array(
‘post_title’ => ‘Sample Page’,
‘post_content’ => ‘Content here’,
‘post_status’ => ‘publish’,
‘post_type’ => ‘page’,
);
$post_id = wp_insert_post($page);
Adding Security Measures
When handling user input or external data, you should always sanitize the input and verify intent with nonces if the action is triggered via form submission.
Example with Security Best Practices
if (isset($_POST[‘my_plugin_nonce’]) && wp_verify_nonce($_POST[‘my_plugin_nonce’], ‘my_plugin_create_page’) ) {
// Sanitize user input
$title = sanitize_text_field($_POST[‘page_title’]);
$content = wp_kses_post($_POST[‘page_content’]);
// Prepare page data
$page = array(
‘post_title’ => $title,
‘post_content’ => $content,
‘post_status’ => ‘publish’,
‘post_type’ => ‘page’,
);
// Insert the page
$post_id = wp_insert_post($page);
if (is_wp_error($post_id)) {
echo ‘Failed to create page: ‘ . $post_id->get_error_message();
} else {
echo ‘Page created successfully with ID: ‘ . $post_id;
}
}
HTML Form Example (to pair with the above PHP):
<form method=”post”>
<?php wp_nonce_field(‘my_plugin_create_page’, ‘my_plugin_nonce’); ?>
<input type=”text” name=”page_title” placeholder=”Page Title” required>
<textarea name=”page_content” placeholder=”Page Content” required></textarea>
<input type=”submit” value=”Create Page”>
</form>
Notes:
Use sanitize_text_field() for simple text fields like titles.
Use wp_kses_post() for content that may include HTML but should be restricted to safe tags.
Always use wp_verify_nonce() to protect against CSRF (Cross-Site Request Forgery) attacks.
Consider checking if the page already exists using get_page_by_title() to avoid duplicates.
Conclusion
Importing pages into WordPress is a straightforward process that can be accomplished in various ways depending on your specific requirements. Whether you need to import a single page, import pages from another website, or import an entire existing website, WordPress provides the necessary tools and plugins to make the import process seamless and efficient.
Ready to import your pages into WordPress? By following the step-by-step instructions provided in this article, you can easily import pages into your WordPress website and ensure a smooth transition of your content. Make your website migration a breeze with WP Ultimate CSV Importer today!
Ready to Import Your Pages the Easy Way?
Manually creating pages one by one can be time-consuming, especially when migrating large websites. WP Ultimate CSV Importer Pro simplifies the entire process by allowing you to import, export, update, and schedule WordPress page imports from CSV, XML, Excel, ZIP, and other supported file formats.
With advanced field mapping, media handling, duplicate detection, scheduled imports, and bulk migration support, you can move hundreds or even thousands of pages into WordPress in minutes without writing a single line of code.
Start importing WordPress pages the smarter way with WP Ultimate CSV Importer Pro and streamline your website migration today.
[Get WP Ultimate CSV Importer Pro] →
Frequently Asked Questions
1. What’s the difference between importing posts and importing pages in WordPress?
Posts and pages use the same import methods (CSV, XML, or REST API), but they’re different content types. Posts are time-based, organized by categories and tags, and appear in your blog feed and RSS. Pages are standalone and hierarchical they can have parent/child relationships and are meant for static content like About, Contact, or Services. The key field that controls this during import is post_type, set to either “post” or “page.”
2. Will importing pages into WordPress create duplicate content or hurt my SEO?
Importing pages itself doesn’t hurt SEO, but how you handle URLs afterward can. If you’re importing pages that already exist live elsewhere, for example, consolidating two sites, search engines may flag the imported version as duplicate content unless you set a canonical tag pointing to the preferred version or 301-redirect the old URLs. To avoid this, keep slugs consistent with the source where possible, set up redirects for any changed URLs, and don’t import identical content onto multiple live sites without rewriting it. WP Ultimate CSV Importer Pro lets you map and verify slugs before the import runs, which catches URL conflicts early.
3. What WordPress versions support wp_insert_post() for importing pages programmatically?
wp_insert_post() has been a core WordPress function since version 1.0, with full support for the page post_type added in WordPress 1.5. It remains fully supported through WordPress 7.0 and works seamlessly with both the block editor and the newer Site Editor.
4. How do I handle large page imports without errors?
When importing many pages or heavy content, batch process by splitting imports into chunks (e.g., 100 records per request). You can also use WP-CLI to run imports via the command line, avoiding web server timeouts. To increase server limits:
max_execution_time = 300
memory_limit = 512M
upload_max_filesize = 100M
You can also log progress to a file to resume on failure. Tip: Combine with set_time_limit(0); in PHP (with caution) for long scripts.
5. How do I secure page imports?
Always sanitize and validate input:
sanitize_text_field() for titles
wp_kses_post() for post content
Use nonces to prevent CSRF in forms. Only allow admin users to run imports. Escape output with esc_html() or esc_attr() when displaying imported data. Use capability checks:
if ( ! current_user_can( ‘manage_options’ ) ) {
wp_die( ‘Unauthorized’ );
}
6. What if my CSV has encoding issues (e.g., special characters) when importing pages to WordPress?
First convert the CSV to UTF-8 without BOM before importing. You can use tools like Notepad++ (Encoding → Convert to UTF-8) or LibreOffice (Save As → UTF-8). In PHP, run:
$content = mb_convert_encoding($content, ‘UTF-8’, ‘auto’);
If using fgetcsv(), set the locale properly:
setlocale(LC_ALL, ‘en_US.UTF-8’);
7. Can I automate page imports without a plugin?
Yes. You can use custom PHP scripts or WP-CLI commands in a cron job or deployment pipeline. Example:
wp myplugin import_pages
Or trigger imports via REST API or webhook, with proper authentication and nonce validation.
8. How do I debug page import errors?
Use WP_DEBUG and WP_DEBUG_LOG in wp-config.php:
define(‘WP_DEBUG’, true);
define(‘WP_DEBUG_LOG’, true);
Log errors with:
error_log( ‘Error: ‘ . print_r( $error, true ) );
Check for invalid post data (e.g., missing post_title), permissions issues, or wp_insert_post() returning a WP_Error. Use var_dump(), die(), or Xdebug for deeper inspection during development.
9. Can I import WooCommerce product pages without a plugin?
Yes, but it’s more complex. WooCommerce products are a custom post type (product) with custom fields and taxonomies. Minimum example:
$product = array(
‘post_title’ => ‘Sample Product’,
‘post_content’ => ‘Product description’,
‘post_status’ => ‘publish’,
‘post_type’ => ‘product’,
);
$product_id = wp_insert_post($product);
// Set product meta
update_post_meta($product_id, ‘_price’, 29.99);
update_post_meta($product_id, ‘_regular_price’, 29.99);
You’ll also need to handle product type (simple, variable), stock, SKU, and taxonomies (product_cat, product_tag). Use WooCommerce functions like wc_get_product() or the WC_Product classes when available.
10. How do I import pages with translations?
To support multilingual content, use plugins like WPML, Polylang, or TranslatePress. WP Ultimate CSV Importer supports translated page imports for all three.
WordPress User Role Management: The Complete Guide with Advanced User Role Manager(2026)
7 Jul 2026, 4:45 am
WordPress user role management is the process of controlling what each user on your site can see, do, and publish. It determines whether someone can install plugins, publish posts, manage orders, or only read content. Every WordPress site has a built-in role system, but as teams grow, those defaults stop being enough.
This guide covers everything you need to know about WordPress user roles and capabilities, how to create and manage custom roles using the free Advanced User Role Manager plugin by Smackcoders, and how to bulk import and export WordPress users with their roles using WP Ultimate CSV Importer Pro all in one place, updated for 2026.
What Are WordPress User Roles and Capabilities?
Before managing roles, it helps to understand what you are actually managing.
A role is like a job title. It is a label assigned to a user that bundles a specific set of permissions together. A capability is the actual permission for the specific task a user is allowed to perform.
Think of it this way – “Editor” is the role. “edit_others_posts” and “publish_posts” are the capabilities that come with it.
WordPress ships with more than 60 built-in capabilities, covering actions like
- edit_posts – create and edit your own posts
- publish_posts – make posts live on the site
- manage_options – access and change site settings
- activate_plugins – install and activate plugins
- manage_woocommerce – access the WooCommerce dashboard
- upload_files – add media to the library
Understanding this distinction matters for security. When you assign a role, you are handing over every capability bundled inside it. That is why knowing exactly what each role unlocks is the first step toward tighter access control.
The 6 Default WordPress User Roles Explained
WordPress provides six built-in user roles. Here is what each one can do and who it is best suited for.
| Role | What They Can Do | Best For |
| Super Admin | Full control over all sites in a network, including managing network settings, themes, and plugins | WordPress Multisite network owners |
| Administrator | Complete control over a single site – install plugins, manage users, change settings, publish any content | Site owners and lead developers |
| Editor | Create, edit, publish, and delete any post or page, including content written by others | Content managers and managing editors |
| Author | Write, edit, and publish their own posts only. Can upload media | Freelance writers, regular contributors |
| Contributor | Can create and edit their own posts but require approval before publishing. An Editor or Administrator must approve and publish | Guest writers, new contributors |
| Subscriber | Can only log in, read content, and manage their own profile | Membership site readers, newsletter subscribers |
What About Plugin-Added Roles?
Several popular plugins add their own roles to WordPress automatically, and these can silently expand a user’s access if you are not paying attention.
- WooCommerce adds Shop Manager (full store control) and Customer (limited to account and order history)
- LearnDash adds Instructor and Student roles
- bbPress adds Moderator, Participant, and Spectator roles
These roles do not always appear in your default Users screen in a clearly labelled way. Review them carefully when auditing access on your site, because a user holding a plugin-added role may have more permissions than you expect.
Why Default WordPress User Roles Are Not Enough in 2026
WordPress’s default roles were designed for simplicity. They cover the basics well but modern WordPress sites are far more complex than a basic blog.
The Principle of Least Privilege
The security industry follows a simple rule: every account should hold the minimum permissions it needs to do its job, and nothing more. Extra permissions mean extra risk. A compromised administrator account can wipe an entire site, delete content, install malicious plugins, and lock out the real owner in minutes. A tightly scoped custom role limits how much damage a compromised account can do.
Default Roles Leave Real Gaps
Consider these common scenarios where default roles fail:
- An agency onboards a freelance SEO analyst who needs to edit post metadata but should not publish or delete content
- A WooCommerce store needs a support agent who can view orders but cannot issue refunds or change pricing
- A membership platform needs instructors who can manage their own course content but not access student payment data
- An enterprise site needs a contractor with temporary access that automatically ends in two weeks
None of these scenarios fit cleanly into WordPress’s six defaults. That is where a dedicated WordPress user role management plugin becomes essential.
What Is Advanced User Role Manager?
Advanced User Role Manager is a free, open-source WordPress plugin built by Smackcoders. It extends WordPress’s native role system with the advanced controls that real teams and growing sites actually need.
Plugin requirements:
- WordPress 6.8 or higher
- PHP 7.0 or higher
- Compatible with WooCommerce
- Compatible with WordPress Multisite networks
You can install it directly from the WordPress.org plugin directory. From your WordPress dashboard, search for “Advanced User Role Manager,” install the plugin, and activate it to get started. No configuration files to edit, no code required.
Core Features of Advanced User Role Manager
Custom Role Creation, Cloning, and Editing
Build new roles from scratch or clone an existing role as a starting point. Name them whatever fits your workflow – “SEO Analyst,” “Campaign Manager,” “Guest Blogger,” or “Support Agent.” Once created, you can edit capabilities at any time without touching code.
Granular Capability Control
WordPress has more than 60 built-in capabilities. Advanced User Role Manager lets you toggle each one individually with a checkbox. Need a contributor who can upload images but cannot publish? A shop editor who can manage products but cannot view payment details? You can configure it precisely and quickly.
Multi-Role Support
Real-world users rarely fit into a single category. A team member might need to function as both an Author and a Shop Manager simultaneously. Advanced User Role Manager lets you assign multiple roles to a single user, and WordPress automatically merges the capabilities from both roles.
Temporary Roles with Auto-Expiration
This feature is especially useful for agencies and sites that work with freelancers or contractors. Assign a role to any user, set an expiration date, and the plugin automatically removes that role when the date arrives. No cron job setup, no calendar reminders, no manual cleanup required.
OAuth2 Login Integration
Let users log into your WordPress site through Google, Microsoft, or any OAuth2 provider. The plugin maps each external identity to the correct WordPress role automatically. The setup is guided within the plugin’s admin screen, no manual configuration of files is needed.
Complete Audit Log
Every role change, capability update, and user assignment is recorded with the acting user’s name and a timestamp. If access is misused or something breaks after a permission change, you can trace exactly who changed what and when. This is particularly valuable for compliance reviews and post-incident investigations.
Role-Based User Filtering
Filter your entire user list by role with one click. Bulk-edit all contributors at once, message every shop manager, or quickly identify users whose temporary access is approaching its expiry date. This makes user management far more efficient on large sites.
How to Get Started with Advanced User Role Manager
Step 1. Install and Activate
Go to your WordPress dashboard, navigate to Plugins > Add New, search for “Advanced User Role Manager,” click Install Now, and then Activate.
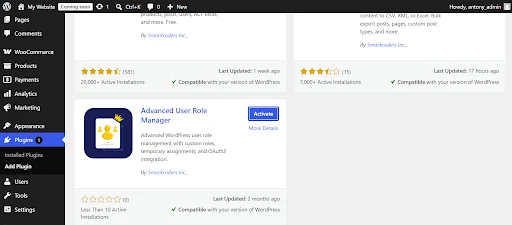
Step 2. Plan Your Role Structure First
Before creating any roles, write down every job function on your site and the exact capabilities each one needs. This planning step saves significant time. Skip it, and you will spend days editing roles repeatedly.
Step 3. Create or Clone a Role
Open the plugin’s admin screen. Either create a new role from scratch or clone the existing role that is closest to what you need, rename it, and adjust the capabilities by toggling the relevant checkboxes.
Step 4. Assign, Set Expiry, and Monitor
Assign roles to your users, set expiration dates for anyone with temporary access, and review the audit log regularly to catch anything unexpected. If you run a Multisite network, repeat this process at the network level so every subsite inherits the same baseline permissions.
Who Should Use Advanced User Role Manager?
Advanced User Role Manager is the right choice for any WordPress site where the default roles create gaps, create risk, or create manual work. That includes
- Membership sites that sell tiered access and need fine-grained control over what each membership level can view or do
- Multi-author publications where editors, staff writers, and guest contributors each need distinct permissions
- WooCommerce stores with support representatives, vendors, and warehouse staff who each need access to specific parts of the backend
- Agencies that onboard and offboard freelancers regularly and need temporary role assignments with automatic expiry
- Educational platforms where instructors, teaching assistants, and students each require completely different capability sets
- Enterprise WordPress sites where compliance, audits, and incident response require a full and reliable access trail
How to Bulk Import and Export WordPress Users with Roles
Managing WordPress users one at a time works for small teams. When you are onboarding hundreds of members, migrating users from another platform, or reassigning roles across an entire site, you need bulk import and export.
WP Ultimate CSV Importer Pro handles this for WordPress sites. Here is how both processes work.
How to Bulk Import WordPress Users with Roles
Step 1. Prepare your CSV file
Create a CSV or Excel file with the required user fields. Mandatory columns include user_login, user_email, user_pass, user_nicename, first_name, last_name, and role. To assign multiple roles to a single user, add a multi_user_role column and separate multiple roles with a pipe character, for example, editor|subscriber.
Step 2. Upload the file
Go to WP Ultimate CSV Importer > Import/Update. Upload your file from your desktop, FTP/SFTP, an external URL, or a server file location.
Step 3. Select “Users” as the post type
Choose “Users” from the post type dropdown and select Fresh Import for new records. If you are updating existing users, select Update Content instead.
Step 4. Map the fields
On the mapping screen, match your CSV column headers to the corresponding WordPress user fields. The plugin auto-matches fields where possible. Map the multi_user_role field under the Custom Fields section if you are assigning multiple roles.
Step 5. Configure and run the import
Set your duplicate handling preference, enable the Rollback option if you want a database backup before the import runs, and click Import. Monitor real-time progress in the import log. Once complete, go to Users > All Users to verify the imported records and their assigned roles.
How to Bulk Export WordPress Users with Roles
Step 1. Go to the Export section
Navigate to WP Ultimate CSV Importer > Export and select Users from the list of available modules.
Step 2. Configure your export
Set your file name and choose your output format: CSV, Excel (XLS/XLSX), XML, JSON, or TSV. For large user databases, use the Split the Record option to break the export into multiple files delivered as a single ZIP.
Step 3. Apply filters if needed
Filter your export by user role (for example, export only Shop Managers or Subscribers), by registration date range, or by users who have purchased a specific WooCommerce product. Click Preview to confirm the filtered list before exporting.
Step 4. Export and download
Click “Export” to generate the file, then click Download to save it locally. Open the file to verify that all user data, including roles, exported correctly.
This workflow is practical for site migrations, bulk role reassignment, creating filtered user reports, and onboarding large groups of members at once.
For a more detailed walkthrough on importing and exporting WordPress users, including advanced field mapping, duplicate handling, and export options, refer to the official WP Ultimate CSV Importer User Import & Export documentation.
Best Practices for WordPress User Role Management in 2026
Apply the principle of least privilege. Every account should have the minimum permissions needed for its job function and nothing beyond that.
Keep administrator accounts to a maximum of one or two. Never share admin credentials between team members. Each person should have their own account with the appropriate role.
Audit your user list every quarter. Remove inactive accounts, downgrade users whose responsibilities have changed, and check for accounts with higher permissions than their current role requires.
Test all role changes on a staging site first. A capability change that seems minor can break a workflow or lock someone out unexpectedly. Test before pushing changes live.
Review plugin-added roles carefully. WooCommerce, LearnDash, bbPress, and other plugins add their own roles that can quietly give users more access than you intended. Audit these regularly.
Document every custom role you create. Write down the role name, the capabilities it holds, and which team members use it. This makes site handoffs, audits, and troubleshooting far easier.
Enable two-factor authentication for all admin-level accounts. Role hygiene alone is not enough if admin credentials can be compromised. 2FA adds a critical second layer of protection.
Use temporary roles with expiration dates for contractors and freelancers. Set the access to expire the day the project ends. Automation removes the human error of forgetting to revoke access manually.
Frequently Asked Questions
1. What are the 6 default WordPress user roles?
WordPress includes six default user roles: Super Admin (Multisite only), Administrator, Editor, Author, Contributor, and Subscriber. Each role holds a different set of capabilities that controls what a user can do on the site.
2.What is the difference between Author and Contributor in WordPress?
Both Author and Contributor can write their own posts, but the key difference is publishing access. An Author can publish their own posts directly. A Contributor can only submit posts for review – an Editor or Administrator must approve and publish the content.
3.How do I create a custom user role in WordPress?
You can create a custom user role using the Advanced User Role Manager plugin by Smackcoders. Install and activate the plugin, open its admin screen, create a new role or clone an existing one, name it, and toggle the specific capabilities it should hold. No code required.
4.Can I assign multiple roles to one WordPress user?
Yes. Advanced User Role Manager supports multi-role assignment out of the box. You can assign more than one role to a single user, and WordPress merges the capabilities from all assigned roles automatically.
5.How do I bulk import users with roles into WordPress?
Use WP Ultimate CSV Importer Pro. Prepare a CSV file with the required user fields, including user_login, user_email, role, and optionally multi_user_role for multiple roles. Upload the file in the plugin’s Import/Update section, select Users as the post type, map the fields, and run the import.
6.How do I export WordPress users with their roles to CSV?
Go to WP Ultimate CSV Importer > Export, select Users, choose CSV as your file format, apply any role-based or date-based filters if needed, and click Export. The plugin generates a downloadable file containing all user data, including assigned roles.
7.What happens when a temporary role expires in Advanced User Role Manager?
The plugin automatically removes the temporary role from the user on the expiration date you set. No manual action or cron job setup is required. The access is revoked at the scheduled time.
8. Does Advanced User Role Manager work with WooCommerce?
Yes. The plugin is compatible with WooCommerce and recognizes WooCommerce roles like Shop Manager and Customer. You can edit the capabilities of WooCommerce roles the same way you manage any other WordPress role.
9. Is Advanced User Role Manager free?
Yes. Advanced User Role Manager is a free, open-source plugin available on the WordPress.org plugin directory. It is built and maintained by Smackcoders.
10.How do I restrict content based on WordPress user roles?
Content restriction based on user roles requires either a dedicated membership plugin or custom capability checks in your theme or plugin code. Advanced User Role Manager controls what users can do in the WordPress backend. For frontend content restrictions such as hiding pages or posts from certain roles, pair it with a membership or content protection plugin.
Take Full Control of Your WordPress Users
WordPress gives you roles. Advanced User Role Manager gives you real control over those roles. And WP Ultimate CSV Importer Pro gives you the ability to manage users at scale, importing, exporting, and updating hundreds of accounts in minutes instead of manually handling each one.
Whether you are tightening security on an existing site, onboarding a large team, preparing for a compliance review, or migrating a user database from another platform, these two tools from Smackcoders cover the entire workflow.
Start by mapping out the role structure your site actually needs, then build it with the right tools.
Download Advanced User Role Manager for free
Try WP Ultimate CSV Importer Pro for bulk user import and export
How to Sync Inventory Between WooCommerce and Shopify
6 Jul 2026, 11:59 am
Running WooCommerce and Shopify at the same time means managing two separate inventory systems that don’t talk to each other by default. A sale on Shopify doesn’t update stock on WooCommerce, and vice versa. That gap leads to overselling, cancelled orders, and manual update work that only gets worse as your store grows.
WooCommerce Shopify inventory sync solves this through a webhook-based connection that links both platforms via their APIs, so any stock change reflects across both stores the moment it happens. Getting it right depends on using the correct authentication for your Shopify account type, keeping SKUs consistent across both catalogs, and choosing a sync setup that actually matches how your business runs.
This guide covers everything you need for a reliable WooCommerce Shopify inventory sync setup – authentication, plugin configuration, sync direction, variable products, real-time webhooks, multi-store management, SEO migration, and troubleshooting – so both stores always show accurate stock, automatically.
Understanding Inventory Synchronization Between WooCommerce and Shopify
Inventory synchronization means keeping stock levels automatically updated between WooCommerce and Shopify so both stores always show the correct number of items available. When a customer buys something on one platform, stock should drop on the other platform too, with no manual work needed.
WooCommerce manages stock inside your WordPress database. You get full control: allow backorders, send low-stock alerts, and set custom rules per product. Shopify uses a central inventory system that tracks stock across multiple locations, which becomes especially useful as your business scales.
Types of Inventory Sync
One-way sync – Data flows in a single direction, such as WooCommerce to Shopify. Useful for migrations where one platform is primary.
Bidirectional sync – Changes in either store update the other automatically. Ideal for stores actively managing products on both platforms in parallel.
For non-technical users, think of it like syncing your phone contacts with your computer. Changes on one device appear on the other without manual input.
H2: Why Inventory Synchronization Is Important for Multi-Store Sellers
For sellers managing multiple stores, inventory sync is more than a convenience it’s a business necessity.
Prevent overselling – Accurate stock visibility ensures you don’t sell items you don’t have, which directly reduces cancellations and refund requests in multi-channel setups.
Accurate stock visibility – Real-time updates give you a single source of truth, helping you make informed decisions on restocking or promotions.
Better customer trust – Customers expect reliable availability. Sync eliminates “out of stock after purchase” surprises, boosting satisfaction and repeat business.
Reduced manual work – Automation frees up time for growth activities instead of spreadsheet updates.
For example, a clothing retailer selling on both platforms might run a flash sale on WooCommerce. Without sync, Shopify would still show outdated stock, leading to unfulfilled orders and unhappy customers.
WooCommerce vs Shopify Inventory Handling
| Feature | WooCommerce | Shopify |
| SKU Handling | Allows custom SKUs for every product and variation; flexible structure | Requires a unique SKU for each product and variant; strict SKU management |
| Product Variations | Supports unlimited attributes like size, color, material | Supports up to 100 variants per product |
| Stock Management Rules | Supports backorders, hides out-of-stock items, low-stock thresholds | Uses location-based inventory tracking with automatic stock adjustments |
| Inventory Tracking | Managed at product/variation level in WordPress dashboard | Managed per product and per location in Shopify admin |
| Stock Notifications | Email alerts for low stock (requires configuration) | Built-in low stock alerts and inventory reports |
| Order-Based Stock Deduction | Reduces based on order status settings | Reduces immediately after order placement |
| Multi-Location Support | Requires extensions for advanced multi-location support | Built-in multi-location inventory tracking |
WooCommerce offers more customization for developers, while Shopify prioritizes simplicity for business owners. A sync plugin bridges these gaps by mapping data appropriately between the two systems.
Pre-Sync Requirements
Before setting up sync, make sure both stores are prepared. This minimizes errors during setup.
WooCommerce Authentication
Open WooCommerce → Settings → Advanced → REST API. Create a new API key with Read and Write permissions.
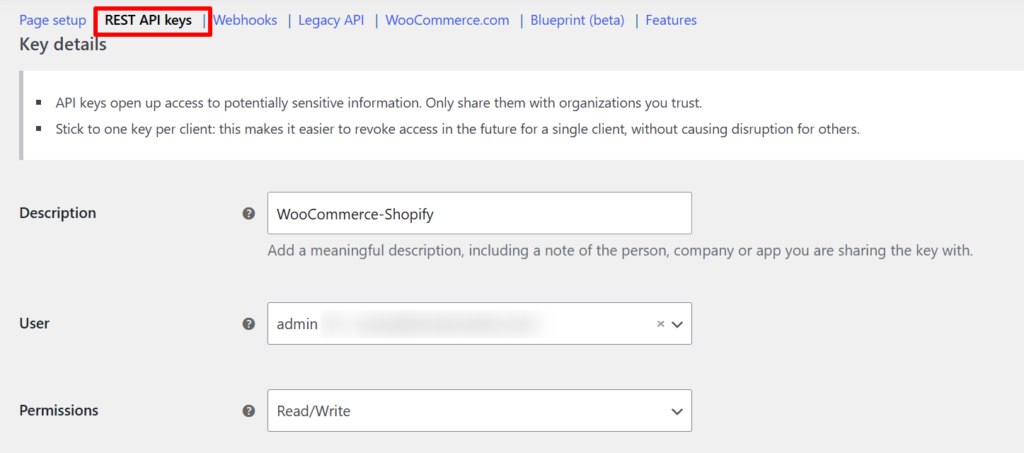
then copy the Consumer Key and Consumer Secret for use in the plugin. Full field definitions are available in the WooCommerce REST API documentation.
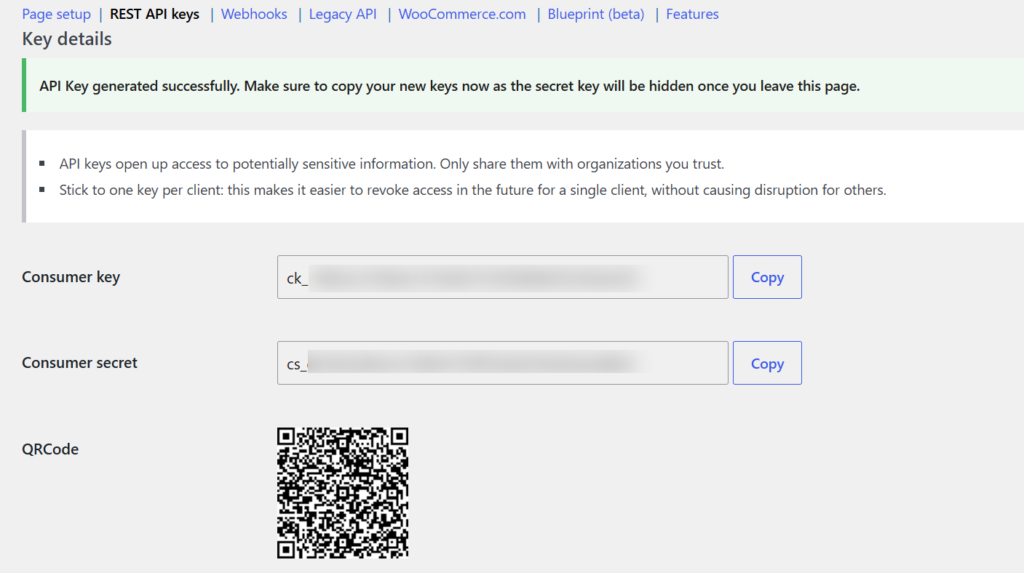
Shopify Authentication
This depends on when your Shopify account was created, and Shopify has moved to an OAuth-based authorization flow for generating access tokens, so the process now requires merchant approval rather than a simple static token copy.
- If your Shopify account was created before January 1, 2026, authenticate using an Admin API access token: log in to Shopify Admin → click your profile icon → Dev Dashboard → Create App → enter an App Name and App URL → Create → enable the required Admin API scopes (Products, Inventory, Orders, Customers) → complete the OAuth authorization to approve the app’s permissions → Shopify generates and displays the Admin API access token once. Copy and store it securely, since it cannot be viewed again after this step.
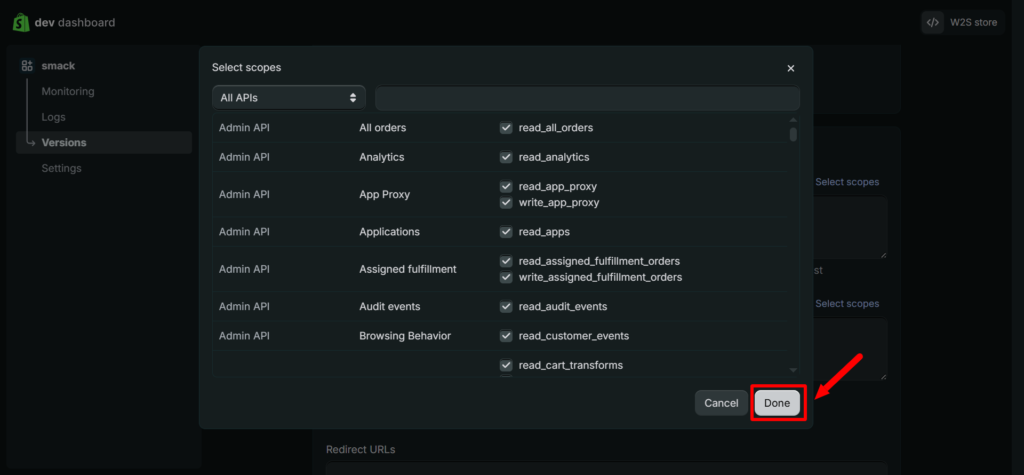
- If your Shopify account was created on or after January 1, 2026, you must instead configure your store using a Client ID and Client Secret when connecting it to the sync plugin, following the same Dev Dashboard → Create App flow.
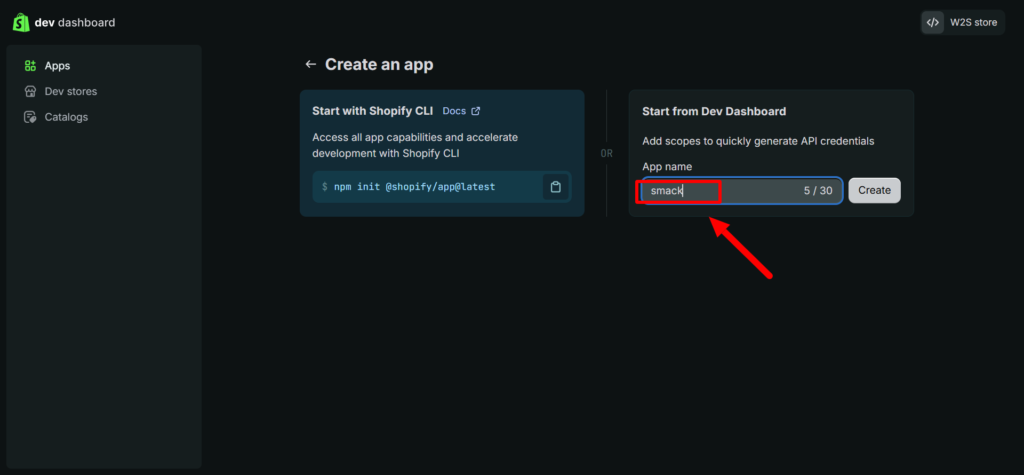
For the complete walkthrough, see our Shopify Admin API access token setup guide.
Product SKU Consistency
SKUs must match exactly between stores for accurate mapping. Export product CSVs from both platforms, compare SKUs, and standardize them (e.g., “PROD-001” consistently). Inconsistent SKUs are one of the most common causes of sync failures.
API Rate Limits
Shopify enforces API rate limits on its REST endpoints, so choose a sync tool that handles throttling and retries gracefully rather than failing outright.
Inventory Data That Can Be Synced
| Data Type | Can Be Synced | Sync Direction | Notes |
| Stock Quantity | Yes | One-way / Bidirectional | Real-time supported via webhooks |
| Product Variations | Yes | Bidirectional | Unique SKU required per variation |
| Price | Yes | Configurable | Price transformation rules available in Pro |
| Product Status | Yes | Configurable | Active/Draft |
| Images | Limited | Usually one-way | May require separate handling |
| Custom Fields / Metafields | Limited | Depends on configuration | Available via Selective Field Sync in Pro |
With W2S Sync Pro, you’re not limited to an all-or-nothing sync. Selective Field Sync lets you choose exactly which fields transfer (Title, Description, Price, Stock, SKU, Weight, Barcode, Vendor, Product Type, Status, Images, Tags, and Metafields), so your WooCommerce team and Shopify team can each own specific fields without overwriting each other’s work.
Methods to Sync Inventory
Plugin-based sync (recommended) – User-friendly, handles API connections, mapping, and scheduling without coding. Best for most sellers.
Manual updates – Logging into each platform and updating stock manually or via CSV. Works only for very small stores under 50 products; fails as order volume grows.
Custom API integration – Developers build integrations directly against WooCommerce and Shopify APIs. Full customization, but high development and maintenance costs suited to large enterprises with unique requirements.
| Method | Technical Skill | Cost | Scalability | Recommended For |
| Plugin-Based Sync | Low | Medium | High | Most businesses |
| Manual Updates | None | Free | Very Low | Small stores |
| Custom API Integration | High | Expensive | Very High | Enterprises |
Step-by-Step: Sync Inventory Using W2S Sync Pro
W2S Sync Pro by Smackcoders automates product, stock, order, and customer synchronization between WooCommerce and Shopify using secure API-based communication. Here’s how to configure it correctly.
1. Install and Authenticate Both Stores
Note: W2S Sync Pro requires the free W2S – WooCommerce to Shopify Sync plugin to be installed and activated first before installing the Pro add-on.
Activate the free plugin, then upload the Pro version. Navigate to the W2S Pro dashboard, which shows an overview of your store pairings, sync options, and connection status. Enter your WooCommerce Consumer Key and Consumer Secret, then your Shopify credentials (Admin API access token, or Client ID/Secret for accounts created on or after January 1, 2026). Verify both connections show an active, successful status before proceeding — if either shows an error, resolve the authentication issue first. For the full walkthrough, see our Getting Started with W2S Sync guide.
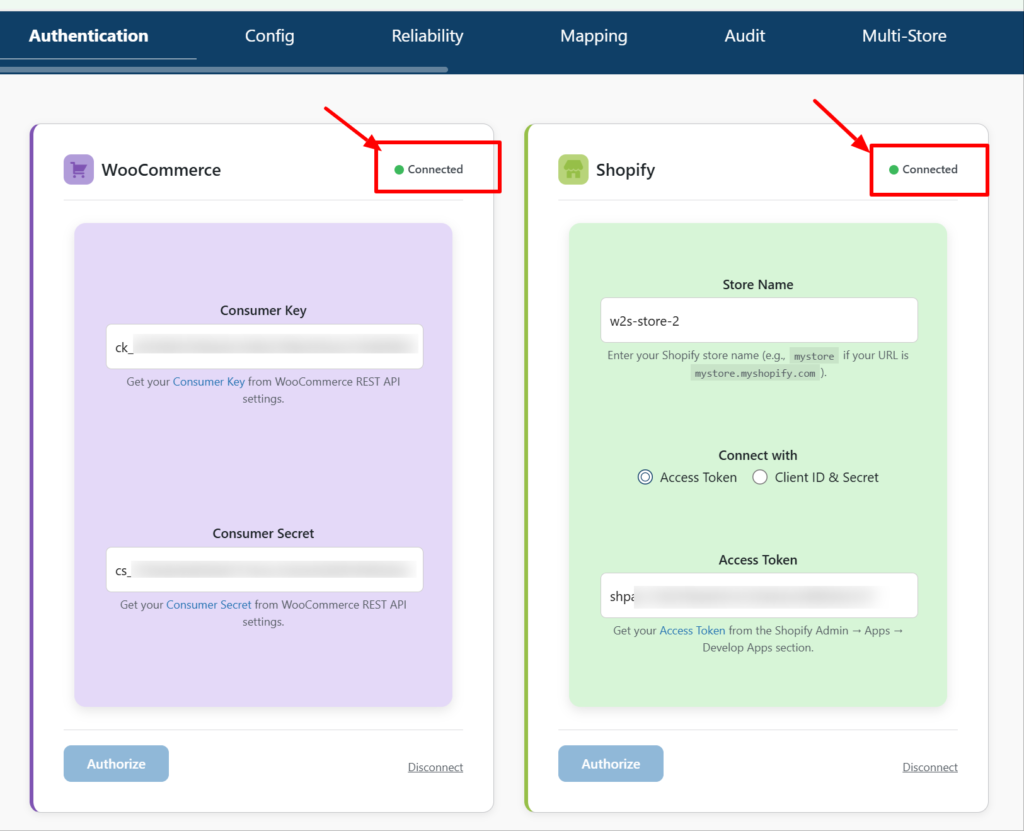
2. Set Up SKU-Based Product Mapping
SKUs are mandatory for product sync and act as the primary identifier for matching products between platforms. They prevent duplicate products and ensure inventory updates hit the correct item. In the free version, products without SKUs must be updated manually before syncing. In W2S Sync Pro, if a product is missing a SKU, the plugin can automatically generate a unique SKU using the product name, removing that manual prep step entirely. See the full WooCommerce & Shopify Product Synchronization Guide for field-level details.
3. Configure Sync Direction
Go to Woo-Shopify → Config. Under “Choose Sync Direction”, select one of:
- WooCommerce to Shopify – WooCommerce is the source, Shopify the destination
- Shopify to WooCommerce – Shopify is the source, WooCommerce the destination
- Bidirectional Sync – both stores update each other
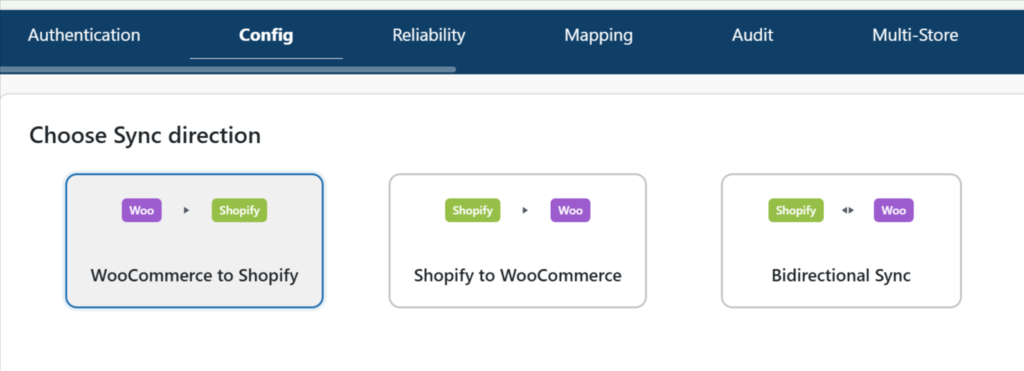
If Shopify is your primary checkout system, sync from Shopify to WooCommerce to avoid overselling. If WooCommerce is your content/SEO hub with Shopify as a secondary channel, sync WooCommerce to Shopify.
4. Choose Your Sync Timing
Under “Select Timing for Auto Sync”, choose
- On Save Sync – products sync instantly when you click Save Configuration
- Schedule Sync – hourly, daily, or weekly, powered by WordPress Cron (make sure WP-Cron is active on your server)
- Custom Sync – set a specific date range to sync only products created or modified within that window
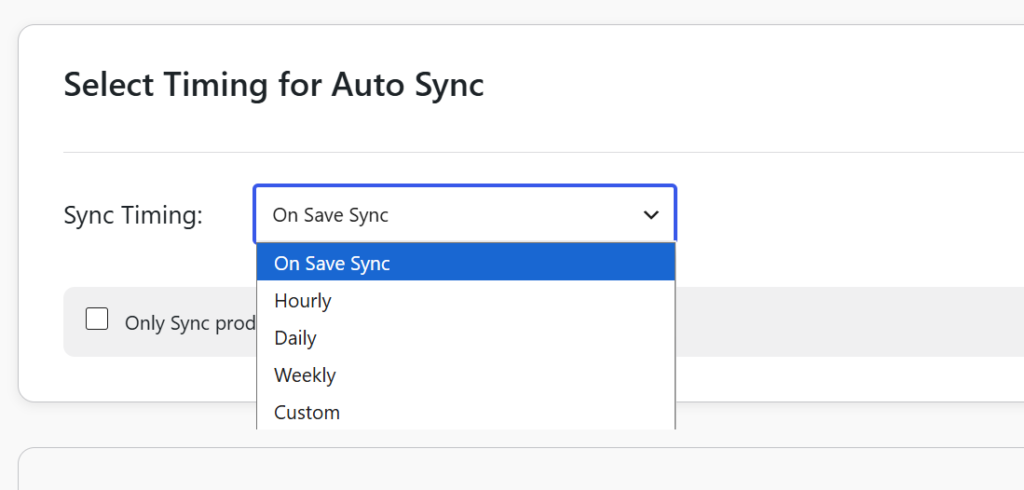
Scheduled sync works well for bulk updates or lower-traffic stores. For instant, event-driven updates, use real-time sync via webhooks (covered next).
Once saved, always spot-check a sample of synced products titles, prices, images, and variation data – before rolling out to your full catalog.
5. Apply Advanced Filters and Selective Field Sync
Instead of syncing your entire catalog, use Advanced Filters to narrow which products are included by category, tag, stock status, product status, or date range. Then switch from Full Sync mode to Selective Field Sync and check only the fields you want transferred. After applying filters, W2S Pro shows you the exact list of matching products before anything syncs. Review it, adjust filters if needed, then click Save Configuration to lock in your settings. For a detailed walkthrough, see Sync Products from WooCommerce to Shopify with Advanced Filters.
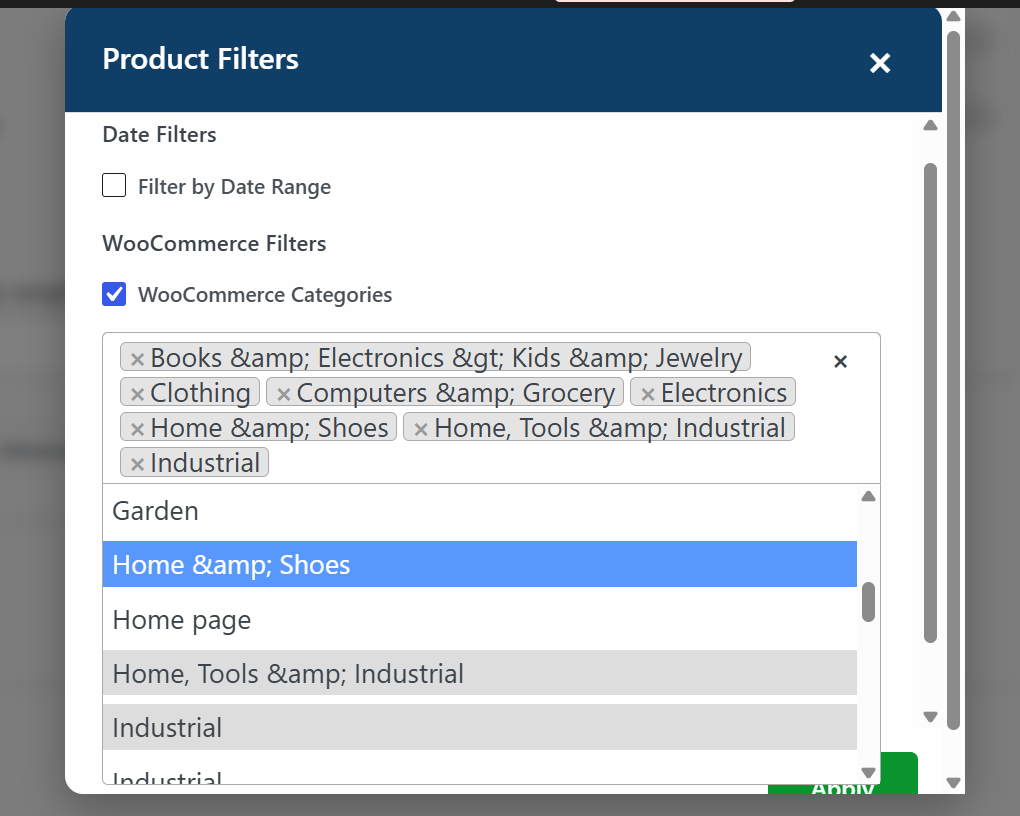
Syncing Inventory for Variable Products
Variable products, like t-shirts in different sizes and colors, need precise mapping. In W2S Sync Pro:
- Ensure each variation has a unique SKU on both platforms
- WooCommerce variations are automatically mapped to Shopify variants using attributes like size, color, or material
- Example: a WooCommerce “Large-Red” variant with SKU “TSH-LR” maps directly to its Shopify equivalent
- Before your first sync, confirm every variation has a valid price and stock quantity. Incomplete variation data is one of the most common causes of variable product sync failures
- Test by placing an order: stock should deduct from the correct variant across both stores, not the entire product
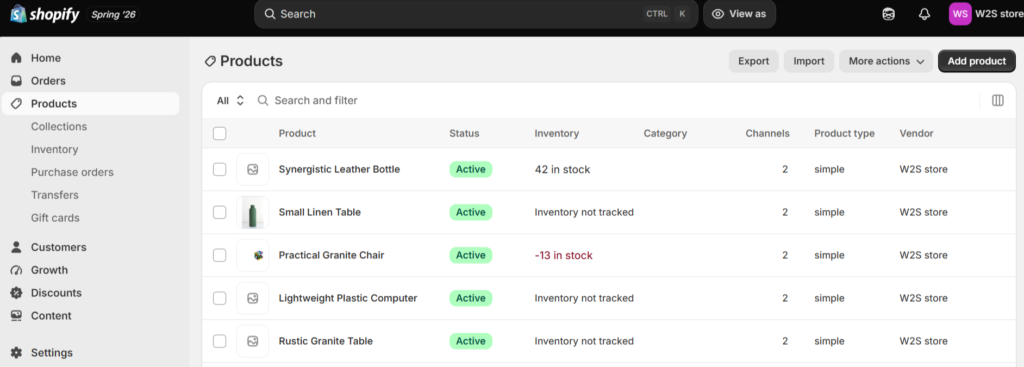
This prevents partial overselling, where one size sells out while others incorrectly still show as available.
Real-Time Sync via Shopify Webhooks
W2S Sync Pro enables true real-time synchronization, not scheduled polling – through Shopify webhooks.
Here’s how it works: the plugin generates a unique webhook endpoint URL for your WordPress site. You register this URL in Shopify Admin → Settings → Notifications → Webhooks, select the Shopify webhook events you want to track (product creation, order updates, inventory adjustments, customer changes, and 50+ other events), and paste the webhook secret for validation.
Once registered, any change made in Shopify, a sale, a manual stock edit, or a new product is pushed to WooCommerce the instant it happens. No cron jobs, no CSV exports, no waiting for the next scheduled run.
This mode is ideal for high-volume stores, flash sales, or limited-stock items where even a few minutes of delay can cause overselling.
Handling Order-Based Stock Updates
Order sync in W2S Sync Pro is creation-based the plugin creates new orders on the destination store when an order is created on the source store, rather than modifying existing financial records. This keeps historical order data intact and avoids accidental changes to completed or paid orders.
- Orders created in WooCommerce can sync to Shopify, and orders created in Shopify can sync to WooCommerce
- Bidirectional order creation is supported, so both platforms can sync independently
- You can filter which orders sync based on order status
- If a product doesn’t yet exist in the destination store, the order still syncs with the product name and price preserved
- Sync customers before syncing orders this ensures orders are correctly linked to the right customer records, and sync products first so SKUs are verified before order data starts flowing
For the full field-by-field breakdown, see the WooCommerce to Shopify Order Sync Guide.
Protecting SEO During Migration
Organic traffic is often a store’s most valuable asset, and losing it during a WooCommerce-to-Shopify migration can cost months of recovery. W2S Sync Pro’s SEO Migration Engine addresses this with four safeguards:
- Automatic 301 redirects from every WooCommerce product URL to its Shopify equivalent, created using Shopify’s Redirect API no manual CSV uploads or third-party redirect apps
- SEO metadata transfer – titles and descriptions from Yoast SEO or Rank Math are mapped directly into Shopify’s native SEO fields
- JSON-LD structured data migration – product schema markup transfers to Shopify to help preserve rich snippets in search results
- Redirect history – every redirect is logged in the Audit Log under the SEO entity for full traceability
Multi-Store Management with Store Pairings
If you’re managing more than one WooCommerce or Shopify store common for agencies handling multiple client accounts W2S Sync Pro lets you register unlimited WooCommerce stores (using Consumer Key and Consumer Secret) and Shopify stores (using Store Name and Admin Access Token) from a single WordPress installation.
Each store gets its own connection status, test button, and management controls. From there, you create Store Pairings, logical links between a specific WooCommerce store and a specific Shopify store, each with its own independent sync direction, entity type selection, and operation toggles.
This means you can run bidirectional sync for your primary store pair while pushing one-way updates to a secondary outlet, all managed from one dashboard.
Common Inventory Management Challenges
Overselling and stock mismatch – If your WooCommerce store shows 5 units and a customer buys 3 on Shopify without sync, WooCommerce still shows 5, allowing another sale that can’t be fulfilled. This leads to cancellations, refunds, and possible chargebacks.
Manual stock updates – Relying on spreadsheets or manual logins to update stock is error-prone. Updating 100 products daily across two platforms takes hours, and it’s easy to miss a variation.
Delayed order sync – Even a few minutes of delay during peak hours can result in multiple sales of the same item. This is exactly what real-time webhook sync is built to eliminate.
Troubleshooting
Common sync issues and how to resolve them:
Missing SKU – Products without a SKU won’t sync correctly in the free version and must be added manually. In W2S Sync Pro, if a SKU is missing, the plugin can automatically generate one using the product name, resolving this without manual intervention.
API limits exceeded – Shopify throttles requests when rate limits are hit. Schedule large syncs during off-peak hours and rely on the plugin’s built-in retry handling rather than re-running syncs manually.
Debugging – Use the JSON Audit Log Viewer to review the exact JSON payload sent to Shopify for each order, along with detailed status and error messages for every product, order, or customer processed during sync. The log can also be exported as CSV for deeper analysis or reporting.
A few additional causes worth knowing, confirmed from the plugin’s own documentation:
- Duplicate products usually happen when SKUs aren’t unique, or when the sync is set to “Create” instead of “Update” for products that already exist on the destination store
- Unpublished products or incorrect sync direction settings are common reasons products silently fail to appear on the other platform
- Data mismatches after a sync often trace back to Selective Field Sync being misconfigured, or two teams updating the same field from both stores at once. Set a clear field-ownership policy to prevent this
Best Practices for WooCommerce–Shopify Inventory Sync
- Regularly audit SKUs for consistency across both platforms
- Start with a small product set for testing before enabling full sync
- Use bidirectional sync only if both stores are genuinely active
- Monitor audit logs weekly for anomalies
- Set low-stock alerts on both platforms
- Avoid manual edits during a sync run to prevent conflicts
- Back up both stores before your initial sync
- Update plugins and platforms regularly
- Never use Full Sync mode if your Shopify team has made custom edits you don’t want overwritten
Frequently Asked Questions
1. Can I sync products and inventory between WooCommerce and Shopify?
Yes. A dedicated integration plugin like W2S Sync connects both platforms via their APIs, synchronizing product details, stock quantities, variations, pricing, and related data. Bidirectional syncing is supported, so updates in either store reflect automatically in the other.
2. How does WooCommerce Shopify inventory sync work?
Sync works through secure, API-based communication between the two platforms. When a change occurs in one store like a stock reduction after an order the plugin detects the update and pushes the corresponding change to the connected store, either instantly via webhooks or on a schedule.
3. What happens if the SKU doesn’t match?
If SKUs don’t match between WooCommerce and Shopify, the plugin can’t correctly identify corresponding products, so those items may not sync or may generate errors in the Audit Log. W2S Sync Pro can auto-generate a missing SKU from the product name to prevent this.
4. Can variable products be synced?
Yes, as long as each variation has a unique SKU on both platforms. The plugin uses these SKUs to match variations like size or color, updating inventory for each variant independently without affecting other variants of the same product.
5. Does W2S Sync Pro support multiple WooCommerce and Shopify stores?
Yes. W2S Sync Pro’s multi-store management lets you register unlimited WooCommerce and Shopify stores from a single WordPress installation, then create independent Store Pairings between any combination, each with its own sync direction and settings.
6. Do I need a Client ID and Secret for Shopify, or just an Access Token?
It depends on when your Shopify account was created. Accounts created before January 1 – 2026, authenticate using an Admin API access token via Shopify’s OAuth flow. Accounts created on or after January 1, 2026 require a Client ID and Client Secret instead.
7. Will I lose my Google rankings if I migrate products from WooCommerce to Shopify?
Not if you use W2S Sync Pro’s SEO Migration Engine. It automatically creates 301 redirects from every WooCommerce product URL to its Shopify equivalent, transfers SEO titles and descriptions from Yoast SEO or Rank Math, and migrates JSON-LD structured data to help preserve rich snippets.
8. What’s the difference between the free W2S plugin and W2S Sync Pro?
The free version covers core product, order, and customer sync with SKU-based mapping and scheduled sync. W2S Sync Pro adds real-time sync via webhooks, multi-store management with Store Pairings, Selective Field Sync, Advanced Filters, automatic SKU generation, price transformation rules, and the SEO Migration Engine for safe platform migrations.
9. Is there a free way to sync WooCommerce and Shopify?
Yes. W2S – WooCommerce to Shopify Sync is a free plugin by Smackcoders that covers core product, order, and customer sync with SKU-based mapping and scheduled sync. For real-time webhook sync, multi-store management, selective field sync, automatic SKU generation, and the SEO Migration Engine, you can upgrade to W2S Sync Pro.
10. How long does WooCommerce Shopify sync take?
It depends on your sync method and catalog size. With real-time webhook sync, individual stock changes reflect within seconds of the triggering event. Scheduled sync runs hourly, daily, or weekly depending on your configuration. For large initial syncs involving thousands of products, the first run may take several minutes progress is visible in real time through the plugin’s import log.
Conclusion
Syncing WooCommerce and Shopify is not just about keeping stock numbers accurate – it is about running a multichannel business without the errors, delays, and manual work that eat into your time and revenue.
The setup matters. Authenticate correctly for your Shopify account type, map your SKUs consistently, choose the right sync direction, and configure only the fields each platform needs to own. Get those foundations right, and the rest runs automatically.
Stop managing two stores manually. Set up W2S Sync Pro today and keep your WooCommerce and Shopify inventory perfectly aligned in real time.

JetEngine vs Meta Box: Which Dynamic Content Plugin Is Better?
25 Jun 2026, 10:30 am
Every dynamic WordPress site needs a solid data layer underneath it. Custom post types, custom fields, taxonomies, and relationships are what make directories, booking systems, membership portals, and listing pages actually function the way users expect. JetEngine and Meta Box are the two plugins most often compared in this space, and each one approaches the same problem from a completely different angle.
This article walks through how JetEngine vs Meta Box differ in setup, field management, dynamic display, speed, pricing, and SEO friendliness, so you can match the right plugin to your project instead of guessing.
What Is JetEngine?
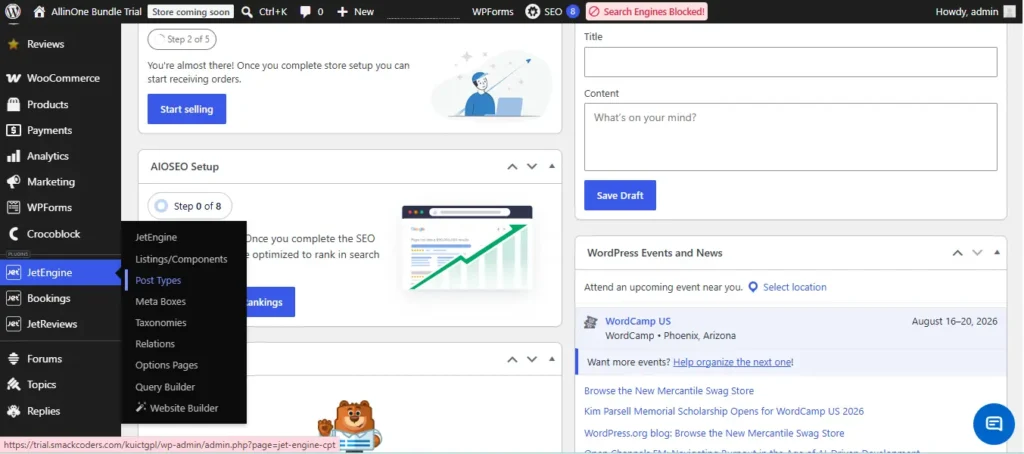
JetEngine comes from Crocoblock and is built to plug directly into Elementor, Gutenberg, or Bricks Builder. It hands non-developers a point-and-click way to build out listings, directories, booking tools, and membership areas without ever opening a code editor. Most agencies and freelancers reach for it specifically because it removes the need to involve a developer on every dynamic feature.
How JetEngine Works
Everything in JetEngine happens inside the regular WordPress dashboard. You set up a custom post type through a simple on-screen form, attach fields by dragging them into place, then pull that data onto the front end using the Listing Grid widget, whichever builder you happen to be using. None of this requires touching PHP.
This visual-first approach is exactly why JetEngine resonates with designers and marketers who know their way around WordPress but have never written a line of code. The catch is that JetEngine stores its configuration as post entries in the database instead of in actual code files, so tracking changes in Git or pushing updates between staging and live sites takes more effort than it would with a code-based plugin.
Key Features of JetEngine
The plugin packs in a drag-and-drop post type and taxonomy builder, over 25 field types covering everything from repeaters to galleries to map fields, and the Listing Grid module that turns raw post data into styled, filterable front-end displays. On top of that, JetEngine ships with a no-code Query Builder for pulling advanced WP_Query results, a Relations tool for linking posts to other posts or users, conditional front-end submission forms, a Profile Builder for user dashboards, and calendar widgets built around events.
Put together, this toolkit handles nearly everything a directory, booking platform, or membership site would need without bolting on extra plugins. It is common for agencies to compress what would otherwise be a multi-week custom build into a few days of configuration directly inside Elementor.
Who Should Use JetEngine?
JetEngine fits best with agencies and freelancers running client projects on Elementor, designers who need dynamic functionality but no developer on hand, and teams putting together directory sites, real estate listings, job boards, or booking platforms. It also makes sense for anyone planning to hand the finished site over to a client who will manage the content themselves.
Teams without dedicated PHP developers, or projects where getting to launch quickly matters more than fine-grained code control, will almost always move faster with JetEngine than with a code-first plugin.
What Is Meta Box?
Meta Box takes the opposite approach. It is a developer-oriented framework for building custom content structures, with a free core plugin that is widely regarded as one of the most efficient custom fields tools on the market. A set of paid add-ons extends it further into relationships, REST API exposure, and front-end form handling. The entire philosophy behind Meta Box is that developers should retain full control of their code and that a site should never load more than it actually needs.
How Meta Box Works
Setting up Meta Box happens mostly through PHP or JSON, though there is an online generator for developers who want a visual head start before exporting that configuration into code. Field groups, post types, and taxonomies all get registered programmatically, meaning the entire setup can live in version control rather than sitting inside the WordPress database.
That code-first approach takes longer to learn than JetEngine’s drag-and-drop system, but it hands developers precise control over what loads on any given page. Since Meta Box is built in modules, you can enable only the specific add-ons a project requires, keeping the overall plugin footprint small.
Key Features of Meta Box
Meta Box brings more than 40 field types to the table, backed by a PHP API that developers generally describe as clean and well documented. Post types and taxonomies can be registered through code or through the MB Custom Post Type extension, and many-to-many relationships are handled through MB Relationships. Other notable pieces include MB Frontend Submission for public-facing forms, REST API support that exposes custom fields automatically, and MB Views for building dynamic templates without relying on a separate page builder.
This entire feature set is aimed at developers who want long-term maintainability over a quick no-code setup. Because everything runs through an API, Meta Box slots cleanly into larger development pipelines, including CI and CD workflows.
Who Should Use Meta Box?
Meta Box suits WordPress developers who would rather write code than click through a visual interface, teams building headless or REST API driven projects, and high-traffic sites where shaving off milliseconds actually matters. Multi-developer teams that need field definitions they can review, version, and deploy through Git will also find this approach far easier to manage than a database-stored alternative.
If a project involves custom business logic, ties into outside systems, or needs to stay light on budget hosting, Meta Box will generally hold up better over the project’s lifetime than a visual builder plugin would.
JetEngine vs Meta Box: Feature-by-Feature Comparison
The sections below dig into specific capabilities side by side, so you can see exactly where each plugin pulls ahead and where the two are more evenly matched.
Ease of Use and Learning Curve
JetEngine’s entire admin experience is visual. Setting up a custom post type, attaching fields, and getting that data onto a listing grid can realistically happen in under an hour without writing any code. That kind of accessibility is exactly why designers, marketers, and freelancers who are not comfortable with PHP gravitate toward it.
Meta Box, on the other hand, runs on PHP, JSON, or its generator tool. Non-developers face a steeper climb getting started, but development teams gain much tighter control over every field and query along the way. Anyone prototyping quickly or working without a developer will likely move faster in JetEngine, while teams that already have development talent in place tend to settle into Meta Box comfortably.
Custom Fields Comparison
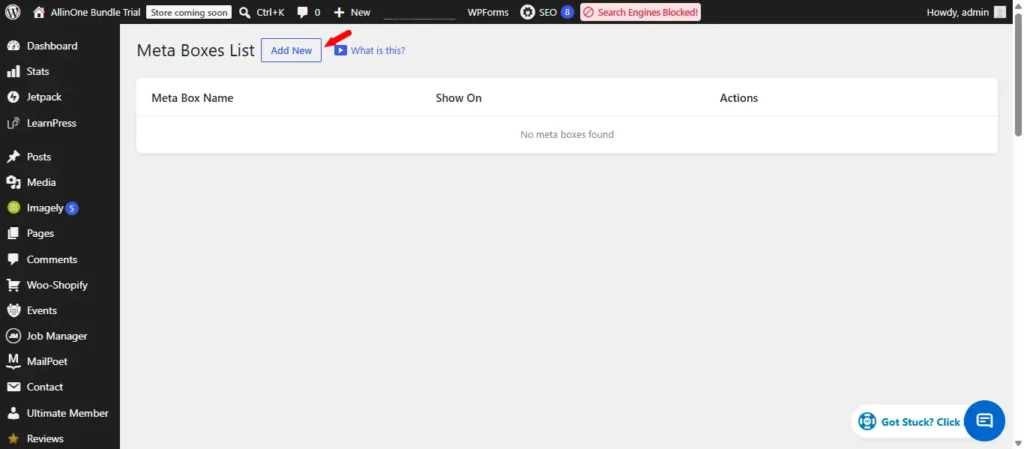
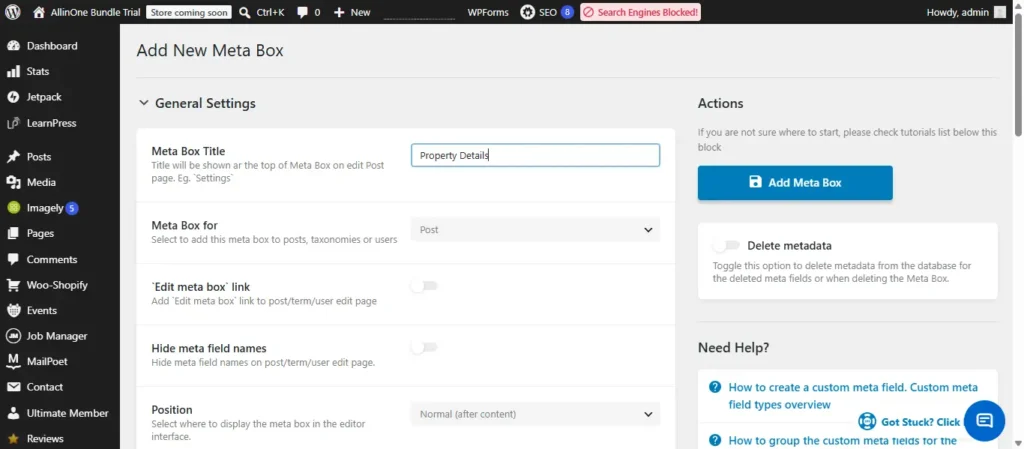
Both plugins support the standard range of field types, text, number, image, repeater, and relationship fields included. Meta Box pulls ahead for developers thanks to its 40-plus field types, a wide set of hooks and filters, and a tidier JSON or PHP API for registering fields in code.
JetEngine’s field setup is friendlier visually but comes with fewer advanced settings out of the box. Developers after maximum field variety and programmatic control will likely prefer Meta Box, while anyone who wants a fast, no-code setup will get there quicker with JetEngine.
Custom Post Types and Taxonomies
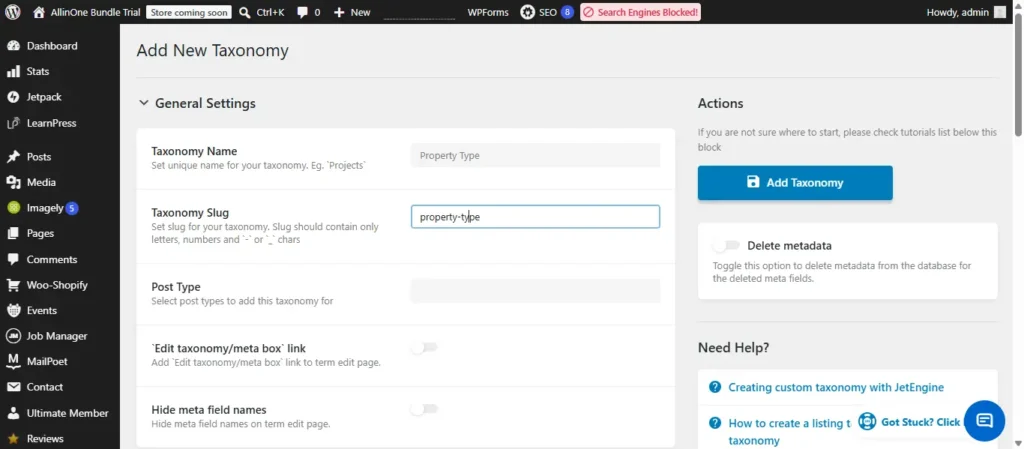
Building custom post types and taxonomies inside JetEngine happens completely through the visual builder, without touching a single line of code anywhere in the process. This makes the plugin especially handy for getting new structures like property listings, job postings, or directory entries up and running in a short amount of time.
Meta Box handles this through code or its MB Custom Post Type extension, which takes more time upfront but produces a setup that is far easier to track, review, and move between environments using version control. As a project’s content structure grows more complex, Meta Box’s code-based approach tends to pay off more than JetEngine’s database-stored setup.
Dynamic Content and Listings
This is where JetEngine clearly separates itself from the competition. The Listing Grid, dynamic visibility rules, and visual Query Builder together give you everything needed to display, filter, and paginate custom data right from inside the Elementor editor. For directory, real estate, or booking sites, this is usually the quickest path to a finished front end.
Meta Box needs either MB Views or an external page builder to reach a similar result. It can get there, but it involves more manual setup and template or PHP work along the way, which is why JetEngine holds a clear advantage whenever the goal is visual, code-free dynamic content.
Query Builder Comparison
JetEngine’s visual Query Builder makes it possible to construct detailed database queries, filtering by meta value, taxonomy term, author, or date, all without writing a single line of PHP. For directory and listing sites that depend on filtered, sortable front-end views, this saves a meaningful amount of build time.
Meta Box gets to the same destination through custom WP_Query code, which gives developers more precision and control but takes considerably longer to write if you are not already comfortable with PHP. Teams with development experience often prefer this route because the resulting queries are easier to fine-tune and debug later on.
Relationship Management Features
JetEngine’s Relations module handles post-to-post and post-to-user connections through a visual interface, which covers most everyday scenarios like linking real estate listings to agents or products to categories. Meta Box offers the same capability through MB Relationships, configuring many-to-many connections through code instead.
Both methods get the job done reliably. The real difference is workflow: JetEngine’s visual setup is quicker to configure on the fly, while Meta Box’s code-based relationships hold up better across larger codebases managed by a team.
Frontend Forms and User Submission
JetEngine bakes front-end submission forms with conditional logic directly into its visual editor, making it simple to let logged-in users submit listings, bookings, or directory entries on their own. Meta Box covers similar ground through MB Frontend Submission, though it is set up through code rather than a drag-and-drop form builder.
When an agency needs a client-facing submission form put together quickly, JetEngine is typically the quicker route to get there. Developers who want full control over validation, data handling, and custom logic will get more flexibility out of Meta Box’s code-driven forms.
Performance and Site Speed
Because Meta Box is built in modules, it only loads the code a project actually uses, which keeps its core plugin light even on shared hosting. JetEngine, by comparison, loads extra JavaScript and CSS to power its builder modules, and that can show up as slower load times on weaker servers if it is not configured carefully.
On stronger hosting, such as a managed WordPress plan or a VPS, JetEngine performs noticeably better, and the gap between the two plugins shrinks further once caching and a lightweight theme are in place. On budget or shared hosting specifically, Meta Box still comes out ahead on raw performance. Keep in mind these are general observations based on how each plugin is architected and how it typically behaves on common hosting setups, not numbers pulled from a controlled lab test, so your own results will depend on your theme, host, and configuration.
Elementor Integration
JetEngine was built with Elementor in mind from the very beginning, so its widgets, dynamic tags, and visibility conditions sit natively inside the Elementor editor with no extra setup required. Meta Box connects to Elementor through the separate MetaBox Elementor Integrator extension, which works fine but takes more configuration and never quite feels as built-in as JetEngine’s experience.
For agencies and freelancers working primarily in Elementor, this is one of the more noticeable practical gaps between the two plugins, and it is an area where JetEngine’s tight, native integration is genuinely hard to beat.
Bricks Builder Compatibility
JetEngine now offers solid support for Bricks Builder and handles Bricks-based projects well. Meta Box connects to Bricks through its own Meta Box Bricks Builder Integrator extension. Neither plugin’s Bricks integration is quite as polished as its Elementor counterpart, but both are perfectly usable in a live project.
Teams standardizing on Bricks instead of Elementor will find this matchup much closer than the Elementor comparison, with JetEngine holding only a slight edge in overall polish.
Developer Experience and Code Quality
Meta Box wins clearly in this category. Its API is consistent, thoroughly documented, and follows WordPress coding conventions closely, and registering field groups through PHP stays clean and easy to manage through version control, something that matters a great deal for teams deploying across multiple environments.
JetEngine, by contrast, stores its settings as post entries in the database, which makes them harder to track in Git and harder to move predictably between staging and production. Teams working in code-heavy environments will generally find Meta Box the more comfortable option day to day.
SEO Impact: Does Your Plugin Choice Matter?
Neither plugin has a direct line to search rankings, since Google has no awareness of which custom fields framework sits behind a website. That said, your choice between the two still carries indirect SEO weight through page speed, structured data, and how easily your dynamic content gets crawled.
Page Speed and Core Web Vitals
Meta Box’s smaller footprint tends to help Core Web Vitals scores on weaker hosting, since it ships less JavaScript and CSS by default. JetEngine can close that gap on stronger hosting environments, but on budget shared plans, its additional builder modules may noticeably affect load time and interactivity. The only reliable way to know the real impact on your own site is to run it through a tool like PageSpeed Insights or GTmetrix once everything is configured.
Schema Markup and Structured Data
Both plugins let you store structured data inside custom fields, but neither one outputs JSON-LD schema automatically.
You will still need an SEO plugin such as Rank Math or Yoast, or some custom code, to translate those field values into proper Schema.org markup on the page.
Crawlability of Dynamic Content
JetEngine’s Listing Grid renders as server-side HTML by default, so search engine bots can crawl it without running into any JavaScript rendering issues.
Meta Box’s dynamic output, whether built through MB Views or a separate builder, generally renders server-side as well, though how crawlable it ends up being depends on how the front-end templates were put together.
Pricing Comparison
Once features land close to a tie, pricing usually tips the decision. Here is how the two plugins compare on cost and long-term value.
JetEngine Pricing and Crocoblock Bundle
There is no free version of JetEngine, it is a paid plugin from the start.
Most buyers pick it up through the Crocoblock All Plugins bundle, which bundles in more than 20 plugins under one annual subscription. Agencies launching five or more Elementor sites a year tend to get strong value out of this bundle since it covers far more than just dynamic content tools.
Meta Box Pricing and Lifetime Licensing
Meta Box’s core plugin costs nothing, with paid add-ons covering relationships, frontend submission, and other advanced features as needed.
You can buy it as an annual subscription or, notably, as a one-time lifetime license, an option JetEngine does not offer at all. The Individual plan covers a single site, while the Developer and Agency tiers extend that coverage to unlimited sites.
Which Plugin Offers Better Value?
Solo developers on a tight budget generally come out ahead with Meta Box, since the free core plus a handful of targeted extensions, especially paired with the lifetime license, removes recurring costs entirely.
Agencies running multiple Elementor projects per year, though, often get more overall value from the Crocoblock bundle once you factor in everything else included alongside JetEngine.
Which Plugin Should You Choose? Real-World Use Cases
Feature comparisons only tell part of the story. The breakdown below matches each plugin to the kind of project it tends to perform best on in actual production use.
Choose JetEngine If You’re Building
JetEngine makes the most sense for business directories or listing sites covering real estate, jobs, or restaurants, booking and reservation platforms with front-end forms, or membership and community sites built around user profiles. It also fits naturally on Elementor-based sites where the client will be managing content visually after the project wraps up.
Portfolio sites that rely on heavily filtered project grids are another strong match, since JetEngine’s Listing Grid and Query Builder were built with exactly this kind of filtered, visual display in mind.
Choose Meta Box If You’re Building
Meta Box is the stronger pick for headless WordPress builds that pull data through the REST API or GraphQL, high-traffic sites where every bit of load time counts, or projects with custom business logic that demands real PHP. It also fits multi-developer teams that need field definitions they can manage cleanly through standard Git workflows.
On client projects working with a tighter budget, Meta Box’s free core plugin lets you launch without any upfront cost and add only the specific paid extensions the project genuinely needs.
Managing Imported and Dynamic Content at Scale
Picking the right plugin solves the structural side of things, but filling that structure with real data becomes its own challenge once a site starts to grow. This section covers what typically happens after the custom fields and post types are already in place.
Why Bulk Content Management Matters for Directory and Listing Sites
Once a directory, real estate, or listings site built on JetEngine or Meta Box starts scaling up, entering listings one by one through the WordPress admin stops being practical.
Most teams eventually need a dependable way to bulk import, update, and sync custom post type data and field values from spreadsheets, outside databases, or third-party platforms, all without disrupting the relationships and field structures these plugins rely on.
How WP Ultimate CSV Importer Pro Complements JetEngine and Meta Box Workflows
WP Ultimate CSV Importer Pro is purpose-built for this kind of bulk data work, and it supports custom post types, custom fields, and taxonomies created by both JetEngine and Meta Box.
Rather than rebuilding directory entries one at a time, teams can pull large CSV or XML datasets straight into the custom fields these plugins already generate, then set up recurring schedules to keep listings synced with an external source. That makes it a practical companion for any JetEngine or Meta Box project that has outgrown manual data entry.
Pros and Cons Summary
Here is a quick recap pulling together where each plugin stands out and where it tends to fall short.
JetEngine Pros and Cons
JetEngine’s strengths include a genuinely intuitive visual builder, top-tier Elementor integration, a built-in Query Builder that requires no code, and solid performance on directory and listing sites. Buying it through the Crocoblock bundle also tends to be excellent value for agencies juggling several projects.
On the downside, it uses more resources than Meta Box, has no free core plugin, stores settings in the database rather than in code, only offers annual licensing with no lifetime option, and can still take some getting used to for complete first-time users despite the visual interface.
Meta Box Pros and Cons
Meta Box’s strengths include a lightweight, modular architecture, a free core plugin with more than 40 field types, strong fit for developers and REST API work, a lifetime license option, and the better raw performance of the two plugins.
On the downside, it is not particularly beginner-friendly out of the box, dynamic display requires more setup than JetEngine offers natively, costs can climb once you start adding extensions, and its community is smaller than some other custom fields plugins on the market.
Frequently Asked Questions
1. Is JetEngine Better Than Meta Box?
It comes down to your workflow. JetEngine is the better pick for visual, no-code development and Elementor-based projects.Meta Box wins out for developer-driven, performance-sensitive builds where code quality and version control are priorities.
2. Which Plugin Is Faster?
Meta Box tends to be lighter out of the box thanks to its modular setup.JetEngine’s additional builder modules can add some overhead, though how much actually depends on your theme and hosting environment.
3. Can JetEngine Replace Meta Box?
For most Elementor-based projects, yes, it can.But if your project leans on REST API integrations, custom PHP logic, or a headless setup, Meta Box is generally the better fit and offers more room to maneuver.
4. Which Plugin Is Better for Agency Client Work?
JetEngine usually works better for agency projects since its visual builder lets non-technical clients manage listings, bookings, or directory entries themselves after handoff.Meta Box only really makes sense for agencies when the client has an in-house developer or the agency plans to maintain the site through code long term.
5. Which Plugin Is Better for Directories and Listings?
JetEngine wins this one clearly. Its Listing Grid, visual Query Builder, and Profile Builder were built specifically for directory and listing use cases.They typically get you to a finished result faster than Meta Box’s code-based route.
6. Does Meta Box Have a Visual Interface?
It does, through MB Blocks and MB Views.Both require more setup than JetEngine’s drag-and-drop system and are aimed more at developers than at no-code users.
Conclusion
Both JetEngine and Meta Box are well-maintained, capable plugins, and which one is right for you depends entirely on the project and the team behind it. Go with JetEngine if you are building on Elementor, need visual dynamic listings, or want to launch a directory, booking, or membership site quickly without writing PHP. Go with Meta Box if you are a developer who values clean code, REST API access, or a headless setup, or if squeezing out every bit of performance on shared or budget hosting matters to your project.
Both plugins fit comfortably into the broader WordPress ecosystem and continue to see regular updates. Whichever one you settle on, pairing it with a dependable bulk data tool like WP Ultimate CSV Importer Pro will make it far easier to scale your content once your directory or listing site outgrows manual entry.
Morbi lectus risus, iaculis vel, suscipit quis, luctus non, massa. Fusce ac turpis quis ligula lacinia aliquet. Mauris ipsum. Nulla metus metus, ullamcorper vel, tincidunt sed, euismod in, nibh.
Proin quam. Etiam ultrices. Suspendisse in justo eu magna luctus suscipit. Sed lectus. Integer euismod lacus luctus magna.
Nulla facilisi. Ut fringilla. Suspendisse potenti. Nunc feugiat mi a tellus consequat imperdiet. Vestibulum sapien. Proin quam. Etiam ultrices. Suspendisse in justo eu magna luctus suscipit. Sed lectus. Integer euismod lacus luctus magna.